
U0140 on 2019-2021 Dodge Challenger: Lost Communication With Body Control Module Fixes
This code means the Body Control Module (BCM) has lost communication. The most common causes are a weak battery, faulty BCM, or wiring issues. A new BCM can cost $250-$550 for the part, and requires programming by a dealer or qualified shop.
- U0140 means the Body Control Module (BCM) has stopped communicating, which can cause widespread and unpredictable electrical problems.
- Always start diagnosis by checking the simplest things first: test the battery's health and inspect all related fuses.
- The BCM is located under the passenger side of the dashboard; check its connectors for looseness or corrosion.
- Replacing the BCM is a job for a professional, as the new module must be programmed to your vehicle's specific VIN and configuration.
- Be aware that improperly installed aftermarket electronics can interfere with the vehicle's network and trigger this code.
What's Unique About the 2019-2021 Dodge CHALLENGER
On modern Dodge vehicles like the Challenger, the electronics are complex and highly integrated. A U0140 code often appears with a cascade of other 'U' (communication) codes, as noted in Dodge's own technical service bulletins. While the root cause can be a simple battery issue, these vehicles are also sensitive to aftermarket electronics (like remote starters or radios) that can disrupt the CAN bus network if not installed correctly. Furthermore, TSB 18-011-22 specifically points to a potential software glitch in the Powertrain Control Module (PCM) for 2021 models with the 3.6L engine, which can be resolved with a dealer-performed software update, highlighting that the issue isn't always a hardware failure.
Diagnostic Flowchart
Tap your situation to follow the diagnostic path that matches what you're seeing on this vehicle.
Symptoms You May Notice
- Check Engine Light is on
- Multiple warning lights on the dashboard (ABS, Traction Control, etc.)
- Power windows, door locks, or mirrors not working
- Exterior or interior lights malfunctioning (flickering, staying on, or not turning on)
- Wipers operating erratically or not at all
- Key fob and remote entry features fail to work
- Vehicle may not start, or may stall
- Horn honking unexpectedly when using other functions (like brakes or turn signals)
- Poor or slow acceleration
- AC system blowing hot air on one side and cold on the other
- Replacing other control modules (like the PCM or TCM) before properly diagnosing the BCM and its network connections.
- Replacing the battery without having it properly load-tested, as a battery can show good voltage but still fail under load.
- Replacing the BCM when the root cause is a software issue requiring a dealer reflash, a corroded ground wire, or a bad CAN bus star connector.
Most Likely Causes
- Weak or Failing Battery 🔴 High Probability → Shop Vehicle Battery Modern electronic modules are highly sensitive to voltage. A battery that is low, failing, or has a poor connection at the terminal or Intelligent Battery Sensor (IBS) can cause unpredictable communication dropouts across the network.
How to confirm: Test the battery voltage with a multimeter. It should be above 12.4V (ideally 12.6V) with the engine off. Have the battery load-tested at an auto parts store to confirm its health. Check that the battery terminals and the IBS connector are clean and tight.
Typical fix: Recharge or replace the battery. Clean all battery-related connections.
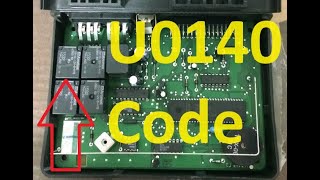
Est. part cost: $150-$350 - Faulty Body Control Module (BCM) 🟡 Medium Probability → Shop Body Control Module The BCM can fail internally due to electrical surges, moisture intrusion, or simple component fatigue over time. On related platforms, water leaks from clogged sunroof drains or bad windshield seals have been known to damage the BCM.
How to confirm: After confirming power (12V+) and ground (<0.1 Ω) to the BCM and verifying the CAN bus wiring is intact, a professional scan tool will be unable to communicate with the BCM. This points to an internal module failure. A visual inspection may reveal corrosion or a burnt smell.
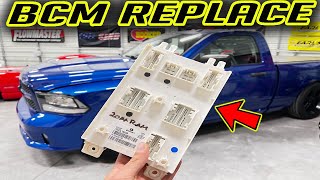
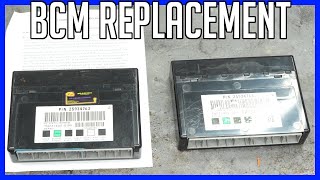
Typical fix: Replace the BCM and have it professionally programmed 🎬 Watch this video to see the BCM replacement process. to the vehicle.
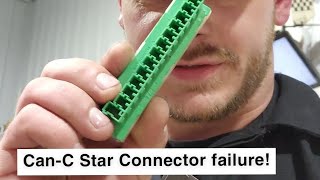
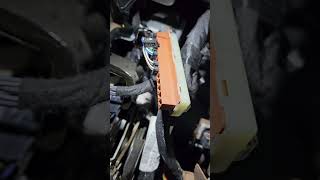
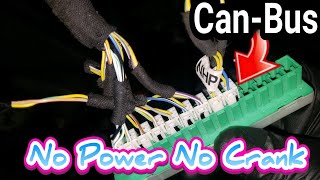
Est. part cost: $290-$580 - Wiring Harness or Connector Issues 🟡 Medium Probability Wires can become damaged, corroded, or disconnected. Key failure points include the main BCM connectors, chassis ground points (G905/G906 behind kick panels), and the CAN bus star connector (junction block) located behind the glove box 🎬 See how to diagnose a faulty CAN-C star connector here., which is a known hub for communication failures.
How to confirm: Visually inspect the wiring harness leading to the BCM for any signs of chafing, melting, or corrosion. Check for power and ground at the BCM connector with a multimeter. Test the CAN bus wiring for proper resistance (typically around 60 ohms between CAN High and CAN Low at the OBD-II port with the battery disconnected).
Typical fix: Repair the damaged section of the wiring harness or clean/replace the corroded connector. Applying dielectric grease can prevent future corrosion.
Est. part cost: $10-$100 - Blown Fuse or Faulty Relay ⚪ Low Probability
How to confirm: Check the vehicle's fuse boxes (both in the engine bay and inside the cabin) for any fuses labeled BCM, ECU, or Body. Visually inspect them and test for continuity with a multimeter.
Typical fix: Replace the blown fuse.
Est. part cost: $1-$5
Rare But Worth Checking
- Software Glitch: On some Dodge vehicles, a software glitch can cause communication issues. TSB #18-011-22 specifically applies to 2021 Challengers with the 3.6L engine and recommends a PCM software update to resolve U0140 and a host of other communication codes.
- Aftermarket Electronics Interference: Improperly installed aftermarket alarms, remote starters, or stereo systems can tap into the CAN bus wiring incorrectly, causing data corruption and communication failures that trigger a U0140 code. It is crucial to use proper adapter harnesses that isolate the new device from the main vehicle network.
Diagnosis Steps
- Check Battery Health: Ensure the battery has a full charge (>12.4V) and have it load-tested. Inspect terminals and the IBS sensor connection for tightness and corrosion.
- Scan for All Codes: Use a professional-grade OBD-II scanner to read codes from all vehicle modules, not just the engine computer. Note all communication ('U') codes present.
- Check for TSBs: Specifically check if TSB 18-011-22 applies to your vehicle (2021 3.6L). A PCM software update at the dealer could be the primary fix.
- Attempt to Communicate with BCM: Use the scanner to try and directly communicate with the Body Control Module. If it's 'offline', the problem is likely power, ground, the module itself, or the network wiring.
- Inspect Fuses: Check all fuses related to the BCM and other control modules in both interior and engine bay fuse boxes.
- Inspect BCM Wiring and Connectors: Locate the BCM (high in the driver's side footwell, to the left of the steering column) and visually inspect its connectors and nearby wiring for damage, corrosion, or loose connections.
- Inspect CAN Bus Star Connector: Locate the CAN bus junction/star connector behind the passenger side glove box. Inspect it for corrosion or loose pins, as this is a common point of total network failure.
- Verify Power and Ground: Using a multimeter, confirm that the BCM is receiving proper battery voltage (12.2-12.8V) and has a solid ground connection (resistance < 0.1 Ω).
- Test CAN Bus Network: Disconnect the battery. Test the resistance between the CAN High (Pin 6) and CAN Low (Pin 14) pins at the OBD-II port. A healthy network should read approximately 60 ohms.
- Isolate the Fault: If wiring, power, and software are good, the BCM is the most likely culprit. If other modules are also offline, the issue may be a broader network wiring problem originating from the star connector or another module crashing the bus.
Parts You'll Likely Need
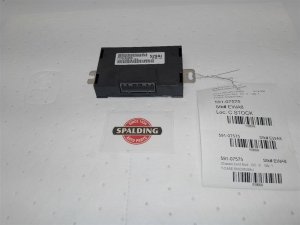
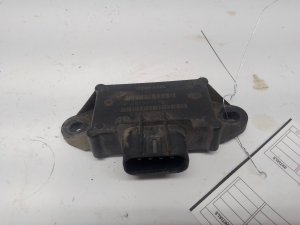
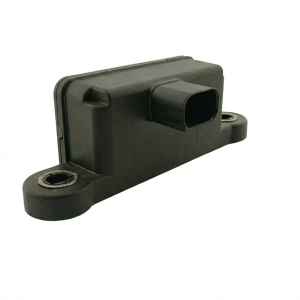
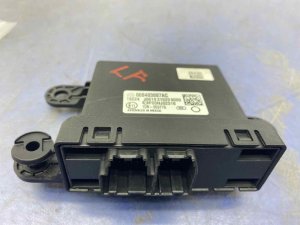
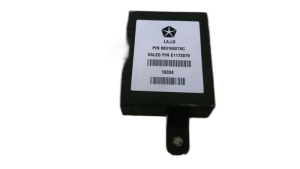
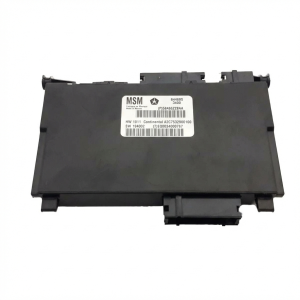
- Body Control Module (BCM)
(OEM #68396561AB, 68424593AB, 68525718AB)— This module is the central hub for body electronics and can fail internally, causing a total loss of communication. Part number varies by model year and options.
Trusted brands: Mopar (OEM)
OEM price range: $290-$580
Aftermarket price range: $250-$450
Related Codes That Often Appear With This One
- U0101 — Lost Communication With TCM. The BCM often acts as a gateway, and its failure can disrupt communication with the transmission module. This code is also listed in TSB 18-011-22.
- U0141 — Lost Communication With IPM (Front Control Module). This is another key module on the network that communicates through the BCM. This code is also listed in TSB 18-011-22.
- U0155 — Lost Communication With Cluster/CCN (Instrument Panel). The instrument cluster relies on data from the BCM for many of its gauges and warning lights. This code is also listed in TSB 18-011-22.
Technical Service Bulletins (TSBs) & Recalls
- 18-011-22: For 2021 3.6L models, this TSB recommends a PCM software update to fix a bug causing U0140 and other communication codes.
Platform-Specific Known Issues
- TSB #18-011-22: For 2021 Challengers with the 3.6L engine, the manufacturer issued a bulletin to update the PCM software to fix a bug that could cause U0140 and many other communication codes. This should be the first check for applicable vehicles.
- CAN Bus Star Connector: On the Challenger and its platform mates, a common failure point is the CAN bus star connector (junction block) located behind the glove box. Corrosion from a water leak or even a single loose pin can bring down the entire network, causing this code.
- Advanced DIY Programming: While professional programming is recommended, some advanced owners use tools like AlfaOBD with a security gateway bypass module to perform configuration changes, backup, and restore BCM data themselves.
Mechanic-Grade Diagnostic Values
- CAN Bus Network Resistance — expected: ~60 Ω (measured between Pin 6 and Pin 14 at OBD-II port with battery disconnected).. Failure: A reading of ~120 Ω suggests an open circuit or missing terminating resistor. A reading near 0 Ω indicates a short between the CAN high and low wires. A reading like 45 Ω could indicate an unusual network issue like a third terminating resistor or a faulty transceiver.
- BCM Power Supply Voltage — expected: 12.2 - 12.8 V at the BCM connector with the ignition on.. Failure: Voltage significantly below 12.2V points to a problem in the power supply circuit (fuse, relay, wiring) before the BCM.
- BCM Ground Circuit Resistance — expected: < 0.1 Ω between the BCM's ground pin and a clean chassis point.. Failure: Resistance higher than 0.1 Ω indicates a corroded, loose, or broken ground connection, a common cause of intermittent module issues.
- Battery Voltage During Module Flashing — expected: Must be maintained between 13.2 and 13.5 volts using a battery charger.. Failure: Voltage dropping below 13.2V or rising above 13.5V can interrupt the flash process, potentially corrupting the module.
Scan Tool Commands That Help
- AlfaOBD / wiTECH: Proxy Alignment (Configuration) — This procedure is required after replacing the BCM or adding/changing other modules on the network. It synchronizes the vehicle's configuration across all modules. A flashing odometer is a key indicator that a proxy alignment is needed.
- wiTECH: Reprogram PCM / Flash Module — Used to perform software updates as specified by Technical Service Bulletins, such as TSB #18-011-22, which can be the primary fix for the U0140 code on certain models.
- AlfaOBD: Active Diagnostics / Test Mode — To test if the BCM is capable of functioning. This allows a user to command specific outputs (e.g., 'turn on left turn signal,' 'honk horn') directly from the software to verify if the BCM and its output circuits are working, even if the inputs (stalks, buttons) are not being read.
- AlfaOBD: Read/Save BCM Configuration — Before making any changes or as a diagnostic step, the entire BCM configuration can be read and backed up. This provides a restore point if a programming change causes issues.
Wiring & Ground Locations
- CAN Bus Star Connector / Junction Block — Located behind the passenger side glove box. Access requires lowering the glove box and removing the right-side kick panel/trim.. This is the central hub where CAN bus wires from many modules connect. A single loose pin or corrosion in this block (often from a water leak) can disable the entire network, causing U0140 and other communication codes. It is a critical point for network-wide diagnosis.
- Alternate Star Connector — In the trunk, under the floor cover near the spare tire area.. This provides another access point to the vehicle's communication network, often used for programming keys but can also be used for diagnostics.
- BCM Location — High in the driver's side footwell, to the left of the steering column, behind the lower dash panel.. This is the physical location of the module itself. It is distinct from the star connector on the passenger side. Verifying connections here is a key step, but do not confuse it with the network hub.
- Main Chassis Grounds — Key points include the driver's side strut tower and the main ground strap from the chassis to the engine block.. A corroded or loose main ground can create high resistance, causing voltage drops and intermittent communication failures across multiple modules, leading to a U0140 code.
Real Owner Repair Stories
- Go-Parts documented repair (2019 Dodge Charger (same platform)) — No-start condition with multiple communication codes, including U0140.
❌ Tried (didn't work) Standard diagnosis of the BCM, its power supply, and its ground connections.
✅ What actually fixed it An internally shorted Electronic Shifter Module (ESM) was bringing the entire CAN C network down. The fault was isolated by disconnecting modules one-by-one from the star connector until communication was restored. - Go-Parts forum user report compilation (2011+ Dodge Charger/Challenger/Chrysler 300) — U0140 with other U-codes, radio and HVAC controls inoperative, possible no-start.
❌ Tried (didn't work) Replacing the BCM, Replacing the PCM, Checking main power and ground wires
✅ What actually fixed it An improperly installed aftermarket radio was disrupting the CAN bus. Disconnecting the aftermarket unit restored all vehicle communications.
"I Checked Everything" — The Actual Cause
- In a documented case on a 2019 Charger, all power, ground, and wiring checks for the BCM came back clean. The actual cause was a completely different module, the Electronic Shifter Module (ESM), which had an internal short that was crashing the entire communication network. The U0140 code was a symptom, not the cause, and the problem was only found by isolating modules at the CAN star connector.
When the Usual Fixes Don't Work
- While many diagnostic paths focus on the BCM itself, a significant amount of evidence from platform-related repairs shows that the U0140 code is often a symptom of a network-wide problem, not a failure of the BCM. In one case, an internally shorted Electronic Shifter Module was the root cause. In another common scenario, an improperly installed aftermarket radio was found to be disrupting the CAN bus, and simply disconnecting it resolved the code. This proves that before replacing the BCM, it is critical to diagnose the entire network, often by isolating modules at the star connector, to find the true source of the communication failure.
OEM Part Supersession History
68396561AB→68396561AC— Standard part revision or manufacturer update.
Heads up: None noted. The new part is a direct replacement for the original.
Model Year Variations Within This Range
- 2021: For models with the 3.6L engine, TSB #18-011-22 recommends a PCM software update as a potential primary fix for U0140, indicating a known software bug specific to this configuration.
Helpful Videos
We Have This Part in Stock

The information in this article is provided for general reference and educational purposes only. Vehicle specifications, procedures, and part compatibility can vary by production date, trim level, and region. Always consult your vehicle's factory service manual and verify part numbers before purchasing or performing repairs. Safety-critical components such as airbags, seat belts, and braking systems should be installed by a qualified professional.
- Dodge CHALLENGER:
- 🧭 Diagnostic Flowchart
- 🎬 Helpful Videos
- 🛍️ Shop This Part
- What's Unique About the 2019-2021 Dodge CHALLENGER
- Symptoms You May Notice
- Most Likely Causes
- Rare But Worth Checking
- Diagnosis Steps
- Parts You'll Likely Need
- Related Codes That Often Appear With This One
- Technical Service Bulletins (TSBs) & Recalls
- Platform-Specific Known Issues
- Mechanic-Grade Diagnostic Values
- Scan Tool Commands That Help
- Wiring & Ground Locations
- Real Owner Repair Stories
- "I Checked Everything" — The Actual Cause
- When the Usual Fixes Don't Work
- OEM Part Supersession History
- Model Year Variations Within This Range
- 🎟️ Get 5% Off