
U0140 on 2011-2018 Dodge Charger: Lost Communication With Body Control Module Fixes
This code means the Body Control Module (BCM) has stopped communicating with the main engine computer. The most common causes are a faulty BCM, wiring issues, or a software glitch that requires a dealer update. A full reset by disconnecting the battery may provide a temporary fix.
- U0140 means the Body Control Module (BCM) isn't talking to the rest of the car's computers.
- Before replacing any parts, check with a Dodge dealer to see if a simple PCM software update is available for your vehicle, as this is a very common fix.
- Common symptoms include malfunctioning lights, locks, windows, and wipers.
- If software isn't the issue, the most likely causes are a failed BCM, damaged wiring, or a bad ground.
- Diagnosis and repair of this code are best left to a professional due to the complexity of vehicle network systems.
What's Unique About the 2011-2018 Dodge CHARGER

On this generation of Dodge Charger (LD), the U0140 code is frequently documented in manufacturer Technical Service Bulletins (TSBs). These bulletins often point to software issues within the Powertrain Control Module (PCM) that can be resolved with a software update from a Dodge dealer. Unlike many other vehicles where this code almost always points to a wiring or module failure, on the Charger, a PCM reflash is a very common and officially recognized solution. 🎬 Watch: Understanding U0140 causes and common fixes Owners also report that a full electrical system reset can sometimes temporarily restore communication. The BCM on this platform acts as a gateway between high and low-speed CAN data bus networks, making its proper function critical for overall vehicle electronics.
Diagnostic Flowchart

Tap your situation to follow the diagnostic path that matches what you're seeing on this vehicle.
Symptoms You May Notice

- Check Engine Light is on
- Malfunction of power windows, door locks, or mirrors
- Interior or exterior lights acting erratically or not working
- Windshield wipers not functioning correctly
- Vehicle security alarm acting up or key fob not working
- HVAC (Air Conditioning and Heat) controls are unresponsive
- Vehicle may not start or may stall intermittently
- Multiple warning lights on the dashboard (e.g., ABS, Airbag, Traction Control)
- Unexplained battery drain
- Poor or slow acceleration
- Instrument panel displays "Service Electronic Stability Control" message
- Replacing the PCM when it only needs a software update.
- Replacing the battery when the root cause is a parasitic drain from a faulty BCM.
- Replacing the BCM when the actual fault is a corroded pin at a connector or the CAN bus star connector.
Most Likely Causes

- PCM Software Glitch 🔴 High Probability Multiple manufacturer TSBs specifically call for a PCM software update to resolve U0140, indicating known software bugs. Owners on forums confirm that a dealer flash update often resolves a persistent 'permanent' U0140 code. [13, Bulletin #18-084-16, #18-073-20, #18-070-16, #18-088-16 REV. A]
How to confirm: A Dodge dealer or a shop with a wiTECH scan tool can check the current PCM software version against the latest available version referenced in TSBs.
Typical fix: Reprogramming the Powertrain Control Module (PCM) with updated software. This requires a battery charger to maintain stable voltage (13.2-13.5V) during the flash process.
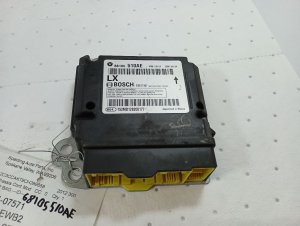
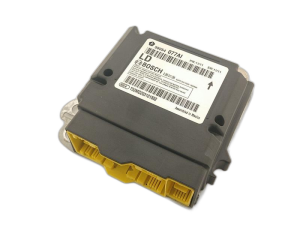
Est. part cost: $0 - Faulty Body Control Module (BCM) 🟡 Medium Probability → Shop Body Control Module The BCM, located behind the driver's side lower dash panel (kick panel), can fail from internal wear, vibration, or moisture intrusion over time.
How to confirm: After ruling out wiring and software, a technician will use a diagnostic tool to attempt direct communication with the BCM. If it's unresponsive but has good power (approx. 12.6V) and ground (<0.1 Ω resistance), the module is likely faulty.
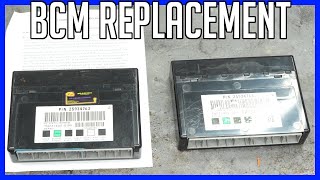
Typical fix: Replace the Body Control Module. The new unit must be programmed to the vehicle's VIN. Some companies sell pre-programmed, plug-and-play BCMs. 🎬 Watch: Step-by-step guide to replacing a Body Control Module
Est. part cost: $250-$500 - Wiring Harness Damage or Corrosion 🟡 Medium Probability The CAN bus wires that connect the modules can become chafed, corroded, or damaged, especially in areas where the harness passes through the firewall or near the center console and passenger kick panel.
How to confirm: Visually inspect the wiring harness between the PCM and BCM. Check for continuity and resistance on the CAN C bus wires (often a twisted pair) using a multimeter. The star connector/junction block, a central hub for CAN wires located under the passenger side glove box, is a key inspection point for corrosion or loose pins.
Typical fix: Repair the damaged section of the wiring harness or clean corroded connectors with contact cleaner and apply dielectric grease.
Est. part cost: $10-$100 - Low Battery Voltage or Failing Alternator ⚪ Low Probability → Shop Vehicle Battery Modern control modules are sensitive to voltage. Low or unstable voltage can cause communication dropouts between modules.
How to confirm: Test the battery voltage with the engine off (should be >12.4V, ideally 12.6V) and the charging system voltage with the engine running (should be 13.5V-14.5V).
Typical fix: Charge or replace the battery; replace the alternator if it's not charging correctly.
Est. part cost: $150-$400 - Poor Ground Connection ⚪ Low Probability
How to confirm: Locate the main ground points for the BCM (often shared with other interior components near the kick panels) and PCM and inspect them for looseness or corrosion. Perform a voltage drop test on the ground circuit.
Typical fix: Clean and tighten the ground connection.
Est. part cost: $0-$5
Rare But Worth Checking
- Faulty Brake Light Switch: → Shop Brake Light Switch TSB #18-102-15 specifically links U0140 with the brake switch code P0573. A failing brake switch can sometimes disrupt network communication, making it a worthwhile check if both codes are present.
- Aftermarket Electronics Interference: Poorly installed aftermarket alarms, remote starters, or audio equipment can interfere with the CAN bus network and cause communication codes. These should be professionally removed or repaired as a diagnostic step.
Diagnosis Steps
- Scan for all DTCs in all modules. Note any other communication codes (U-codes) or codes related to specific BCM functions. A cascade of U-codes points to a network-level problem.
- Check and record battery voltage and charging system performance. Ensure voltage is stable and within specification (>12.4V off, 13.5-14.5V running).
- Perform a hard reset. Disconnect both battery terminals and touch the cable ends together for 60 seconds to drain residual power from the modules. Reconnect and see if the fault clears. This is often a temporary fix.
- Check for applicable TSBs. A dealer can confirm if your vehicle's PCM has a pending software update to address U0140. This is a very common fix for these vehicles.
- Visually inspect the BCM connectors and wiring harness. The BCM is located behind the driver's side lower dash/kick panel. Check for signs of water intrusion, corrosion, or physical damage.
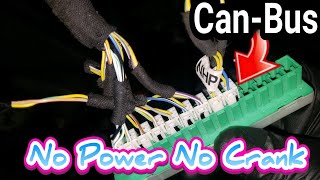
- Locate the CAN bus star connector(s) under the passenger side glove box area and inspect for corrosion or loose pins. This is a common failure point. 🎬 See how a faulty star connector causes no-start issues
- If wiring appears intact, use an advanced scan tool to check for communication on the CAN bus network. A technician may use an oscilloscope to verify the network signals are mirroring each other correctly.
- If the network is functional but the BCM will not communicate, verify the BCM has proper power and ground at its connectors using a multimeter. If it does, the BCM has likely failed and requires replacement.
Parts You'll Likely Need
- Body Control Module (BCM)
(OEM #68154472AB, 68354142AE (Varies by year and options, VIN required))— This is the module that has lost communication. If wiring and software are ruled out, the module itself is the point of failure.
Trusted brands: Mopar (OEM)
OEM price range: $290-$430
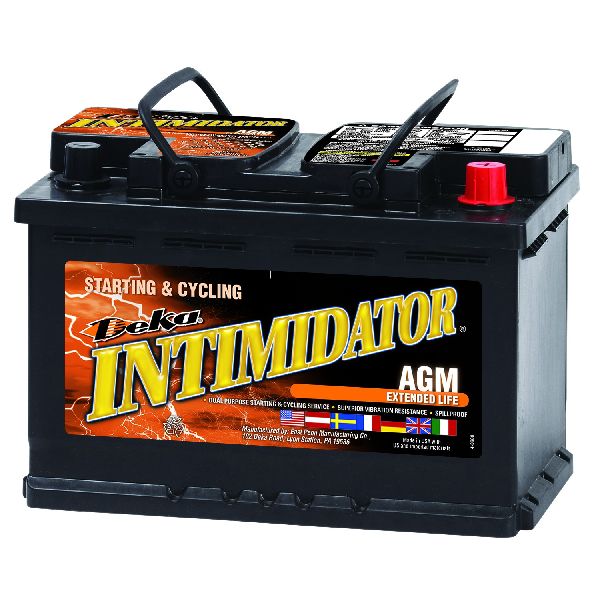
Aftermarket price range: $200-$400 (Often remanufactured and pre-programmed) - Battery — A weak or failing battery is a common source of various electrical and communication problems in modern vehicles.
Trusted brands: Interstate, DieHard, Duralast
OEM price range: $200-$300
Aftermarket price range: $150-$250
Related Codes That Often Appear With This One
- P0573 - Brake Switch 1 Stuck Off — As noted in TSB #18-102-15, a faulty brake switch circuit can occur alongside the BCM communication loss, suggesting a related electrical issue.
- P0335 - Crankshaft Position Sensor Circuit — Several TSBs list this code as another fault that can be resolved by the same PCM software update that fixes U0140. [Bulletin #18-084-16, #18-070-16]
- U-codes (various) — Since the BCM is a gateway module, its failure can cause a cascade of communication codes with other modules on the network, such as the ABS or instrument cluster.
Technical Service Bulletins (TSBs) & Recalls
- 18-084-16: Mentions U0140 as a code that can be cleared by a PCM software update.
- 18-073-20: Also lists U0140 as a DTC fixable with a PCM flash.
- 18-102-15: Links U0140 with P0573 (Brake Switch) and indicates clearing the code may be unsuccessful without addressing the root cause.
- 18-070-16: Another TSB where a PCM software update is the specified fix for U0140 among other codes.
- 18-088-16 REV. A: Lists U0140 as a code addressed by a PCM software reflash for LD platform vehicles.
Platform-Specific Known Issues
- A known software issue in the PCM can cause this code, which is correctable with a dealer-installed update as per multiple TSBs (e.g., #18-084-16, #18-073-20).
- The CAN bus wiring, particularly around the center console shifter area, can be damaged during unrelated repairs, leading to communication faults.
- The CAN bus star connector, located under the passenger-side dash, is a known point of failure for corrosion or loose connections.
Mechanic-Grade Diagnostic Values
- CAN C Bus Network Resistance — expected: Approximately 60 Ω. Failure: A reading of ~120 Ω indicates one of the two terminating resistors is offline. A reading near 0 Ω indicates a short between the CAN High and CAN Low wires. Readings significantly different from 60 Ω (e.g., 45 Ω or 80 Ω) can indicate a partially failed module or wiring resistance.
- CAN C Bus Voltage (Key On, Engine Off) — expected: CAN_H (White/Light Blue wire): ~2.6V to ground. CAN_L (White/Black wire): ~2.4V to ground.. Failure: Voltages that are stuck high (e.g., near 5V or 12V), stuck low (near 0V), or do not mirror each other indicate a short to power, short to ground, or a faulty module transceiver.
- BCM Power Supply Voltage — expected: > 9.0V, ideally ~12.6V with engine off.. Failure: Voltage below 9.0V for more than a second can trigger internal BCM faults and communication loss.
- BCM Ground Circuit Resistance — expected: < 0.1 Ω to a known good chassis ground.. Failure: High resistance indicates a poor ground connection, which can cause intermittent module operation and communication faults.
Scan Tool Commands That Help
- wiTECH: Restore Vehicle Configuration — This function is used after replacing a BCM or other major module to ensure all modules on the network recognize the new part and its configuration. It can also resolve issues where the vehicle's configuration has become corrupted, which can cause a U0140 code.
- wiTECH: Proxi Configuration Alignment — This is a critical step after replacing a module on a Fiat-Chrysler platform. It aligns the configuration data across all modules. A mismatch (proxi misalignment) can cause a flood of U-codes, including U0140, especially after installing a new radio or BCM.
- wiTECH: View CAN Bus Topology — This function provides a visual map of all modules on the network and their communication status. It allows a technician to quickly see which modules are online and which are not communicating, helping to isolate the source of the U0140 fault.
- wiTECH: Reset ECU — A specific reset can be sent to an individual module, like the BCM (or ETM - Electronic Telematic Module, as it's sometimes called). This is a software-level reboot that can be used to try and restore communication before performing more invasive diagnostics.
Wiring & Ground Locations
- CAN Bus Star Connector (also called Diagnostic Can-C Connector or Star Point) — Located behind the glove box on the passenger side. You may need to remove the glove box liner to access it. It's a block with multiple connectors plugged into it.. This is the central hub where the CAN C bus wires from multiple modules meet. Corrosion (especially from a water leak) or a single loose pin in this connector can take down the entire network, causing U0140 and other communication codes. It's a primary point of failure and inspection.
- BCM Connectors (C1, C2, etc.) — The BCM is located high up in the driver's side footwell, to the left of the steering column, behind the lower dash panel.. These are the main electrical interfaces to the BCM. Technicians need to access these connectors to test for power, ground, and CAN signal integrity directly at the module. Pinouts are required to know which wire to test.
- BCM Ground Circuit (Z922) — The BCM ground wires (typically black) are often secured to a chassis ground point near the driver's side kick panel or A-pillar. Multiple components may share the same ground stud.. A loose or corroded ground is a common cause of intermittent and difficult-to-diagnose module issues, including communication loss. A voltage drop test on this circuit is essential.
- CAN C Bus Wires — These are a twisted pair of wires. On this platform, the CAN C (+) is typically White/Light Blue, and the CAN C (-) is typically White/Black or White/Dark Blue. They run throughout the main vehicle harness.. These are the specific wires that carry the data between the PCM and BCM. A short or open in either of these wires will directly cause a U0140 code.
Real Owner Repair Stories
- Forum user reports (Various 2011+ Dodge Charger/Challenger/Chrysler 300) — U0140 code present, along with other U-codes. Radio and HVAC controls not working. Vehicle may or may not start.
❌ Tried (didn't work) Replacing the BCM, Replacing the PCM, Checking main power and ground wires
✅ What actually fixed it The aftermarket radio was improperly installed and was disrupting the CAN bus network. When the aftermarket radio was disconnected, all communication was restored and the U0140 code could be cleared. The fix was to either remove the radio or install it correctly with the proper adapter harness that isolates it from the main CAN bus. - ChargerForums user discussion (2012 Dodge Charger) — Intermittent U0140, dash lights flickering, car sometimes won't start, multiple warning lights.
❌ Tried (didn't work) Replacing the battery, Performing a hard reset by disconnecting the battery
✅ What actually fixed it The CAN bus star connector under the passenger dash had corrosion on several pins, likely from a small water leak. Cleaning the pins and the connector block with contact cleaner and applying dielectric grease restored stable communication and resolved the codes.
Model Year Variations Within This Range
- 2015-2018: The 2015 model year introduced a significant interior and technology refresh, including updated Uconnect infotainment systems. These newer radios are more deeply integrated into the CAN bus network. A failure of the radio or an improper radio replacement is more likely to cause a U0140 or other network codes on these later models. A 'Proxi Configuration Alignment' is often required after replacing a radio on a 2015+ vehicle to prevent these issues.
Helpful Videos
Used OEM Parts in Stock


New Aftermarket Parts Available


The information in this article is provided for general reference and educational purposes only. Vehicle specifications, procedures, and part compatibility can vary by production date, trim level, and region. Always consult your vehicle's factory service manual and verify part numbers before purchasing or performing repairs. Safety-critical components such as airbags, seat belts, and braking systems should be installed by a qualified professional.
- Dodge CHARGER:
- 🧭 Diagnostic Flowchart
- 🎬 Helpful Videos
- 🛍️ Shop This Part
- What's Unique About the 2011-2018 Dodge CHARGER
- Symptoms You May Notice
- Most Likely Causes
- Rare But Worth Checking
- Diagnosis Steps
- Parts You'll Likely Need
- Related Codes That Often Appear With This One
- Technical Service Bulletins (TSBs) & Recalls
- Platform-Specific Known Issues
- Mechanic-Grade Diagnostic Values
- Scan Tool Commands That Help
- Wiring & Ground Locations
- Real Owner Repair Stories
- Model Year Variations Within This Range
- 🎟️ Get 5% Off