
U0155 on 2021 Dodge Charger: Instrument Cluster Communication Loss Guide
This code means your 2021 Dodge Charger's instrument cluster has stopped communicating with the rest of the vehicle. The most common causes are a weak battery, faulty wiring, or a failed instrument cluster. A dead or erratic dashboard is the primary symptom.
- U0155 means the instrument cluster on your 2021 Charger is offline, which is a critical safety issue.
- Do not drive the vehicle. You cannot monitor speed or see important safety warnings.
- The most common causes are a weak battery, bad wiring, or a failed cluster. Always check the battery first.
- Diagnosis is complex and best left to a professional with the right tools to test the CAN bus network.
- If other 'U' codes are present, as suggested by TSB #1801222, it strongly indicates a broader network problem, not just a bad cluster.
What's Unique About the 2021-2021 Dodge CHARGER
On modern vehicles like the 2021 Charger, the instrument cluster is not just a display; it's an integral node in the vehicle's communication network, often referred to as the Cabin Compartment Node (CCN). A failure here can cause widespread and alarming symptoms. The presence of multiple 'U' codes alongside U0155, as noted in TSB #1801222 (such as U0140 and U0141), often points to a broader network-level problem rather than an isolated cluster failure. This makes a systematic network diagnosis crucial, as a fault in a related module like the BCM can manifest as a U0155 code.
Diagnostic Flowchart
Tap your situation to follow the diagnostic path that matches what you're seeing on this vehicle.
Symptoms You May Notice
- Instrument cluster is completely blank or dead.
- Gauges (speedometer, tachometer, fuel, temperature) are stuck at zero or behave erratically.
- Warning lights are all on, all off, or flickering randomly.
- Odometer and driver information display are not working.
- Check engine light is on.
- A 'No Bus' message may appear on the display.
- Intermittent loss of function, where the cluster works fine for a period and then fails.
- Replacing the instrument cluster without first checking the battery and wiring. A weak battery is a very common and much cheaper cause for this code.
- Addressing the U0155 code first when multiple 'U' codes are present. The root cause may lie with another module, and U0155 is just a symptom.
Most Likely Causes
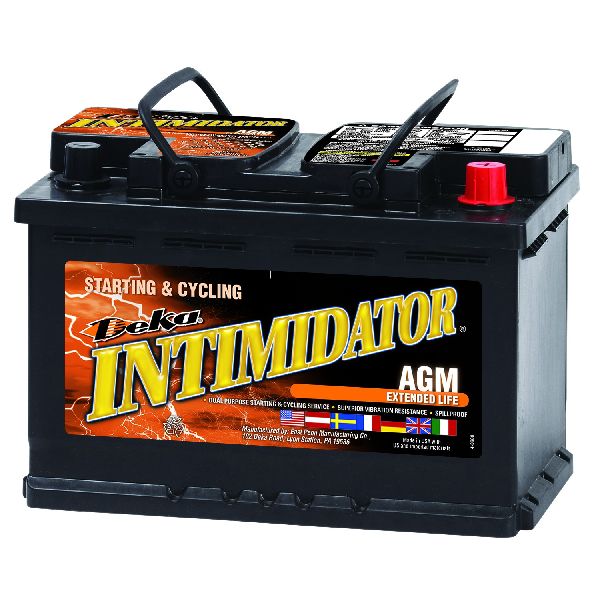
- Weak or Failing Battery 🔴 High Probability → Shop Vehicle Battery Modern vehicles like the Charger are highly sensitive to voltage. A battery with low or unstable voltage can cause modules to drop off the communication network, triggering multiple 'U' codes. This is one of the most common and easily overlooked causes.
How to confirm: Test the battery voltage with a multimeter. A healthy, fully charged battery should read approximately 12.6 volts with the engine off and 13.7-14.7 volts with the engine running. A load test is required to confirm the battery's ability to hold a charge under stress.
Typical fix: Recharge or replace the battery. Ensure battery terminals are clean and tight.
Est. part cost: $150-$350 - Wiring or Connector Issues 🟡 Medium Probability Vibrations and temperature cycles can cause wiring harnesses and connectors to become loose or corroded over time, interrupting communication. The main connector at the back of the instrument cluster is a common point of failure.
How to confirm: Visually inspect the wiring harness and connectors at the back of the instrument cluster and at the Body Control Module (BCM) for any signs of damage, corrosion, or loose pins. A multimeter can be used to check for continuity and shorts in the CAN bus wires (typically twisted pairs).
Typical fix: Repairing the damaged wire or cleaning/re-seating the connector.
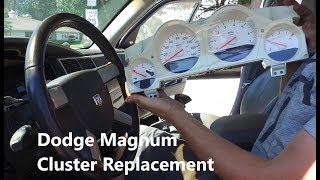
Est. part cost: $5-$100 - Faulty Instrument Panel Cluster (IPC) 🟡 Medium Probability → Shop Instrument Cluster The cluster itself is a complex electronic module that can fail internally due to software corruption or hardware failure on the circuit board. This can include the microcontroller or memory chips failing.
How to confirm: This is typically a process of elimination. If the battery, power, grounds, and CAN bus wiring are all confirmed to be good, the cluster itself is the likely culprit. An advanced scan tool may be able to communicate directly with the cluster to test its function.
Typical fix: The instrument cluster must be replaced and programmed to the vehicle's VIN. This often requires a dealership or a specialized repair shop. 🎬 Watch: A complete guide to replacing your Charger gauge cluster
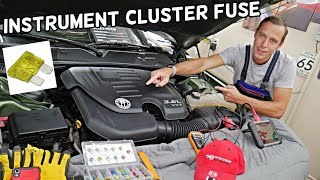
Est. part cost: $500-$1000 - Blown Fuse ⚪ Low Probability A fuse dedicated to the instrument cluster can blow, cutting off its power and causing it to lose communication. On Chargers from this generation, the relevant fuses are often located in the rear Power Distribution Center (PDC) in the trunk.
How to confirm: Locate the fuse for the instrument cluster in the vehicle's fuse box (refer to the owner's manual or diagrams online). A video for the 2011-2022 Charger points to fuse #32 (a 15 amp fuse) in the trunk fuse box as one to check for the instrument cluster. Visually inspect it or test it for continuity with a multimeter.
Typical fix: Replace the blown fuse with a new one of the exact same amperage rating.
Est. part cost: $1-$5
Rare But Worth Checking
- Body Control Module (BCM) or other Gateway Module Fault: → Shop Body Control Module The TSB #1801222 lists multiple communication codes together, including for the BCM (U0140). If the BCM, which acts as a network gateway, is faulty, it can prevent communication with the cluster. This is rare but should be considered if multiple unrelated modules are offline.
- Aftermarket Device Interference: Poorly installed aftermarket alarms, remote starters, or even plug-in telematics/insurance trackers connected to the OBD-II port can interfere with the CAN bus network and cause communication errors.
Diagnosis Steps
- Check Battery Health: Start by fully charging and load-testing the battery. Ensure voltage is stable and above 12.4V with the engine off. Clean any corrosion from the terminals.
- Scan for All Codes: Use an advanced OBD-II scanner to read all codes from all modules. Pay close attention to other 'U' series codes, as they can help pinpoint the source of the network failure. Diagnose other 'U' codes before U0155.
- Inspect Fuses: Check all fuses related to the instrument cluster and Body Control Module. For the 2021 Charger, this includes the fuse boxes in the engine bay and trunk. Specifically check fuse #32 in the trunk PDC.
- Visual Inspection: Inspect the wiring and connectors at the back of the instrument cluster and at the BCM. Look for any obvious signs of damage, corrosion, or loose connections.
- Check Power and Ground at the Cluster: Using a multimeter and a vehicle-specific wiring diagram, verify that the instrument cluster is receiving proper power (12.0V - 12.6V with ignition on) and has a solid ground connection (less than 0.5Ω resistance to battery negative).
- Test CAN Bus Network: This is an advanced step. With the battery disconnected, use a multimeter to check for resistance across the CAN High (Pin 6) and CAN Low (Pin 14) pins at the OBD-II port. The reading should be approximately 60 ohms. A reading of 120 ohms suggests a missing terminating resistor or a break in the circuit, while a reading below 60 ohms can indicate a shorted module.
- Isolate Modules: If the network is down, you may need to unplug modules one by one from the STAR connector (starting with any aftermarket devices) to see if communication is restored. This can identify a faulty module that is bringing down the entire network.
- Test/Replace the Instrument Cluster: If all other steps check out, the instrument cluster is the most likely point of failure. Replacement requires programming to the vehicle's VIN and mileage.
Parts You'll Likely Need
- Instrument Panel Cluster
(OEM #68547916AA (example, supersedes others))— If wiring and power supply are confirmed good, the internal electronics of the cluster are likely the cause of the communication failure. Mopar part numbers for this component are frequently superseded.
Trusted brands: Mopar
OEM price range: $700-$1200
Aftermarket price range: $400-$800 - Automotive Battery — A weak or failing battery is a primary cause of network communication codes in modern vehicles.
Trusted brands: Mopar, Interstate, DieHard
OEM price range: $200-$350
Aftermarket price range: $150-$250
Related Codes That Often Appear With This One
- U0140 — Lost Communication With Body Control Module. As seen in TSB #1801222, this often appears with U0155, suggesting a wider network issue or a fault with the BCM itself.
- U0141 — Lost Communication With IPM (BCM). Also from TSB #1801222, this points towards a problem with the Body Control Module or the network it manages.
- U0100 — Lost Communication with ECM/PCM. If the engine control module also loses communication, it points to a significant CAN bus network failure affecting multiple critical modules.
Technical Service Bulletins (TSBs) & Recalls
- 1801222: Lists U0155 as 'Lost Communication With Cluster-CCN' and shows it in conjunction with other communication codes like U0140 and U0141, indicating potential for a wider network issue.
- General TSB Guidance: It is always recommended to check for any TSBs related to the specific module that is reporting the code or the module that has lost communication.
Platform-Specific Known Issues
- Intermittent Failure After Driving: Some owners on forums for related platforms (like Dodge Challenger) report the U0155 code appearing after driving for a period, with the dash going dead and multiple warning lights coming on. The issue can sometimes be intermittent, disappearing after the vehicle is shut off and restarted, which can point towards a thermal issue in a module or a loose connection.
- Module Reset via Battery Disconnect: → Shop Vehicle Battery In some cases, particularly if the code was triggered by a cheap OBD-II reader or a temporary glitch, a simple battery disconnect for a few minutes can reset the modules and clear the code. However, if the underlying fault is still present, the code will return.
Mechanic-Grade Diagnostic Values
- Instrument Cluster Power Supply Voltage — expected: 12.0V to 12.6V with ignition on. Failure: Low voltage indicates a weak battery, charging system issue, or high resistance in the power feed.
- Instrument Cluster Ground Circuit Resistance — expected: < 0.5 Ω between the cluster's ground terminal and the battery negative post. Failure: High resistance indicates a corroded or loose ground connection.
- CAN C Bus Voltage (Normal Operation) — expected: CAN High (CAN C +) should be ~2.6V and CAN Low (CAN C -) should be ~2.4V.. Failure: Voltages that are stuck high (e.g., near 10V) or low (near 0V) indicate a short or open on the bus.
Scan Tool Commands That Help
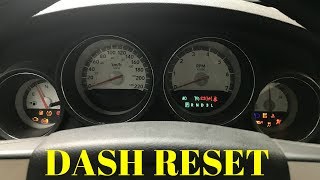
- wiTECH or AlfaOBD: Instrument Cluster Reset / Self-Test — This is a bidirectional command that forces the instrument cluster to perform a self-diagnostic, sweeping all gauges and illuminating all lights. It can help determine if the cluster is capable of functioning at all. A similar, more limited test can be initiated without a scan tool by holding the trip reset button while turning the key to the 'ON' position.
- wiTECH: Reprogram IPC / Flash IPC — If a Technical Service Bulletin (TSB) indicates a software update is available to fix a known glitch, the dealer-level wiTECH tool is used to flash the Instrument Panel Cluster (IPC) with new software.
- AlfaOBD: Odometer Correction — When replacing a faulty instrument cluster with a new or used one, AlfaOBD can be used to program the vehicle's correct mileage into the replacement cluster. This is a critical step after physical replacement.
- wiTECH: Proxy Configuration Alignment — After replacing or reprogramming the instrument cluster (or BCM), a proxy alignment must be performed. This procedure updates the vehicle's configuration list across all modules, ensuring the new or updated module is correctly recognized by the network.
Wiring & Ground Locations
- STAR Connector (CAN C) — Typically located behind the driver's side dash, sometimes accessible by removing the light switch panel or lower dash trim.. This is the central hub where many modules, including the instrument cluster, connect to the CAN C bus. A bad connection here or a fault in one of the connected modules can bring down the entire network, causing U0155. Technicians can disconnect modules one by one from this point to isolate the source of a network-wide fault.
- G202 — Located at the left side of the dash, near the breakout for the instrument cluster's C3 connector (on older but related platforms).. This is a primary ground point for several dash components. A loose or corroded G202 can cause a loss of ground to the instrument cluster, leading to a complete shutdown and a U0155 code.
- Trunk Ground Stud — Under the passenger side carpet, near the front seat, there is a factory ground post.. Because the battery is in the trunk, ensuring solid ground paths from the rear to the front of the vehicle is critical. This ground stud is a key point in that path. Poor grounding between the front and rear can cause voltage discrepancies and communication errors.
- CAN C Wires — The CAN C bus wires are typically a twisted pair of a white wire and a white/light blue wire on this platform.. These are the specific data lines that carry communication to and from the instrument cluster. When performing continuity or voltage checks, identifying these specific wires in the harness behind the cluster is necessary.
Real Owner Repair Stories
- Reddit user on r/Challenger (2017 Dodge Challenger SXT) — Screen and gauge cluster would intermittently go black when starting the car or accelerating from a stop. The clock and date would reset.
❌ Tried (didn't work) The owner initially suspected a faulty alternator or battery.
✅ What actually fixed it A visit to an auto parts store for a battery test revealed the battery had not been mounted properly and a connection was loose. Tightening the battery connection resolved all symptoms for free.
OEM Part Supersession History
68475220AA, 68475220AB, 68475220AC→68547916AA— Standard part revision and update by the manufacturer.
Helpful Videos
We Have This Part in Stock


The information in this article is provided for general reference and educational purposes only. Vehicle specifications, procedures, and part compatibility can vary by production date, trim level, and region. Always consult your vehicle's factory service manual and verify part numbers before purchasing or performing repairs. Safety-critical components such as airbags, seat belts, and braking systems should be installed by a qualified professional.
- Dodge CHARGER:
- 🧭 Diagnostic Flowchart
- 🎬 Helpful Videos
- 🛍️ Shop This Part
- What's Unique About the 2021-2021 Dodge CHARGER
- Symptoms You May Notice
- Most Likely Causes
- Rare But Worth Checking
- Diagnosis Steps
- Parts You'll Likely Need
- Related Codes That Often Appear With This One
- Technical Service Bulletins (TSBs) & Recalls
- Platform-Specific Known Issues
- Mechanic-Grade Diagnostic Values
- Scan Tool Commands That Help
- Wiring & Ground Locations
- Real Owner Repair Stories
- OEM Part Supersession History
- 🎟️ Get 5% Off