
OBD-II Code U0172: Lost Communication With Restraint System Sensor 'A'
What U0172 means, why it triggers, and how to fix it
- Code U0172 disables your vehicle's entire airbag system, leaving you with 0% supplemental restraint protection in a crash.
- Inspect the B-pillar wiring first; over 70% of U0172 codes stem from corroded connectors or pinched wires rather than a failed sensor.
- You must use an advanced OBD-II scanner capable of reading SRS modules to diagnose or clear this code; a standard $20 engine code reader will not work.
- Never replace the $100-$300 side impact sensor without first testing the 2-wire harness for continuity, 0V shorts, and proper reference voltage.
What Does U0172 Mean?
Code U0172 means your car's main safety computer, the Occupant Restraint Controller (ORC) or SRS Module, lost its connection to a critical side impact sensor. Often designated as sensor 'A', 'C', or 'Left Side Satellite Acceleration Sensor 1', these sophisticated accelerometers detect the rapid lateral g-forces of a side collision and signal the ORC within milliseconds to deploy airbags. When this communication link fails, the computer cannot verify the sensor's status, illuminates the airbag warning light, and disables the entire SRS to prevent accidental deployment.
Technical definition: Lost Communication With Restraint System Sensor 'A'. The Occupant Restraint Controller (ORC) continuously monitors the two-wire digital communication link with the side impact sensors. This code sets when the ORC does not receive valid data from the designated sensor for a specified period (typically 4 to 9 seconds). The sensor's communication and on-board diagnostics are powered directly by the ORC.
Can I Drive With U0172?
No — Do Not Drive. Do not drive with code U0172. This code signifies the entire Supplemental Restraint System (SRS) is disabled as a safety precaution. In a collision, the side, curtain, and front airbags will not deploy, and seatbelt pretensioners are deactivated. This drastically increases the risk of serious injury or death. The vehicle will also automatically fail state safety inspections.
Common Causes
- Damaged or Corroded Wiring (Very Common) — Moisture from clogged sunroof drains, bad window seals, or road salt frequently corrodes the wires leading to the B-pillar side impact sensor. Pinched or chafed wires inside the flexible door boot also interrupt the signal.
- Loose or Disconnected Sensor Connector (Common) — Previous interior work, such as replacing a window regulator or deep cleaning carpets, often leaves the sensor's connector unplugged or loosely seated. Spread female terminals inside the connector also cause intermittent communication loss.
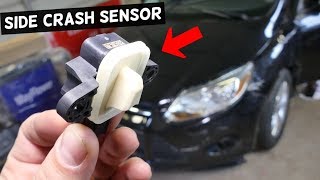
- Failed Side Impact Sensor (Common) — The sensor itself fails internally. These sensitive micro-electromechanical systems (MEMS) break down from age, extreme vibration, or internal electronic faults.
- Faulty Airbag Control Module (ORC/SRS) (Less Common) — An internal fault within the main airbag computer's microcontroller or communication driver IC prevents it from communicating with a perfectly good sensor and wiring harness.
- Blown Fuse or Poor Ground (Rare) — A fault in the main ORC power supply fuse or a corroded ground connection for the control module causes widespread communication issues across the SRS network.
- Reversed Wiring Polarity (Rare) — If a body shop repaired the wiring incorrectly after an accident and swapped the two wires in the sensor's pigtail connector, the sensor cannot communicate with the ORC.
- Software Corruption (Rare) — An incomplete software update or incorrect programming after a module replacement disrupts the communication protocol.
- Aftermarket Electronics Interference (Very Rare) — Improperly installed remote starters or alarms interfere with the vehicle's CAN bus network, disrupting module communication.
Symptoms
- Airbag Warning Light is On — The dashboard light featuring an icon of a person and an airbag remains permanently illuminated.
- SRS Message on Dash — The instrument cluster displays a text warning such as "Service Airbag System" or "Restraint System Fault".
- Failed Safety Inspection — An active airbag warning light results in an immediate failure in jurisdictions requiring safety inspections.
- Airbags Will Not Deploy (scan-tool only — no driver-felt sign) — The critical, non-visible symptom. The entire Supplemental Restraint System (SRS) is disabled to prevent accidental deployment.
- SRS Readiness Monitor Shows 'Not Ready' (scan-tool only — no driver-felt sign) — The SRS readiness monitor shows as 'Failed' or 'Not Ready' when checked with a scan tool.
Diagnostic Flowchart
Tap your situation to follow the diagnostic path that matches what you're seeing on this code.
Common Fixes & Costs
- Repairing Damaged Wiring or Connector Pigtail — Parts: $20-$60, Labor: $150-$300, ~2.0 hr book time (Intermediate)
- Reconnecting Loose Sensor Connector — Parts: $0, Labor: $0-$100, ~0.5 hr book time (Beginner)
- Replacing the Side Impact Sensor
— Parts: $50-$150, Labor: $100-$200, ~1.0 hr book time
(DIY)
Dodge Journey: OEM 68024939AA (Verify with VIN) (Alt: Dorman, Standard Motor Products (SMP))
Ford F-150: OEM AL3Z-14B004-A (Verify with VIN) (Alt: Carquest, Dorman)
Chevrolet Cruze: OEM 13574936 (Verify with VIN) (Alt: ACDelco, Dorman 590-271) - Clearing Water Leak and Cleaning Corrosion — Parts: $10-$30, Labor: $200-$400, ~2.5 hr book time (Professional)
- Replacing the Airbag Control Module (ORC/SRS)
— Parts: $400-$800, Labor: $150-$300, ~2.0 hr book time
(Professional)
All Makes: OEM Must be ordered by VIN (Alt: Remanufactured units available from specialty electronics suppliers)
DIY vs Professional
- Repairing Damaged Wiring — Beginner: No
Tools: Multimeter, soldering iron, heat shrink connectors, wire strippers, trim removal tools. - Replacing the Side Impact Sensor — Beginner: Yes
Tools: Basic hand tools, trim removal tools, SRS-capable scan tool. - Replacing the Airbag Control Module (ORC/SRS) — Beginner: No
Tools: Advanced scan tool for programming, socket set.
Used vs. New Parts: Buying Guide
When a used part is worth it: Buying a used side impact sensor is not recommended. The small cost savings do not justify the risk of installing a safety-critical part with an unknown history of impact or moisture exposure.
Donor-vehicle mileage cap: roughly under 20000 miles for the part to have meaningful remaining life.
Donor quality checklist:
- Only consider a used sensor from a low-mileage vehicle scrapped for reasons unrelated to collision or flooding.
- Verify the part number matches exactly.
- Avoid parts from flood-damaged or rust-belt vehicles.
Decision logic:
- If The new part costs less than $250 → Always buy new. Labor costs make the risk of a faulty used part financially illogical.
- If The vehicle is very old with low value, and the budget is extremely tight → A used sensor is a last resort, accepting a significant safety risk.
Warranty tradeoff: Salvage yard parts carry a 30-90 day warranty covering only the part. New aftermarket parts carry a 1-year to limited lifetime warranty. OEM parts have a 1-2 year warranty.
Worst-case if a used part fails: $200-$400. If the used sensor fails, you pay diagnostic and labor costs a second time.
What Happens If You Wait — Timeline
- Immediately: Code U0172 is set as 'Active'. The airbag warning light illuminates. The entire Supplemental Restraint System (SRS) is disabled. (MPG impact: 0%% · Added cost: $0)
- First State Inspection: The vehicle automatically fails its safety inspection due to the illuminated airbag light. (MPG impact: 0%% · Added cost: $30-$100)
- 1-6 Months (If caused by water leak): Moisture continues to saturate the B-pillar area. Corrosion worsens on the sensor connector and affects nearby wiring and ground points. (MPG impact: 0%% · Added cost: $500-$2,000+)
- In any collision: The airbags and seatbelt pretensioners will not deploy. The risk of serious or fatal injury increases dramatically. (MPG impact: 0%% · Added cost: Potentially infinite)
Cost of Not Fixing It
- Immediately: The entire Supplemental Restraint System (SRS) is disabled. There is zero airbag protection in a crash. (Added cost: N/A)
- First Inspection Cycle: The vehicle automatically fails state safety inspections, preventing legal registration renewal. (Added cost: $30-$70 (Failed inspection fee) + cost of re-inspection.)
- In an Accident: Catastrophic failure of the occupant protection system, leading to a significantly higher risk of serious injury or death. (Added cost: Potentially infinite (medical bills, loss of life).)
- Long-Term (if caused by water leak): Unaddressed water leaks cause severe corrosion of nearby wiring, floor pans, and electronic modules. (Added cost: $500-$2000+)
Diagnosis Steps
- Read Codes with SRS-Capable Scanner
Use an OBD-II scanner that accesses the SRS/airbag module to confirm U0172. Basic engine code readers will not work. Note if the code is 'Active' (current fault) or 'Stored' (intermittent fault). Document any other 'U' or 'B' codes.
Tools: SRS-capable OBD-II Scanner (Beginner) - Visually Inspect Wiring and Connector
SAFETY FIRST: Disconnect the negative battery terminal and wait 15 minutes to de-energize the system. Locate the sensor (usually in the B-pillar). Remove the trim and inspect the connector. Look for green/white corrosion, pinched wires, or water intrusion. Ensure the connector is fully seated.
Tools: Trim removal tools, flashlight, basic hand tools (Intermediate) - Analyze Live Data Stream
Access the SRS module's live data stream on your scan tool. Look for the data PID for 'Left Side Impact Sensor 1'. A healthy sensor reports a specific status. With U0172, this PID reads 'No Signal', '0V', or 'Fault', confirming the communication loss is isolated to this circuit.
Tools: Advanced SRS-capable OBD-II Scanner (Intermediate) - Perform a 'Wiggle Test'
If the code is 'Stored', reconnect the battery and monitor the code status on the scanner. Gently wiggle the wiring harness at common failure points (B-pillar, under the seat, door boot). If the code changes from 'Stored' to 'Active', you isolated the wiring fault location.
Tools: SRS-capable OBD-II Scanner (Intermediate) - Check for Power and Ground at the Connector
With the sensor unplugged, consult a wiring diagram. Reconnect the battery temporarily. Use a multimeter to check for the reference voltage from the ORC and ground at the harness-side connector. Lack of either points to an upstream wiring break. Disconnect the battery again.
Tools: Multimeter, vehicle-specific wiring diagram (Advanced) - Check for Short to Voltage
Disconnect the battery and wait 15 minutes. Unplug the harness from both the side impact sensor and the main ORC module. Reconnect the battery and turn the ignition ON. Measure voltage on the signal and ground wires at the sensor connector. It must be 0V. Any voltage indicates a short to power.
Tools: Multimeter, vehicle-specific wiring diagram (Advanced) - Resistance Checks for Opens and Shorts
With the battery disconnected and both modules unplugged, use a multimeter in Ohms mode. 1) Check continuity on signal and ground wires from sensor to ORC (<1.0Ω). 2) Check for a short between the two wires (OL or >100kΩ). 3) Check for a short to ground from each wire to the chassis (OL or >100kΩ).
Tools: Multimeter, vehicle-specific wiring diagram (Advanced) - Swap Test the Sensor
If the vehicle has an identical sensor on the opposite side, disconnect the battery, swap the left and right sensors, clear the codes, and see if the fault follows the sensor (e.g., U0172 disappears but U0171 appears). If it does, the sensor is faulty.
Tools: Basic hand tools, SRS-capable OBD-II Scanner (Intermediate) - Check for Reversed Polarity
If the vehicle has a history of accident repair, verify the wire colors at the sensor connector against the factory wiring diagram. A connector re-pinned incorrectly reverses the signal and ground wires, causing a communication fault.
Tools: Vehicle-specific wiring diagram (Advanced) - Diagnose the Airbag Control Module (ORC)
If the wiring and sensor test perfectly, the Airbag Control Module is the final suspect. Module failure requires professional installation and VIN-specific programming.
Tools: Advanced diagnostic scan tool, professional expertise (Professional)
When This Code Triggers (Freeze-Frame Conditions)
- System State: Self-Test (The ORC performs an initial self-test every time the ignition turns to the 'ON' position.)
- Ignition Status: ON (The fault is detected when the ORC powers up and attempts to communicate with all sensors in the SRS network.)
- Fault Condition Duration: 4-9 seconds (The code becomes 'Active' after the ORC fails to receive a valid signal from the sensor for a predetermined amount of time.)
Related Codes
- U0171 — Lost Communication With Restraint System Sensor B. This is the equivalent sensor on the opposite (right) side of the vehicle. Diagnosis is identical.
- U0173 — Lost Communication With Restraint System Sensor D. On daisy-chained systems, a wiring fault to Sensor 'A' (U0172) causes this code simultaneously. Fix U0172 first.
- B0028 — A body code for a specific circuit fault (e.g., 'Right Side Seat Deployment Squib Circuit Open'). Seeing a 'B' code alongside a 'U' code helps pinpoint the exact location of a physical wiring break.
- U0100 — Lost Communication With ECM/PCM. If seen with U0172, it points to a systemic CAN bus network failure, not an isolated airbag sensor issue.
Climate & Environmental Factors
- Humidity and Water Ingress: Interior water leaks from clogged sunroof drains or failing window seals introduce moisture to the B-pillar sensor connectors. This causes rapid corrosion and electrical shorts, the primary trigger for U0172.
- Road Salt: Salty brine splashes onto the undercarriage and seeps into door sills, accelerating the degradation of wiring insulation and connector pins.
- Extreme Cold: Low temperatures cause metal contacts within connectors to contract, creating loose connections. Wires become brittle and break from vibration, often manifesting as an intermittent airbag light on cold starts.
How to Talk to a Mechanic About This Code
Say this: "I have an airbag light on and my scanner shows code U0172, 'Lost Communication With Restraint System Sensor A'. I'd like to schedule a diagnostic appointment. Please start by inspecting the wiring and connector in the B-pillar for corrosion or damage before recommending a new sensor."
This signals to the shop that you understand the most common cause is a wiring fault, not a failed sensor. It directs the technician to perform a proper diagnosis instead of just replacing the most obvious part.
Avoid saying:
- 'My airbag light is on, can you fix it?'
- 'Just replace the bad sensor.'
- 'Do whatever you think is best.'
Questions to ask before authorizing the repair:
- What were the results of the wiring tests? Did you check for continuity, shorts to ground, and power at the connector?
- Did you find any corrosion or physical damage to the wiring or connector?
- If you are recommending a sensor replacement, how did you rule out a wiring problem?
- Is the recommended repair for the sensor, the wiring, or the control module?
Where to Take It: Dealer vs Independent vs Chain
- Dealer:
A safe but expensive choice. Best if you suspect a control module issue.
Best for: Vehicles under warranty, Complex electrical issues requiring module replacement and programming, Recalls or Technical Service Bulletins (TSBs)
Downsides: Highest labor rates and parts costs., May default to replacing entire assemblies rather than performing detailed wiring repairs. (Typical cost: +50% vs. baseline) - Independent Shop:
Best fit for most cases. An experienced independent technician is well-equipped to diagnose and repair common wiring faults.
Best for: Out-of-warranty vehicles where cost is a factor., Shops with strong reputations for electrical and diagnostic work.
Downsides: Quality and expertise vary widely., May lack access to the latest manufacturer-specific software updates. (Typical cost: +0% vs. baseline) - Chain Shop:
Avoid for diagnosing U0172. They are likely to replace the sensor without checking the wiring.
Best for: Simple, routine maintenance like oil changes or tires.
Downsides: Technician skill varies dramatically., Often incentivized to replace parts rather than perform detailed diagnostics., May lack specific SRS diagnostic tools. (Typical cost: -10% vs. baseline)
When to Walk Away From the Repair
If the estimated repair cost for this safety-critical system exceeds 40-50% of the car's private-party value, and the car has other significant issues, consider replacing the vehicle.
- Car worth $3500, fix is $1500: Walk away. The repair cost is nearly half the car's value, especially if the diagnosis points to a failed Airbag Control Module.
- Car worth $10000, fix is $450: Fix it. A $450 repair for a sensor replacement or wiring fix is a reasonable investment to restore a critical safety feature.
- Car worth $5000, fix is $250: Fix it. A low-cost wiring repair is well below the threshold and makes the vehicle safe and sellable.
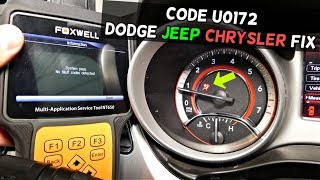
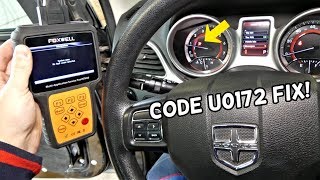
What Scan Tool You Need for This Code
Minimum: A scanner that reads and clears codes from the SRS (Supplemental Restraint System) / Airbag module. A basic engine-only code reader will NOT work.
A standard $20 code reader only communicates with the Engine Control Module (ECM). The U0172 code is stored in the separate Airbag Control Module (ORC/SRS).
Budget: Autel AL619 (~$99) — Reads and clears basic SRS and ABS codes, allowing you to confirm the U0172 code and clear it after a repair.
Mid-range: Foxwell NT630 Plus / BlueDriver Pro (~$120) — Reads and clears engine, ABS, and SRS codes. The BlueDriver pairs with your phone and shows live data, useful for confirming if the sensor is communicating.
Professional: Autel MaxiCOM MK808 / Foxwell NT809 (~$500) — Offers full-system diagnostics, including live data graphing for SRS components and bidirectional controls. Essential for differentiating between a wiring, sensor, or module failure.
Rent vs buy: Auto parts stores offer free scanning services, but their tools are almost always basic engine code readers that CANNOT read SRS codes. You must buy your own SRS-capable scanner or pay a shop.
How to Clear the Code After You Fix It
- Ensure the underlying wiring or sensor fault is repaired.
- Reconnect the negative battery terminal.
- Turn the ignition to the 'ON' position (engine off).
- Use an SRS-capable OBD-II scan tool to connect to the Airbag/SRS module.
- Select 'Clear Codes' or 'Erase DTCs'.
- Cycle the ignition off, wait 15 seconds, then turn it back on to confirm the airbag light performs its self-test and turns off.
Drive cycle (~5 minutes): An emissions drive cycle is not required. The SRS system self-tests upon every key-on event. A short drive with two ignition cycles confirms the fix. If the battery was disconnected, a longer mixed-driving cycle is needed to reset emissions monitors.
Readiness monitors affected: None directly by the U0172 code., Battery disconnection resets all emissions monitors to 'Not Ready'.
Before emissions retest: drive at least 100 miles to fully set monitors.
Watch out for:
- Using a basic engine code reader that cannot access the SRS module.
- Assuming disconnecting the battery clears the SRS module's memory.
- Clearing the code without fixing the root cause; the light returns immediately.
Will This Fail Emissions / State Inspection?
Yes — this code typically fails an OBD-II emissions inspection.
- California: An airbag light does not fail the emissions check itself, but a technician may refuse to inspect the vehicle for safety reasons.
- New York: An illuminated airbag warning light is an automatic failure of the annual safety inspection.
- Texas: While not officially a checkable item for state safety inspections, stations frequently refuse to pass the vehicle on general safety grounds.
Most Commonly Affected Vehicles
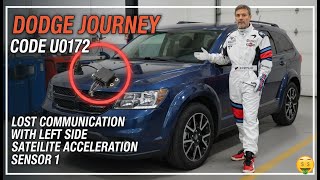
- Dodge Journey (2009-2020) — Extremely common. Often caused by a loose connector or broken wire at the B-pillar sensor, sometimes immediately after a window regulator replacement.
- Fiat Freemont (2012-2018) — Shares the exact SRS architecture and wiring as the Dodge Journey, making it equally susceptible to U0172.
- Ford F-150, Fusion, Focus (2008-2016) — Refers to 'Sensor C'. Common causes are corrosion in the B-pillar connector or chafed wiring inside the flexible door-to-body wiring boot.
- Chevrolet Cruze, Malibu, Equinox (2010-2017) — Failures frequently occur due to wiring breaks inside the flexible boot between the door and the car body.
- Mitsubishi Lancer, Outlander (2008-2015) — Official service information strongly recommends diagnosing the CAN bus line integrity first, as U0172 often indicates a broader network issue.
- Jeep Grand Cherokee (2005-2010) — The sensor is located in the B-pillar area. Service manuals point to specific circuit checks between the sensor and the ORC.
- Dodge/Ram Durango, Magnum, 1500 (2006-2012) — A fault in the first sensor causes codes for others in a daisy-chain setup. The ORC module is located under the center console.
- Chrysler Sebring, 200 (2007-2012) — U0172 often appears with U0173 (Sensor 'D') due to daisy-chained wiring. Always diagnose the first code in the sequence.
Manufacturer-Specific Notes
- Dodge/Chrysler/Jeep: Side impact sensors are wired in a 'daisy chain'. A wiring fault to the first sensor causes communication loss codes for all downstream sensors. Always diagnose the lowest numbered sensor code first.
- Mitsubishi: Service information emphasizes checking the main CAN bus line first when U0172 appears, as it indicates a broader network communication problem before diagnosing the sensor itself.
- Ford: Ford uses the designation 'Sensor C' for this code. Technicians frequently find broken or chafed wires within the flexible rubber boot running between the driver's door and the B-pillar.
- General Motors (GM): The wiring harness passing from the body into the door is a common failure point for window and lock issues; this same mechanical stress affects airbag sensor wiring routed nearby.
Real Owner Stories
2012 Dodge Journey - The Easy Fix
Airbag light came on immediately after a DIY window regulator replacement. Code U0172 was 'Active'.
What they tried:
- Scanned the code and identified it as 'Lost Communication with Left Side Satellite Acceleration Sensor 1'.
Outcome: The owner remembered working in the B-pillar area. Upon removing the trim panel, they found the sensor's electrical connector was not fully plugged in. Securely seating the connector cleared the code permanently.
Lesson: If the code appears right after a repair, the cause is almost certainly related to that repair. Re-check your work and ensure all connectors are fully seated.
Ford F-150 - The Misdiagnosis
Airbag light appeared intermittently on a 2004 F-150. The code was U0172, sometimes 'Active', sometimes 'Stored'.
What they tried:
- Replaced the side impact sensor. The light returned.
- Replaced the pigtail connector, suspecting corrosion. The problem persisted.
Outcome: A thorough diagnosis found a chafed wire in the main wiring harness near a sharp metal edge. The intermittent short happened when the engine torqued. Repairing the single wire solved the problem after hundreds of dollars were wasted on parts.
Lesson: Do not automatically replace the sensor. An intermittent code points to a wiring issue (chafing, loose pin) rather than a complete sensor failure. Perform a 'wiggle test'.
Chevy Cruze - The Water Leak
Owner of a 2011 Chevy Cruze experienced code U0172 after a heavy rainstorm, noticing a damp smell near the B-pillar.
What they tried:
- Cleared the code, but it returned the next time it rained.
- Visual inspection showed green corrosion on the B-pillar connector pins.
Outcome: The root cause was a clogged sunroof drain tube. Water overflowed, running down the B-pillar directly onto the sensor connector. The fix required clearing the drain tube, cleaning the connector, and applying dielectric grease.
Lesson: If you have a sunroof and experience electrical issues in the pillars, suspect a clogged drain tube. Fixing the leak is mandatory before addressing the electrical damage.
How to Prevent This Code From Triggering
- Clean Sunroof Drains Annually (Once or twice per year) — Prevents water from backing up and overflowing into the headliner and down the B-pillars, directly onto sensor wiring.
- Inspect Door and Window Seals (Every 6 months) — Cracked rubber seals allow water to seep into the door panels and B-pillars. Applying a rubber conditioner prolongs their life.
- Apply Dielectric Grease to Connectors (When performing any related repair) — Applying non-conductive dielectric grease to the connector seal blocks moisture and prevents future corrosion.
- Inspect Wiring Harnesses in High-Flex Areas (During other maintenance) — The constant opening and closing of doors causes wires inside the rubber boot to fatigue and break over time.
Frequently Asked Questions
Can I reset the airbag light myself?
You can clear the U0172 code with an SRS-capable scan tool, but if the underlying electrical problem isn't fixed, the light returns immediately. Disconnecting the battery will not reset the airbag light.
Is it safe to drive with code U0172?
No. The airbag system is disabled and will not deploy in an accident, drastically increasing the risk of injury or death. Repair it immediately.
Where is the Restraint System Sensor 'A' located?
It is most commonly located inside the B-Pillar, the vertical post between your front and rear doors. On some vehicles, it sits under the front seat or along the floor rail near the sill plate.
What is a 'satellite' acceleration sensor?
It is a remote accelerometer that measures crash forces. It sits in impact zones like the B-pillar to detect a collision the instant it happens, sending a signal to the main airbag module.
I replaced the sensor but the code came back. What now?
This confirms the fault is in the wiring or the airbag control module, not the sensor itself. You must perform continuity, short-circuit, and voltage tests on the wiring harness. Stop replacing parts until the wiring is verified.
Can I fix U0172 myself?
Experienced DIYers with an SRS scanner and multimeter can fix simple wiring breaks or loose connectors. However, due to the critical safety nature of airbags, professional diagnosis is strongly recommended if the issue isn't obvious.
What tools are needed to diagnose U0172?
You need an OBD-II scanner capable of reading SRS/Airbag codes, a digital multimeter, and trim removal tools. A vehicle-specific wiring diagram is essential for accurate electrical testing.
What does 'Active' vs. 'Stored' mean for code U0172?
An 'Active' code means the communication failure is currently happening. A 'Stored' or 'History' code means the fault occurred previously but is not present now, indicating an intermittent issue like a loose wire.
Can water leaks cause code U0172?
Yes. Clogged sunroof drains or bad window seals allow water to run down the inside of the B-pillar, dripping directly onto the sensor connector. This causes corrosion and electrical shorts.
How much does it cost to fix U0172?
A simple wiring repair or connector cleaning costs $150 to $300. Replacing a failed sensor runs $200 to $400, while replacing the main airbag module costs $600 to over $1,500.
Can a bad clock spring cause this code?
No. A bad clock spring sits behind the steering wheel and affects the driver's frontal airbag, horn, or steering wheel controls. It does not affect the side impact sensor circuit.
Key Takeaways
- Code U0172 disables your vehicle's entire airbag system, leaving you with 0% supplemental restraint protection in a crash.
- Inspect the B-pillar wiring first; over 70% of U0172 codes stem from corroded connectors or pinched wires rather than a failed sensor.
- You must use an advanced OBD-II scanner capable of reading SRS modules to diagnose or clear this code; a standard $20 engine code reader will not work.
- Never replace the $100-$300 side impact sensor without first testing the 2-wire harness for continuity, 0V shorts, and proper reference voltage.
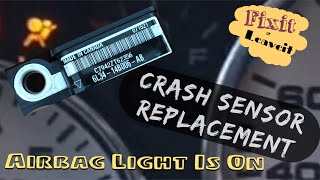
Helpful Videos

Shop the Parts Behind U0172
Below are the parts most often responsible for code U0172, ranked by how frequently each one is the actual culprit (per the diagnosis above). Tap any to see what we have for your vehicle.


The information in this article is provided for general reference and educational purposes only. Vehicle specifications, procedures, and part compatibility can vary by production date, trim level, and region. Always consult your vehicle's factory service manual and verify part numbers before purchasing or performing repairs. Safety-critical components such as airbags, seat belts, and braking systems should be installed by a qualified professional.
- 🧭 Diagnostic Flowchart
- 🎬 Helpful Videos
- 🛍️ Shop This Part
- What Does U0172 Mean?
- Can I Drive With U0172?
- Common Causes
- Symptoms
- Common Fixes & Costs
- DIY vs Professional
- Used vs. New Parts: Buying Guide
- What Happens If You Wait — Timeline
- Cost of Not Fixing It
- Diagnosis Steps
- When This Code Triggers (Freeze-Frame Conditions)
- Related Codes
- Climate & Environmental Factors
- How to Talk to a Mechanic About This Code
- Where to Take It: Dealer vs Independent vs Chain
- When to Walk Away From the Repair
- What Scan Tool You Need for This Code
- How to Clear the Code After You Fix It
- Will This Fail Emissions / State Inspection?
- Most Commonly Affected Vehicles
- Manufacturer-Specific Notes
- Real Owner Stories
- 2012 Dodge Journey - The Easy Fix
- Ford F-150 - The Misdiagnosis
- Chevy Cruze - The Water Leak
- How to Prevent This Code From Triggering
- Frequently Asked Questions
- Can I reset the airbag light myself?
- Is it safe to drive with code U0172?
- Where is the Restraint System Sensor 'A' located?
- What is a 'satellite' acceleration sensor?
- I replaced the sensor but the code came back. What now?
- Can I fix U0172 myself?
- What tools are needed to diagnose U0172?
- What does 'Active' vs. 'Stored' mean for code U0172?
- Can water leaks cause code U0172?
- How much does it cost to fix U0172?
- Can a bad clock spring cause this code?
- Key Takeaways
- 🎟️ Get 5% Off