
OBD-II Code U0180: Lost Communication With Automatic Lighting Control Module
What U0180 means, why it triggers, and how to fix it
- Code U0180 indicates the Automatic Lighting Control Module (ALCM) has stopped communicating, disabling headlights, DRLs, and automatic lighting features.
- Always check the ALCM fuse and verify 12V power and ground at the module connector before replacing any expensive parts.
- Repairing a corroded wire or bad ground costs $50 to $250, while replacing the ALCM or BCM exceeds $600 at a repair shop.
- Do not drive at night with an active U0180 code, as sudden headlight failure increases crash risk and violates traffic laws.
- Search for manufacturer Technical Service Bulletins (TSBs) first, as vehicles like the 2016 Honda Pilot have known, cheap sensor fixes for this exact code.
What Does U0180 Mean?
The U0180 code signifies that your car's main computer network lost its connection to the Automatic Lighting Control Module (ALCM). This module acts as the brain for your vehicle's lighting system, controlling automatic headlights, daytime running lights (DRLs), and hazard lights. When this communication link breaks, these lighting systems malfunction or stop working entirely.
Technical definition: The official SAE/J2012 definition is "Lost Communication With Automatic Lighting Control Module". It indicates the ALCM is no longer sending or receiving messages on the Controller Area Network (CAN bus). Supervising modules, like the Body Control Module (BCM), set this code when they fail to receive expected status messages from the ALCM within a specific timeframe.
Can I Drive With U0180?
Yes, But With Caution. Yes, you can drive the vehicle, as the code does not affect core engine or transmission functions. However, your automatic headlights, daytime running lights, and turn signals are often inoperative or erratic. Driving at night or in poor visibility without functional headlights is illegal and extremely dangerous. Continuing to operate the vehicle with an underlying electrical fault also risks more complex repairs if a short circuit damages other CAN bus modules.
Common Causes
- Damaged Wiring, Corroded Connectors, or Loose Pins (Very Common) — Wiring and connectors for the ALCM are the primary culprits. Exposure to moisture, road salt, and vibrations causes corrosion on connector pins, chafed insulation, or broken wires. Female terminals within a connector also lose tension over time, creating an intermittent open circuit known as 'pin drag'.
- Loss of Power or Ground to the Lighting Module (Common) — The ALCM requires a stable power supply and a solid ground connection to operate. A blown fuse, a corroded ground point on the chassis, or a break in the power wire prevents the module from powering on and communicating.
- Failed Automatic Lighting Control Module (ALCM) (Common) — The module itself fails internally due to age, heat exposure, moisture intrusion, or electrical surges. When its internal microcontroller or transceiver fails, it permanently drops off the vehicle network.
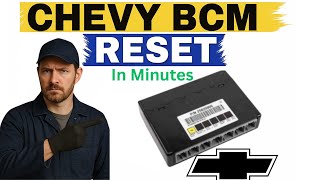
- Water Intrusion at BCM 🎬 See this guide on how to reset your BCM. or Interior Fuse Box (Less Common) — Clogged sunroof drains or a leaking windshield allow water to drip directly onto the Body Control Module (BCM) or main fuse panel. This corrosion disrupts the entire communication network, causing a cascade of U-codes.
- Faulty CAN Bus Network Splice or Termination (Less Common) — Vehicle networks use splice packs or star connectors to join multiple modules. Corrosion or a loose connection within one of these junctions disrupts a specific network branch, causing multiple communication codes simultaneously.
- Software Glitches or Corruption (Less Common) — The module's software becomes corrupted, or a software update for another module creates a communication conflict. A software reflash or update resolves the U0180 code without replacing any hardware.
- Interference from Aftermarket Accessories (Rare) — Improperly installed aftermarket parts like remote starters, alarms, or LED lighting kits introduce electrical noise or voltage spikes onto the CAN bus, interfering with normal module communication.
Symptoms
- Headlights or Daytime Running Lights Malfunction — Headlights or DRLs flicker, appear dim, or fail to turn on entirely.
- Automatic Headlight Feature Inoperative — Headlights no longer switch on automatically in the dark, requiring manual operation.
- Interior Lights Not Working Correctly — Dome or courtesy lights malfunction, as the ALCM often influences interior lighting circuits.
- Erratic Turn Signal or Hazard Light Operation — Turn signals fail to activate or hazard lights flash randomly due to networked lighting functions.
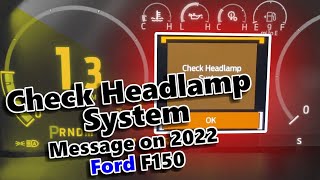
- Lighting System Warning on Dashboard 🎬 Watch: Troubleshooting a headlamp system message on a newer truck. (also visible on scanner) — A specific warning light or a message like "Lighting System Fault" appears on the instrument cluster.
Diagnostic Flowchart
Tap your situation to follow the diagnostic path that matches what you're seeing on this code.
Common Fixes & Costs
- Replacing a Blown Fuse — Parts: $1-$5, Labor: $0, ~0.1 hr book time (DIY)
- Repairing Damaged Wires or Cleaning Connectors — Parts: $5-$25, Labor: $100-$250, ~1.5 hr book time (Intermediate)
- Repairing a Faulty Ground Connection — Parts: $1-$10, Labor: $50-$150, ~0.8 hr book time (DIY)
- Replacing the Automatic Lighting Control Module (ALCM) — Parts: $250-$700, Labor: $150-$300, ~1.8 hr book time (Professional)
- Replacing a Faulty Body Control Module (BCM) — Parts: $300-$800, Labor: $200-$400, ~3 hr book time (Professional)
- Updating or Reflashing Module Software — Parts: $0, Labor: $120-$200, ~1 hr book time (Professional)
Used vs. New Parts: Buying Guide
When a used part is worth it: Buying used electronic modules is highly risky. It only makes sense for an older, lower-value vehicle where the cost of a new part is prohibitive and the owner accepts the risk of programming challenges.
Donor-vehicle mileage cap: roughly under 60000 miles for the part to have meaningful remaining life.
Donor quality checklist:
- Match the part number exactly, including hardware or software version numbers.
- Avoid parts from vehicles with flood or fire damage.
- Verify the seller offers a functional warranty (at least 90 days) and a clear return policy.
Decision logic:
- If The part requires VIN programming or security initialization → Buy a new or professionally remanufactured part pre-programmed to your VIN.
- If The vehicle is less than 10 years old → Buy new OEM or a high-quality aftermarket part to ensure compatibility and longevity.
- If A used part costs more than 50% of a new part → Buy new; the small savings do not justify the risk of failure and reprogramming headaches.
Warranty tradeoff: Used parts from a salvage yard typically have a 30-90 day warranty, which does not cover labor. New aftermarket parts carry a 1-year to limited lifetime warranty. New OEM parts installed by a dealer come with a 12-month/12,000-mile warranty.
Worst-case if a used part fails: $500-$1000 if a used module fails or cannot be programmed, requiring repeat diagnostic fees, labor, and the purchase of another part.
What Happens If You Wait — Timeline
- Immediate: Automatic headlights and DRLs fail to operate. A warning light appears on the dash. The vehicle is unsafe and illegal to drive at night. (MPG impact: 0%% · Added cost: $0)
- 1-3 months: If the fault is due to an internal short in the ALCM, a parasitic battery drain develops. The vehicle struggles to start or has a completely dead battery after sitting. (MPG impact: 0%% · Added cost: $150-$350 (Parasitic draw diagnostics and new battery cost))
- 3-9 months: The faulty module broadcasts corrupt data onto the CAN bus, causing unrelated systems to act erratically. The radio, instrument cluster, or power locks malfunction intermittently. (MPG impact: 0-2%% · Added cost: $350-$500 (Increased diagnostic complexity and potential for misdiagnosis))
- 9+ months: A shorted module left connected to the network causes permanent damage to a critical gateway computer, like the Body Control Module (BCM), leading to a no-start condition. (MPG impact: 0-5%% · Added cost: $800-$2000+ (Cost to diagnose and replace/program a BCM))
Cost of Not Fixing It
- Immediate: Inoperative automatic headlights, DRLs, or other lights, creating a serious safety hazard at night or in poor visibility. Potential for a traffic ticket. (Added cost: 0)
- 1-6 months: If the fault is due to a shorted module or wire, it causes a parasitic battery drain, leading to a no-start condition and requiring a new battery. (Added cost: $150-$350)
- 6+ months: An unstable communication network causes unrelated electronic systems to malfunction. A shorted module eventually damages the Body Control Module (BCM), leading to a complex repair. (Added cost: $800-$2000+)
Diagnosis Steps
- Check for Technical Service Bulletins (TSBs)
Search for TSBs for your vehicle's make, model, and year related to code U0180. Manufacturers provide known fixes for specific models, saving hours of diagnostic time.
Tools: Online TSB Database or Repair Manual Subscription (Beginner) - Perform a Full Network Scan
Use a professional-grade OBD-II scanner to read all vehicle modules. Confirm U0180 is active and note any other modules reporting a loss of communication to determine if the fault is isolated or network-wide.
Tools: Advanced OBD-II Scanner (Beginner) - Inspect Fuses for the ALCM and BCM
Locate all fuses related to the Automatic Lighting Control Module and Body Control Module. Visually inspect and test these fuses with a multimeter. A blown fuse is the simplest cause of power loss.
Tools: Owner's Manual, Fuse Puller, Multimeter or Test Light (Beginner) - Inspect ALCM Wiring and Connector
Locate the ALCM. Visually inspect its connector and wiring harness for corrosion (green/white powder), water damage, chafing, or broken wires. Disconnect the module and check for bent or backed-out pins.
Tools: Flashlight, Inspection Mirror (Intermediate) - Verify Power and Ground at the ALCM Connector
With the connector unplugged and the key on, use a multimeter to verify the ALCM receives battery voltage (12.4V+) on the power pin. Check for a solid ground by measuring resistance between the ground pin and the negative battery terminal (must be <1 ohm).
Tools: Multimeter, Vehicle-specific wiring diagram (Intermediate) - Analyze Scan Tool Live Data PIDs
Monitor live data PIDs from the BCM or gateway module. Look for 'ALCM Status' or 'CAN Bus Status'. An 'Offline' status for the ALCM while other modules are 'Online' isolates the problem to the ALCM or its direct wiring.
Tools: Advanced OBD-II Scanner with Live Data capability (Advanced) - Measure CAN Bus Network Resistance
With the battery disconnected, measure resistance between the CAN High and CAN Low wires at the DLC or ALCM connector. A healthy two-wire system reads 60 ohms. 120 ohms indicates an open circuit; 0 ohms indicates a short.
Tools: Multimeter, Vehicle-specific wiring diagram (Advanced) - Check CAN Bus Voltages (Key On)
With the battery reconnected and key on, measure voltage on the CAN lines. High-Speed CAN High should be 2.6V and CAN Low 2.4V. Deviations indicate a short to ground or a short to voltage.
Tools: Multimeter (Advanced) - Isolate the Faulty Module or Wiring Branch
If network tests fail, unplug other modules on the same network branch one by one. If unplugging a specific module or splice pack restores normal network resistance/voltage, you have isolated the short.
Tools: Advanced Scan Tool, Wiring Diagram (Advanced)
When This Code Triggers (Freeze-Frame Conditions)
- Battery Voltage: 11.5-14.5V (Code sets with key on, engine off, or while driving. Low voltage (<12V) is a common trigger for communication faults.)
- Vehicle Speed: 0-75 mph (Occurs at any speed, including stationary. Often sets upon startup as modules perform their initial network check-in.)
- Engine RPM: 0-3000 RPM (Not directly related to engine speed; the fault is on the body communication network, active when the ignition is on.)
- Ambient Temperature: -20°F - 120°F (Extreme temperatures stress wiring and electronic modules, but the code is not dependent on a specific temperature range.)
Related Codes
- U0184 — Lost Communication With Radio. Frequently appears alongside U0180 because the radio and lighting modules share the same CAN bus. If both fail, suspect a network-wide problem like a bad BCM or ground.
- U0073 — Control Module Communication Bus 'A' Off. Indicates a major failure on the primary high-speed CAN bus. Diagnose U0073 first, as it is the foundational fault causing the secondary U0180 code.
- U0181 / U0182 — Lost communication with the Headlamp Leveling Module (U0181) or Front Lighting Control Module (U0182). Seeing these together with U0180 strongly suggests a wiring problem common to all lighting modules.
- U0155 — Lost Communication With Instrument Panel Cluster (IPC). The IPC routes messages between networks. If the IPC fails, it cannot route messages to the ALCM, causing U0180 to set.
Climate & Environmental Factors
- High Humidity & Coastal Regions: Moisture and salt in the air accelerate corrosion on wiring connectors, fuse box terminals, and module pins, leading to intermittent communication failures.
- Cold Weather / Winter: Low temperatures reduce battery efficiency, causing low voltage conditions that trigger random communication codes. Wires and plastic connectors also become brittle and break from vibration.
- Road Salt (Rust Belt): Heavy road salt spray severely corrodes ground points on the chassis, wiring harnesses, and exposed modules, leading to open circuits or high resistance.
How to Talk to a Mechanic About This Code
Say this: "I have a U0180 code and my automatic headlights aren't working. I'd like to schedule a diagnostic appointment. Please start by verifying power, ground, and CAN bus network integrity at the lighting module connector before recommending a module replacement."
This signals you are an informed consumer. It directs the technician to follow a logical diagnostic path (check wiring/power first) rather than immediately suggesting the most expensive part.
Avoid saying:
- 'My headlights are acting weird, can you fix it?'
- 'Just fix whatever is wrong with the lights.'
- 'My check engine light is on, I don't know why.'
Questions to ask before authorizing the repair:
- Did you verify that the lighting module has 12V power and a good ground at its connector?
- What were the CAN bus resistance and voltage readings at the module? Were they within spec?
- If you are recommending a module replacement, how have you ruled out a wiring or network problem as the root cause?
- Does the new module require programming, and is that included in the estimate?
- Can I see the old part you are replacing?
Where to Take It: Dealer vs Independent vs Chain
- Dealer:
A safe but expensive choice. Best if you suspect a software issue or if the car is still under warranty. They have direct access to all TSBs and programming tools.
Best for: Vehicles under warranty, Complex, manufacturer-specific software issues or programming, When a known Technical Service Bulletin (TSB) requires dealer-specific tools
Downsides: Highest labor rates, often $150-$250+ per hour., May be quicker to replace an entire assembly rather than diagnose a smaller component fault. (Typical cost: +50% vs. baseline) - Independent Shop:
Best fit for most cases, provided you find the right shop. A good independent technician specializing in electrical issues diagnoses wiring, ground, and network faults effectively and affordably.
Best for: Out-of-warranty vehicles where cost is a factor., Shops with a good reputation for electrical and diagnostic work.
Downsides: Quality and expertise vary widely. Must find a shop with certified technicians and modern diagnostic equipment., May not have access to the very latest dealer-level software or programming tools for brand-new models. (Typical cost: +0% vs. baseline) - Chain Shop:
AVOID. Network communication diagnostics require expertise and equipment not typically found at chain shops. There is a high risk of misdiagnosis.
Best for: Simple, high-volume jobs like oil changes, tires, and brake pads.
Downsides: Technicians lack the specialized training and equipment for complex network diagnostics., Business model pressures technicians to upsell, leading to misdiagnosis or unnecessary repairs. (Typical cost: -10% vs. baseline)
When to Walk Away From the Repair
If the repair cost exceeds 50% of the car's private-party value, seriously consider your options. For older cars (10+ years or >150,000 miles), lower this threshold to 40%.
- Car worth $4000, fix is $800: Fix it. This repair cost is well within a reasonable percentage of the car's value.
- Car worth $3000, fix is $1800: Walk away. The repair cost is over 50% of the vehicle's value. It is not a sound financial decision.
- Car worth $8000, fix is $1200: Fix it. The repair is a manageable expense compared to the car's worth and the cost of replacement.
What Scan Tool You Need for This Code
Minimum: A scanner that performs a full system scan, reading codes from all modules (Engine, Body, Chassis, Network), not just basic powertrain codes.
A basic $20 code reader only checks for powertrain (P-codes) and cannot see network (U-codes) like U0180. You must see which modules are online to begin diagnosing the issue.
Budget: BlueDriver Pro (~$100) — Connects to your smartphone and performs a full vehicle scan, reading U-codes from body and network modules. It allows you to see freeze-frame data and confirm the presence of U0180.
Mid-range: Autel MaxiCOM MK808 / Foxwell NT809 (~$300-450) — Offers bidirectional control to command the headlights on/off directly from the tool, isolating if the problem is in the command wiring, the module, or the network. Shows live data from the network.
Professional: Autel MaxiSys MS906Pro / Launch X431 Series (~$1000-2000) — Provides full OEM-level diagnostics, including network topology maps that visually show which modules are communicating. Offers advanced coding and programming functions required for module replacement.
Rent vs buy: For a one-time diagnosis, renting a tool from an auto parts store is a good option. If you plan to do more DIY work, buying a midrange scanner is a worthwhile investment.
How to Clear the Code After You Fix It
- Ensure all connectors are secure and the battery is reconnected.
- Use a compatible OBD-II scan tool to erase the Diagnostic Trouble Codes (DTCs) from all modules.
- Perform a full drive cycle to allow the vehicle's readiness monitors to run.
Drive cycle (~20 minutes): Cold start the vehicle and let it idle for 2-3 minutes. Drive in mixed city traffic (stop-and-go) for 10 minutes. Drive at a steady highway speed (55-60 mph) for 5 minutes. Let the vehicle cool down completely.
Readiness monitors affected: Comprehensive Component Monitor, Misfire Monitor
Before emissions retest: drive at least 50 miles to fully set monitors.
Watch out for:
- Disconnecting the battery will not reliably clear a U-code from all modules and resets all readiness monitors.
- The code returns immediately if the root cause (broken wire, bad ground, faulty module) is not repaired.
Will This Fail Emissions / State Inspection?
Yes — this code typically fails an OBD-II emissions inspection.
- California: An active U0180 code that causes the Check Engine Light to illuminate is an automatic failure. After repair, a full drive cycle is required to set readiness monitors before a retest.
- New York: The NYS inspection includes an OBD-II scan. Any code illuminating the MIL results in failure. The lighting system itself is also checked during the safety inspection.
- Texas: In counties requiring emissions testing, a vehicle fails if the MIL is commanded on by any trouble code. Readiness monitors must be set to 'Ready' to pass.
Most Commonly Affected Vehicles
- Chevrolet / GMC Silverado, Sierra, Tahoe, Yukon (2007-2014) — Prone to GMLAN network issues. A common failure point is the G218 ground connection under the driver's side dashboard, causing widespread communication codes including U0180.
- Ford F-150 (2015-2024) — Headlight Control Module (HCM) failures are documented. A failing battery causes numerous random communication codes; a Battery Management System (BMS) reset is required after replacement.
- Dodge / Ram Ram 1500/2500, Charger, Grand Caravan (2009-2018) — Susceptible to CAN bus issues stemming from the Totally Integrated Power Module (TIPM). Intermittent faults are also traced to wiring issues at network splice connectors.
- Jeep Grand Cherokee (2011-2021) — Electrical issues are common. A 2021 recall (21V950000) addressed an incomplete Smart Lighting Module (SLM) software update causing headlights to become inoperable.
- Honda Pilot (2016) — Honda TSB ATS 150901 states body code B121E should be diagnosed using the U0180 procedure. The most common fix is replacing the dashboard light sensor (Part # 38990-TG7-A01).
- Hyundai Elantra, Sonata (2011-2017) — General electrical wiring issues lead to communication codes. Diagnosis requires tracing wiring harnesses for intermittent shorts before condemning a module.
- Volkswagen Jetta, Golf, Passat, Tiguan (2005-2019) — The Central Electronics Module (J519) controls lighting. Water intrusion from clogged sunroof drains is a primary cause of J519 failure, leading to U0180.
- Subaru Legacy, Outback, Forester, WRX (2010-2025) — Subaru uses a Body Integrated Unit (BIU). A failing BIU causes erratic lights and parasitic battery drain. This module requires programming upon replacement.
Manufacturer-Specific Notes
- General Motors (GM): GM's low-speed GMLAN is a single-wire network. Technicians isolate faults by disconnecting branches at a splice pack and using a jumper wire to connect the scan tool directly to individual circuits.
- Ford: A failing battery or improper Battery Management System (BMS) reset after replacement causes random communication codes. Always perform a BMS reset after installing a new battery.
- Chrysler / Dodge / Jeep: Electrical issues are frequently traced to the Totally Integrated Power Module (TIPM). The TIPM contains non-serviceable internal relays that fail, requiring TIPM repair or replacement.
- Mazda: Communication codes are often caused by poor pin fitment in large connectors. TSBs point to specific pins backing out of harness connectors, causing intermittent faults reproduced by tapping the dashboard.
Real Owner Stories
2016 Honda Pilot with U0180 and B121E codes
Check engine light illuminated, automatic headlights stopped working, and the dashboard displayed a "Lighting System Problem" message.
What they tried:
- Suspected a major electrical problem or a bad BCM.
- Searched online forums and found Honda TSB ATS 150901, stating code B121E should be diagnosed using the U0180 procedure.
Outcome: The TSB identified the root cause as a faulty dashboard light sensor. The owner replaced the sensor (Part # 38990-TG7-A01), instantly resolving the code and restoring automatic headlights.
Lesson: Always check for Technical Service Bulletins (TSBs) first. A known issue turns a complex electrical problem into a simple, cheap part replacement.
2011 Dodge Ram 1500 with intermittent no-start
The truck randomly cranked but would not start. The fuel pump also continued running after shutoff, draining the battery.
What they tried:
- Replaced the fuel pump, but the problem returned.
- Checked fuses and relays, finding no voltage at the fuse during a no-start event.
- Suspected the Totally Integrated Power Module (TIPM) based on forum research.
Outcome: The owner confirmed the TIPM was faulty by temporarily jumping the fuel pump fuse. Replacing the TIPM with a remanufactured unit permanently solved the communication and power issues.
Lesson: On Chrysler/Dodge/Ram vehicles, intermittent electrical issues often point to a failing TIPM acting as the central hub, rather than individual component failures.
2007.5 Chevrolet Silverado with cascading electrical failures
Power windows worked intermittently, followed by the starter failing. The owner suspected a bad ground.
What they tried:
- Cleaned multiple ground connections under the dash and in the engine bay.
- Verified the ignition switch was sending a signal.
- Researched the Body Control Module (BCM) as a central point of failure.
Outcome: The owner diagnosed a failed BCM. Replacing and programming the BCM restored function to all affected systems, clearing the U0180 and related codes.
Lesson: When multiple, unrelated electrical accessories fail simultaneously, the root cause is usually a central computer like the BCM or a shared ground, not individual system faults.
How to Prevent This Code From Triggering
- Apply Dielectric Grease to Connectors (When servicing or if connectors are exposed) — Dielectric grease seals electrical connectors from moisture, oxygen, and salt, preventing the corrosion that causes high resistance and communication failures.
- Perform Regular Undercarriage Washes (Monthly, especially in winter (Rust Belt)) — Regularly washing the undercarriage removes corrosive road salt before it destroys wiring, ground points, and module casings.
- Maintain Battery Health and Terminals (Annually (professional test) and every 6 months (visual inspection)) — Low battery voltage is a primary cause of random communication codes. Testing the battery and cleaning terminals ensures modules receive stable power.
- Check for and Clear Water Drains (Annually, especially for vehicles with sunroofs) — Clogged sunroof or cowl drains cause water to leak inside the cabin, dripping directly onto the BCM or interior fuse panel and destroying electronics.
Frequently Asked Questions
Can a weak or old battery cause a U0180 code?
Yes. A battery providing low or unstable voltage is a primary cause of random communication errors. Have your battery and charging system professionally tested before starting complex diagnostics.
My mechanic wants to replace the lighting module right away. Is this correct?
It is often premature. Wiring, connector, power, or ground issues are more frequent causes. Ask the shop to verify power, ground, and network integrity at the module's connector before authorizing replacement.
Will code U0180 go away on its own?
If the fault was a momentary low-voltage glitch, the code becomes a 'history' code and lights resume normal function. If the cause is a physical defect like a corroded wire, the code remains active until repaired.
How much does it cost to fix a U0180 code?
Diagnostic fees typically run $100-$200. Simple wiring or ground repairs cost under $250 total. Replacing and programming a Body Control Module or Lighting Control Module ranges from $600 to over $1,100 depending on the vehicle.
My cheap scan tool says U0180 is for the radio. Is that right?
No, this is a known error in some consumer-grade scan tool databases. The official SAE definition for U0180 is 'Lost Communication With Automatic Lighting Control Module,' while the radio code is U0184. If both fail, suspect a shared network issue.
Can I just replace the lighting module myself to fix the code?
It is highly risky. Modern control modules are rarely 'plug-and-play' and require professional scan tools for VIN programming and security initialization. An improperly installed module will not work and can prevent the car from starting.
What is a 'splice pack' and could it cause this code?
A splice pack is a plastic junction box connecting multiple network wires. Corrosion or a loose wire inside can take down an entire network branch, triggering codes like U0180. Technicians open these packs to test individual circuits and isolate faults.
Key Takeaways
- Code U0180 indicates the Automatic Lighting Control Module (ALCM) has stopped communicating, disabling headlights, DRLs, and automatic lighting features.
- Always check the ALCM fuse and verify 12V power and ground at the module connector before replacing any expensive parts.
- Repairing a corroded wire or bad ground costs $50 to $250, while replacing the ALCM or BCM exceeds $600 at a repair shop.
- Do not drive at night with an active U0180 code, as sudden headlight failure increases crash risk and violates traffic laws.
- Search for manufacturer Technical Service Bulletins (TSBs) first, as vehicles like the 2016 Honda Pilot have known, cheap sensor fixes for this exact code.
Helpful Videos
![How To Test CAN BUS With A Multimeter [CAN Bus Resistance Check] Mechanic Mindset](https://img.youtube.com/vi/JPE42HSJxAk/mqdefault.jpg)
Shop the Parts Behind U0180
Below are the parts most often responsible for code U0180, ranked by how frequently each one is the actual culprit (per the diagnosis above). Tap any to see what we have for your vehicle.


The information in this article is provided for general reference and educational purposes only. Vehicle specifications, procedures, and part compatibility can vary by production date, trim level, and region. Always consult your vehicle's factory service manual and verify part numbers before purchasing or performing repairs. Safety-critical components such as airbags, seat belts, and braking systems should be installed by a qualified professional.
- 🧭 Diagnostic Flowchart
- 🎬 Helpful Videos
- 🛍️ Shop This Part
- What Does U0180 Mean?
- Can I Drive With U0180?
- Common Causes
- Symptoms
- Common Fixes & Costs
- Used vs. New Parts: Buying Guide
- What Happens If You Wait — Timeline
- Cost of Not Fixing It
- Diagnosis Steps
- When This Code Triggers (Freeze-Frame Conditions)
- Related Codes
- Climate & Environmental Factors
- How to Talk to a Mechanic About This Code
- Where to Take It: Dealer vs Independent vs Chain
- When to Walk Away From the Repair
- What Scan Tool You Need for This Code
- How to Clear the Code After You Fix It
- Will This Fail Emissions / State Inspection?
- Most Commonly Affected Vehicles
- Manufacturer-Specific Notes
- Real Owner Stories
- 2016 Honda Pilot with U0180 and B121E codes
- 2011 Dodge Ram 1500 with intermittent no-start
- 2007.5 Chevrolet Silverado with cascading electrical failures
- How to Prevent This Code From Triggering
- Frequently Asked Questions
- Can a weak or old battery cause a U0180 code?
- My mechanic wants to replace the lighting module right away. Is this correct?
- Will code U0180 go away on its own?
- How much does it cost to fix a U0180 code?
- My cheap scan tool says U0180 is for the radio. Is that right?
- Can I just replace the lighting module myself to fix the code?
- What is a 'splice pack' and could it cause this code?
- Key Takeaways
- 🎟️ Get 5% Off