
U0180 on 2013-2016 Cadillac ATS: Causes and Fixes for Lost Audio and Chimes
On a 2013-2016 Cadillac ATS, U0180 indicates a communication loss with the audio system, causing all sound—including radio, chimes, and turn signal clicks—to stop working. The most common causes are a software glitch fixed by a system reset or a failed audio amplifier, which is often located in the trunk and requires replacement and programming. Water intrusion in the trunk is a known potential cause of amplifier failure.
- On a 2013-2016 ATS, U0180 means a loss of communication with the audio system, not the lighting system.
- The primary symptoms are a total loss of sound, including the radio, warning chimes, and turn signal clicks.
- Always attempt a CUE system hard reset and check the radio/amplifier fuses before assuming a part has failed.
- The most common failed part is the audio amplifier, especially on vehicles with premium sound systems (RPO UQA or UQS).
- Any replacement amplifier or radio module must be professionally programmed to your car's VIN to function.
What's Unique About the 2013-2016 Cadillac ATS
The Cadillac ATS, built on the GM Alpha platform, integrates many crucial driver alerts into the audio system as a core design feature. Unlike in many other vehicles where chimes and clicks are generated by the instrument cluster, the ATS relies on the radio and amplifier. This means a communication fault like U0180 has the unique and often confusing symptom of silencing the turn signals and safety warnings. This specific issue was common enough that General Motors issued Technical Service Bulletins #PIE0348A and #PIE0348 to gather information from dealerships and investigate the root cause, which was often linked to the premium audio amplifier in models with RPO codes UQA or UQS.
Diagnostic Flowchart
Tap your situation to follow the diagnostic path that matches what you're seeing on this vehicle.
Symptoms You May Notice
- Complete loss of all audio from the radio/infotainment system.
- Warning chimes (for seatbelts, door ajar, etc.) are silent.
- The audible 'click-clack' sound for the turn signals is absent, though the exterior lights still flash.
- The CUE infotainment screen may be frozen or unresponsive, though often it appears to function normally but produces no sound.
- No sound from Bluetooth calls or navigation prompts.
- The volume bar may disappear or not respond when using steering wheel or console controls.
- Replacing the radio head unit (HMI module) when the amplifier is the actual cause of the 'no sound' issue.
- Replacing individual speakers, which will not fix a problem caused by a lack of signal from the amplifier.
- Replacing the Body Control Module (BCM) because of a communication code, without first isolating the fault to the audio system network.
- Assuming the CUE screen is the problem, especially if it was recently replaced. While related issues can occur, total sound loss including chimes points more directly to the amplifier communication.
Most Likely Causes
- Software Glitch / Frozen Module 🔴 High Probability The Cadillac CUE system and associated modules can experience software anomalies that interrupt communication. This is a known issue across many GM vehicles of this era.
How to confirm: The issue is intermittent or appeared suddenly without any other symptoms. Performing a hard reset restores function, at least temporarily. The issue may resolve on its own after the vehicle sits turned off for an extended period (30+ minutes), allowing modules to fully 'sleep' and reset.
Typical fix: Perform a hard reset. A common method is to turn the car off, open the driver's door for at least 60 seconds, close the door, and restart the car. Another method is to disconnect the negative battery terminal for 15-30 minutes to reset all vehicle modules.
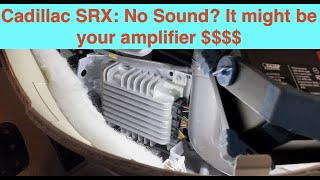
Est. part cost: $0 - Failed Audio Amplifier 🔴 High Probability → Shop Audio Amplifier GM TSBs PIE0348 and PIE0348A specifically target this issue on models with premium audio amplifiers (RPO codes UQA or UQS), indicating the amplifier is a common point of failure. The amplifier is located in the trunk and can be susceptible to damage from water leaks caused by bad taillight seals or sunroof drains.
How to confirm: A hard reset does not restore sound, and fuses are intact. A professional scan tool cannot communicate with the amplifier module. The amplifier is located in the trunk on the driver's side; checking for power, ground, and for signs of water damage or corrosion on its connectors is a key diagnostic step. A technician can use a MOST bus loopback adapter to bypass the amplifier; if sound returns to other components (or if communication is restored to other modules on the bus), the amplifier is confirmed faulty.
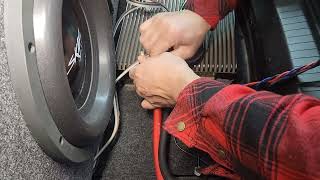
Typical fix: Replace the audio amplifier. 🎬 Watch: How to access and install a replacement amplifier The replacement part (new or used) must be programmed to the vehicle's VIN to function. Some owners have sourced used amplifiers from salvage yards.
Est. part cost: $150-$400 (Used/Remanufactured) - Blown Fuse ⚪ Low Probability
How to confirm: Check the fuses for the radio (Radio/Infotainment) and amplifier (AMP) in the interior and/or trunk fuse panels. TSB PIE0348 specifically recommends checking the amplifier fuse. On some similar GM models, an internal failure in the fuse box itself can prevent power from reaching the amplifier despite a good fuse.
Typical fix: Replace the blown fuse. If the fuse blows again, it indicates a short circuit in the wiring or a failed component (like the amplifier) that needs to be diagnosed.
Est. part cost: $1-$5 - Wiring or Connector Issue ⚪ Low Probability Other GM service bulletins for the ATS platform (like PIT5076E and PIC4740F) mention issues with harness chafing or unseated connector pins causing various communication ('U') codes, suggesting a potential vulnerability in the vehicle's wiring.
How to confirm: Visually inspect the wiring harnesses and connectors going to the radio head unit (behind the dash) and the audio amplifier (in the trunk) for damage, corrosion, or loose pins. Pay special attention to the large connectors and any areas where the harness may rub against the chassis. A key ground point for rear electronics is G304, located in the right rear passenger footwell area.
Typical fix: Repair the damaged section of the harness or clean/re-seat the affected connector.
Est. part cost: $5-$50
Rare But Worth Checking
- Water Intrusion Damaging Amplifier: → Shop Audio Amplifier
Diagnosis Steps
- Check Fuses: Inspect the fuses for the radio and amplifier. The amplifier fuse is a critical first check as recommended by GM's TSB.
- Perform a CUE System Reset: With the car on, open the storage compartment under the CUE screen. Turn the car off. Open the driver's door and leave it open for at least 60 seconds. Close the door, start the car, and close the storage compartment.
- Perform a Full Battery Reset: If the CUE reset doesn't work, disconnect the negative battery terminal for 15-30 minutes. This forces a full reset of all vehicle modules, including the amplifier, and can resolve software glitches.
- Scan for Codes: Use an OBD-II scanner capable of reading BCM and network codes ('U' codes). Confirm U0180 is present and check for other related codes like B1325.
- Inspect Amplifier and Trunk Area: Locate the audio amplifier in the trunk on the driver's side, behind the liner. Check that its connectors are secure and look for any signs of water intrusion, staining, or corrosion on the module and its wiring.
- Professional Diagnosis: If the steps above do not resolve the issue, the vehicle should be taken to a qualified technician. They can test the fiber-optic MOST bus network using a loopback adapter (part of GM tool kit EL-51578) to isolate the faulty module and determine if the amplifier or radio requires replacement and programming.
Parts You'll Likely Need
- Audio Amplifier
(OEM #23448824, 84315074 (Note: Part numbers can vary by year and specific audio option. Always verify with VIN.))— This is the most common hardware failure leading to a total loss of sound and the U0180 code on premium audio-equipped models (RPO UQA/UQS), as identified in GM's own service bulletins.
Trusted brands: ACDelco (OEM)
OEM price range: $350-$600
Aftermarket price range: $150-$400 (Used/Remanufactured) - Radio/HMI Module — If the amplifier is confirmed to be working, the radio module (also called the Human Machine Interface or HMI module) is the next most likely point of failure in the communication chain.
Trusted brands: ACDelco (OEM)
OEM price range: $300-$500
Aftermarket price range: $100-$250 (Used/Remanufactured)
Related Codes That Often Appear With This One
- B1325 sym03 — This device power circuit fault code is specifically mentioned alongside U0180 in TSBs #PIE0348 and #PIE0348A as a related code found when investigating the loss of audio and chimes. The 'sym03' suffix indicates 'Circuit Voltage Below Threshold', strongly suggesting the amplifier is losing power.
Technical Service Bulletins (TSBs) & Recalls
- PIE0348A: Engineering bulletin requesting field information on vehicles losing all audio, chimes, and turn signal sounds in conjunction with DTC U0180. This bulletin also applied to the 2014-2016 Cadillac CTS.
- PIE0348: The original version of the engineering information request bulletin for the U0180 audio loss condition.
Platform-Specific Known Issues
- GM Technical Service Bulletin #PIE0348A (and its predecessor #PIE0348) was a 'Preliminary Information' bulletin created specifically to investigate customer concerns of 'loss of audio, chimes or turn signal click/clack, with DTC U0180 or B1325 sym03' on 2013-2016 Cadillac ATS models. This confirms the issue is a known problem on this platform directly related to the audio system.
Mechanic-Grade Diagnostic Values
- Amplifier Module Power Supply Voltage — expected: 12.0V or higher with engine off; ~14.0V with engine running.. Failure: Voltage below 9-10V. The presence of code B1325 sym03 indicates the module has detected voltage below its operational threshold.
- MOST Bus Optical Signal — expected: A visible red light should be emitted from the 'out' port of a functioning module's fiber optic connector when the system is active.. Failure: No red light coming from a module's output port indicates that module (or one before it in the ring) has failed and broken the communication loop.
Hidden / Shadow Codes Worth Checking
- B1325 sym03: This code, specifically mentioned in the GM TSB for this issue, means 'Device Power Circuit Voltage Below Threshold'. It is set by a module (in this case, likely the amplifier) when its main power supply voltage drops too low for stable operation. (see via A professional scan tool capable of reading GM-specific Body Control Module (BCM) and chassis codes, such as the dealer-level GDS2.)
Scan Tool Commands That Help
- GM EL-51578 (Physical Tool): MOST Bus Loopback Connector — This physical tool is used to diagnose a break in the fiber-optic MOST bus ring. By unplugging a module (like the amplifier) and inserting this loopback connector, you complete the ring. If audio functionality returns to other components, the bypassed module is confirmed as the source of the failure.
- GDS2 (Global Diagnostic System 2): Module Setup / Programming — After replacing the amplifier or radio module, this factory software is required to program the new module to the vehicle's VIN. Without this step, the module will not function due to the 'Theft Lock' feature.
Wiring & Ground Locations
- Audio Amplifier — In the trunk, behind the liner on the driver's side.. This is the primary module that fails, causing the U0180 code and loss of all sound. Its location makes it vulnerable to water intrusion from trunk leaks.
- G304 — Right rear passenger foot well area.. This is a major ground distribution point for several rear body components. A poor connection here could potentially cause intermittent power or communication issues for the nearby amplifier.
- Active Noise Cancellation (ANC) Bypass — On similar GM platforms with Bose systems (e.g., Cadillac XTS), a Purple/Light Blue wire in the largest connector at the amplifier can be cut to disable the ANC microphones.. While not a direct fix for U0180, a faulty ANC module or microphone input can sometimes cause strange audio behavior. This is a known modification in the audio community when troubleshooting or installing aftermarket systems.
Real Owner Repair Stories
- YouTube video by 'Khmer Ohio' on a Cadillac XTS, a similar platform. (2013-2020 Cadillac XTS with Bose Audio) — Installing an aftermarket amplifier and subwoofer, which requires interacting with the factory amplifier.
✅ What actually fixed it To prevent feedback from the Active Noise Cancellation (ANC) system when adding a subwoofer, the technician cut the Purple/Light Blue wire at the top-most connector of the factory amplifier. This successfully disabled the ANC microphones without causing other issues. - YouTube video by 'The Carab' on a 2018 GM SUV with MOST bus. (2018 Chevrolet Suburban with MyLink (uses MOST bus)) — Blank screen and no radio function.
❌ Tried (didn't work) Using a multimeter to test the MOST bus wires was found to be not useful as the signals are complex.
✅ What actually fixed it The technician used a MOST loopback jumper to bypass modules in the fiber-optic ring one by one. Bypassing the CD player did not fix it. Bypassing the Human Machine Interface (HMI) module restored radio sound (though the screen remained blank), proving the HMI module had failed internally and was breaking the MOST ring. The HMI module required replacement.
Model Year Variations Within This Range
- 2013: On 2013 models with 4-cylinder engines (LCV, LTG) and automatic transmissions built before mid-December 2012, a key engine ground (G104) was located at the front of the engine. On models built after this date, it was moved to the rear. While not the amplifier ground, intermittent ground issues are a known cause of communication codes, and this location change is a critical detail for early-production models.
Helpful Videos


The information in this article is provided for general reference and educational purposes only. Vehicle specifications, procedures, and part compatibility can vary by production date, trim level, and region. Always consult your vehicle's factory service manual and verify part numbers before purchasing or performing repairs. Safety-critical components such as airbags, seat belts, and braking systems should be installed by a qualified professional.
- Cadillac ATS:
- 🧭 Diagnostic Flowchart
- 🎬 Helpful Videos
- What's Unique About the 2013-2016 Cadillac ATS
- Symptoms You May Notice
- Most Likely Causes
- Rare But Worth Checking
- Diagnosis Steps
- Parts You'll Likely Need
- Related Codes That Often Appear With This One
- Technical Service Bulletins (TSBs) & Recalls
- Platform-Specific Known Issues
- Mechanic-Grade Diagnostic Values
- Hidden / Shadow Codes Worth Checking
- Scan Tool Commands That Help
- Wiring & Ground Locations
- Real Owner Repair Stories
- Model Year Variations Within This Range
- 🎟️ Get 5% Off