
OBD-II Code U0186: Lost Communication With Audio Amplifier 'A'
The Ultimate 2026 Guide: What U0186 means, why it triggers, and how to fix it for good
- Code U0186 disables your vehicle's audio amplifier, instantly muting all radio sound, turn signal clicks, and critical safety chimes.
- Do not replace the amplifier first; over 60% of U0186 cases stem from a blown 30A/40A fuse, a weak 12V battery, or a loose connector pin.
- If your scanner shows multiple 'U' codes alongside U0186, the fault lies in a central gateway module (like GM's SDGM) rather than the audio system.
- Check for Technical Service Bulletins (TSBs) before starting repairs, as 2017-2020 GM trucks and 2019-2024 Mazdas have known, documented connector flaws that trigger this exact code.
What Does U0186 Mean?

U0186 is a network communication code indicating your car's main computer system lost its data connection to the primary audio amplifier module. The amplifier is a separate electronic unit that boosts the audio signal to power the speakers. When this link breaks, all sound—including radio, phone audio, and system warning chimes—ceases immediately.
Technical definition: The official SAE/OBD-II definition is "Lost Communication With Audio Amplifier 'A'". This DTC sets when a supervisory control module (like the BCM, Radio, or Gateway Module) on the vehicle's communication network (CAN bus, GMLAN, MOST) fails to receive expected status messages from the audio amplifier for a calibrated period, typically 2 to 6 seconds. This confirms the amplifier is offline, not that the radio head unit failed.
Can I Drive With U0186?
Yes, But With Caution. Yes, the vehicle is mechanically safe to drive as the code does not affect the engine, braking, or steering systems. However, you will have no audio, which disables critical safety chimes for seatbelts, door ajar warnings, and turn signal sounds. CRITICAL NOTE: If the root cause is a failing gateway module (like the SDGM in GM vehicles), the issue escalates without warning, leading to a no-start condition, erratic instrument panel gauges, or total failure of other electronic systems.
Common Causes

- Wiring or Connector Issues (Very Common) — This is the most frequent cause. It includes loose, spread, or corroded connector pins at the amplifier, radio, or central communication hub. Vibrations, improper repairs, or chafing against vehicle components damage or short these wires.
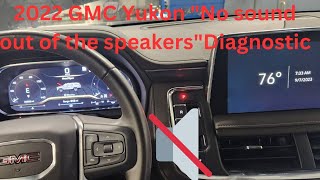
- Faulty Gateway or Body Control Module (BCM) (Very Common) — Modern vehicles use a central 'gateway' module (e.g., GM's SDGM, Chrysler's TIPM) to manage data traffic. A software glitch, internal failure, or poor connector pin tension at this gateway isolates the amplifier, even if the amp itself functions perfectly. This is the primary cause on 2017+ GM trucks. 🎬 Watch: Diagnostic steps for U0186 on a late-model GMC Yukon.
- Blown Amplifier Fuse (Common) — The audio amplifier relies on a dedicated high-amperage fuse (typically 30A or 40A) located in an under-hood or trunk fuse panel. 🎬 See this guide to finding radio and amplifier fuses. If this fuse blows, the amplifier loses all power and drops off the communication network.
- Low System Voltage / Weak Battery (Common) — Communication modules require stable voltage. A weak battery (below 12.4V at rest) causes modules to fail their initialization sequence during vehicle startup, triggering random communication codes like U0186.
- Water Intrusion (Common) — Water leaking into the vehicle destroys amplifiers. Clogged sunroof drains, failed third brake light seals, and poor rear window seals drip water directly onto the amplifier (often located in the trunk or under a seat), causing terminal corrosion and internal short circuits.
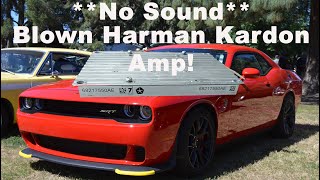
- Failed Audio Amplifier Module (Less Common) — The amplifier itself fails due to internal electronic component breakdown, 🎬 Watch: How to diagnose and remove a failed Harman Kardon amplifier. overheating, or physical damage. While often suspected first, actual hardware failure is less common than wiring, power, or gateway module issues.
- Poor Ground Connection (Less Common) — The amplifier requires a clean, tight connection to the vehicle's metal chassis. A loose, rusty, or corroded ground wire prevents the amplifier from operating and causes intermittent electrical dropouts.
- Aftermarket Equipment Interference (Rare) — Improperly installed aftermarket remote starters, alarms, or audio interfaces that tap into the vehicle's data network disrupt communication by sending invalid signals or shorting the bus.
- Software Incompatibility (Rare) — If a related module (radio, BCM, or gateway) is replaced but not programmed with the correct software for the vehicle's specific VIN, it cannot communicate with the original amplifier.
Symptoms

- Complete loss of all audio — No sound from the radio, CD player, Bluetooth, or any other audio source. The infotainment screen appears normal, but produces zero sound.
- No warning chimes or turn signal sounds — Audible alerts like the seatbelt reminder, door ajar chime, parking assist tones, and turn signal clicks are missing because they route through the amplifier.
- Popping or crackling from speakers — Before total failure, you hear popping, static, or crackling noises, especially when hitting bumps. This confirms a loose physical connection, a hallmark symptom on Mazda vehicles.
- Infotainment screen is blank, frozen, or erratic — If a central gateway module causes the fault, the entire infotainment display freezes, or the instrument cluster acts erratically.
- Steering wheel audio controls do not work — Volume and track selection buttons on the steering wheel become unresponsive because their signals cannot reach the offline amplifier.
Diagnostic Flowchart
Tap your situation to follow the diagnostic path that matches what you're seeing on this code.
Common Fixes & Costs
- Repairing Wiring or Reseating Connectors — Parts: $0-$50, Labor: $150-$450, ~1.5 hr book time (Intermediate)
- Reprogramming or Replacing a Gateway Module (e.g., GM SDGM)
— Parts: $150-$350, Labor: $150-$450, ~1.5 hr book time
(Professional)
GMC/Chevrolet/Cadillac (2017-2020 Trucks/SUVs): OEM ACDelco 84526372 (Verify by VIN) (Alt: Dorman 599-949) - Replacing the Audio Amplifier
— Parts: $300-$800, Labor: $150-$300, ~1.2 hr book time
(Professional)
Chevrolet Malibu (2016-2018 w/ Bose): OEM GM 84333839 (Verify by VIN) (Alt: N/A)
Mazda3 (2019-2024 w/ Bose): OEM BDGF-66-A20 (Verify by VIN) (Alt: N/A) - Replacing the Amplifier Fuse — Parts: $1-$10, Labor: $0-$50, ~0.2 hr book time (DIY)
- Battery System Service or Replacement — Parts: $150-$300, Labor: $50-$100, ~0.5 hr book time (DIY)
- Replacing the TIPM (Chrysler/Dodge/Jeep)
— Parts: $400-$1200, Labor: $150-$400, ~1.5 hr book time
(Professional)
Dodge Ram 1500 (2013, 5.7L): OEM Mopar 68197810AA (Verify by VIN) (Alt: Dorman 599-904)
Used vs. New Parts: Buying Guide
When a used part is worth it: For a simple audio amplifier in an older vehicle, a used part from a reputable recycler is cost-effective. For critical gateway modules (SDGM, TIPM), used parts are risky due to programming requirements and pre-existing faults.
Donor-vehicle mileage cap: roughly under 100000 miles for the part to have meaningful remaining life.
Donor quality checklist:
- Match the OEM part number exactly; superseded numbers are not compatible without programming.
- Ensure the donor vehicle was not scrapped due to flood or electrical fire.
- For amplifiers, avoid donors from areas with high humidity or known water leak issues.
- Ask about the warranty period, typically 30-90 days for used electronics.
Decision logic:
- If The part is a critical gateway module like a TIPM or SDGM → Buy a new or professionally remanufactured part. Used modules require dealer programming and may not configure to your VIN.
- If The part is a standard audio amplifier and the vehicle is over 10 years old → A used part is a reasonable choice if the cost savings exceed 50% versus new.
- If The vehicle has a known TSB for the part (e.g., GM SDGM) → Buy a new part with the latest hardware revisions to ensure the original design flaw is corrected.
Warranty tradeoff: Used parts have a 30-90 day parts-only warranty. New OEM parts have a 1-2 year warranty. Aftermarket new parts offer a 1-year to limited lifetime warranty.
Worst-case if a used part fails: $500-$1500 if a used gateway module is incompatible or fails after installation, requiring repeat labor costs and towing.
What Happens If You Wait — Timeline
- 0-4 Weeks: Intermittent audio failure. Sound cuts out on one trip and works the next. A 'logic lock' or marginal connection is the cause. The U0186 code is stored but may not be persistent. (MPG impact: 0%% · Added cost: $0)
- 1-3 Months: Permanent loss of all audio and safety chimes. The U0186 code is a 'hard fault' and will not clear. This is a safety hazard due to the lack of audible alerts. (MPG impact: 0%% · Added cost: $0)
- 3-6 Months (if gateway module is the cause): The underlying gateway module fault affects other systems. You experience erratic instrument cluster behavior, flickering lights, or random communication codes for different modules. (MPG impact: 0%% · Added cost: $200-$500 (for advanced diagnostics))
- 6+ Months (if gateway module is the cause): Catastrophic failure of the gateway module. This causes a sudden no-start condition or the vehicle loses power while driving, requiring an immediate tow. (MPG impact: 0%% · Added cost: $800-$2000 (towing plus emergency module replacement))
Cost of Not Fixing It
- Immediate: Loss of all audio, including safety-critical warning chimes for seatbelts, door ajar, and turn signals. This is a safety hazard. (Added cost: $0)
- 1-3 Months: If the cause is a failing gateway module (e.g., GM SDGM, Chrysler TIPM), the fault escalates, causing other modules to lose communication. This leads to erratic gauge behavior and intermittent electrical problems. (Added cost: $200-$500 (for advanced diagnostics))
- 3+ Months: Catastrophic failure of the gateway module occurs without warning, leading to a no-start condition or the vehicle shutting down while driving. (Added cost: $800-$2000 (towing + emergency module replacement))
Diagnosis Steps

- Check for Other Trouble Codes
Use a professional OBD-II scanner to read codes from ALL modules. If multiple 'U' codes are present (e.g., U0140, U0155, U0184), the problem is a network-wide issue. This proves the fault lies with a central gateway module, main power/ground, or network wiring, not the amplifier.
Tools: Professional OBD-II Scanner (Beginner) - Inspect the Amplifier Fuse and Test Battery
Locate the audio amplifier fuse (often labeled 'AMP' or 'AUDIO' in the manual). Visually inspect the 30A or 40A fuse. Next, test the battery voltage; it must be above 12.4V with the engine off. A low battery causes random communication faults.
Tools: Owner's Manual, Fuse Puller, Multimeter (Beginner) - Perform a Hard Reset
Disconnect the negative battery terminal for 30 minutes. This forces all modules to power down completely, clearing temporary software glitches. Reconnect the battery, start the vehicle, and check if audio is restored.
Tools: Wrench for battery terminal (Beginner) - Visually Inspect Wiring and Connectors
Locate the audio amplifier (trunk, under seat, or behind side panel). Unplug its main electrical connector and look for green/white corrosion, bent pins, or water damage. Check TSB-specified connectors, like the GM SDGM (behind driver's dash) or Mazda CMU (behind screen).
Tools: Trim Removal Tools, Flashlight (Intermediate) - Test Amplifier Power and Ground
Set a multimeter to DC Volts. With the key on, probe the amplifier's main power wire to verify battery voltage (12V+). Switch to Ohms and check the ground wire for a solid connection to the chassis (less than 1 Ohm).
Tools: Multimeter, Wiring Diagram (Intermediate) - Inspect for Aftermarket Device Interference
Inspect the vehicle for aftermarket remote starters, alarms, or audio processors. Look for T-taps or non-factory wiring spliced into harnesses near the radio or OBD-II port. Disconnect these devices entirely and re-test.
Tools: Flashlight, Wire Cutters (Intermediate) - Advanced: Check Network Topology
Using a bi-directional scan tool with a network topology feature, view the vehicle's communication map. This visually shows which modules are communicating (green) and which are offline (red). This confirms if U0186 is isolated or part of a larger failure.
Tools: Professional Bi-Directional Scan Tool (Advanced) - Advanced: CAN Bus Voltage Check
With the key on, measure DC voltage on the data lines. On a standard high-speed CAN bus, CAN High should be ~2.5-3.5V and CAN Low should be ~1.5-2.5V relative to ground. Significant deviation points to a wiring short or a faulty module pulling the voltage down.
Tools: Multimeter, Wiring Diagram/Pinout Chart (Advanced) - Advanced: Ground Circuit Voltage Drop Test
With the amplifier powered on, connect the positive multimeter lead to the amplifier's ground pin and the negative lead to the negative battery post. A reading greater than 0.2V indicates excessive resistance in the ground circuit that requires repair.
Tools: Multimeter, Wiring Diagram (Advanced)
When This Code Triggers (Freeze-Frame Conditions)
- Module Voltage: 10.5-11.8V (During engine crank or low battery state.)
- Engine State: Key On, Engine Off or Cranking (Code sets during the initial module 'handshake' at startup.)
- Vehicle Speed: 0 mph (Fault is logged before the vehicle is in motion.)
- Malfunction Frequency Counter: 1+ (Indicates the number of drive cycles in which the fault has been detected.)
Related Codes
- U0184 — Lost Communication with Radio. If U0186 appears alone, the radio is communicating but the amplifier is not. If both are present, suspect a shared network problem like a faulty gateway module.
- U0140 — Lost Communication with Body Control Module (BCM). Seeing this code with U0186 guarantees the fault is not the amplifier. It indicates a major network failure at the BCM or gateway.
- U0155 — Lost Communication with Instrument Panel Cluster (IPC). If both U0155 and U0186 are present, it strongly indicates a network-wide failure, likely at a gateway module.
- U2145 — Communication error with remote tuner. Specific to Mazda, this code appears with U0186 because both are caused by the exact same loose connector pin behind the infotainment screen.
- B129D — Audio Amplifier Power Circuit. This confirms the reason for the U0186 communication loss is a lack of power, directing diagnosis to fuses and wiring instead of the data network.
Climate & Environmental Factors
- High Humidity / Rain: Moisture from clogged sunroof drains or bad window seals enters the cabin or trunk, causing rapid corrosion on amplifier connectors and internal short circuits.
- Temperature Cycles (Hot/Cold): Repeated heating and cooling causes metal connector pins to expand and contract, leading to a loss of pin tension and intermittent connections ('fretting').
- Cold Weather: Cold temperatures reduce battery voltage. This causes sensitive electronic modules to fail initialization during startup, triggering temporary U0186 codes.
How to Talk to a Mechanic About This Code
Say this: "I have a U0186 code and a total loss of audio. I'd like to schedule a diagnostic appointment. Based on my vehicle, the issue might be a known TSB, a gateway module, or a wiring problem, so I want a full network scan before replacing the amplifier."
This signals you understand U0186 is a complex network code. It steers the technician away from the most expensive, incorrect first guess (replacing the amplifier) and toward a logical diagnostic process.
Avoid saying:
- 'My radio is broken.' (It's a network issue, not the radio)
- 'Just fix whatever's wrong.' (This is a blank check for unnecessary repairs)
- 'I think I need a new amplifier.' (Don't diagnose it for them; describe the symptoms and the code)
Questions to ask before authorizing the repair:
- Did you perform a full network scan and were there other 'U' codes present?
- Did you check for Technical Service Bulletins (TSBs) related to this code for my specific VIN?
- Did you test for power, ground, and network activity directly at the amplifier's connector?
- If a module needs replacement, does the quoted price include the necessary programming?
- Can you show me the corroded connector or the failed part?
Where to Take It: Dealer vs Independent vs Chain
- Dealer:
Recommended. The dealer has direct access to TSBs and proprietary software for programming new modules, which are highly relevant for U0186.
Best for: Vehicles under warranty., Complex, vehicle-specific issues covered by TSBs (e.g., GM SDGM, Mazda connector fault)., Repairs requiring module replacement and VIN-specific programming.
Downsides: Highest labor rates., Less willing to perform component-level wiring repairs versus full module replacement. (Typical cost: +50% vs. baseline) - Independent Shop:
Good Fit. An independent shop specializing in electrical diagnostics is an excellent choice. However, a general repair shop will struggle and recommend a trip to the dealer if programming is needed.
Best for: Out-of-warranty vehicles where the cause is likely a wiring or connector issue., Shops specializing in automotive electrical diagnostics.
Downsides: Lacks expensive, dealer-level tools for programming certain modules., Quality and expertise vary widely. (Typical cost: +0% vs. baseline) - Chain Shop:
AVOID. Complex electrical and network diagnosis is outside the scope of chain repair shops. They will misdiagnose the problem.
Best for: Simple maintenance like oil changes or tires.
Downsides: Technicians are not trained for complex network diagnostics., Lacks advanced scan tools and access to TSBs., High pressure to sell parts leads to misdiagnosis. (Typical cost: -10% vs. baseline)
When to Walk Away From the Repair
If the estimated repair cost exceeds 40-50% of the car's private-party value, sell or trade in the vehicle instead of repairing it.
- Car worth $5000, fix is $2200: Walk away. The repair cost is nearly half the car's value, and for an electrical issue, other problems will follow.
- Car worth $15000, fix is $800: Fix it. This repair is well below the threshold and restores a key safety feature.
- Car worth $3000, fix is $450: Borderline. If the fix is a simple connector repair, it is worth it. If it is a gateway module, the risk of future issues is high. Get a firm diagnosis before deciding.
What Scan Tool You Need for This Code
Minimum: A scanner that performs a 'full system scan' to read codes from the Body Control Module (BCM), Radio (ACM), and Gateway modules, not just the Engine (ECU).
A basic $20 code reader only checks for engine codes ('P' codes). It cannot see communication codes ('U' codes). For U0186, you MUST know if other modules are offline to determine if the problem is network-wide.
Budget: Ancel BD310 or similar full-system scanner (~$80) — Connects to a phone app to perform a full-system scan, identifying which modules store the U0186 code. This is the minimum data needed to start diagnosis.
Mid-range: Foxwell NT510 Elite / XTOOL D7 / Innova 5610 (~$150) — Offers full system scans plus bidirectional controls. Allows you to command modules directly, view live data from network gateways, and see network topology maps to pinpoint the communication breakdown.
Professional: Autel MaxiCOM MK808 / Launch X431 CRP919E (~$450-600) — Provides dealer-level diagnostics, full bidirectional control, network topology, and the ability to perform software programming for replacement modules.
Rent vs buy: Free rental scanners at auto parts stores are basic code readers and insufficient for U0186. You must own or borrow a tool capable of a full-system scan.
How to Clear the Code After You Fix It
- Reconnect battery if disconnected for a hard reset.
- Use an OBD-II scan tool to perform the 'Clear All DTCs' function.
- Cycle the ignition off, then on, and verify that audio functions have been restored.
- Perform a complete drive cycle to ensure the code does not return.
Drive cycle (~20 minutes): Start with a cold engine. Idle for 2-3 minutes with electrical loads on (A/C, defroster). Accelerate to 55 mph and hold steady for 3-5 minutes. Decelerate to 20 mph without braking, then accelerate back to 55-60 mph. Hold steady for 5 minutes. Decelerate and stop.
Readiness monitors affected: Comprehensive Component Monitor, Catalyst Monitor, EVAP System Monitor
Before emissions retest: drive at least 50 miles to fully set monitors.
Watch out for:
- Disconnecting the battery clears the code from the active list but does not erase it from history, and it does not fix the underlying problem.
- Clearing the code resets all OBD-II readiness monitors to 'Not Ready', causing an automatic emissions test failure.
- If the root cause is not fixed, the code returns on the next key cycle.
Will This Fail Emissions / State Inspection?
Yes — this code typically fails an OBD-II emissions inspection.
- California: A 'U' code is not an automatic failure, but if it causes the Check Engine Light to illuminate, the vehicle fails. Clearing the code resets readiness monitors, blocking the test.
- New York: The NYS inspection checks for stored codes. The presence of any code that turns on the check engine light results in failure.
- Texas: An illuminated Check Engine Light is an automatic failure. Clearing the code right before the test causes a failure due to 'Not Ready' monitors.
Most Commonly Affected Vehicles
- GMC/Chevrolet/Cadillac Sierra, Silverado, Suburban, Yukon, Tahoe, Escalade (2017-2020) — Extremely common failure of the Serial Data Gateway Module (SDGM) or its X1/X2 connectors. Diagnosis MUST start at the SDGM per GM TSBs #PIT5586G and #20-NA-212.
- Mazda Mazda3, CX-30 (2019-2024) — Caused by a specific loose pin (6F) in harness connector 0920-101F behind the infotainment screen. Symptoms include popping audio before total failure (TSB SA-021-24).
- Chevrolet Malibu (2016-2018) — Caused by water intrusion into the trunk from a faulty high-mount third brake light seal, which destroys the amplifier (GM TSB #PI1149A).
- Dodge/Chrysler/Jeep Ram 1500, Durango, Grand Cherokee (2006-2014) — Related to internal failures of the Totally Integrated Power Module (TIPM). Check for other TIPM-related DTCs before condemning the amplifier.
- Ford Focus, Fusion, F-150, Explorer (2012-2018) — On Ford vehicles, 'no audio' is frequently traced to an internal failure of the Audio Control Module (ACM/radio head unit), rather than a separate amplifier.
- Volvo XC90, S60, V70 (2005-2015) — Caused by water damage to the amplifier located under the front passenger seat. The source is typically clogged sunroof drain tubes.
Manufacturer-Specific Notes
- General Motors (GM): On 2017-2020 trucks and SUVs, U0186 is almost always a symptom of a faulty Serial Data Gateway Module (SDGM) or its connectors, not the amplifier. Diagnosis must begin at the SDGM.
- Mazda: On 2019+ Mazda3 and CX-30 vehicles, the code is caused by a single pin (6F) backing out of a connector behind the main display screen, causing popping noises then a loss of audio.
- Chrysler/Dodge/Jeep/Ram: Diagnostic procedures point to checking the Totally Integrated Power Module (TIPM) for related faults, as it controls power distribution and is a common source of network issues.
Real Owner Stories
2017 Chevy Silverado, complete audio loss
Complete loss of audio, including radio, turn signal clicks, and all warning chimes. The radio display worked normally. The truck stored code U0186.
What they tried:
- Disconnecting the battery for over an hour.
- Checking all fuses related to the audio system.
Outcome: The owner located the Serial Data Gateway Module (SDGM) under the driver's side dash, disconnected its two large connectors, and firmly reconnected them. This action immediately restored all audio functions.
Lesson: On modern GM trucks, U0186 is a primary symptom of a poor connection at the SDGM, not a failed amplifier. Always check the SDGM connectors per TSBs #PIT5586G and #20-NA-212 before replacing parts.
2021 Mazda CX-30, popping speakers
Audio intermittently cut out, accompanied by popping and crackling noises from the speakers. Tapping on the dashboard near the infotainment screen made the problem appear or disappear. Codes U0186 and U2145 were stored.
What they tried:
- Suspected a faulty amplifier or head unit.
Outcome: Following Mazda TSB SA-021-24, the owner accessed the main connector (0920-101F) behind the infotainment screen. Pin 6F had backed out slightly. Pushing the pin back until it clicked permanently fixed the popping and audio loss.
Lesson: For 2019+ Mazda3 and CX-30 models, popping sounds and U0186 are almost always caused by a specific loose pin behind the screen. This requires zero new parts to fix.
2016 Chevy Malibu, damp trunk
The audio system stopped working, triggering code U0186. The owner discovered the trunk carpet was damp.
What they tried:
- Initial diagnosis pointed towards a failed amplifier.
Outcome: The root cause was a water leak from a faulty third brake light seal (GM TSB #PI1149A). Water saturated the amplifier in the trunk, causing a short circuit. The fix required replacing the amplifier and repairing the brake light seal.
Lesson: When an amplifier fails, investigate the cause. Water intrusion kills electronics. Find and fix the leak first, or the replacement part will suffer the same fate.
How to Prevent This Code From Triggering
- Clean Sunroof Drains Annually (Once or twice per year, especially before rainy seasons.) — Clogged sunroof drains cause water to overflow into the cabin. This water drips directly onto amplifiers located under seats or in the trunk, causing immediate short circuits.
- Maintain Battery Health (Test battery every oil change, replace every 3-5 years.) — Low system voltage causes sensitive electronic modules to fail their initialization 'handshake' during startup, triggering false 'U' codes like U0186.
- Inspect and Condition Weather Seals (Every 6 months.) — Degraded rubber seals around third brake lights and windows allow water to enter the trunk, destroying electronics. Applying a rubber conditioner keeps them pliable and watertight.
Frequently Asked Questions
What is a Serial Data Gateway Module (SDGM)?
An SDGM is a central computer in modern GM vehicles that acts as a secure traffic cop for the car's data networks. It isolates secure networks from unsecured ones and routes communication between different modules. A failure or connector issue at the SDGM isolates the amplifier, triggering U0186.
Can a low battery cause code U0186?
Yes. A weak or dying battery is a primary cause of random communication codes. If voltage drops below 12.4V during startup, sensitive modules fail to initialize, triggering U0186.
What is the most common misdiagnosis for code U0186?
The most common mistake is immediately replacing the radio head unit or the amplifier. In most cases, the root cause is a faulty gateway module, a bad connector, or a blown fuse. Always diagnose the entire network before replacing expensive components.
Can a bad ground cause communication codes like U0186?
Yes. All electronic modules need a solid ground to function. A loose or corroded ground introduces electrical noise and voltage fluctuations that disrupt network communication and trigger a flood of 'U' codes.
Can a software update fix code U0186?
Yes, in some cases. A hard reset (disconnecting the battery for 30 minutes) clears temporary module logic locks. However, a dealer-performed software update is often required to permanently prevent the glitch from recurring.
Will the U0186 code go away by itself?
If the communication loss was a temporary low-voltage glitch, the code clears on its own after several successful drive cycles. However, a persistent code indicates a hard fault like a broken wire or failed module that requires physical repair.
Is it safe to drive my car with code U0186?
The vehicle remains drivable, but it is a significant safety concern due to the loss of all audible warnings and turn signal clicks. On vehicles where a gateway module is the cause, ignoring the code leads to severe issues, including a sudden no-start condition.
What is an audio amplifier and where is it?
An audio amplifier takes the weak sound signal from your car's radio and boosts its power to drive the speakers. It is usually a separate metal box located in the trunk, under a front seat, or behind a dashboard panel.
Key Takeaways
- Code U0186 disables your vehicle's audio amplifier, instantly muting all radio sound, turn signal clicks, and critical safety chimes.
- Do not replace the amplifier first; over 60% of U0186 cases stem from a blown 30A/40A fuse, a weak 12V battery, or a loose connector pin.
- If your scanner shows multiple 'U' codes alongside U0186, the fault lies in a central gateway module (like GM's SDGM) rather than the audio system.
- Check for Technical Service Bulletins (TSBs) before starting repairs, as 2017-2020 GM trucks and 2019-2024 Mazdas have known, documented connector flaws that trigger this exact code.
Helpful Videos


Shop the Parts Behind U0186
Below are the parts most often responsible for code U0186, ranked by how frequently each one is the actual culprit (per the diagnosis above). Tap any to see what we have for your vehicle.


The information in this article is provided for general reference and educational purposes only. Vehicle specifications, procedures, and part compatibility can vary by production date, trim level, and region. Always consult your vehicle's factory service manual and verify part numbers before purchasing or performing repairs. Safety-critical components such as airbags, seat belts, and braking systems should be installed by a qualified professional.
- 🧭 Diagnostic Flowchart
- 🎬 Helpful Videos
- 🛍️ Shop This Part
- What Does U0186 Mean?
- Can I Drive With U0186?
- Common Causes
- Symptoms
- Common Fixes & Costs
- Used vs. New Parts: Buying Guide
- What Happens If You Wait — Timeline
- Cost of Not Fixing It
- Diagnosis Steps
- When This Code Triggers (Freeze-Frame Conditions)
- Related Codes
- Climate & Environmental Factors
- How to Talk to a Mechanic About This Code
- Where to Take It: Dealer vs Independent vs Chain
- When to Walk Away From the Repair
- What Scan Tool You Need for This Code
- How to Clear the Code After You Fix It
- Will This Fail Emissions / State Inspection?
- Most Commonly Affected Vehicles
- Manufacturer-Specific Notes
- Real Owner Stories
- 2017 Chevy Silverado, complete audio loss
- 2021 Mazda CX-30, popping speakers
- 2016 Chevy Malibu, damp trunk
- How to Prevent This Code From Triggering
- Frequently Asked Questions
- What is a Serial Data Gateway Module (SDGM)?
- Can a low battery cause code U0186?
- What is the most common misdiagnosis for code U0186?
- Can a bad ground cause communication codes like U0186?
- Can a software update fix code U0186?
- Will the U0186 code go away by itself?
- Is it safe to drive my car with code U0186?
- What is an audio amplifier and where is it?
- Key Takeaways
- 🎟️ Get 5% Off