
U0293 on 2021 Dodge Charger: Causes of Lost Communication With Hybrid Control Module
This code almost always indicates a vehicle-wide electrical network problem, not an issue with a hybrid part. Before suspecting complex modules, check the 12V battery condition, battery terminals, and all major engine and chassis ground straps, as a weak power supply is the most common culprit for CAN bus communication failures.
- U0293 is a network code. Do not immediately assume a 'hybrid' part has failed.
- Always start diagnostics by testing the 12V battery and inspecting all major ground connections. This solves a high percentage of network issues.
- This code often appears with a group of other 'U' codes, which confirms a widespread communication problem.
- Due to the vehicle's Security Gateway Module (SGW), advanced DIY diagnosis is difficult without a bypass cable and a capable scan tool.
- If power and grounds are good, the fault is likely in the CAN bus wiring or a single module pulling the network down, which requires professional diagnosis.
What's Unique About the 2021-2021 Dodge CHARGER
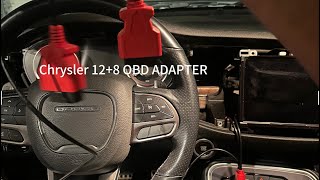
The 2021 Dodge Charger, built on the Chrysler LD platform, uses a complex CAN bus network with central hubs called 'Star Connectors' (also known as gateways). This design means a single faulty module, poor ground, or wiring issue can bring down communication for many unrelated systems, triggering a cascade of 'U' codes like U0293. Diagnosis is further complicated by a Security Gateway Module (SGW) that requires a specific 12+8 pin bypass cable 🎬 Watch: How to bypass the security gateway for advanced diagnostics. or an authorized scan tool (like wiTECH or AlfaOBD) to perform advanced diagnostics, tests, and resets.
Diagnostic Flowchart
Tap your situation to follow the diagnostic path that matches what you're seeing on this vehicle.
Symptoms You May Notice
- Check Engine Light is on
- Multiple other warning lights may be illuminated (ABS, Traction Control, etc.)
- Hybrid System warning message on the instrument cluster
- Instrument cluster gauges may stop working or behave erratically
- Radio, climate control, or window controls may not function
- Vehicle may enter a reduced power or 'limp' mode
- Potential no-start condition or stalling
- Gear selector lights may flash
- Replacing individual modules that are reporting lost communication (e.g., replacing the ABS module because an ABS communication code is also present) without first diagnosing the underlying network fault.
- Immediately replacing the Hybrid Control Module (PIM) without first thoroughly checking the 12V battery, grounds, and CAN bus wiring integrity.
Most Likely Causes
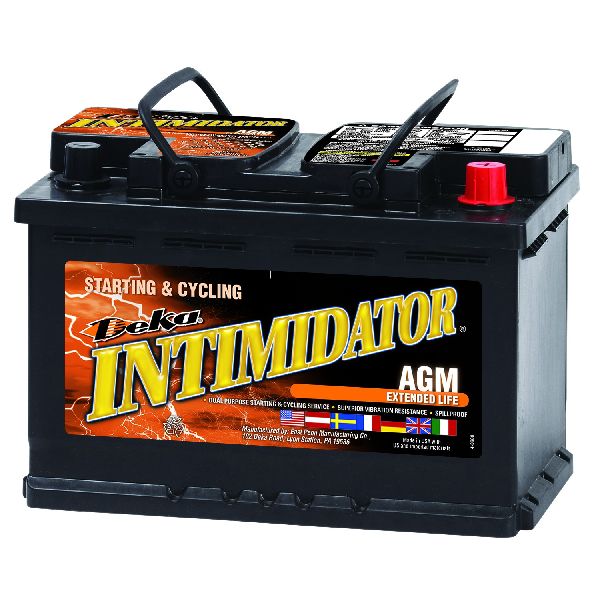
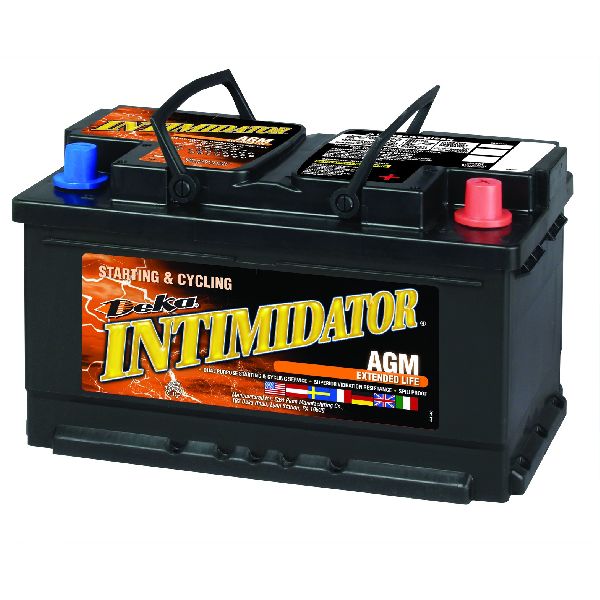
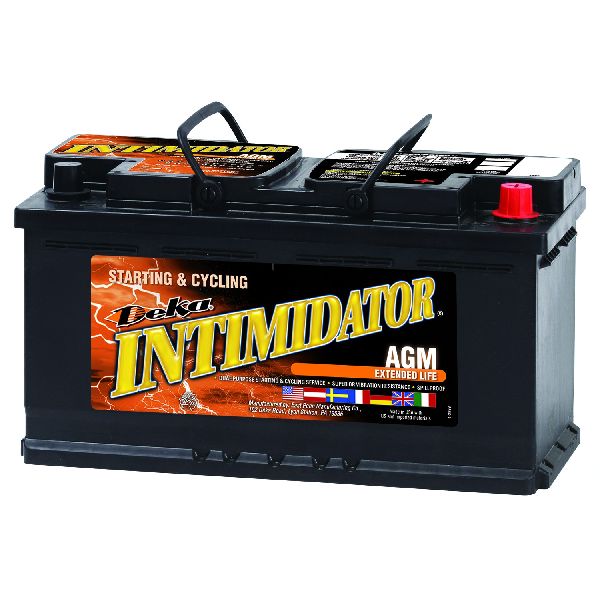
- Low Battery Voltage or Failing 12V AGM Battery 🔴 High Probability → Shop Vehicle Battery Modern vehicles like the Charger have dozens of electronic modules that are highly sensitive to voltage. A weak or failing 12V AGM battery is a leading cause of random communication codes as modules fail to initialize correctly.
How to confirm: Test the battery with a digital multimeter or an electronic battery tester. A healthy, fully charged AGM battery should read approximately 12.6-12.8 volts with the engine off. Check for voltage drops below 10.5V during cranking. Many auto parts stores will test your battery for free.
Typical fix: Recharge or replace the 12V AGM battery. A Battery Management Sensor (BMS) reset may be required using a capable scan tool after replacement.
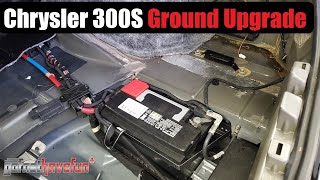
Est. part cost: $200-$400 - Loose or Corroded Battery Terminals or Ground Straps 🔴 High Probability → Shop Engine Ground Strap Ground straps connecting the battery to the chassis and the engine to the chassis are known failure points. They can corrode or loosen, creating high resistance that disrupts the entire electrical system and CAN bus network.
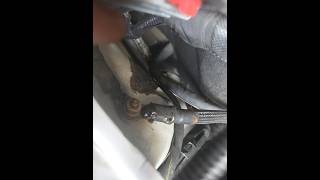
How to confirm: Visually inspect the main battery terminals (located in the trunk), the remote jump posts under the hood, the negative cable connection to the chassis, and the engine-to-chassis ground straps for looseness, corrosion, or fraying. A common failure point is the main ground wire near the engine block. 🎬 See this walkthrough on replacing a corroded engine ground strap. Perform a voltage drop test across the ground connections with the engine running; a drop of more than 0.2 volts indicates a problem.
Typical fix: Clean the connection points to bare metal and tighten the fasteners. Replace any damaged or corroded cables or straps. In some cases, owners have had to splice in new connectors.
Est. part cost: $20-$100 - CAN Bus Wiring Harness Damage 🟡 Medium Probability
How to confirm: Visually inspect wiring harnesses for chafing, rodent damage, or corrosion, particularly near the Star Connector hubs, which are often located behind the glove box or passenger kick panel. A technician would use a multimeter or oscilloscope to check for proper CAN bus voltage (approx. 2.3V on CAN Low and 2.7V on CAN High) and resistance (approx. 60 Ohms across pins 6 and 14 of the OBD-II port with the battery disconnected).
Typical fix: Repair the damaged section of the wiring harness. This can be labor-intensive.
Est. part cost: $5-$50 in materials, but labor-intensive - Faulty Module Bringing Down the Network ⚪ Low Probability
How to confirm: This requires isolating modules one by one. A technician will disconnect modules from the Star Connector hub until network communication is restored. The last module disconnected before the system returned to normal is the likely culprit. This is a systematic process of elimination.
Typical fix: Replace the faulty module and program it to the vehicle.
Est. part cost: $300-$1500+
Rare But Worth Checking
- Aftermarket Electronics: Improperly installed aftermarket accessories (remote starters, alarms, audio equipment) tapped into the CAN bus can disrupt network communication and cause a flood of U-codes. These should be disconnected as a primary diagnostic step.
- Faulty Hybrid Control Module (PIM/HPCM): While the code directly names this module, it's more likely that the communication *to* the module is the problem. The module itself failing is a less common cause compared to wiring and power supply issues. An internal failure of the module's communication circuits can occur, but other causes should be ruled out first.
- Software Glitch / Required Update: Occasionally, a software glitch can cause communication issues. Checking for available Powertrain Control Module (PCM) or other module software updates via a TSB is a valid diagnostic step for a dealership technician.
Diagnosis Steps
- Check Battery Health: Ensure the 12V AGM battery is fully charged (12.6V+) and healthy. A weak battery is the most common cause of multiple communication codes.
- Inspect Power and Grounds: Check that battery terminals in the trunk are clean and tight. Inspect the main ground straps from the battery to the chassis and from the engine to the chassis for corrosion, damage, or looseness. A key ground to check is the main engine ground strap, which can fray or corrode.
- Scan for All Codes: Use a high-quality scan tool capable of reading manufacturer-specific codes from all modules. Note all 'U' (communication) codes present, as the pattern can indicate the source of the fault.
- Bypass Security Gateway Module (SGW): For any active diagnostics, connect a 12+8 pin SGW bypass cable or use an authorized tool like wiTECH or AlfaOBD.
- Check CAN Bus at Diagnostic Port: With the key on and battery disconnected, check for approximately 60 Ohms of resistance between Pin 6 (CAN High) and Pin 14 (CAN Low). With the key on and battery connected, check for approximately 2.3-2.7V on both CAN High and CAN Low.
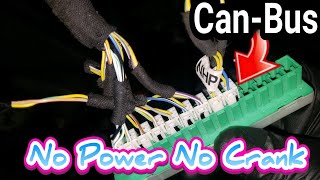
- Isolate Modules at Star Connector: Locate the main CAN bus Star Connector (typically located behind the glove box or passenger side kick panel). Disconnect one module branch at a time and re-scan the vehicle to see if communication is restored. If it is, the last module disconnected is the source 🎬 Watch: How to isolate dead modules at the star connector. of the network disruption.
- Inspect Wiring: If a specific branch is identified, inspect the wiring to that module for shorts, opens, or corrosion.
- Test Module Power/Ground: If wiring is good, test the power and ground connections at the connector of the suspected faulty module before condemning it.
Parts You'll Likely Need
- 12V AGM Battery — A weak or failing battery is the most frequent cause of network communication faults on modern vehicles. The Charger requires an AGM type battery.
Trusted brands: Mopar, Interstate, DieHard, Duralast
OEM price range: $250-$400
Aftermarket price range: $200-$350 - Engine or Chassis Ground Strap — These straps are critical for a stable electrical system. Corrosion or damage can cause intermittent and widespread communication issues.
Trusted brands: Mopar, Dorman
OEM price range: $40-$80
Aftermarket price range: $20-$50
Related Codes That Often Appear With This One
- U0159 — Lost Communication With Parking Assist Control Module. Its presence with U0293 suggests a wider network failure, as cited in TSB #18-012-22.
- U017E — Lost Communication With Seatbelt Sensor 1. Its presence with U0293 suggests a wider network failure, as cited in TSB #18-012-22.
- U0402 — Implausible Data Received From TCM. Its presence with U0293 suggests a wider network failure, as cited in TSB #18-012-22.
- P0642 — Sensor Reference Voltage 'A' Circuit Low. This code often appears with network issues on Chrysler products when a wiring problem or failing sensor pulls down the 5-volt reference circuit, which can disrupt module communication.
Technical Service Bulletins (TSBs) & Recalls
- Bulletin #18-012-22: This Manufacturer TSB for the 2021 Dodge Charger lists U0293 as 'Lost Communication With Hybrid Control Module' and groups it with numerous other communication failure codes, confirming the network-related nature of the fault. The TSB often points towards a software update or a systematic diagnostic approach rather than immediate parts replacement.
Platform-Specific Known Issues
- The appearance of U0293 alongside a cluster of other communication codes (like U0159, U017E, U0402, U0403) is a known pattern documented in Dodge's own service bulletins, strongly indicating a vehicle-wide network or power issue rather than a single module failure.
Mechanic-Grade Diagnostic Values
- CAN C Bus Voltage (Key On, Engine Off) — expected: CAN High (Pin 6): ~2.7V, CAN Low (Pin 14): ~2.3V.. Failure: Shorted wires may show ~2.5V on both. A short to voltage may show >6.0V on one line.
- CAN Bus Resistance (Battery Disconnected) — expected: ~60 Ohms between Pin 6 and Pin 14.. Failure: 120 Ohms indicates one terminating resistor is offline. ~0 Ohms indicates a short between the CAN High and Low wires.
- Voltage at MGU (eTorque Alternator) 48V post — expected: ~48V with engine running.. Failure: Significantly lower voltage (e.g., 4V-9V) indicates a problem with the 48V battery, the MGU itself, or the wiring between them.
Scan Tool Commands That Help
- AlfaOBD: Body Computer -> Active Diagnostics / Car Configuration Change — To perform bidirectional tests on individual modules or reset configurations after bypassing the Security Gateway Module (SGW). This allows a technician to actively query the network and see what is and isn't responding.
- wiTECH (Dealer Tool): Reprogram PIM (Power Inverter Module) — This is required if the Power Inverter Module (the 'Hybrid Control Module') is replaced. The new module will not have the correct software and must be flashed to integrate with the vehicle.
Wiring & Ground Locations
- Star Connector / Gateway — Behind the glove box. Access is gained by lowering or removing the glove box and sometimes a lower trim panel on the passenger side.. This is the central hub for the CAN bus network. Technicians can disconnect branches here to isolate a faulty module that may be bringing the entire network down and causing the U0293 code.
- Engine to Chassis Ground Strap — A braided metal strap typically connecting the engine block to the vehicle's frame/body in the engine bay.. Corrosion or looseness of this strap creates high resistance, destabilizing the vehicle's entire electrical system. This is a primary cause of intermittent communication codes like U0293.
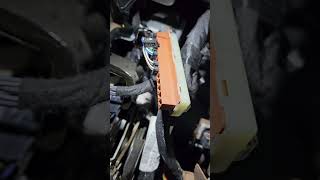
- Power Inverter Module (PIM) — Located in the engine bay, as it is integrated with the Motor Generator Unit (MGU), which functions as the alternator in the eTorque system.. This is the module that is 'lost' according to the code. Checking its dedicated power, ground, and communication line connectors is a key step after verifying the main battery/grounds.
Real Owner Repair Stories
- YouTube video by user 'Mopar SRT' (2016-2019 Dodge Charger) — Stalling, sudden loss of power, fluctuating voltage.
❌ Tried (didn't work) Initial diagnosis pointed to a bad ground.
✅ What actually fixed it The owner found the factory ground wire connector had failed. He cut off the old connector, spliced the wires into a new, single-prong connector, and attached it securely. The charging system voltage immediately returned to a stable ~14V and the problem was resolved. - JLwranglerforums.com user 'msandhu413' (2019 Jeep Wrangler with 2.0L eTorque (similar hybrid system)) — Hybrid system not working, 'Lost communication with the hybrid control module' (U0293).
❌ Tried (didn't work) Replacing the MGU (alternator), which includes the hybrid power module.
✅ What actually fixed it The user replaced the MGU but the code remained, confirming the issue was not the module itself but likely in the wiring, power supply, or another part of the CAN network. This story serves as a cautionary tale against replacing the module first.
"I Checked Everything" — The Actual Cause
- For network codes, the equivalent of a 'smoke test clean' scenario is when basic CAN bus voltage and resistance tests at the OBD-II port appear normal (e.g., ~2.5V on each line, 60 ohms resistance). In these cases, the fault is often an individual module that is corrupting the bus only when it's powered on. The correct diagnostic procedure is to physically isolate modules by disconnecting them one-by-one at the Star Connector hub until communication on the rest of the network is restored. The last module disconnected is the culprit.
When the Usual Fixes Don't Work
- A common assumption is that a code naming a specific module, like U0293 for the 'Hybrid Control Module', means that module has failed. However, real-world experience often proves this wrong. In a documented case on a similar eTorque system, a technician replaced the entire Motor Generator Unit (which contains the control module) only to have the exact same U0293 code return immediately. This strongly supports the diagnostic principle that 'U' codes indicate a communication problem (wiring, power, ground, network interference) and that the named module is more often the victim than the cause.
Helpful Videos
We Have This Part in Stock


The information in this article is provided for general reference and educational purposes only. Vehicle specifications, procedures, and part compatibility can vary by production date, trim level, and region. Always consult your vehicle's factory service manual and verify part numbers before purchasing or performing repairs. Safety-critical components such as airbags, seat belts, and braking systems should be installed by a qualified professional.
- Dodge CHARGER:
- 🧭 Diagnostic Flowchart
- 🎬 Helpful Videos
- 🛍️ Shop This Part
- What's Unique About the 2021-2021 Dodge CHARGER
- Symptoms You May Notice
- Most Likely Causes
- Rare But Worth Checking
- Diagnosis Steps
- Parts You'll Likely Need
- Related Codes That Often Appear With This One
- Technical Service Bulletins (TSBs) & Recalls
- Platform-Specific Known Issues
- Mechanic-Grade Diagnostic Values
- Scan Tool Commands That Help
- Wiring & Ground Locations
- Real Owner Repair Stories
- "I Checked Everything" — The Actual Cause
- When the Usual Fixes Don't Work
- 🎟️ Get 5% Off