
OBD-II Code U0656: Lost Communication With Glow Plug Control Module 'B'
The Ultimate 2026 Guide to Diagnosing and Fixing U0656
- U0656 indicates a total communication failure between the engine computer and the secondary ('B') Glow Plug Control Module on diesel engines.
- On 2019-2023 GM trucks and SUVs, this code is a primary indicator of a chafed engine wiring harness requiring sectional repair (TSB 21-NA-149).
- Ignoring this code blocks Diesel Particulate Filter (DPF) regeneration, leading to a clogged filter that costs $1,500 to $3,000 to replace.
- Test the CAN bus resistance at the OBD-II port (target: 60 ohms) and verify glow plug resistance (0.1-2.0 ohms) before spending $200+ on a new control module.
What Does U0656 Mean?
U0656 is a network communication code meaning the main engine computer (ECU/PCM) lost its connection to the 'B' Glow Plug Control Module (GPCM). The GPCM is a small computer on diesel engines controlling the glow plugs, which heat the engine cylinders to ensure quick cold starts. When this Controller Area Network (CAN) bus link fails, the ECU cannot command the glow plugs or receive status information from the module.
Technical definition: The formal SAE/OBD-II definition is 'Lost Communication With Glow Plug Control Module 'B''. This indicates the Powertrain Control Module (PCM) did not receive expected data signals from the secondary Glow Plug Control Module over the Controller Area Network (CAN) bus within a specified timeframe.
Can I Drive With U0656?
Yes, But With Caution. For diesel vehicles, you can continue driving, but you will experience hard starting or a no-start condition in cold weather. The significant danger comes from the underlying cause: if triggered by a chafed wiring harness (common in GM vehicles), critical wires short unpredictably, causing the engine to stall or enter 'Reduced Engine Power' mode while driving. Ignoring the code on modern diesels also prevents Diesel Particulate Filter (DPF) regeneration, leading to a clogged DPF and a $1,500-$3,000+ repair.
Common Causes
- Chafed or damaged engine wiring harness (Very Common) — On modern trucks, especially 2019+ General Motors models, the engine wiring harness rubs against sharp metal edges. This wears through the insulation and shorts the CAN bus wires to ground, disrupting communication and triggering U0656.
- Failed Glow Plug Control Module (GPCM) (Common) — The module fails internally due to electronic component breakdown from heat and vibration, especially when mounted directly on the engine. Water intrusion into the module or its connectors is also a frequent failure point.
- Poor electrical connections or corroded connectors (Common) — Connectors for the GPCM and main engine harness loosen, corrode (showing green/white powder), or fill with moisture. This interrupts the signal just as effectively as a broken wire.
- Blown fuse or faulty relay for the GPCM circuit (Less Common) — The GPCM relies on a dedicated power supply through a high-amperage fuse and relay. If this fuse blows or the relay fails, the module loses power and drops off the network.
- Low battery voltage or charging system problems (Less Common) — Vehicle communication networks require stable voltage. A weak battery, failing alternator, or poor battery cable connections cause voltage drops that force modules to temporarily shut down.
- Failed CAN bus terminating resistor (Rare) — The CAN bus network requires a 120-ohm resistor at each end (60 ohms total). If one resistor fails, total resistance jumps to 120 ohms, disrupting communication for modules on the network.
- Software or calibration corruption (Rare) — An incomplete software update, programming glitch, or corrupted PCM memory causes the main computer to lose its ability to recognize the GPCM.
- Aftermarket accessories or improper repairs (Rare) — Improperly installed aftermarket electronics (remote starters, alarms) interfere with the CAN bus network. Tapping into the wrong wire creates electrical noise that disrupts communication.
Symptoms
- Check Engine Light is on — The Malfunction Indicator Lamp (MIL) illuminates on the dashboard.
- Difficult or no-start condition when cold — The glow plugs fail to pre-heat the cylinders, making combustion difficult or impossible in a cold engine.
- Glow Plug indicator light flashing or staying on — The dashboard glow plug light flashes, stays on longer than usual, or fails to illuminate entirely.
- Reduced engine power or 'Limp Mode' — If caused by wiring issues, the ECU enters a protective limp mode, limiting speed and acceleration to prevent damage from unpredictable sensor signals.
- Multiple warning lights and erratic gauges — A major wiring harness short causes other modules to lose communication, triggering ABS/Traction Control lights and causing gauges to sweep erratically.
- Rough idle after starting — The engine runs poorly, shakes, or produces excessive white smoke for a few minutes after a cold start before smoothing out.
- GPCM 'B' Not Responding (scan-tool only — no driver-felt sign) — When viewed on a professional scan tool, the status for the 'B' module shows as 'Not Found' or 'Offline'.
Diagnostic Flowchart
Tap your situation to follow the diagnostic path that matches what you're seeing on this code.
Common Fixes & Costs
- Repairing a chafed engine wiring harness — Parts: $20-$75, Labor: $300-$1500, ~2.5 hr book time (Professional)
- Replacing the Glow Plug Control Module (GPCM)
— Parts: $150-$350, Labor: $100-$200, ~1.0 hr book time
(Intermediate)
Chevrolet/GMC Silverado/Sierra (2019-2023): OEM GM: 12746363, 12704708 (Alt: ACDelco, Dorman)
Ford F-Series Super Duty 6.7L (2011-2017): OEM Ford: BC3Z12B533A, Motorcraft: DY1261 (Alt: Alliant Power: AP63525, Dorman: 904-917)
Ford F-Series Super Duty 6.7L (2018-2020): OEM Ford: HC3Z12B533C (Alt: Dorman: 904-919) - Cleaning or replacing GPCM connectors — Parts: $5-$120, Labor: $100-$300, ~0.8 hr book time (DIY)
- Replacing a blown fuse — Parts: $1-$10, Labor: $0-$50, ~0.1 hr book time (DIY)
- Replacing a CAN Bus Terminating Resistor — Parts: $20-$100, Labor: $100-$300, ~1.5 hr book time (Intermediate)
Used vs. New Parts: Buying Guide
When a used part is worth it: A used Glow Plug Control Module (GPCM) is a cost-effective option for older, high-mileage vehicles where the cost of a new OEM part is prohibitive. It makes sense if the seller is reputable and offers a start-up warranty.
Donor-vehicle mileage cap: roughly under 100000 miles for the part to have meaningful remaining life.
Donor quality checklist:
- Verify the part comes from a vehicle that was not scrapped due to electrical or flood damage.
- Inspect the connector pins on the used module for any signs of corrosion, burning, or physical damage.
- Match the part number exactly. Different software versions cause compatibility issues.
Decision logic:
- If The vehicle is under 8 years old or has low mileage → Buy new (OEM or reputable aftermarket like ACDelco). The risk of premature failure of a used part outweighs the savings.
- If The vehicle is over 150,000 miles and the budget is tight → A used part from a trusted source with a 90-day warranty is an acceptable risk.
- If The cause of the original module failure was an external short or faulty glow plug → Buy new. The original module may have been weakened, and a new part provides a clean slate after the root cause is fixed.
Warranty tradeoff: Used parts typically offer a 30-90 day warranty for part replacement only. New aftermarket parts carry a 1-year to limited lifetime warranty. New OEM parts have a 1-2 year warranty, which covers labor if installed by a dealer.
Worst-case if a used part fails: $300-$600 if the used module fails shortly after the warranty period, requiring repeat labor costs and the purchase of another part.
What Happens If You Wait — Timeline
- 0-1 month: Check Engine Light illuminates. In warm weather, symptoms are minimal. In cold weather, the engine cranks longer before starting. (MPG impact: 0-2%% · Added cost: $0-$50 in wasted fuel and minor starter/battery wear.)
- 1-4 months: Hard starting becomes consistent. The vehicle produces excessive white smoke and runs rough after a cold start. The ECU begins inhibiting DPF regeneration cycles. (MPG impact: 2-5%% · Added cost: $50-$150 in increased fuel consumption and significant stress on the starting system.)
- 4-8 months: The Diesel Particulate Filter (DPF) becomes progressively clogged. The engine enters limp mode. If caused by a chafing harness, the risk of a critical wire shorting increases. (MPG impact: 5-15%% · Added cost: $1,500-$3,000 for forced DPF regeneration, professional cleaning, or DPF replacement.)
- 8+ months: Catastrophic failure occurs. A critical wire shorts, causing the engine to stall suddenly while driving. A completely clogged DPF renders the vehicle undrivable and damages the turbocharger. (MPG impact: 15-25%+% · Added cost: $3,000-$7,000+ for DPF replacement plus potential costs of a tow or damage to other engine components.)
Cost of Not Fixing It
- Immediate (especially in cold weather): Hard starting or a no-start condition, potentially leaving you stranded. Increased stress on the starter motor and battery from prolonged cranking. (Added cost: $200-$500 for a tow and potential starter/battery replacement.)
- 1-6 months: Failure to perform Diesel Particulate Filter (DPF) regeneration. The GPCM is involved in the engine management strategy for DPF regen. Without it, the DPF becomes clogged with soot. (Added cost: $1,500-$5,000+ for professional DPF cleaning or complete replacement.)
- Ongoing: If the cause is a chafing wiring harness, the risk of a critical wire shorting to ground increases over time. This causes the engine to stall suddenly while driving, creating a major safety hazard. (Added cost: Cost of an accident or extensive diagnostic time ($500-$2000+) to find a more complex short that has damaged other modules.)
Diagnosis Steps
- Check for Technical Service Bulletins (TSBs)
Search for TSBs for your vehicle's make, model, year, and code U0656. GM TSB #21-NA-149 details engine harness chafing causing this exact code on 2019-2023 trucks and SUVs. A TSB saves hours of diagnostic time.
Tools: Internet access (Beginner) - Scan Tool Live Data Analysis
Access the live data stream for the powertrain control module. Look for PIDs related to the Glow Plug Control Module 'B'. The absence of any data or status from GPCM 'B' confirms the communication loss.
Tools: Professional scan tool (Advanced) - Inspect Fuses and Battery
Locate and check all fuses related to the GPCM, ECU, and engine controls. Test the battery to ensure it has at least 12.4 volts with the engine off and the charging system provides 13.7-14.7 volts with the engine running.
Tools: Owner's manual, multimeter, fuse puller (Beginner) - Visually Inspect the Engine Wiring Harness
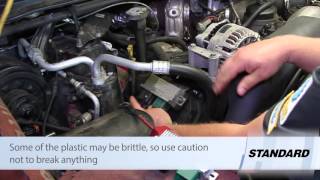
Perform a thorough visual inspection of the engine wiring harness. Look for sections rubbing against metal brackets, the engine block, or the vehicle frame. Look for shiny, worn-through plastic conduit or exposed copper wires.
Tools: Flashlight, inspection mirror (Intermediate) - Inspect the GPCM and Connectors
Locate the Glow Plug Control Module 'B'. Disconnect its electrical connectors and inspect the pins and sockets for green or white corrosion, bent pins, or signs of water entry.
Tools: Basic hand tools (Intermediate) - Test GPCM Power and Ground
Identify the power and ground pins on the GPCM connector. With the key on, verify the power pin receives full battery voltage (12.4V+) and the ground pin has excellent continuity to the chassis ground (less than 0.5 ohms).
Tools: Multimeter, vehicle-specific wiring diagram (Advanced) - Test Individual Glow Plugs
Disconnect the glow plug harness. Set a multimeter to its lowest Ohms setting. Test each glow plug by placing one probe on a clean engine ground and the other on the glow plug's terminal. A good glow plug measures between 0.1 and 2.0 Ohms. A reading of zero indicates a shorted plug that will destroy a new GPCM.
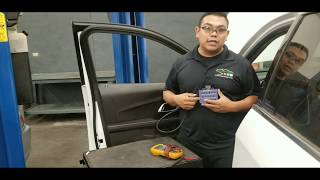
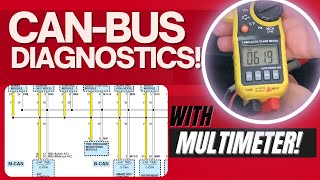
Tools: Multimeter, basic hand tools (Advanced) - Check CAN Bus Network Resistance
With the battery disconnected, measure the resistance between the two CAN bus wires (CAN High and CAN Low) at the OBD-II port (pins 6 and 14). A healthy network reads approximately 60 ohms. 120 ohms indicates an open circuit; below 60 ohms suggests a short.
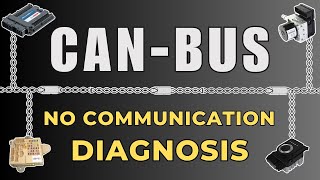
Tools: Multimeter, OBD-II pinout diagram (Advanced) - Isolate the Faulty Module
If the CAN bus resistance is incorrect, a single module may be shorting the network. Identify all modules on the same bus. Disconnect them one by one, re-checking the resistance at the OBD-II port. When the 60-ohm reading returns, the last module disconnected is the source.
Tools: Multimeter, wiring diagram, basic hand tools (Professional) - Analyze the CAN Bus Signal with an Oscilloscope
Connect to the CAN High and Low wires. A healthy signal shows clean, symmetrical square waves. CAN High toggles between 2.5V and 3.5V-3.75V; CAN Low toggles between 2.5V and 1.5V-1.25V. A flat line indicates an inactive bus, while a noisy pattern points to a wiring fault.
Tools: Oscilloscope, back-probe connectors (Professional)
When This Code Triggers (Freeze-Frame Conditions)
- Engine Coolant Temperature: 170-210°F (Engine at full operating temperature. The ECU runs continuous network checks, logging faults once the system is fully awake and all modules are expected to report.)
- Vehicle Speed: 45-65 mph (Steady highway cruise. Engine and road vibrations cause intermittent shorts in chafed wiring harnesses to make contact.)
- Engine RPM: 1500-2500 RPM (Constant engine speed. This creates a consistent vibration frequency that exposes loose connections or wiring faults.)
- System Voltage: 13.5-14.5V (Normal charging system operation. The code sets when the electrical system is healthy, proving the communication loss isn't due to a low voltage event.)
Related Codes
- U0106 — This is the code for the primary Glow Plug Control Module ('A'). If both U0106 and U0656 are present, it strongly suggests a network-wide problem rather than two independent module failures.
- U0073 — This code means 'Control Module Communication Bus 'A' Off'. If you see U0073, the entire communication network is down, and U0656 is merely a symptom. Always diagnose U0073 first.
- P0670 — This code means 'Glow Plug Control Module Control Circuit'. P0670 points to a fault within the GPCM's own logic, while U0656 indicates a failure to communicate on the network.
- U0100 — This code indicates 'Lost Communication With ECM/PCM'. Seeing both codes indicates a complete, two-way communication breakdown, pointing directly to the CAN bus wiring between the two specific modules.
Climate & Environmental Factors
- Cold Weather: Cold temperatures make the primary symptom—a hard start or no-start—significantly more pronounced. An engine starts without glow plug assistance in warm weather, masking the problem, but cold weather turns a nuisance code into a no-start situation.
- High Humidity / Wet Conditions: Humid climates or areas with heavy rain/snow increase moisture intrusion into electrical connectors. This moisture accelerates corrosion on the GPCM connector pins, a common cause of communication failure.
- Vibration and Engine Heat: The constant vibration of a diesel engine directly causes wiring harness chafing. Modules mounted directly to the engine are subjected to extreme heat cycles and vibration, leading to internal electronic failure.
How to Talk to a Mechanic About This Code
Say this: "I have a U0656 code on my [Vehicle Year, Make, Model] and I'd like to schedule a diagnostic. I understand this is a communication failure with the glow plug module and that wiring issues are a very common cause. Please start by checking the integrity of the CAN bus network and inspecting the engine harness for chafing, especially at known problem areas for this model, before recommending a module replacement."
This signals you are an informed customer. It directs the technician to perform a proper diagnosis of the network and wiring—the most likely culprits—instead of just replacing the GPCM, which may not solve the problem. It protects you from paying for a part you don't need.
Avoid saying:
- 'My truck is hard to start when it's cold.'
- 'My check engine light is on, can you just fix it?'
- 'I think I need a new glow plug controller, can you give me a price?'
Questions to ask before authorizing the repair:
- Did you find a specific wiring fault, and can you show me the damaged area?
- What was the ohm reading on the CAN bus at the OBD-II port? Was it a stable 60 ohms?
- If the wiring is the issue, is a localized wire repair possible instead of replacing the entire harness?
- If you are recommending a new GPCM, have you confirmed it has proper power, ground, and clean communication signals at the connector?
Where to Take It: Dealer vs Independent vs Chain
- Dealer:
Recommended for in-warranty vehicles to ensure TSBs are covered. For out-of-warranty vehicles, they are a reliable but expensive option; push for a harness repair over replacement.
Best for: Vehicles under warranty (especially GM trucks/SUVs covered by TSB 21-NA-149)., Complex, manufacturer-specific network issues where proprietary software is required.
Downsides: Highest labor rates., Defaults to expensive full harness replacement ($2,000-$6,000+) instead of a more affordable sectional repair. (Typical cost: +50% vs. baseline) - Independent Shop:
Best fit for most out-of-warranty situations, IF you find the right shop. Look for ASE-certified technicians and reviews mentioning successful electrical or 'U-code' diagnostics.
Best for: Out-of-warranty vehicles where cost is a major factor., Shops that specialize in auto electrical diagnostics.
Downsides: Quality and expertise vary greatly. A general mechanic lacks the advanced tools (oscilloscope) or experience for CAN bus diagnosis., Must vet the shop's reputation for electrical work specifically. (Typical cost: +0% vs. baseline) - Chain Shop:
AVOID. This is an advanced diagnostic problem, not a simple parts-swap. A chain shop is the wrong venue for a U-code communication issue.
Best for: Simple, unrelated maintenance like oil changes or tires.
Downsides: Technicians are generally not equipped or trained for complex network diagnostics., High likelihood of misdiagnosis, leading to unnecessary parts replacement and wasted money. (Typical cost: -10% vs. baseline)
When to Walk Away From the Repair
If the total estimated repair cost exceeds 40-50% of the vehicle's private-party value, seriously consider selling or trading in the vehicle instead of repairing it.
- Car worth $35000, fix is $6500: Walk away from this specific quote. The repair cost is high relative to the vehicle's value. Seek a second opinion for a sectional harness repair, which could be under $1,500 and would be a 'Fix it' decision.
- Car worth $15000, fix is $750: Fix it. This repair is well below the threshold and restores critical functionality.
- Car worth $5000, fix is $2500: Walk away. The repair cost is 50% of the truck's value. This is a classic 'mechanic's special' situation.
What Scan Tool You Need for This Code
Minimum: A tool that reads codes from all vehicle modules (ABS, BCM, etc.), not just the engine (ECM). A basic $20 reader is insufficient.
A cheap reader only shows generic engine codes. It cannot see network-wide faults (like U0073) or tell you which other modules lost communication. For a 'U' code, seeing the status of the entire network is essential.
Budget: BlueDriver Pro (~$119) — Connects to a smartphone app and scans all vehicle modules to see which are communicating and which are not. It reads freeze-frame data and manufacturer-specific codes, providing crucial context.
Mid-range: Foxwell NT510 Elite / Autel MaxiCOM MK808 (~$150-350) — These handheld scanners offer deeper diagnostics with limited bidirectional controls. They display network topology on some vehicles, visually showing which modules are offline.
Professional: Autel MaxiCOM MK808BT Pro / Launch X431 Series (~$450-800) — Provides full bidirectional control, allowing you to command modules and run active tests. This is critical for network diagnostics, as you can actively communicate with modules to confirm a fault.
Rent vs buy: Rent a basic scanner from an auto parts store to confirm the U0656 code for free. However, to diagnose the root cause (wiring vs. module), you need to see the whole network. Buying a 'Budget Pick' like the BlueDriver is a worthwhile investment.
How to Clear the Code After You Fix It
- Reconnect the battery if it was disconnected for the repair.
- Use a quality OBD-II scan tool to erase the Diagnostic Trouble Codes (DTCs).
- Perform a complete drive cycle to allow the vehicle's readiness monitors to run and complete their self-checks.
Drive cycle (~30 minutes): A generic drive cycle includes a cold start (engine temp below 122°F), a 2-3 minute idle with electrical loads on, followed by 15 minutes of mixed city/highway driving including steady speeds around 55 mph, and periods of coasting down to 20 mph without braking.
Readiness monitors affected: Comprehensive Component Monitor, Misfire Monitor, Catalyst Monitor
Before emissions retest: drive at least 100 miles to fully set monitors.
Watch out for:
- Disconnecting the battery clears the code but resets all emissions readiness monitors to 'Not Ready', causing an automatic failure at an emissions testing station.
- The code returns immediately if the root cause (like a chafed wire or bad module) was not properly fixed.
- Taking the vehicle for an emissions test too soon after clearing codes results in a 'Not Ready' rejection. You must drive 50-100 miles to ensure monitors complete.
Will This Fail Emissions / State Inspection?
Yes — this code typically fails an OBD-II emissions inspection.
- California: An illuminated Check Engine Light results in an automatic smog check failure. All required readiness monitors must be 'Ready'. After repairs, a drive cycle of 50-100 miles is needed before re-testing.
- New York: A vehicle subject to an OBD-II emissions inspection automatically fails if the 'Check Engine' light is on. Inspections are required annually.
- Texas: In counties requiring emissions testing, an illuminated Check Engine Light is an automatic failure. Clearing the U0656 code resets all monitors initially, requiring a drive cycle before testing.
Most Commonly Affected Vehicles
- Chevrolet Silverado 1500/2500HD/3500HD (2019-2023) — Extremely prone to engine harness chafing. Per GM TSB 21-NA-149, check for harness contact at the ECM/TCM bracket, driver's side upper control arm, and the shock tower bolt.
- GMC Sierra 1500/2500HD/3500HD (2019-2023) — Shares the same platform and wiring harness issues as the Chevrolet Silverado. Highly susceptible to this code due to chafing as detailed in TSB 21-NA-149.
- Chevrolet Tahoe / Suburban (2021-2023) — Affected by the same engine harness chafing issue (TSB 21-NA-149), particularly models with the 3.0L LM2 diesel engine.
- GMC Yukon / Yukon XL (2021-2023) — These SUVs with diesel engines are included in GM TSB 21-NA-149 for potential engine harness damage leading to communication DTCs.
- Cadillac Escalade (2021-2023) — Diesel models are listed in GM TSB 21-NA-149 as vehicles that experience engine harness chafing, triggering U0656.
- Ford F-Series Super Duty (F-250, F-350, F-450) (2011-2022) — On Power Stroke engines, the GPCM fails due to heat and vibration. Test all glow plugs for correct resistance (0.1-2.0 ohms) before installing a new GPCM.
- BMW / Mini Various models with diesel engines (2008-2018) — Communication codes often arise from water intrusion into module locations (trunk well or under carpets), or from a single faulty module shorting out the bus.
- Ram 2500/3500 (2013-2023) — On Cummins-equipped trucks, this code appears due to wiring harness issues, particularly corrosion at the main bulkhead connector on the firewall.
Manufacturer-Specific Notes
- General Motors (Chevrolet/GMC): On 2019-2023 trucks and SUVs, code U0656 is almost a guaranteed sign of engine wiring harness chafing. TSB #21-NA-149 identifies three primary contact points: the ECM/TCM bracket, the driver's side upper control arm, and a shock tower bolt. Owners should reference this TSB when speaking with a dealer.
- Ford (Power Stroke): On 6.0L and 6.7L Power Stroke engines, the GPCM is located on the valve cover, exposed to intense heat and vibration. Before replacing a GPCM, it is critical to OHM-test all glow plugs. A single shorted glow plug destroys a brand-new control module instantly.
- BMW: BMW uses multiple bus systems. A communication fault on one bus is often caused by an unrelated module. Common causes include water damage to modules located in the trunk spare tire well or improperly installed aftermarket stereos interfering with the MOST bus.
- Hyundai / Kia: Technicians note harnesses rubbing against battery trays or unfixed brackets in the engine bay, leading to intermittent shorts and various communication ('U') codes. A general inspection of harness routing is a wise diagnostic step.
Real Owner Stories
2021 GMC Sierra 1500 AT4 3.0L Duramax with multiple electrical faults
The owner experienced a check engine light, the engine fan stuck on high, and multiple fault codes. The dealer diagnosed it as engine harness chafing per a GM service bulletin.
Outcome: The owner opted for the sectional repair. The underlying issue was broken harness retaining clips that allowed the harness to rub through after a previous engine replacement.
Lesson: For 2019+ GM trucks, harness chafing is a known issue (TSB 21-NA-149). A sectional wire-by-wire repair is a viable, affordable alternative to a full harness replacement. Always ask if a sectional repair is possible.
Ford 7.3L Power Stroke with one bank of glow plugs failing
The check engine light illuminated, and a scan revealed codes for all four glow plugs on the driver's side bank. The owner suspected a bad Glow Plug Control Module (GPCM).
Outcome: The owner found a loose under-valve-cover harness (UVCH) connector. Shimming the connector restored the connection and resolved all codes without replacing the GPCM.
Lesson: When an entire bank of glow plugs fails at once, investigate the shared wiring and connectors for that bank before replacing the expensive GPCM.
2005 GMC Sierra 3500 Duramax with intermittent communication codes
The truck had poor shifting, low power, and multiple communication codes, including U0106 (Lost Communication with GPCM).
Outcome: The oscilloscope showed a faulty signal. By disconnecting modules one by one, the owner isolated the problem to the GPCM. Unplugging the faulty GPCM restored communication between all other modules.
Lesson: A single faulty module brings down the entire communication network, causing codes for perfectly good modules. Isolate the bad module by disconnecting components one at a time before replacing parts.
How to Prevent This Code From Triggering
- Inspect and Protect Engine Wiring Harness (Every oil change) — Periodically check known rubbing points, especially on GM trucks. Secure harnesses close to sharp metal edges with zip ties or add a protective sleeve to prevent chafing.
- Apply Dielectric Grease to Connectors (Anytime a connector is disconnected) — Applying a small amount of dielectric grease to the connector's rubber seal prevents moisture intrusion and corrosion. Do not pack the pins with grease.
- Ensure Harness Clips and Mounts are Secure (After any engine repair) — Double-check that all original plastic retaining clips are re-secured. A loose harness vibrates and chafes against other components.
- Perform Regular Battery and Charging System Tests (Annually) — CAN bus communication is sensitive to voltage. Ensuring stable system voltage (13.7-14.7V when running) prevents phantom communication faults.
Frequently Asked Questions
What is a Glow Plug Control Module 'B'?
Some diesel engines, particularly V8s or those with complex emissions systems, use two separate glow plug control modules to manage the high electrical load. The 'A' module (code U0106) controls one bank of cylinders, and the 'B' module (U0656) controls the other. This code specifically points to a problem with the secondary module or its communication circuit.
Where is the Glow Plug Control Module 'B' located?
Location varies by manufacturer. On Ford Power Stroke engines, it bolts directly to a valve cover. On GM Duramax engines, it mounts on the side of the engine block or inner fender.
What is the most common misdiagnosis for U0656?
The most common mistake is immediately replacing the Glow Plug Control Module ('B') without a full diagnosis. The code indicates a communication loss, which is usually caused by the wiring or connectors leading to the module, not the module itself. Technicians must verify the module has proper power, ground, and CAN bus signal integrity before condemning the part.
Can a bad glow plug cause code U0656?
Not directly. A bad glow plug itself typically sets a 'P' code (e.g., P0671-P0678). However, an internally shorted glow plug draws excessive current, which overloads and destroys the Glow Plug Control Module, subsequently triggering the U0656 communication code.
I cleared the code and it came back a week later. Why?
This indicates an intermittent problem, a classic symptom of a chafed wiring harness. As the engine vibrates, the damaged wire temporarily makes and breaks contact with a ground source. Clearing the code provides a temporary fix, but the code returns unpredictably until the underlying short is permanently repaired.
How much does it cost to diagnose this code?
Most repair shops charge a diagnostic fee equivalent to one to two hours of labor. Expect to pay between $150 and $350 for a technician to accurately diagnose the root cause of a communication code like U0656. This fee covers tracing wires and using advanced tools like an oscilloscope.
Will replacing the Glow Plug Control Module definitely fix the problem?
No. While the module itself fails, the code only confirms communication was lost. The actual problem is often the wiring to the module, the power or ground supply, or a network-wide issue.
Key Takeaways
- U0656 indicates a total communication failure between the engine computer and the secondary ('B') Glow Plug Control Module on diesel engines.
- On 2019-2023 GM trucks and SUVs, this code is a primary indicator of a chafed engine wiring harness requiring sectional repair (TSB 21-NA-149).
- Ignoring this code blocks Diesel Particulate Filter (DPF) regeneration, leading to a clogged filter that costs $1,500 to $3,000 to replace.
- Test the CAN bus resistance at the OBD-II port (target: 60 ohms) and verify glow plug resistance (0.1-2.0 ohms) before spending $200+ on a new control module.
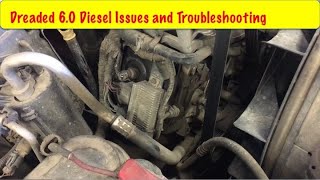
Helpful Videos

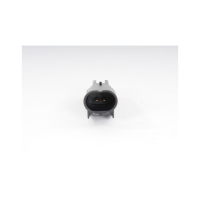
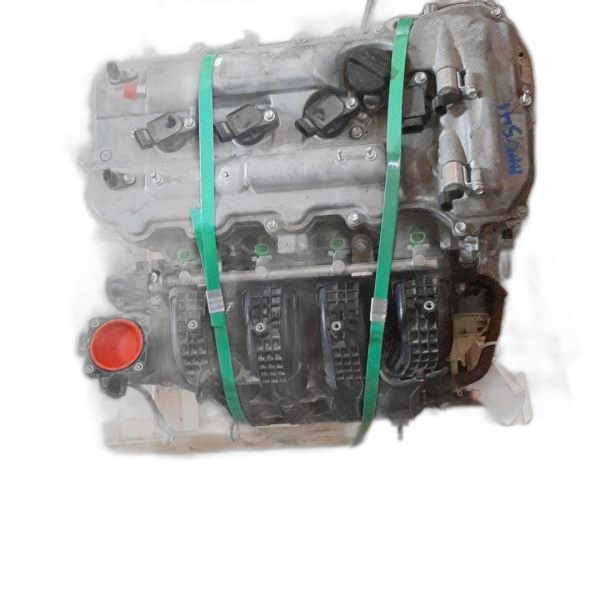
Shop the Parts Behind U0656
Below are the parts most often responsible for code U0656, ranked by how frequently each one is the actual culprit (per the diagnosis above). Tap any to see what we have for your vehicle.


The information in this article is provided for general reference and educational purposes only. Vehicle specifications, procedures, and part compatibility can vary by production date, trim level, and region. Always consult your vehicle's factory service manual and verify part numbers before purchasing or performing repairs. Safety-critical components such as airbags, seat belts, and braking systems should be installed by a qualified professional.
- 🧭 Diagnostic Flowchart
- 🎬 Helpful Videos
- 🛍️ Shop This Part
- What Does U0656 Mean?
- Can I Drive With U0656?
- Common Causes
- Symptoms
- Common Fixes & Costs
- Used vs. New Parts: Buying Guide
- What Happens If You Wait — Timeline
- Cost of Not Fixing It
- Diagnosis Steps
- When This Code Triggers (Freeze-Frame Conditions)
- Related Codes
- Climate & Environmental Factors
- How to Talk to a Mechanic About This Code
- Where to Take It: Dealer vs Independent vs Chain
- When to Walk Away From the Repair
- What Scan Tool You Need for This Code
- How to Clear the Code After You Fix It
- Will This Fail Emissions / State Inspection?
- Most Commonly Affected Vehicles
- Manufacturer-Specific Notes
- Real Owner Stories
- 2021 GMC Sierra 1500 AT4 3.0L Duramax with multiple electrical faults
- Ford 7.3L Power Stroke with one bank of glow plugs failing
- 2005 GMC Sierra 3500 Duramax with intermittent communication codes
- How to Prevent This Code From Triggering
- Frequently Asked Questions
- What is a Glow Plug Control Module 'B'?
- Where is the Glow Plug Control Module 'B' located?
- What is the most common misdiagnosis for U0656?
- Can a bad glow plug cause code U0656?
- I cleared the code and it came back a week later. Why?
- How much does it cost to diagnose this code?
- Will replacing the Glow Plug Control Module definitely fix the problem?
- Key Takeaways
- 🎟️ Get 5% Off