
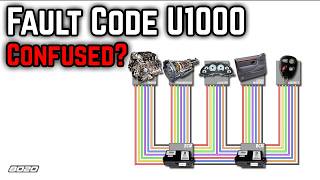
U1000 on 2004-2007 Buick Rainier: Class 2 Communication Failure Causes and Fixes
Code U1000 on a Buick Rainier means one or more computer modules have stopped talking to each other over the Class 2 data network. The most common causes are corroded grounds (especially under the driver's side headlight), broken wires (under the driver's seat, in door harnesses, or near the PCM), or a failing Body Control Module (BCM) due to water damage. Fixing the underlying wiring or ground issue is often a low-cost repair, but a replacement BCM can cost several hundred dollars.
- U1000 is a network code; do not immediately replace expensive modules without a full diagnosis.
- Always start with the easiest and most common issues: check the battery, fuses, and visible ground connections.
- On a Rainier, the two most important places to inspect for problems are the wiring under the driver's side floor/sill plate and the BCM under the rear seat.
- A scan tool that can perform a 'roll-call' of all modules is essential for determining where the communication breakdown is occurring.
- If you replace the BCM, it will require programming to your vehicle's VIN to function correctly.
What's Unique About the 2004-2007 Buick Rainier
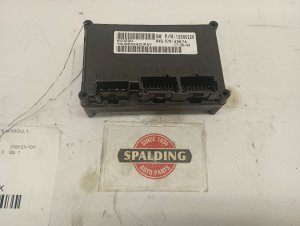
The Buick Rainier is built on the GM GMT360 platform, shared with the Chevy Trailblazer and GMC Envoy. On these trucks, the U1000 code is frequently traced back to the Body Control Module (BCM), which is located under the rear driver's-side seat, integrated with the fuse panel. This location makes it extremely susceptible to moisture from spilled drinks, leaking window seals, or clogged sunroof drains, which can corrode connectors and the BCM's circuit board, bringing down the entire communication network.
Symptoms You May Notice
- Check Engine Light is on
- No-start or no-crank condition
- Instrument cluster gauges are dead, erratic, or sweep on startup
- Radio, HVAC, power windows, or door locks do not work
- Security light stays on
- Scan tool cannot communicate with one or more modules
- Display message 'UNKNOWN DRIVER'
- Doors may lock and unlock repeatedly on their own
- Replacing the Powertrain Control Module (PCM) without thorough diagnosis. The PCM is rarely the cause of a U1000 code unless it's accompanied by specific PCM-related codes or a no-communication-with-PCM status.
Most Likely Causes
- Wiring Harness Damage 🔴 High Probability Wires can chafe and break in common areas. Key spots include: under the driver's side sill plate/carpet (from foot traffic and moisture), in the flexible rubber boot going to the doors (especially the driver's door), and in the engine bay where the harness can rub against brackets or the shock tower. One owner on GMTNation found a no-start U1000 was caused by a tiny cut in the orange 12V power wire to the PCM near the main harness.
How to confirm: Visually inspect the Class 2 data wire (typically a solid dark green wire on this platform) for breaks, chafing, or corrosion in known problem areas. A multimeter can be used to check for continuity on the data line from the DLC (pin 2) to various modules. Also check for stable 12V power and clean grounds at the modules.
Typical fix: Repair the damaged section of the wire. This involves soldering in a new piece of wire and protecting it with heat shrink tubing to seal out moisture.
Est. part cost: $5-$20 - Corroded or Loose Ground Connections 🔴 High Probability The GMT360 platform has several critical ground packs (splice packs) that can corrode over time, causing high resistance and intermittent network failures. A primary culprit is the ground pack located on the frame rail below the driver's side headlight, which is exposed to road salt and spray.
How to confirm: Locate the main ground points for the BCM and PCM (G103/G104 near the front of the engine, G301 under the driver's sill plate). Check for visible corrosion or looseness. Use a multimeter to perform a voltage drop test on the ground circuit; anything more than a few millivolts indicates a problem.
Typical fix: Remove the ground bolt/screw, clean the contact surfaces on the terminal and the chassis down to bare metal with a wire brush or sandpaper, and re-secure it tightly. Apply dielectric grease over the connection to prevent future corrosion.
Est. part cost: $5-$15 - Failing Body Control Module (BCM) 🟡 Medium Probability → Shop Body Control Module The BCM is located under the rear driver's side seat and is highly vulnerable to moisture damage from spills, open windows, or clogged sunroof drains. Liquid wicks into the connectors, causing corrosion on the pins and eventually destroying the module's internal circuit board.
How to confirm: After confirming wiring and grounds are good, unplug the BCM connectors. If communication is restored to other modules on the network, the BCM is the likely culprit. Inspect the BCM and its connectors for any signs of green/white corrosion, rust, or water stains.
Typical fix: Replace the Body Control Module. In some cases, a specialist may be able to repair the water damage by cleaning the board and replacing components, but replacement is more common. The new module must be programmed to the vehicle's VIN and options.
Est. part cost: $200-$450 - Failing Instrument Panel Cluster (IPC) ⚪ Low Probability → Shop Instrument Cluster The IPC is a module on the Class 2 network. Internal failures, often due to cold solder joints from age and heat cycles, can cause it to stop communicating or, in some cases, broadcast corrupt data that takes down the entire network.
How to confirm: If the gauges are dead and U1000 is present, and other checks are inconclusive, unplugging the IPC to see if communication returns to other modules can isolate the fault. This is a common step in a 'module isolation' diagnostic procedure.
Typical fix: Replace or send the original cluster to a specialist for repair. Repair services often replace all stepper motors and reflow solder joints.
Est. part cost: $150-$400 - Weak or Failing Battery ⚪ Low Probability → Shop Vehicle Battery
How to confirm: Test the battery voltage with a multimeter. A healthy battery should be above 12.4 volts at rest. Low voltage during cranking can cause modules to drop off the network temporarily, setting communication codes. Have the battery load-tested at an auto parts store.
Typical fix: Replace the vehicle's battery.
Est. part cost: $150-$250
Rare But Worth Checking
- Faulty Aftermarket Electronics: Poorly installed remote starters, alarms, or stereos can interfere with or damage the Class 2 data line (dark green wire), causing communication failures. Installers may tap into the wrong wire, creating a short or data collision.
- Failing OnStar Module (VCIM): The analog OnStar module in these vehicles is obsolete. While it more commonly sets a B1000 code, a failing VCIM can sometimes disrupt the Class 2 network and cause a U1000. Many owners simply unplug it, as it no longer functions on modern cellular networks.
- Faulty Ignition Switch: → Shop Ignition Switch A worn ignition switch is a very common issue on the GMT360 platform and can cause a wide array of bizarre electrical issues, including intermittent power loss to key modules, which results in communication loss codes.
Diagnosis Steps
- Connect a professional scan tool capable of a 'network test' or 'module roll-call' (e.g., GM Tech 2).
- Attempt to communicate with all modules on the vehicle (PCM, BCM, IPC, Radio, HVAC, etc.). Note which modules are not responding.
- Check and record any other stored DTCs. Codes like U1016 (PCM) or U1064 (BCM) point to the source.
- Check the battery and charging system. Ensure voltage is stable and above 12.4V at rest and doesn't drop excessively during cranking.
- Inspect all relevant fuses in both the under-hood and rear fuse blocks with a multimeter, not just visually.
- Visually inspect the wiring harness under the driver's side sill plate and carpet for moisture, corrosion, or damage. Pull up the carpet to be thorough.
- Inspect the wiring harness in the driver's door jamb boot for broken or chafed wires.
- Inspect the Body Co
Parts You'll Likely Need
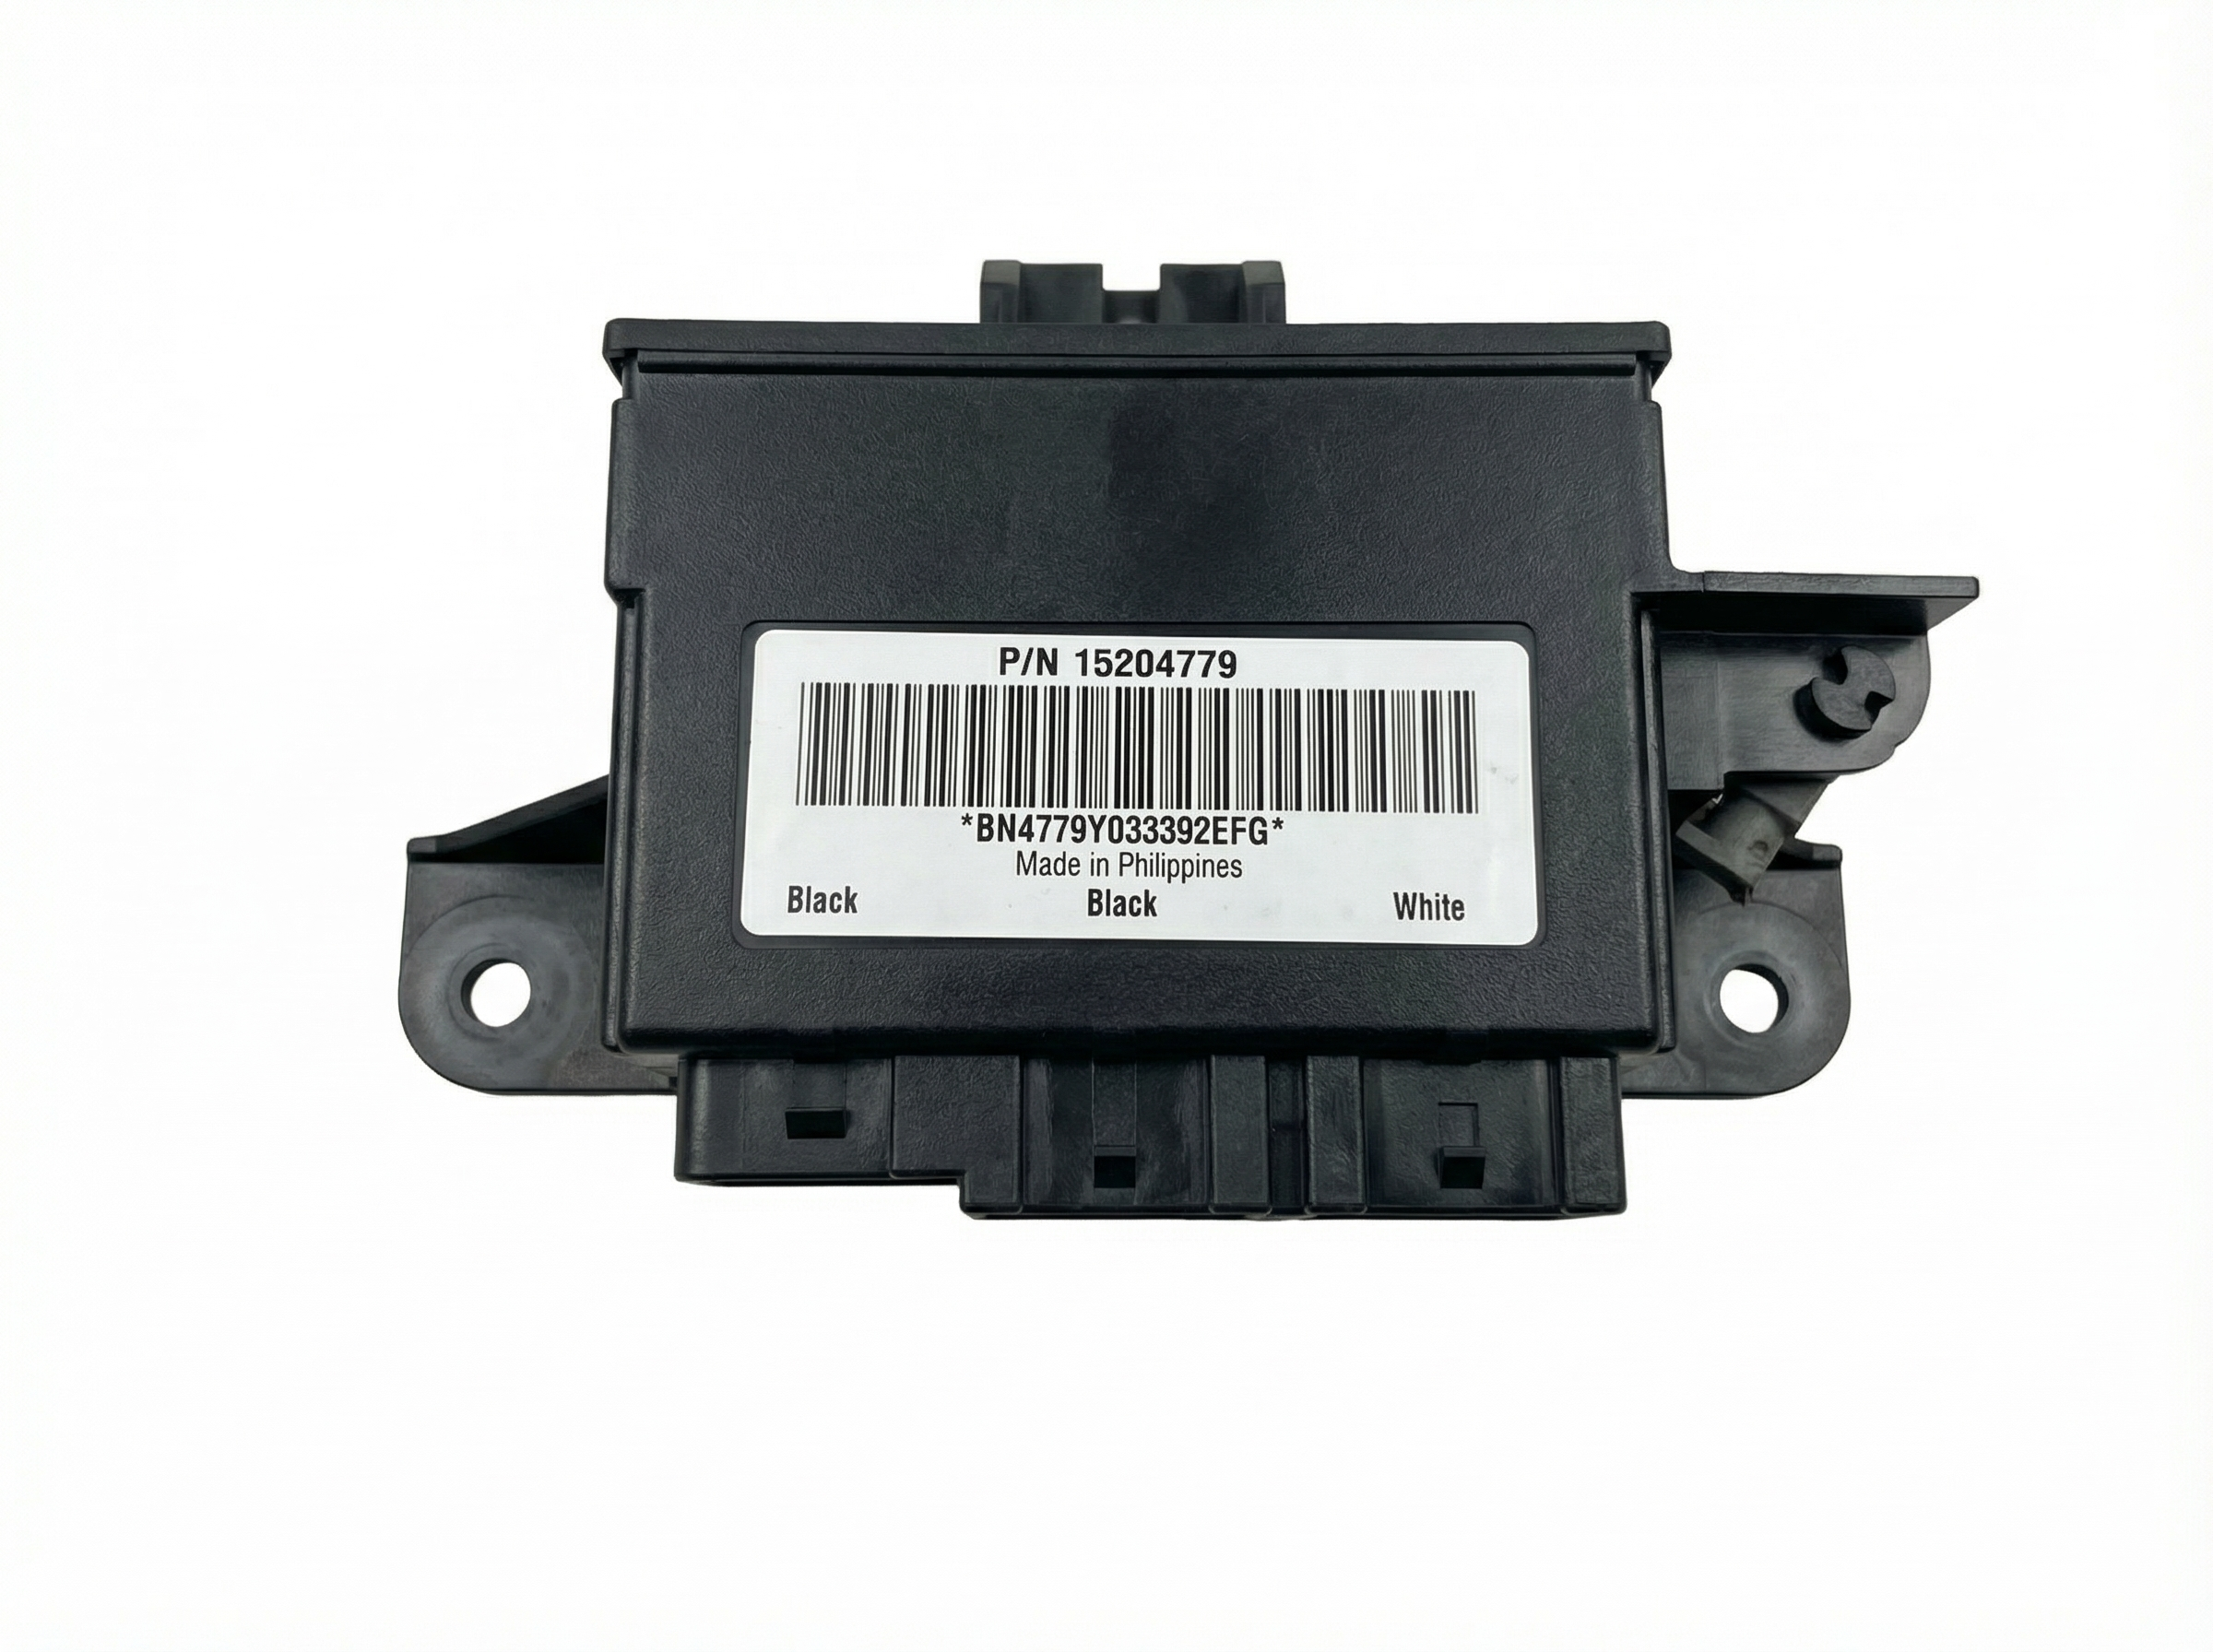
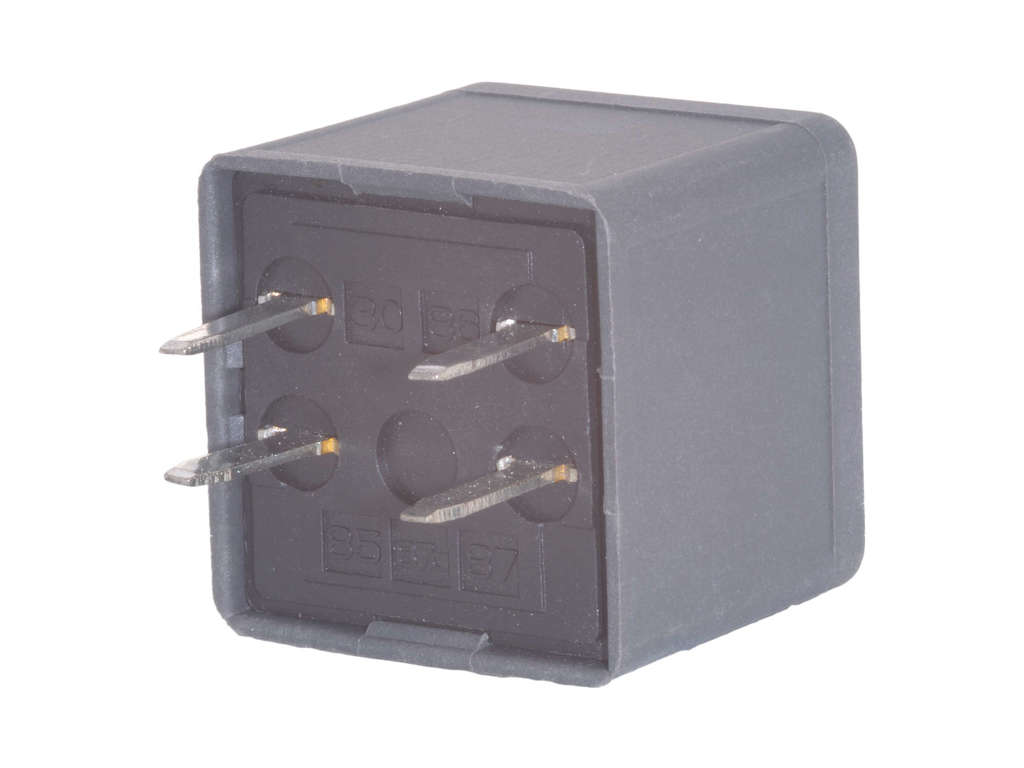
- Body Control Module (BCM)
(OEM #15114669)— This module is a central hub for communication and is prone to failure from moisture due to its location under the rear seat.
Trusted brands: ACDelco (Genuine GM), Dorman
OEM price range: $300-$400
Aftermarket price range: $200-$300 - Ignition Switch
(OEM #1S6482 (ACDelco D1462G))— A known weak point on the platform that causes numerous electrical faults, including intermittent power to modules which triggers communication codes. A failing switch can cause a no-crank and a U1000 code.
Trusted brands: ACDelco, Standard Motor Products
OEM price range: $50-$80
Aftermarket price range: $30-$60
Related Codes That Often Appear With This One
- U1016 — Loss of Communication with PCM. This often appears with U1000 when the PCM itself is the module that has dropped off the network or when the reporting module can't hear the PCM.
- B1000 — ECU Malfunction. This code indicates a module has failed an internal self-test. You may see this code from a specific module (like the BCM or SDM) along with the general U1000 network code.
- U1064 — Loss of Communication with BCM. This is very common to see alongside U1000 and strongly points towards a BCM-related issue, either the module itself or its wiring/power/ground.
Technical Service Bulletins (TSBs) & Recalls
- GM Preliminary Info – PIC3557: Notes that U1000 diagnostics may not lead directly to a single part and require network-first isolation.
- Bulletin #21-NA-149: Details various engine wiring harness chafing locations that can cause a multitude of DTCs, including U-codes for loss of communication.
- TSB PIP4578B: Addresses carbon buildup in the throttle body causing reduced power modes, an issue sometimes seen alongside electrical faults.
Platform-Specific Known Issues
- The Body Control Module (BCM) is located under the rear driver's side seat, making it highly vulnerable to liquid spills and water intrusion from windows or sunroof drains, which leads to corrosion and failure.
- Wiring harnesses are known to chafe in specific spots: under the driver's door sill trim, inside the driver's door-to-body boot, and against various brackets in the engine bay.
- A key ground point for multiple modules is located on the frame behind and below the driver-side headlight assembly, where it is exposed to the elements and frequently corrodes, causing network-wide communication faults.
Mechanic-Grade Diagnostic Values
- Class 2 Data Line Voltage (at DLC Pin 2) — expected: The bus toggles between 0V (inactive/ground potential) and approximately 7V (active). A Digital Multimeter (DMM) may show an average of 2-3V due to rapid switching.. Failure: A line stuck at 0V indicates a short to ground. A line stuck at a constant voltage (e.g., 5V or 12V) indicates a short to power from another circuit or a faulty module.
- Module Operating Voltage — expected: 9-16 volts for modules to communicate properly.. Failure: Voltage below 9V, often caused by a weak battery or poor connections, can prevent modules from initializing and cause them to drop off the network.
Scan Tool Commands That Help
- GM Tech 2: Class 2 Message Monitor — This is the primary function for diagnosing a U1000. It performs a 'roll call' of all modules on the Class 2 network and shows which are 'Active' and which are not. This allows a technician to see exactly which module has dropped off the network, even if the scan tool can't establish normal communication with it.
- GM Tech 2: Module Isolation — This is a manual process used when a faulty module is suspected of crashing the entire bus. By physically disconnecting modules one by one (e.g., unplugging the IPC, Radio, or BCM) and then re-running the Class 2 Message Monitor, you can identify the culprit. When the faulty module is disconnected, the other modules will reappear as 'Active' on the scan tool.
Wiring & Ground Locations
- DLC (Data Link Connector) Pin 2 — Under the driver's side dashboard.. This is the direct access point for the Class 2 Serial Data line. All diagnostic voltage and signal tests for the entire network start here.
- SP205 (Splice Pack) — On many GMT360 vehicles, it is located behind the driver's side kick panel, near the parking brake mechanism.. This splice pack connects the Class 2 data lines from many different modules together. By removing the shorting bar, a technician can isolate each branch of the network and test it individually to find a short to ground or power without having to access each module directly.
- G103 / G104 — On the engine block or near the front of the engine.. These are primary engine and PCM ground points. Poor connection here can cause the PCM to lose communication, triggering a U1000 in other modules.
- G301 — Under the driver's side sill plate.. This is a major body ground point. Corrosion here is common due to moisture and can affect multiple modules, including the BCM.
Real Owner Repair Stories
- YouTube user x298racer (2002 Chevrolet Trailblazer) — U1000 code present, no lights on the four-wheel drive indicator switch, 4WD system inoperative, scan tool could not communicate with modules.
❌ Tried (didn't work) Replacing the 4WD switch., Checking fuses.
✅ What actually fixed it The Transfer Case Control Module (TCCM) had failed and was shorting out the communication bus. Replacing the TCCM restored communication and fixed the 4WD system. - CorvetteForum user SpeedyZ (Corvette (similar GM Class 2 architecture)) — Data bus reading 0V, no communication with any device, 'Reduced Engine Power' message.
❌ Tried (didn't work) Initial checks of various modules.
✅ What actually fixed it The Instrument Panel Cluster (IPC) had an internal short, grounding the entire Class 2 data bus. Unplugging the IPC from the bus restored communication with all other modules. Replacing the IPC resolved the issue.
OEM Part Supersession History
15065293→25846782— Standard part evolution and revision by the manufacturer.
Heads up: BCMs for the GMT360 platform are year-range specific (e.g., 2002-2005 vs. 2006-2009) due to hardware revisions, but a service like GMT360BCM.com can program a refurbished unit from either range to work if the correct software is applied. The key is programming to the specific VIN and options.
Diagnostic Flowchart
Other Known Issues on This Vehicle
Issues unrelated to this code that are worth knowing about as an owner of this generation:
- Failing Electronic Fan Clutch 🔴 High — Very common failure. Can fail by either staying engaged (loud roaring noise) or not engaging (overheating at idle). (Ref: No official recall, but a widely documented problem on owner forums.)
- Rear Air Suspension Leaks 🟠 Medium — Common for the rear air springs to develop dry rot and leak, causing the rear of the vehicle to sag. The air compressor may also burn out from running constantly to compensate. Many owners opt to replace the system with conventional coil springs.
- Failing Instrument Cluster Stepper Motors 🟠 Medium → Shop Instrument Cluster — Extremely common across all GMT360s. Gauges for the speedometer, tachometer, fuel, etc., become erratic, get stuck, or stop working completely. (Ref: No recall, but numerous TSBs exist for other GM vehicles with the same issue. It is a widely known failure.)
- Dirty/Sticking Throttle Body 🟠 Medium — Carbon buildup from the PCV system can cause the throttle plate to stick, leading to a 'Reduced Engine Power' mode and codes like P2101 or P1516. (Ref: TSB PIP4578B addresses this issue, recommending throttle body cleaning as the primary fix.)
- Cracked Exterior Door Handles 🟡 Low — The plastic exterior door handles are known to become brittle and break, particularly on the 2006 model year.
Used vs. New Parts: Buying Guide for This Vehicle
When a used part is the smart pick: For this repair, obtaining a used Body Control Module (BCM) from a salvage yard is a very common and cost-effective strategy. Since the primary failure mode is often water damage, finding a 'dry' donor vehicle is key. Other electronic modules like the IPC, Radio, or TCCM are also excellent candidates for used parts.
Donor-vehicle mileage cap: roughly under 500000 miles for the part to have meaningful remaining life.
What to inspect on the donor part:
- For a BCM: Inspect the module and its connectors for ANY sign of white or green corrosion, rust, or water stains. If visible, do not buy it.
- Check the salvage vehicle's interior for signs of water leaks, such as stained carpets or headliners, especially around the rear seat area where the BCM is located.
- For wiring harnesses or splice packs, ensure the plastic is not brittle and the wire insulation is not cracked or previously repaired.
OEM-only on this vehicle (don't cheap out):
- BCM Programming: While a used BCM is fine, the programming that makes it work in your vehicle MUST be done correctly. This requires dealer-level tools (GM Tech 2) or a specialized service that can program the module to your VIN before shipping. A non-programmed BCM will not work.
Aftermarket brands forum-validated for this vehicle:
- ACDelco (GM Genuine for new parts)
- Dorman (Remanufactured ABS/EBCM modules)
- Cardone (Remanufactured ABS/EBCM modules)
- UpFix (Repair service for water-damaged modules)
Brands owners have reported issues with on this vehicle:
- Unnamed, no-brand electronics from online marketplaces can be risky, as they may lack proper programming support or quality control.
Real Owner Stories
Aggregated from forums and TSBs cited above. Mileages and costs reflect what owners reported in those sources.
2004-2007 Buick Rainier (GMT360 Platform)
Symptoms: No-start condition and a U1000 code caused by a Class 2 Serial Communication problem.
What fixed it: Found a tiny cut in the orange 12V power wire to the PCM near the main harness.
Source hint: GMTNation - 'SOLVED! - No Start, Multiple U1000 codes, Class 2 Serial Communication Problem'
2004-2007 Buick Rainier (GMT360 Platform)
Symptoms: Vehicle experienced a no-start and no-crank condition with codes U1000 and U1016 present.
What fixed it: Diagnostic focused on the Class 2 Serial Communication line and loss of communication with the PCM.
Source hint: GMTNation - 'U1000 U1016 no start no crank'
Related OBD-II Codes
Frequently Asked Questions
I'm seeing 'UNKNOWN DRIVER' on my dash and my Rainier won't start. Is this related to U1000?
My Rainier has a U1000 and the gauges are dead. Does GM Preliminary Info PIC3557 offer a specific part to fix this?
Could the ground point under my driver-side headlight be causing my intermittent network failures?
My rear windows and door locks stopped working at the same time the Check Engine Light came on. Is the BCM to blame?
Does Bulletin #21-NA-149 apply to the engine wiring on my Buick Rainier?
Can a dirty throttle body cause a U1000 code on this vehicle?
Helpful Videos

Used OEM Parts in Stock
New Aftermarket Parts Available


The information in this article is provided for general reference and educational purposes only. Vehicle specifications, procedures, and part compatibility can vary by production date, trim level, and region. Always consult your vehicle's factory service manual and verify part numbers before purchasing or performing repairs. Safety-critical components such as airbags, seat belts, and braking systems should be installed by a qualified professional.
- Buick Rainier:
- 🧭 Diagnostic Flowchart
- 🎬 Helpful Videos
- 🛍️ Shop This Part
- What's Unique About the 2004-2007 Buick Rainier
- Symptoms You May Notice
- Most Likely Causes
- Rare But Worth Checking
- Diagnosis Steps
- Parts You'll Likely Need
- Related Codes That Often Appear With This One
- Technical Service Bulletins (TSBs) & Recalls
- Platform-Specific Known Issues
- Mechanic-Grade Diagnostic Values
- Scan Tool Commands That Help
- Wiring & Ground Locations
- Real Owner Repair Stories
- OEM Part Supersession History
- Other Known Issues on This Vehicle
- Used vs. New Parts: Buying Guide for This Vehicle
- Real Owner Stories
- 2004-2007 Buick Rainier (GMT360 Platform)
- 2004-2007 Buick Rainier (GMT360 Platform)
- Related OBD-II Codes
- Frequently Asked Questions
- 🎟️ Get 5% Off