
U1000 on 2002-2006 Cadillac Escalade: Class 2 Communication Failure Causes and Fixes
On a 2002-2006 Escalade, code U1000 means there's a communication breakdown between the vehicle's computers on the GM Class 2 data network. This is often caused by bad wiring (especially under the driver's door sill), poor grounds, or a failing Body Control Module (BCM) with cracked solder joints. Fixing it requires advanced diagnostics to find the specific module or wire that is bringing the network down.
- U1000 on this Escalade is a serious network communication failure, not a simple sensor issue.
- Diagnosis is complex and requires isolating modules one-by-one to find the source of the failure; this is not a job for a basic code reader.
- Always check the easiest things first: battery health and all major ground connections.
- The Body Control Module (BCM) is a common failure point, but wiring issues are just as likely. Thorough diagnosis is required before replacing any expensive modules.
- If the BCM is replaced, it MUST be programmed to your vehicle's VIN to function correctly.
What's Unique About the 2002-2006 Cadillac Escalade
The 2002-2006 Escalade belongs to the GMT800 truck platform, which relies heavily on the Class 2 serial data network. Unlike modern CAN bus systems, this single-wire network is susceptible to being completely disabled by a single faulty module or a short in the wiring. Diagnosis often centers on a component called a 'splice pack' (specifically SP205 🎬 Watch: GM Class 2 data line diagnosis and repair), a junction box where the data wires from many modules meet. This splice pack is typically located behind the driver's side kick panel or under the dash. Problems with this splice pack, corrosion in the wiring harness under the driver's door sill plate, or bad grounds are very common sources of U1000 codes on this specific platform.
Symptoms You May Notice
- Check Engine Light is on
- ABS and/or Brake warning lights are on
- Security light may be illuminated or flashing
- Erratic or non-functional gauges (speedometer, tach, etc.)
- Intermittent failure of power windows, radio, or climate controls
- Vehicle may not start or may stall intermittently
- Scan tool cannot communicate with multiple modules
- "Service Ride Control" message may appear
- Battery light may come on intermittently
- Replacing the ECM/PCM without confirming it's the source of the communication failure.
- Replacing individual components like the radio or instrument cluster when the root cause is a wiring or BCM issue.
- Replacing the battery or alternator without checking for bad grounds or parasitic draws from a faulty module.
Most Likely Causes
- Damaged or Corroded Wiring 🔴 High Probability Wiring harnesses, particularly the Class 2 data wire (a dark green wire), are known to chafe and short to ground. Common problem areas include under the driver's side door sill plate, near the parking brake mechanism, and behind the dash near metal brackets. Water intrusion in these areas accelerates corrosion.
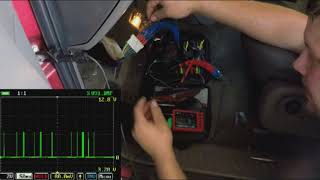
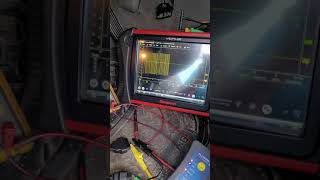
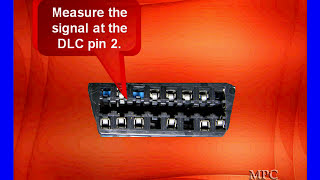
How to confirm: Visually inspect known problem areas for chafed, broken, or corroded wires. A technician would use a multimeter at the DLC (pin 2) and splice pack SP205 to check for a short to ground, short to power, or an open circuit. A healthy Class 2 bus should show a fluctuating voltage between 0 and 7 volts.
Typical fix: Repairing the damaged section of the dark green data wire and re-routing or protecting it from future damage. This often involves soldering in a new piece of wire and using heat shrink tubing.
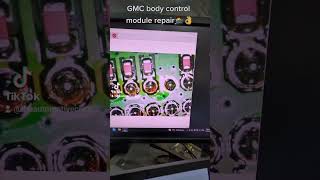
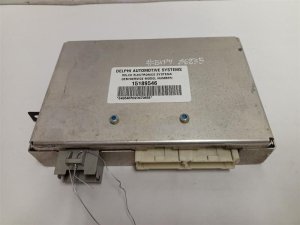
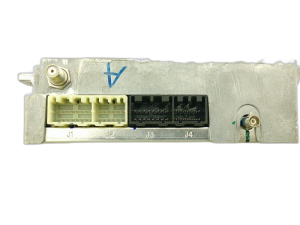
Est. part cost: $10-$50 - Faulty Body Control Module (BCM) 🟡 Medium Probability → Shop Body Control Module The BCM is a central hub for the Class 2 network. Internal failures, often from cracked solder joints on the circuit board where the main connectors are attached, can cause it to stop communicating or flood the network with bad data. This is a well-documented failure on GMT800 vehicles.
How to confirm: A technician would isolate the BCM from the network (by disconnecting it or using the splice pack) and see if communication with other modules is restored. Another common confirmation is to apply light pressure to the BCM or its connectors and see if the electrical problems temporarily resolve, indicating a bad solder joint.
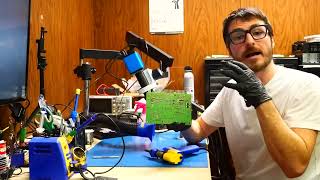
Typical fix: The BCM can often be repaired by removing it, opening the case, and re-soldering the cracked solder joints on the circuit board, particularly at the large connector pins. 🎬 See how to repair GM BCM solder joints Otherwise, it must be replaced. Replacement BCMs must be programmed to the vehicle's VIN.
Est. part cost: $150-$400 - Poor Ground Connections 🟡 Medium Probability These trucks have several key ground points on the frame and under the dash that are prone to corrosion over time, leading to unstable voltage for control modules. Key grounds to check are G201 (under the driver's side dash) and grounds on the frame rail under the driver's door.
How to confirm: Locate, disconnect, and clean the main battery ground, engine block grounds, and chassis grounds (especially under the driver's side). Check for voltage drops between the module connector's ground pin and the battery negative terminal. A reading of more than a few millivolts indicates a poor ground.
Typical fix: Clean the ground connection point to bare metal, apply dielectric grease, and re-secure the ground strap or wire.
Est. part cost: $1-$10 - Faulty Aftermarket Electronics ⚪ Low Probability Improperly installed aftermarket radios, remote starters, or alarms are often tapped into the Class 2 data wire (Pin A1 on the radio harness, for example), causing interference that disrupts communication.
How to confirm: Disconnect the aftermarket device completely from the vehicle's wiring and see if the U1000 code and symptoms disappear. This includes any adapter harnesses used for installation.
Typical fix: Remove the device or have it professionally re-wired using a proper data bus interface adapter that is designed for GM Class 2 systems.
Est. part cost: $0-$100
Rare But Worth Checking
- Another Failing Module: While the BCM is common, any module on the Class 2 network (e.g., radio, HVAC controller, transfer case control module, driver door module) can fail and bring down the network. Diagnosis involves systematically disconnecting modules one-by-one at the splice pack to find the source.
- Weak or Failing Battery: → Shop Vehicle Battery Low system voltage during cranking can sometimes cause modules to lose communication and set a history U1000 code. 🎬 Watch: How to diagnose and fix a U1000 code This should be the first thing checked as it's a simple fix.
- Corroded Splice Pack SP205: The splice pack itself can become a point of failure if it's exposed to moisture, causing corrosion across the terminals and disrupting data signals. A visual inspection after removing the comb from the splice pack will reveal any green or white corrosion.
Diagnosis Steps
- Check Battery and Charging System: Ensure the battery voltage is above 12.4V and that the charging system is working correctly. A weak battery is a common cause of communication codes.
- Perform a Full System Scan: Use a professional, bi-directional scan tool to attempt communication with all modules on the vehicle. Make a list of which modules are responding and which are not.
- Inspect Grounds: Visually inspect and clean main battery, engine, and chassis ground connections. Pay special attention to the grounds located under the driver's side dash (G201) and on the frame rail.
- Locate Splice Pack SP205: This is a key diagnostic point, typically located behind the driver's side lower dash panel or kick panel. It's a black connector with a comb that joins multiple dark green wires.
- Check Data Line Voltage: With a multimeter, check the voltage on the Class 2 data wire (DLC Pin 2). A healthy, active network should show a fluctuating voltage between 0 and 7 volts. A line stuck at 0V indicates a short to ground, while a line stuck high may indicate a short to power.
- Isolate the Network: Disconnect the comb from the splice pack. Using a jumper wire, connect the data line from the scan tool (DLC pin 2) to each pin in the splice pack one by one. The module that prevents communication when connected is the likely source of the problem, or its wiring is shorted/open.
- Inspect Wiring Harnesses: If a module is suspect, trace its dark green data wire. Pay close attention to the harness running under the driver's door sill, as this is a very common chafe point.
- Test Module Power and Ground: If the wiring is good, confirm the suspect module is receiving proper power and has a solid ground connection before condemning the module itself.
Parts You'll Likely Need
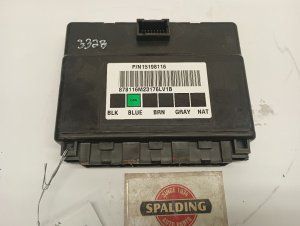
- Body Control Module (BCM)
(OEM #15116066, 15137394, 15136225)— This module is a central communication hub and a frequent point of failure due to cracked internal solder joints.
Trusted brands: ACDelco (GM Genuine), Dorman
OEM price range: $250-$400
Aftermarket price range: $150-$300 - Wiring Harness Repair Supplies — Often the fix is not a part, but repairing a section of the Class 2 data wire (dark green) that is broken, shorted, or corroded, especially under the driver's door sill.
Related Codes That Often Appear With This One
- U1016 — Loss of Communications with PCM
- U1041 — Loss of EBCM (ABS) Communication
- U1064 — Loss of Communications with BCM
- B1000 — Can indicate an internal ECU failure, often pointing to the BCM or OnStar module on this platform.
- P0171/P0174 — If communication with the PCM is intermittent, it can cause fuel trim issues leading to lean codes.
Technical Service Bulletins (TSBs) & Recalls
- GM Bulletin 01-08-42-001G: While not directly for U1000, this bulletin addresses intermittent conditions, including no-starts and electrical fluctuations, related to poor terminal tension at the BCM and other modules, which can be a contributing factor.
- NHTSA Communications related to U1000: General Motors documentation filed with the NHTSA confirms that U1000 on these platforms is a Class 2 (SAE J1850 VPW) fault and that diagnosis requires proving network integrity before replacing parts.
- TSB Bulletin #PIC5460B: A manufacturer service bulletin notes that U1000 codes may be stored in various Class 2 modules due to wiring concerns involving the Class 2 circuit 1807 or Ignition 1 Power Feed circuit 5290.
Platform-Specific Known Issues
- BCM Solder Joint Failure: Owners on forums like TahoeYukonForum and through YouTube videos have documented repairing the BCM by re-soldering the pins where the main wiring harnesses connect to the circuit board. This is a common, low-cost fix for those comfortable with soldering.
- Wiring Chafing Under Driver's Door Sill: Multiple sources point to the wiring harness that runs along the floor under the driver's side plastic door sill trim as a primary culprit. The Class 2 data wire can rub against the metal body, causing a short to ground that brings down the entire network.
- Aftermarket Radio Installation: A user on TahoeYukonForum reported a U1000 code from the Digital Radio Receiver (DDR) after installing an aftermarket stereo. Improperly wiring an aftermarket head unit without the correct data bus adapter is a known cause of network interference.
Mechanic-Grade Diagnostic Values
- Class 2 Data Bus Voltage (J1850 VPW) at DLC Pin 2 — expected: A fluctuating square wave signal toggling between 0V and +7V when viewed on an oscilloscope. The data rate is 10.4 kbps.. Failure: Using a multimeter is not recommended as it only shows a non-diagnostic average voltage. A line stuck at 0V indicates a short to ground. A line stuck high or with spikes approaching 12V indicates a short to power. A missing or malformed square wave indicates a module or wiring fault.
Hidden / Shadow Codes Worth Checking
- U1000 'History' Status: While not a separate code, a professional scanner (like the GM Tech 2) will show if a U-code is 'Active'/'Current' or in 'History'. A history code may have been set by a past, temporary event like a weak battery during cranking. An active code indicates a hard fault is currently present on the network and requires immediate diagnosis. (see via GM Tech 2, Autel high-end scanners, or other professional bidirectional tools that can read manufacturer-specific code status.)
Scan Tool Commands That Help
- GM Tech 2: Module Status / Roll Call — This is a primary step to see which modules are 'Active' (communicating) and which are not. This helps narrow down if the problem is with one specific module or the entire network.
- GM Tech 2 / SPS: BCM Programming / Setup SDM Primary Key in BCM — This is required when a new or used BCM is installed. The BCM must be programmed with the vehicle's VIN and correct RPO codes, and a handshake procedure must be performed with the airbag module (SDM).
- GM Tech 2: 30-Minute Passlock Relearn — After installing a different BCM, the vehicle's anti-theft system will be activated, causing a no-start. This procedure synchronizes the new BCM with the vehicle's ignition and PCM.
Wiring & Ground Locations
- SP205 — Behind the driver's side lower dash panel (knee bolster), above the driver's left knee. It is a black or white plastic connector block where multiple dark green Class 2 data wires are joined by a comb.. This is the central diagnostic point for the Class 2 network. A technician can disconnect the comb to isolate each branch of the network to find the faulty module or shorted wire.
- Frame Grounds (e.g., G103/G104) — Bolted to the outside of the driver-side frame rail, below the driver's door. There are typically two in this area.. These are major chassis ground points and are highly susceptible to rust and corrosion. A poor connection here causes unstable voltage for multiple modules, including the BCM, and is a very common cause of U1000 and other strange electrical issues.
- G201 — Under the driver's side of the dashboard, typically attached to a metal support structure behind the kick panel.. This is a primary interior ground point for several modules and components connected to the BCM.
- Engine/Firewall Ground — A ground strap located on the rear of the driver's side cylinder head, connecting to the firewall.. Ensures a solid ground reference between the engine (and its sensors/PCM) and the chassis/body, which is critical for stable module operation.
- DLC Pin 2 — Pin 2 (typically a purple wire) of the OBD-II Data Link Connector under the driver's side dash.. This is the direct access point for a scan tool and oscilloscope to monitor the health of the entire Class 2 data bus.
Real Owner Repair Stories
- Tahoe Yukon Forum user (GMT800 Truck/SUV) — Weird problems with dash lights and messages, possessed rear wiper, poor fuel mileage.
❌ Tried (didn't work) Not specified, but owner was chasing multiple individual symptoms.
✅ What actually fixed it Found a ground wire that had fallen off its stud on the frame under the driver's side door. Cleaned the frame contact point to bare metal with a Dremel, reattached the ground with a new stainless steel bolt, and coated the connection to prevent future corrosion. This single fix resolved all the erratic electrical issues. - LS1.com / Nick's Electronic Repair (YouTube) (GM Vehicle with BCM issues) — Intermittent loss of radio, power windows, and other interior functions. Functionality was restored by pressing the unlock button or physically manipulating the BCM.
❌ Tried (didn't work) Replacing other components related to the symptoms.
✅ What actually fixed it The owner confirmed a BCM fault by applying physical pressure to the module, which temporarily restored function. The root cause was cracked solder joints on the BCM's main connector pins. The fix was to remove the BCM, open the case, and carefully re-solder the five large pins where the main harness connects to the circuit board. - Reddit user in r/ChevyTrucks (GMT800 Truck) — No communication with multiple modules, various warning lights.
❌ Tried (didn't work) Scanning for codes which only showed a general communication failure.
✅ What actually fixed it The final diagnostic step was to locate the communication splice pack under the dash. After removing the plastic comb, they connected the scan tool's data line to each module's wire one by one. They proceeded by adding one module at a time (PCM, then BCM, etc.) until communication was lost. The module that, when connected, brought the network down was identified as the faulty component.
"I Checked Everything" — The Actual Cause
- The network equivalent of a 'smoke test clean' scenario is when a technician disconnects all modules from Splice Pack SP205, but the data line at the DLC (Pin 2) still shows a short to ground (0 volts). This proves none of the connected modules are at fault. The actual cause is a short in the wiring harness itself, between the splice pack and the DLC, or in another section of the main harness that has chafed against a metal bracket under the dash.
OEM Part Supersession History
15116066→15136225, 15137394, 15198116, 10383536, and others.— Standard part revisions and consolidation by GM over the years.
Heads up: While many numbers are interchangeable for the 2003-2007 classic body style, the BCM must be for the correct vehicle type (SUV/Crew Cab vs. Regular/Extended Cab) as the top connector differs. Crucially, any replacement BCM must be programmed with the vehicle's specific VIN and RPO codes to function.
Model Year Variations Within This Range
- 2003-2006 vs 2002: The 2003 model year marked a significant electrical architecture update for GMT800 trucks. On 2003+ models, functions like power windows and locks are controlled by modules (Driver Door Module, BCM) over the Class 2 data bus. On 1999-2002 models, the master window switch assembly contained its own internal logic and relays. This means a window-related symptom pointing to a data bus issue is more likely on a 2003+ Escalade.
Diagnostic Flowchart
Other Known Issues on This Vehicle
Issues unrelated to this code that are worth knowing about as an owner of this generation:
- Instrument Cluster Gauge Stepper Motor Failure 🟠 Medium → Shop Instrument Cluster — Extremely common. Gauges (speedometer, tachometer, fuel, etc.) will stick, read incorrectly, or stop working entirely. Usually occurs after 50,000 miles. (Ref: GM issued a special coverage adjustment for some vehicles, but it has since expired. The fix is to replace the individual stepper motors on the cluster's circuit board, which requires soldering.)
- Failing Air Ride Suspension Compressor / Leaking Air Shocks 🔴 High — Very common, especially in regions with harsh weather. The compressor fails from age or being overworked by leaking air shocks, causing a 'Service Ride Control' message and a sagging rear suspension. (Ref: No recall, but it's a widely documented failure. The OEM compressor is prone to moisture intrusion and rust.)
- Broken Exhaust Manifold Bolts 🟠 Medium — Common on the 5.3L and 6.0L V8 engines. The rear-most bolts on either side are prone to shearing off due to thermal cycles, causing an exhaust leak (ticking noise) when the engine is cold.
- HVAC Blend Door Actuator Failure 🟡 Low — Common failure. Results in a clicking sound from the dash and an inability to change air temperature or direction (e.g., stuck on hot, or won't switch from vent to defrost).
- Cracked Dashboard 🟡 Low — Extremely common, especially in sun-exposed climates. The top of the dashboard develops cracks, typically around the passenger airbag area and instrument cluster hood.
Used vs. New Parts: Buying Guide for This Vehicle
When a used part is the smart pick: For the Body Control Module (BCM), a used part from a reputable salvage yard can be a cost-effective option, provided you have a way to get it reprogrammed. Other modules like the factory radio, instrument cluster, or door modules are also good candidates for used purchase.
Donor-vehicle mileage cap: roughly under 150000 miles for the part to have meaningful remaining life.
What to inspect on the donor part:
- For a BCM, inspect the module and its connectors for any signs of water damage, such as white or green powdery corrosion. A water-damaged module should be avoided at all costs.
- Ensure the donor vehicle is the same type (e.g., SUV) to ensure physical compatibility of connectors.
- Verify the part number matches one of the known compatible numbers for your vehicle.
OEM-only on this vehicle (don't cheap out):
- While not strictly 'OEM-only', using a genuine ACDelco BCM is highly recommended over aftermarket alternatives to minimize the risk of programming and compatibility issues. The cost savings of an aftermarket BCM can be quickly erased by diagnostic and programming headaches.
Aftermarket brands forum-validated for this vehicle:
- Dorman makes a replacement BCM, but community feedback suggests sticking with OEM/ACDelco if possible.
- For BCM repair, services that re-solder the original board's cracked joints are a well-regarded alternative to replacement.
Brands owners have reported issues with on this vehicle:
- Avoid generic, unbranded electronics, especially data bus interface adapters for aftermarket radios. Use reputable brands like PAC or Axxess that are specifically designed for GM Class 2 systems.
Real Owner Stories
Aggregated from forums and TSBs cited above. Mileages and costs reflect what owners reported in those sources.
2002-2006 Cadillac Escalade
Symptoms: U1000 codes from multiple modules, intermittent no-start condition, and the battery light illuminated on the dash.
What fixed it: The owner had an aftermarket radio installed; the issue required diagnosing network interference related to the radio installation and the Class 2 data circuit.
Source hint: TahoeYukonForum.com - 'U1000 Code - Battery Light On - Intermittent starting Issue'
2002-2006 Cadillac Escalade
Symptoms: Erratic electrical behavior and communication loss traced back to the Body Control Module; suspected cold solder joint failures within the module.
What fixed it: Removing the BCM, opening the case, and re-soldering the pins where the main wiring harnesses connect to the circuit board.
Source hint: TahoeYukonForum.com - 'How to repair a Body Control Module?'
2002-2006 Cadillac Escalade
Symptoms: U1000 code caused by the Digital Radio Receiver (DDR) after an aftermarket stereo was installed.
What fixed it: Addressing improper wiring of the aftermarket head unit that lacked the correct data bus adapter.
Source hint: Vehicle-specific issues: Aftermarket Radio Installation
Related OBD-II Codes
Frequently Asked Questions
Where is the Class 2 data wire most likely to short out on my 2002-2006 Escalade?
Can I fix the Body Control Module (BCM) on my Escalade without buying a new one?
Does GM Bulletin 01-08-42-001G apply to the electrical issues I'm seeing with code U1000?
How can I use Splice Pack SP205 to diagnose which module is causing the U1000 code?
Why did my 'Service Ride Control' and ABS lights come on at the same time as the U1000 code?
Could my new aftermarket radio be the reason for the U1000 code and battery light?
Helpful Videos


We Have This Part in Stock

The information in this article is provided for general reference and educational purposes only. Vehicle specifications, procedures, and part compatibility can vary by production date, trim level, and region. Always consult your vehicle's factory service manual and verify part numbers before purchasing or performing repairs. Safety-critical components such as airbags, seat belts, and braking systems should be installed by a qualified professional.
- Cadillac Escalade:
- 🧭 Diagnostic Flowchart
- 🎬 Helpful Videos
- 🛍️ Shop This Part
- What's Unique About the 2002-2006 Cadillac Escalade
- Symptoms You May Notice
- Most Likely Causes
- Rare But Worth Checking
- Diagnosis Steps
- Parts You'll Likely Need
- Related Codes That Often Appear With This One
- Technical Service Bulletins (TSBs) & Recalls
- Platform-Specific Known Issues
- Mechanic-Grade Diagnostic Values
- Hidden / Shadow Codes Worth Checking
- Scan Tool Commands That Help
- Wiring & Ground Locations
- Real Owner Repair Stories
- "I Checked Everything" — The Actual Cause
- OEM Part Supersession History
- Model Year Variations Within This Range
- Other Known Issues on This Vehicle
- Used vs. New Parts: Buying Guide for This Vehicle
- Real Owner Stories
- 2002-2006 Cadillac Escalade
- 2002-2006 Cadillac Escalade
- 2002-2006 Cadillac Escalade
- Related OBD-II Codes
- Frequently Asked Questions
- 🎟️ Get 5% Off