
U1000 on 2004-2012 Chevrolet Colorado: Class 2 Communication Fault Causes and Fixes
On a first-generation Chevy Colorado, code U1000 is almost always caused by corroded ground connections, specifically the under-hood ground splice packs (SP105 and SP106). These poorly sealed connectors are a notorious failure point. Cleaning these grounds with a 10mm socket and basic supplies is a low-cost, high-success repair that resolves a host of electrical gremlins.
- U1000 on your Colorado is an electrical communication problem, not a mechanical one.
- Before paying for any diagnostic work, inspect and clean the two main ground splice packs under the hood (SP105 and SP106). This is the most likely fix and costs almost nothing.
- Also check and clean the main ground point on the firewall (G103).
- If you have an aftermarket radio or remote start, it is a primary suspect. Disconnect it to see if the problem goes away.
- Do not replace expensive computers like the BCM or ECM until all wiring, ground, and splice pack issues have been completely ruled out.
What's Unique About the 2004-2012 Chevrolet Colorado
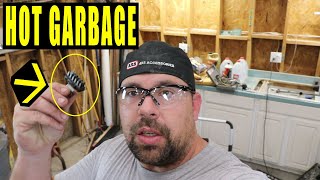
The first-generation Colorado (and its twin, the GMC Canyon) is known for having specific electrical weak points that directly lead to the U1000 code. Unlike other vehicles where this code can be ambiguous, on this truck the fault is very frequently traced back to corrosion in two main ground splice packs located under the hood, SP105 and SP106. These poorly sealed connectors, described by owners as 'hot garbage', gather moisture over time, creating resistance and electrical noise that disrupts the sensitive Class 2 network, causing a cascade of communication errors.
Generation note: This guide covers the entire first generation of the Chevrolet Colorado (2004-2012) and its platform mates (GMC Canyon, Hummer H3, Isuzu i-Series). The electrical architecture and known ground issues are consistent across this generation.
Symptoms You May Notice
- Check Engine Light is on
- ABS, Brake, or Airbag warning lights are illuminated
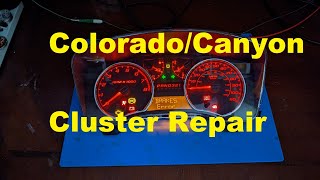
- Gauges (speedometer, tachometer, fuel, temp) work intermittently or not at all 🎬 Watch: How to fix a failing instrument cluster
- Radio, HVAC controls, or power windows stop working
- Scan tool fails to communicate with one or more modules
- Security light may flash, potentially leading to a no-start condition
- Inaccurate fuel gauge reading
- Blower fan for climate control works only on high or not at all
- Replacing the ECM or BCM without first exhaustively checking all grounds and splice packs. These modules are expensive and are rarely the root cause compared to the wiring and ground issues.
Most Likely Causes
- Corroded Under-Hood Ground Splice Packs (SP105 & SP106) 🔴 High Probability These splice packs are poorly sealed from the factory and are located in areas prone to moisture, leading to internal corrosion that creates poor ground connections for multiple critical systems. They are a well-documented, primary cause of electrical issues on this platform.
How to confirm: Locate SP105 on the driver's side inner fender, near the battery and behind the ABS module. Locate SP106 on the passenger's side inner fender, behind the air filter box. Unbolt them from the fender (10mm bolt), remove the plastic 'comb' cover, and inspect the terminals inside for green or white corrosion.
Typical fix: Disassemble the splice pack, thoroughly clean all wire terminals and the main bolt with a wire brush, sand the mounting point on the fender to bare metal, apply dielectric grease, and reassemble securely. A popular permanent fix is to cut the splice pack off entirely, crimp or solder all the black wires into a single high-quality ring terminal, and bolt it directly to the cleaned fender surface. 🎬 Watch: How to repair and clean these ground splice packs
Est. part cost: $0-$15 for cleaning supplies or a new ring terminal. - Poor Main Ground Connection (G103) 🟡 Medium Probability This ground point is critical as it serves the BCM, Instrument Cluster, Radio, and the Data Link (OBD-II) Port itself. 🎬 See this step-by-step walkthrough of Colorado ground fixes Corrosion here can directly impact the Class 2 network and mimic a module failure.
How to confirm: Locate ground G103 on the cowl in the left rear of the engine compartment, often near or above the brake booster. Check for rust or looseness.
Typical fix: Unbolt the ground wires, clean the contact surfaces on the terminals and the vehicle body to bare metal, and re-secure the connection tightly. Using a star washer can improve the connection.
Est. part cost: $0-$5 for cleaning supplies. - Aftermarket Electronics Interference 🟡 Medium Probability Aftermarket stereos, remote starters, or alarms are often improperly tapped into the Class 2 data wire (a Dark Purple wire in the radio harness) to get signals, which can corrupt the entire network.
How to confirm: Inspect the wiring behind the radio and under the dash for any non-factory wiring, T-taps, or scotch-lok connectors on the factory harness, specifically on the Dark Purple wire.
Typical fix: Completely disconnect any aftermarket devices from the vehicle's wiring harness and see if the U1000 code resolves. If it does, the aftermarket device or its installation method is the problem.
Est. part cost: $0 - Weak or Failing Battery ⚪ Low Probability → Shop Vehicle Battery
How to confirm: Test the battery voltage with the engine off (should be ~12.4-12.6V) and with the engine running (should be ~13.7-14.7V). A voltage drop during startup is enough to trigger communication codes. A load test at an auto parts store is the most definitive test.
Typical fix: Replace the battery if it fails a load test or cannot hold a proper charge.
Est. part cost: $150-$250
Rare But Worth Checking
- Failed Body Control Module (BCM): → Shop Body Control Module The BCM can fail, especially due to water damage. On the related Hummer H3 and other GM vehicles with sunroofs, clogged sunroof drains are known to drip directly onto the BCM, causing corrosion and failure. Diagnosis involves ruling out all ground and wiring issues first. Replacement requires programming to the vehicle's VIN.
- Damaged Wiring Harness: The single Class 2 data wire (Dark Purple) can get chafed or broken, especially where the harness passes through the firewall or near sharp metal edges. A manufacturer service bulletin for other GM models, Bulletin #GCUS-3-423, notes that a U1000 can be stored during a crank/no-start event due to harness issues, requiring a revision of the engine harness.
Diagnosis Steps
- Verify Battery Health: Ensure the battery has at least 12.4V with the engine off and that the charging system is working correctly. Clean any corrosion from the battery terminals.
- Inspect Ground Splice Pack SP106 (Passenger Side): Disconnect the negative battery terminal. Remove the air filter box to access SP106, bolted to the inner fender with a 10mm bolt. Disassemble and thoroughly clean the terminals and bolt. Sand the fender contact point to bare metal. Reassemble securely.
- Inspect Ground Splice Pack SP105 (Driver Side): Remove the battery and battery tray to access SP105, bolted to the inner fender behind the ABS module with a 10mm bolt. Disassemble and thoroughly clean the terminals and bolt. Sand the fender contact point. Reassemble securely.
- Inspect Ground G103: Locate G103 on the firewall above the brake booster. Remove the bolt, clean all contact surfaces to bare metal, and re-secure tightly.
- Check for Aftermarket Devices: Inspect wiring behind the radio and under the driver's dash. Temporarily disconnect any aftermarket alarms, stereos, or remote starters.
- Clear Codes and Test Drive: Reconnect the battery, clear all DTCs with a scan tool, and drive the vehicle to see if the U1000 code returns.
- Advanced Diagnosis (Professional): If the code returns, the next step is to access the Class 2 data splice pack (SP205, typically under the driver's side dash near the steering column) to test the data line from each module individually to find the source of the network failure.
Parts You'll Likely Need
- Ground Wiring Repair Supplies — The most common fix involves cleaning or repairing existing ground connections, not replacing a specific component. Supplies include sandpaper, wire brushes, dielectric grease, and optionally, a ring terminal.
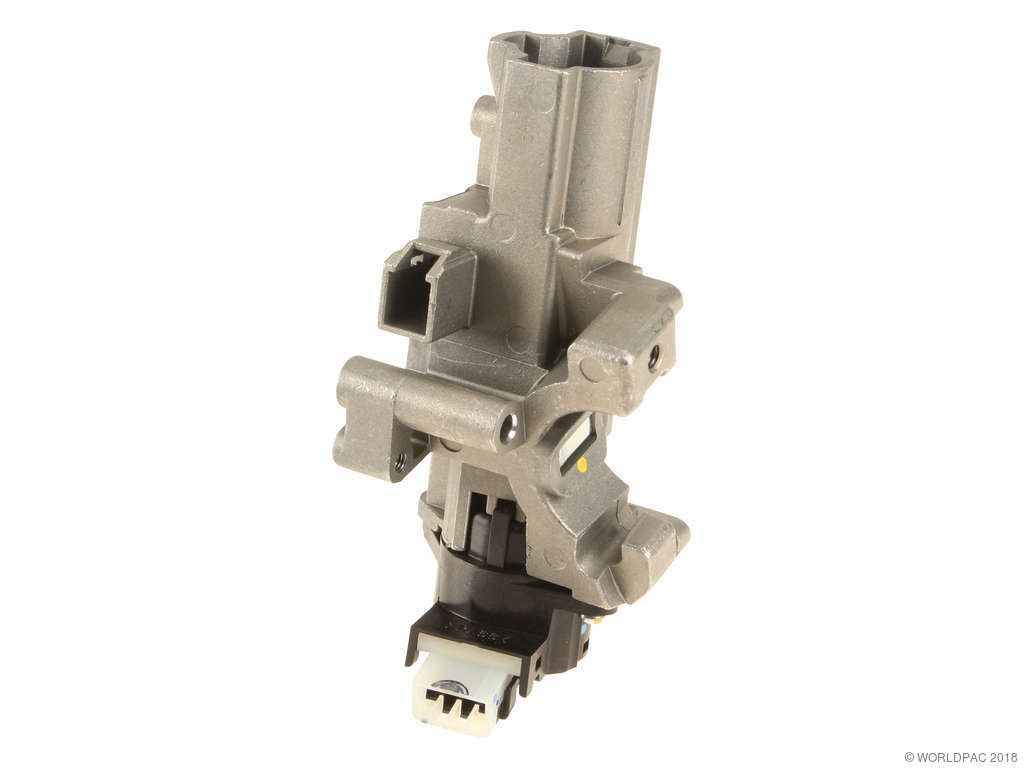
Aftermarket price range: $5-$20 - Ignition Lock Cylinder Housing
(OEM #ACDelco D1493G)— This part is not for the U1000 code itself, but is the primary fix for the very common Passlock anti-theft issue (Code B3060) that often occurs on these trucks and involves similar electrical systems.
Trusted brands: ACDelco
OEM price range: $60-$100
Aftermarket price range: $40-$80
Related Codes That Often Appear With This One
- U10xx (e.g., U1016, U1041, U1064) — These are 'Loss of Communication' with specific modules (like the ECM, BCM, or ABS module). U1000 is the general code indicating a network problem, while the other U-codes point to which modules are not responding.
Technical Service Bulletins (TSBs) & Recalls
- Safety Recall 09049: While not for U1000, this recall for a faulty brake lamp switch on 2004-2009 models highlights the platform's susceptibility to electrical component failures that can affect network-connected systems like cruise control.
- Bulletin #PIC3557: This manufacturer bulletin provides preliminary information regarding Class 2 communication diagnostics, advising technicians that a U1000 code may not always lead directly to a final repair and should sometimes be disregarded if set as a history code.
- Bulletin #PIT5369A: Notes that vehicles may experience a crank no-start issue after sitting overnight below freezing, where a technician may find code U1000 and must gain access to the engine harness above the fuel rail to unsecure it from retainers.
- Bulletin #PIT5369: Describes a condition where the Service Engine Soon lamp illuminates and codes U0100 and U1000 are found in multiple high-speed modules, sometimes accompanied by BCM codes B2190 or B2193.
Platform-Specific Known Issues
- The ground splice packs SP105 and SP106 are a well-documented failure point on this platform, causing a wide variety of seemingly unrelated electrical issues, with U1000 being a common symptom.
Mechanic-Grade Diagnostic Values
- Class 2 Data Line Voltage (Pin 2 at DLC) — expected: A toggling square wave between approximately 0V (inactive) and 7V (active).. Failure: A flat line at 0V indicates a short to ground. A steady voltage (e.g., 5V, 10V, or battery voltage) indicates a short to power, often from an internally failed module.
- Class 2 Data Line Resistance — expected: There is no standardized resistance (Ohm) test for the single-wire Class 2 network, unlike the 60Ω test for modern CAN bus systems.. Failure: N/A. Diagnosis is based on voltage, not resistance.
Hidden / Shadow Codes Worth Checking
- History U-Codes (e.g., U1041, U1064): While U1000 is the general fault, a professional scan tool can often pull historical 'loss of communication' codes with specific modules (U1041 for EBCM, U1064 for BCM, etc.). These act as shadow codes, pointing to the module that first dropped off the network or is causing the disruption. (see via A GM Tech 2 or equivalent professional-grade scan tool that can access history data from all vehicle modules.)
Scan Tool Commands That Help
- GM Tech 2: Module Roll-Call / Network Health Test — Use this function first to get a list of all modules on the network and see which ones are not responding. This helps narrow down the search.
- GM Tech 2: Class 2 Message Monitor — After identifying a network issue, this function allows a technician to see the data messages from each module in real-time to determine which module is silent or sending corrupt data.
- GM Tech 2 / SPS Subscription: BCM Programming / RPO Configuration — This is required after replacing the Body Control Module (BCM). The new or used module must be programmed with the vehicle's VIN and specific options (RPOs) to function correctly and communicate with other modules.
Wiring & Ground Locations
- SP205 — The primary interior Class 2 data bus splice pack. Located under the driver's side dashboard, typically above the driver's left knee. The lower dash panel or knee bolster may need to be removed for access.. This is the most critical diagnostic point after checking grounds. By removing the 'comb' from this pack, a technician can isolate each module's data wire to test for shorts or voltage individually, pinpointing a faulty module or wire branch without guesswork.
- G103 — On the cowl/firewall in the left rear of the engine compartment, near the brake booster.. Provides a key ground path for the BCM, Instrument Cluster, and the OBD-II port itself. Corrosion here can prevent a scan tool from communicating.
- G105 / SP105 — Ground point on the driver's side inner fender, near the EBCM (ABS module). This is the mounting bolt for the SP105 ground splice pack.. This is one of the two most common failure points. It grounds multiple components, and corrosion here is a primary cause of the U1000 code.
- DLC Pin 2 — Pin 2 of the 16-pin OBD-II Data Link Connector under the driver's side dash.. This is the terminal for the Class 2 Serial Data line. It's where a scan tool communicates with the network and where a technician can test the voltage of the entire bus.
Real Owner Repair Stories
- YouTube user 'sps S' (2007 Chevy Colorado) — Dash lights went off, gauges went dead, heater fan quit, 'BRAKES' error message flashing. Truck would not restart.
❌ Tried (didn't work) Initial attempts to restart failed. Plugging in a code reader temporarily made the dash work, but no codes were stored.
✅ What actually fixed it The owner cleaned both under-hood ground splice packs (SP105 and SP106), which were corroded. They also added an extra ground wire connecting both splice points back to the main body ground for the battery. This resolved all issues. - iATN Repair Forum Case Study (2006 Chevrolet Silverado (similar Class 2 network)) — No communication with scan tool, instrument cluster dead.
❌ Tried (didn't work) A simple scan was impossible as the network was down.
✅ What actually fixed it A technician diagnosed a flat-lined 5V on the data bus. Using splice pack SP205, they isolated each circuit and found one wire (Pin K) was shorted to 11V. This wire was traced to the Generator Battery Control Module. Unplugging the faulty module restored communication to the rest of the network. The root cause was a failed module dragging the entire bus down. - YouTube user 'Automotive Diagnostics and Programming' (2012 Chevy Colorado) — Crank, no start condition after a repair shop installed a used Body Control Module (BCM).
❌ Tried (didn't work) Standard BCM programming using the GM SPS (Service Programming System) failed repeatedly.
✅ What actually fixed it The technician physically removed the EEPROM chip from the original (failed) BCM and the used replacement BCM. They then cloned the data from the original chip directly onto the replacement's chip. After reinstalling the cloned chip into the used BCM, the truck started and functioned normally, bypassing the failed software programming. - NHTSA ODI #11244385 — An owner reported that their vehicle would throw codes P0700, U0073, and U1000, resulting in a loss of engine power. The Stabilitrak and Check Engine lights would illuminate, and the vehicle would buck while the odometer, RPM gauge, and temperature gauges malfunctioned.
When the Usual Fixes Don't Work
- While the vast majority of U1000 codes on this platform are fixed by cleaning the under-hood ground splice packs (SP105/SP106), there are documented cases where this does not solve the problem. In one such case on a similar GM truck, the grounds were fine, but the Class 2 data line was being held at a constant 11 volts. A technician used the interior splice pack (SP205) to disconnect modules one by one from the network. They discovered the source of the voltage was an internally shorted Generator Battery Control Module. Replacing that module, not the BCM or cleaning grounds, was the correct fix. This proves that if cleaning grounds doesn't work, the next step is methodical electrical testing of the data bus, not just replacing parts.
OEM Part Supersession History
Various BCM Part Numbers→Various BCM Part Numbers— Standard part evolution and updates.
Heads up: Direct cross-compatibility is less of an issue than programming. Any replacement BCM (new or used) MUST be programmed to the vehicle's VIN. Crucially, installing a used BCM from a higher-mileage truck will PERMANENTLY write the higher mileage to your instrument cluster. In cases where software programming fails, physical EEPROM chip cloning from the old module to the used one is a known master-level fix.
Model Year Variations Within This Range
- 2004-2012: The fundamental electrical architecture, including the Class 2 data network, the location of the problematic SP105/SP106 ground packs, and the diagnostic procedure for a U1000 code, remained consistent throughout the entire first generation. No significant model-year variations are known to affect this specific fault.
Diagnostic Flowchart
Other Known Issues on This Vehicle
Issues unrelated to this code that are worth knowing about as an owner of this generation:
- Passlock Anti-Theft System Failure 🔴 High — Very common. The sensor in the ignition lock cylinder housing wears out, causing intermittent crank-no-start conditions and a flashing security light.
- Blower Motor Resistor and Connector Failure 🟠 Medium — Extremely common. The blower fan only works on high speed or not at all. This is caused by a failed resistor and often a melted connector, sometimes exacerbated by poor grounding at SP106.
- Cracked Exhaust Manifold (5-Cylinder Engines) 🟠 Medium — A known issue on the 3.5L and 3.7L inline-5 engines, causing an exhaust leak noise (ticking) when cold that may disappear as the engine warms up.
- Premature Valve Seat Wear (3.5L Engine) 🔴 High — An issue on early 3.5L L52 engines where valve seats wear prematurely, causing low compression, misfires, and rough running. The fix often requires cylinder head replacement or repair.
- Faulty Fuel Level Sensor 🟡 Low — Commonly occurs, causing the fuel gauge to read inaccurately, especially when below a quarter tank. The vehicle may run out of gas while the gauge still shows fuel. Requires replacing the sensor inside the fuel tank.
Used vs. New Parts: Buying Guide for This Vehicle
When a used part is the smart pick: A used Body Control Module (BCM) from a junkyard or online seller is a smart, cost-effective choice, often saving hundreds of dollars compared to a new unit. However, it is absolutely not a plug-and-play part.
Donor-vehicle mileage cap: roughly under 250000 miles for the part to have meaningful remaining life.
What to inspect on the donor part:
- CRITICAL: Ask for the VIN and mileage of the donor vehicle. Prioritize a BCM from a truck with mileage equal to or LOWER than your own. A higher mileage unit will permanently increase your truck's odometer reading.
- Visually inspect the BCM and its connectors for any signs of white or green corrosion, which indicates water damage.
- If possible, confirm the donor vehicle did not have a sunroof, as this reduces the risk of water damage.
- Ensure the part number on the used BCM matches your original BCM exactly.
OEM-only on this vehicle (don't cheap out):
- Body Control Module (BCM): There are no reliable aftermarket BCMs. The choice is between a new OEM part or a used OEM part.
- Ignition Lock Cylinder: While not a direct U1000 fix, for related Passlock security issues, ACDelco (OEM) parts are strongly recommended for reliability.
Brands owners have reported issues with on this vehicle:
- Avoid any seller of used BCMs who claims it is 'plug and play' or does not require programming. This is false for this vehicle generation.
Real Owner Stories
Aggregated from forums and TSBs cited above. Mileages and costs reflect what owners reported in those sources.
2004-2012 Chevrolet Colorado
Symptoms: Gauges (speedometer, tachometer, fuel, temp) work intermittently or not at all; ABS, Brake, or Airbag warning lights are illuminated; Check Engine Light is on.
What fixed it: Located SP105 and SP106 ground splice packs, disassembled them, cleaned the terminals and bolts with a wire brush, sanded the fender mounting points to bare metal, and reassembled with dielectric grease.
Source hint: 355Nation: "HOW TO: Fix your ground packs"
Related OBD-II Codes
Frequently Asked Questions
Does Safety Recall 09049 for the brake lamp switch on my 2004-2009 Colorado relate to the U1000 code?
Where are the ground splice packs located on my 2004-2012 Colorado?
Why is my fuel gauge acting up and my blower fan only working on high along with the U1000 code?
Can an aftermarket radio cause a U1000 code in my Colorado?
Is there a permanent fix for the corroded ground packs instead of just cleaning them?
My security light is flashing and the truck won't start; is this part of the U1000 issue?
Helpful Videos

We Have This Part in Stock


The information in this article is provided for general reference and educational purposes only. Vehicle specifications, procedures, and part compatibility can vary by production date, trim level, and region. Always consult your vehicle's factory service manual and verify part numbers before purchasing or performing repairs. Safety-critical components such as airbags, seat belts, and braking systems should be installed by a qualified professional.
- Chevrolet Colorado:
- 🧭 Diagnostic Flowchart
- 🎬 Helpful Videos
- 🛍️ Shop This Part
- What's Unique About the 2004-2012 Chevrolet Colorado
- Symptoms You May Notice
- Most Likely Causes
- Rare But Worth Checking
- Diagnosis Steps
- Parts You'll Likely Need
- Related Codes That Often Appear With This One
- Technical Service Bulletins (TSBs) & Recalls
- Platform-Specific Known Issues
- Mechanic-Grade Diagnostic Values
- Hidden / Shadow Codes Worth Checking
- Scan Tool Commands That Help
- Wiring & Ground Locations
- Real Owner Repair Stories
- When the Usual Fixes Don't Work
- OEM Part Supersession History
- Model Year Variations Within This Range
- Other Known Issues on This Vehicle
- Used vs. New Parts: Buying Guide for This Vehicle
- Real Owner Stories
- 2004-2012 Chevrolet Colorado
- Related OBD-II Codes
- Frequently Asked Questions
- 🎟️ Get 5% Off