
U1000 on 2000-2006 Chevrolet Tahoe: Causes and Fixes for Class 2 Communication Failure
On a 2000-2006 Tahoe, code U1000 almost always points to a bad ground connection, a damaged wire, or an issue with an aftermarket stereo. Before replacing any expensive parts, inspect and clean all major ground straps, particularly the engine-to-firewall and battery-to-chassis grounds. Also, check the wiring harness under the hood for damage, as this is a common failure point.
- U1000 on a 2000-2006 Tahoe means there's a communication breakdown on the vehicle's internal network.
- The most likely causes are simple and cheap to fix: bad ground straps, a weak battery, or a damaged wire. Check these first.
- Improperly installed aftermarket stereos are a major cause of this code. If you have one, it's the first thing to suspect.
- Do not replace expensive computers like the ECM or BCM until all wiring, grounds, and the battery have been professionally tested and ruled out.
- This is a difficult code to diagnose at home without a high-end scan tool and electrical knowledge; professional diagnosis is recommended.
What's Unique About the 2000-2006 Chevrolet Tahoe
The 2000-2006 Tahoe belongs to the GMT800 platform, which is well-known for specific electrical vulnerabilities. Unlike modern vehicles with more robust CAN bus networks, the Tahoe's single-wire Class 2 data bus is sensitive; a single corroded ground or a chafed wire can cause widespread, difficult-to-diagnose problems. Owner experiences overwhelmingly point to these physical wiring and grounding issues as the root cause, rather than the failure of expensive computer modules. Key ground locations known to cause issues are on the frame under the driver's door, on the engine block, and from the firewall to the engine.
Symptoms You May Notice
- Engine will not start or has an intermittent no-start condition.
- Engine stumbles or runs rough immediately after starting.
- Multiple warning lights on the dashboard, such as the Check Engine, ABS, Battery, or Security light.
- Gauges behaving erratically or not working at all (especially the fuel gauge reading empty).
- Loss of function in systems like the radio, HVAC controls, or power windows.
- Scan tool cannot communicate with one or more modules.
- "Service 4WD" or other messages appearing on the Driver Information Center (DIC).
- Replacing the Engine Control Module (ECM) or other expensive modules before thoroughly checking all grounds and wiring. A wiring or ground fault is far more likely on this platform.
- Replacing the BCM without first ruling out all wiring, ground, and aftermarket accessory issues. A BCM is expensive and requires programming.
Most Likely Causes
- Corroded or Loose Ground Wires 🔴 High Probability The GMT800 platform is notorious for having ground points that are susceptible to corrosion, especially the main engine-to-firewall strap, battery-to-chassis grounds, and grounds located on the frame rail under the driver's side door.
How to confirm: Visually inspect the main ground straps. Key locations include: G104 (left rear of engine block), G105 (lower left front of engine block), G100 (on left front body mount), and grounds on the frame rail. 🎬 Watch: How to locate and clean these critical grounds Look for fraying, looseness, or corrosion. Use a multimeter to check for high resistance between the engine block and the negative battery terminal.
Typical fix: Remove, clean all contact surfaces to bare metal, and securely re-attach the ground connections. If a strap is heavily corroded or frayed, replace it. Many owners recommend adding redundant ground straps.
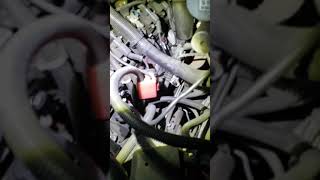
Est. part cost: $10-$40 - Damaged Class 2 Data Wire 🟡 Medium Probability The main wiring harness that passes under the underhood fuse block is a known chafe point where the Class 2 data wire (typically a tan or dark green wire on Pin 2 of the OBD-II port 🎬 See: GM Class 2 data line diagnostic walkthrough) can rub through and short to ground or another wire. Manufacturer TSB Bulletin #GCUS-3-423 notes that during a crank/no-start event, a malfunction indicator lamp will illuminate and the vehicle will store U1000, requiring a harness revision. Similarly, TSB Bulletin #PIT5369A describes a crank no-start issue after sitting overnight below freezing where the technician must unsecure the engine harness from its retainers to address the fault.
How to confirm: Visually inspect the wiring harness under and around the underhood fuse block. Also, check the wiring going to the OBD-II port and any harnesses passing through the firewall. A technician can test for a short to ground or power on Pin 2 of the OBD-II port.
Typical fix: Repair the damaged section of the wire using a quality butt connector and heat shrink tubing. Reroute the harness slightly or add protective loom to prevent future chafing.
Est. part cost: $5-$20 - Improperly Installed Aftermarket Electronics 🟡 Medium Probability Installing an aftermarket stereo without the correct data bus interface adapter (e.g., from PAC or Axxess) is a very common cause. Splicing directly into the Class 2 data wire can disrupt the entire network and cause a flood of U-codes.
How to confirm: If you have an aftermarket stereo, remote starter, or alarm, temporarily disconnect its power and data connections completely. Clear the codes and see if the U1000 code returns. If it doesn't, the aftermarket device or its wiring is the problem.
Typical fix: Reinstall the device using the correct, high-quality data bus interface adapter or remove the device entirely. Ensure no factory wires were permanently damaged.
Est. part cost: $50-$150 - Weak or Failing Battery ⚪ Low Probability → Shop Vehicle Battery Low voltage during cranking can cause modules to fail their power-on self-tests and lose communication, triggering a U1000 code. While not specific to the Tahoe, it's a frequent and simple-to-fix cause.
How to confirm: Test the battery voltage with the vehicle off (should be ~12.4-12.6V) and while running (should be ~13.7-14.7V). A simple load test at an auto parts store can confirm a weak battery.
Typical fix: Replace the vehicle's battery.
Est. part cost: $150-$250
Rare But Worth Checking
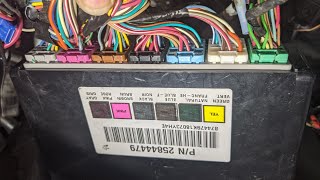
- Failed Body Control Module (BCM): → Shop Body Control Module The BCM acts as a central hub for the Class 2 network. If all wiring and grounds are confirmed to be good, and multiple unrelated systems are acting up (e.g., random security light, interior lights flickering, no-start), the BCM itself may have an internal failure. TSB Bulletin #PIT5369 notes that the Service Engine Soon lamp may illuminate with U1000 stored in multiple high-speed modules and the BCM. Replacement requires programming to the vehicle's VIN. 🎬 Watch: How to replace and program a GM BCM
- Failed Ignition Switch: → Shop Ignition Switch A failing ignition switch can cause intermittent power loss to various modules, leading to communication dropouts and a U1000 code. This may be suspected if problems are most noticeable during startup or when wiggling the key.
- Failed Instrument Panel Cluster (IPC): → Shop Instrument Cluster The IPC is an active module on the data bus. Internal failures, such as bad solder joints or silver migration on the circuit board, can cause it to disrupt network communication. This is a very common issue on GMT800 trucks, often presenting with erratic gauges.
Technical Service Bulletins (TSBs) & Recalls
Manufacturer service bulletins provide critical diagnostic context for this code. TSB Bulletin #PIC3557 advises technicians that diagnosing a Class 2 communications U1000 code may not always lead to a final repair and suggests that in some specific diagnostic scenarios, the code may need to be disregarded if it is not currently active or causing symptoms.
Diagnosis Steps
- Check Battery Health: Ensure the battery is fully charged and passes a load test. A weak battery is a simple but common cause of communication errors.
- Perform a Full System Scan: Use a scan tool capable of reading manufacturer-specific codes from all modules (BCM, TCM, ABS, etc.). Note which modules are not communicating or are storing a U1000 code.
- Inspect All Grounds: This is the most critical step. Locate, remove, and clean the main battery-to-chassis ground, the engine block-to-firewall ground strap (often braided), and the grounds on the frame rail under the driver's door. Ensure all connections are bare metal and tight. A forum user on TahoeYukonForum.com noted that cleaning a single corroded ground on the frame solved numerous electrical issues.
- Disconnect Aftermarket Devices: If any aftermarket stereos, alarms, or remote starters are installed, disconnect them completely and see if communication is restored.
- Inspect Wiring Harnesses: Carefully inspect the wiring harness that runs under the underhood fuse box for any signs of chafing or damage. Also check the harness going to the OBD-II port and any modules located in areas prone to moisture or damage.
- Isolate Modules: If the problem persists, begin unplugging modules one at a time from the Class 2 network. Start with non-essential modules like the radio or HVAC. After unplugging each one, clear the codes and see if communication with the other modules is restored. The last module unplugged before communication returns is likely the faulty one.
- Test the Data Line: With a multimeter, a technician can check the voltage on the Class 2 data line (Pin 2 of the OBD-II port). It should show a fluctuating voltage between 0-7V. A steady high voltage or a short to ground indicates a wiring problem.
Parts You'll Likely Need
- Braided Ground Strap
(OEM #ACDelco 19353372 (example, verify by application))— The original engine and body grounds are unshielded and prone to corrosion, causing high resistance that disrupts module communication. - Body Control Module (BCM)
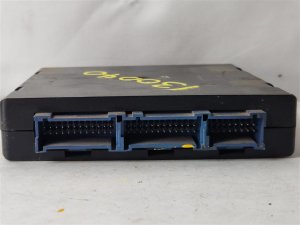
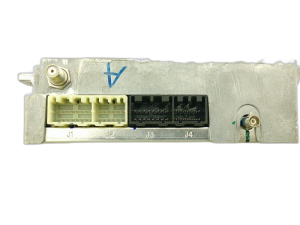
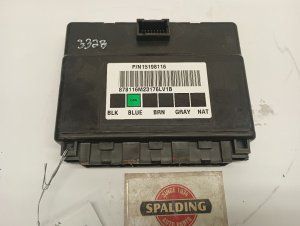
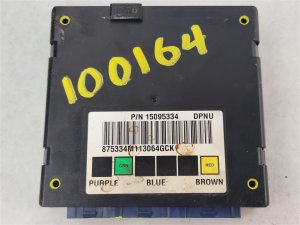
(OEM #15198115 (example, verify by VIN))— The BCM is the central hub for the Class 2 network. Internal failures can bring down the entire bus. It is a common failure point after all wiring and grounds have been verified as good. - Aftermarket Radio Interface Adapter
(OEM #PAC RP5-GM11 (example))— Required to allow an aftermarket stereo to communicate properly with the vehicle's Class 2 data bus. Improper installation or a cheap, non-compliant adapter is a very frequent cause of U1000 codes.
Related Codes That Often Appear With This One
- U1001-U1255 — These are also Class 2 communication codes. Seeing other U-codes, like U1016 (Lost Communication with PCM) or U1064 (Lost Communication with BCM), can help a technician narrow down which module is failing to communicate or where the network fault might be.
- B-series or C-series codes — If a specific module like the Airbag (SRS) or Anti-lock Brake (ABS) module is setting a U1000 code, it will often be accompanied by other codes specific to that module's function, pointing you toward the problem area.
- P0463 — This code for 'Fuel Level Sensor Circuit High Input' is often seen alongside U1000 when the fuel gauge reads erratically. This can be caused by a failing fuel sending unit in the tank or a faulty instrument cluster, both of which are common GMT800 issues.
Mechanic-Grade Diagnostic Values
- Class 2 Data Line (Pin 2 at DLC) Voltage — expected: Fluctuating between 0V and +7V during normal communication.. Failure: A steady voltage (e.g., stuck at 0V or 12V) or no voltage indicates a short to ground, short to power, or an open circuit.
- Class 2 Data Line (Pin 2 at DLC) Resistance to Ground — expected: High resistance (kilo-ohms or mega-ohms).. Failure: Low resistance (a few ohms or less) indicates a short to ground in the wiring or a faulty module.
- Battery Voltage during SPS Programming (with Tech II) — expected: Stable between 12.5V and 14V.. Failure: Voltage dropping below 12.5V can cause programming failure of a new module, leading to persistent communication codes.
Scan Tool Commands That Help
- Tech II: Module 'Ping' or 'Roll Call' — To see a list of all modules on the Class 2 network and identify which ones are actively communicating and which are offline. This is a primary step in isolating the source of the U1000 code.
- Tech II: View DTCs by Module — To check which specific module is setting the U1000 code. Often, multiple modules will report a U1000, but seeing if one module has additional, specific codes can point to the root cause.
- Tech II: BCM Programming / VIN Relearn — This is required after replacing the Body Control Module (BCM). A new or used BCM must be programmed with the vehicle's VIN and options to function and communicate correctly with other modules.
Wiring & Ground Locations
- SP205 (Splice Pack 205) — Located in the instrument panel harness, above the driver's left knee, usually accessible after removing the lower dash hush panel/knee bolster.. This is a major junction point where the Class 2 data wires from many different modules meet. Corrosion or a poor connection inside this splice pack can take down the entire network, causing a U1000 code in multiple modules.
- G103 / G104 — G103 is on the rear of the left cylinder head. G104 is on the left rear of the engine block. These are primary engine-to-chassis grounds.. A poor ground connection at these points can cause a voltage differential between modules, disrupting the sensitive Class 2 communication and triggering U1000 codes.
- G201 — Located on the left side of the instrument panel support, typically behind the driver's side kick panel.. This is a primary interior ground point for several modules, including the BCM and Instrument Panel Cluster. Corrosion here is a common cause of intermittent electrical issues and communication faults.
- Trailer Harness Connector — At the rear of the vehicle, near the trailer hitch.. The factory trailer harness wiring includes a connection to the Class 2 data bus. Corrosion inside the trailer connector or damage to the harness can short the data line, causing a U1000 code.
Real Owner Repair Stories
- GMTNation Forum User (2005 Chevrolet Trailblazer (similar GMT platform)) — No start, no crank, multiple U1000 codes, scan tool would not communicate.
❌ Tried (didn't work) Jumping starter relay (engine would turn over but not start).
✅ What actually fixed it The user isolated the fault to a short in the Class 2 network between Splice Pack SP205 (under dash) and SP306 (under right rear seat). The wire was shorted to ground, and repairing the wire restored all communication. - Reddit user in r/GMT800 (2006 Yukon Denali) — A flood of codes appeared at once, including U1000, U1305, U1016, U1064, and various B and P codes. Dash displayed "Service Ride Control" and "Service Stability".
❌ Tried (didn't work) Initial scanning showed communication loss with multiple modules.
✅ What actually fixed it The problem was an aftermarket trailer brake controller that had failed internally and was disrupting the Class 2 data bus. Unplugging the brake controller resolved all the communication codes instantly. - Chevrolet Forum User (2001 Suburban 2500) — Tech II scanner would not connect to the vehicle, reporting "no connection". Other, simpler scanners could connect.
❌ Tried (didn't work) Tearing apart the dash for 10 hours searching for SP205 based on service manual information that was incorrect for the specific model year.
✅ What actually fixed it The problem was not resolved in the thread, but highlights a critical diagnostic challenge: the documented location of SP205 in Alldata was incorrect for this vehicle, preventing the user from performing the necessary module isolation steps. This emphasizes the need to physically trace wires from the DLC if a component cannot be found. - NHTSA Owner Report (NHTSA ODI #11244385) — An owner reported that the vehicle would throw codes P0700, U0073, and U1000, resulting in a loss of engine power. The check engine and Stabilitrak lights would illuminate, and the vehicle would buck while the odometer, RPM gauge, and temperature gauge behaved erratically.
OEM Part Supersession History
09370249→Multiple, including 15198115 and others.— Revisions to address hardware faults and improve reliability.
Heads up: BCMs for 2000-2002 are physically different (connector style) from 2003-2006 models. Furthermore, BCMs for SUVs/Crew Cabs have different pinouts than those for regular/extended cab trucks due to rear-area features. A replacement BCM must match the vehicle's body style and option set.
Model Year Variations Within This Range
- 2000-2002: These models used a 1.5-DIN radio and have a different dash structure and BCM. Aftermarket radio installation is more complex. The BCM uses different connectors than later models.
- 2003-2006: These models received a significant interior refresh with a new dashboard, a standard double-DIN radio opening, a new instrument cluster, and a different BCM. This makes diagnosing radio-related issues and replacing the BCM different from the earlier years. The preferred replacement BCM for this range is often cited as one from a 2004 model due to perceived reliability.
Diagnostic Flowchart
Other Known Issues on This Vehicle
Issues unrelated to this code that are worth knowing about as an owner of this generation:
- Instrument Cluster Stepper Motor Failure 🔴 High → Shop Instrument Cluster — Extremely common, especially on 2003-2006 models. Gauges (speedometer, fuel, temp) become erratic, get stuck, or stop working entirely. (Ref: GM issued Special Coverage Adjustment #07187C, but it has long since expired.)
- Cracked Dashboard 🟡 Low — Very common, especially in vehicles exposed to sun/heat. The top of the dashboard develops cracks, usually near the passenger airbag or defroster vents.
- Fuel Level Sensor (Sending Unit) Failure 🟠 Medium — Common. The fuel gauge becomes inaccurate, reads empty, or fluctuates wildly. This is due to wear on the contacts of the sending unit, which is part of the fuel pump module in the tank.
- ABS Module Failure 🟠 Medium → Shop ABS Control Module — Common. The solder joints on the ABS control module's circuit board fail, causing an ABS warning light and disabling the anti-lock brakes. The module is located on the driver's side frame rail.
- Intake Manifold Gasket Leak 🟠 Medium — Common. The plastic/rubber intake manifold gaskets degrade over time, causing vacuum leaks that lead to a rough idle, lean codes (P0171, P0174), and misfires.
- HVAC Blend Door Actuator Failure 🟡 Low — Very common. The plastic gears inside the actuators strip, causing a repetitive clicking sound from the dashboard and/or an inability to control air temperature or direction.
Used vs. New Parts: Buying Guide for This Vehicle
When a used part is the smart pick: For expensive electronic modules like the Body Control Module (BCM) or Instrument Panel Cluster (IPC), a used part from a reputable salvage yard can be a cost-effective option. It is critical to match part numbers and ensure the donor vehicle had similar options.
Donor-vehicle mileage cap: roughly under 150000 miles for the part to have meaningful remaining life.
What to inspect on the donor part:
- Verify the part number on the module itself, not just the interchange list.
- For BCMs, ensure the donor vehicle is the same body style (SUV/Crew Cab vs. Regular/Extended Cab).
- Inspect connectors for any signs of corrosion, water intrusion, or burnt pins.
- Choose parts from vehicles that were not involved in a flood or major collision that could have damaged electronics.
OEM-only on this vehicle (don't cheap out):
- Ground Straps: While aftermarket is available, OEM or ACDelco Professional straps often have better plating and construction for long-term corrosion resistance.
- Ignition Switch: Aftermarket ignition switches for this platform are notoriously unreliable and can cause a repeat of the original electrical problems.
Aftermarket brands forum-validated for this vehicle:
- PAC (e.g., RP5-GM11): Widely regarded as the most reliable brand for aftermarket radio data bus interfaces that retain factory features like steering wheel controls and chimes.
- ACDelco Professional: This is ACDelco's premium aftermarket line, generally considered to be of OEM quality and a safe choice for most replacement parts.
Brands owners have reported issues with on this vehicle:
- Dorman: While Dorman makes a wide variety of parts, forum users frequently report issues with their electronic components for this platform, such as HVAC control modules and some sensors, citing poor quality and high failure rates.
Real Owner Stories
Aggregated from forums and TSBs cited above. Mileages and costs reflect what owners reported in those sources.
2004 Chevrolet Tahoe
Symptoms: The vehicle experienced a battery light on the dash and an intermittent starting issue.
What fixed it: Cleaning a single corroded ground connection located on the frame rail.
Source hint: TahoeYukonForum.com thread titled 'u1000-code-battery-light-on-intermittent-starting-issue.142168/'
2003-2006 Chevrolet Tahoe
Symptoms: Multiple gauges including the speedometer, fuel, and temperature became erratic, got stuck, or stopped working entirely.
What fixed it: Replacement of the instrument cluster stepper motors (related to known GMT800 platform issues).
Source hint: Vehicle specific issues: Instrument Cluster Stepper Motor Failure
2000-2006 Chevrolet Tahoe
Symptoms: The engine would not start or had an intermittent no-start condition, accompanied by a 'Service 4WD' message on the Driver Information Center.
What fixed it: Removing, cleaning contact surfaces to bare metal, and securely re-attaching the main ground straps (G104, G105, G100).
Source hint: Common causes: Corroded or Loose Ground Wires
Related OBD-II Codes
Frequently Asked Questions
My 2003 Tahoe's fuel gauge is reading empty and the battery light is on; is this related to U1000?
I just installed a new head unit in my 2004 Tahoe and now I have a U1000 code. What happened?
Where are the most common ground points I should check on my GMT800 Tahoe to fix this code?
Is there a specific wiring harness location on the Tahoe prone to causing U1000?
Does the instrument cluster stepper motor TSB cover my U1000 communication issues?
Can a weak battery cause my Tahoe to throw a U1000 and not start?
Helpful Videos

We Have This Part in Stock

The information in this article is provided for general reference and educational purposes only. Vehicle specifications, procedures, and part compatibility can vary by production date, trim level, and region. Always consult your vehicle's factory service manual and verify part numbers before purchasing or performing repairs. Safety-critical components such as airbags, seat belts, and braking systems should be installed by a qualified professional.
- Chevrolet Tahoe:
- 🧭 Diagnostic Flowchart
- 🎬 Helpful Videos
- 🛍️ Shop This Part
- What's Unique About the 2000-2006 Chevrolet Tahoe
- Symptoms You May Notice
- Most Likely Causes
- Rare But Worth Checking
- Technical Service Bulletins (TSBs) & Recalls
- Diagnosis Steps
- Parts You'll Likely Need
- Related Codes That Often Appear With This One
- Mechanic-Grade Diagnostic Values
- Scan Tool Commands That Help
- Wiring & Ground Locations
- Real Owner Repair Stories
- OEM Part Supersession History
- Model Year Variations Within This Range
- Other Known Issues on This Vehicle
- Used vs. New Parts: Buying Guide for This Vehicle
- Real Owner Stories
- 2004 Chevrolet Tahoe
- 2003-2006 Chevrolet Tahoe
- 2000-2006 Chevrolet Tahoe
- Related OBD-II Codes
- Frequently Asked Questions
- 🎟️ Get 5% Off