
U1000 on 2009-2014 Ford F-150: BCM Solid State Driver Protection Fault
On a 2009-2014 F-150, U1000 means the Body Control Module (BCM) has shut down a specific circuit (like a turn signal or headlight) due to a recurring short or overload. This is almost always caused by a bad bulb, faulty aftermarket lighting, or damaged wiring. The fix is to find and repair the short, then clear the codes from the BCM using a capable scan tool like FORScan.
- U1000 on your F-150 is not a generic network error; it means the BCM has shut down a specific circuit to protect itself from a short.
- Always scan for and diagnose the companion code (like a B-code for a light) first. This tells you where the actual problem is.
- Faulty aftermarket LED headlights are the #1 cause of this code. Be wary of cheap electronics.
- After fixing the short circuit (e.g., repairing a wire, replacing a bulb), you MUST clear the codes from the BCM with a proper scan tool to restore function.
- Do not replace the BCM unless all other possibilities have been exhausted and a U3000 code is also present.
What's Unique About the 2009-2014 Ford F-150
The F-150's Body Control Module (BCM) is designed to be self-protecting. Instead of blowing a physical fuse, it electronically 'trips a breaker' for a specific circuit after detecting a set number of faults (e.g., 50 or 100 times). This is a common source of confusion, as owners may fix an underlying issue (like a bad bulb) but find the component still doesn't work because the BCM has locked out the circuit. A reset with a proper scan tool like FORScan is required to restore function. Aftermarket lighting with incorrect resistance is a frequent trigger for this protective lockout on these trucks.
Symptoms You May Notice
- A specific light (headlight, taillight, turn signal, marker light) is not working
- Rapidly flashing turn signal indicator on the dashboard (hyperflash), even with correct bulbs
- Warning message on the instrument cluster about a lighting system fault (e.g., 'Check Left Rear Turn Lamp')
- Other BCM-controlled accessories may not function (e.g., power mirrors, door locks) if they share a related circuit
- Check Engine Light or Service wrench icon may be illuminated
- DTCs for a specific circuit short (e.g., B1342) are present alongside U1000
- Replacing the BCM first. The U1000 code is almost always the result of an external circuit problem, not a failed BCM. Replacing the module without fixing the underlying short will result in the new BCM also disabling the circuit or being damaged.
- Assuming it's a generic network error. Technicians unfamiliar with Ford's specific implementation of U1000 may waste time diagnosing the CAN bus network when the problem is a simple short circuit on a BCM output.
Most Likely Causes
- Faulty or Improperly Installed Aftermarket Lighting 🔴 High Probability Many aftermarket LED or HID lighting assemblies for the F-150 are not designed to match the OEM current draw. The sensitive BCM interprets the different resistance as a fault, and after repeated detections, it triggers the U1000 lockout.
How to confirm: Scan for BCM codes. If the fault appeared shortly after installing new headlights, taillights, or LED bulbs, they are the primary suspect. Reinstalling the factory lights and clearing the BCM codes should resolve the issue.
Typical fix: Remove the aftermarket lighting and replace it with high-quality, CAN-bus compatible units or revert to OEM housings. 🎬 Watch: How to properly install an LED third brake light Clear codes from the BCM using FORScan or a professional scan tool.
Est. part cost: $0-$1500 - Damaged Wiring or Chafed Harness 🟡 Medium Probability Wiring harnesses on trucks are exposed to the elements and vibration. Known chafe points exist along the frame rails, in the engine bay near the battery, and in the tailgate harness, which can lead to wires rubbing through and shorting to the frame.
How to confirm: Visually inspect the wiring harness leading to the component identified by the primary fault code. Look for areas where the harness is rubbing against metal, has melted, or shows signs of corrosion from water intrusion. Pay close attention to harnesses that may have been disturbed during previous repairs or accessory installations.
Typical fix: Repair the damaged section of wire by soldering in a new piece and protecting it with heat shrink tubing and loom. Secure the harness with zip ties to prevent future chafing.
Est. part cost: $5-$50 - Failed Bulb or Water Intrusion in Light Housing 🟡 Medium Probability
How to confirm: Inspect the bulb corresponding to the fault code. A burnt-out filament can sometimes create a momentary short. Check the light housing and connector for any signs of moisture, condensation, or corrosion. The third brake light (CHMSL) is a very common leak point on these trucks, which can drip water onto the headliner and into wiring.
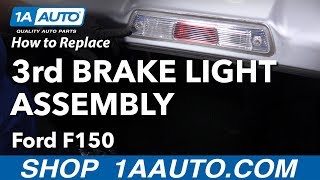
Typical fix: Replace the faulty bulb. If water is present, dry out the housing and connector. Replace the housing seal (especially on the third brake light 🎬 Watch: How to replace a leaking third brake light assembly) or the entire assembly if it is cracked and leaking.
Est. part cost: $10-$300 - Low Battery Voltage or Poor Ground Connection ⚪ Low Probability → Shop Vehicle Battery
How to confirm: Test the battery voltage; it should be above 12.4V with the engine off. A weak battery can cause numerous, seemingly unrelated electrical faults in modern vehicles. Inspect the main battery terminals and chassis ground straps for tightness and corrosion.
Typical fix: Charge or replace the battery. After replacement, perform a Battery Management System (BMS) reset using FORScan to ensure proper charging. Clean or tighten ground connections.
Est. part cost: $0-$250
Rare But Worth Checking
- Internal BCM Failure: This is rarely the cause. The BCM is robust, and its protective strategy is designed to prevent its own failure. Before condemning the BCM, all other possibilities (shorted wires, faulty components) must be exhaustively ruled out. If U1000 is present with U3000:49 (Internal Electronic Failure), an internal BCM fault is confirmed, and the module has permanently disabled the driver. The BCM will need replacement after the external short is fixed.
Diagnosis Steps
- Connect a capable scan tool (like FORScan with an OBDLink adapter or a professional-grade scanner) and read DTCs from the Body Control Module (BCM). Do not use a basic engine code reader.
- Identify the primary fault code that accompanies U1000. This code will name the specific circuit that is shorted (e.g., 'Right Low Beam Headlamp Circuit Short to Ground').
- Thoroughly inspect the circuit identified in the primary code. Check the bulb, the bulb socket, the connector, and the wiring harness for any signs of damage, corrosion, melting, or water intrusion. Pay special attention to common water leak areas like the third brake light.
- If aftermarket accessories are installed on that circuit, disconnect them and return the wiring to stock.
- Repair the identified fault. This could mean replacing a bulb, repairing a wire, or removing a faulty accessory.
- Once the physical repair is complete, use the scan tool to clear all codes from the BCM.
- Activate the component (e.g., turn on the headlights). If it now works, the repair was successful.
- If the component still does not work and the codes return immediately, re-check your repair. If the codes do not return but the component is still off, the BCM has likely disabled the circuit. Use FORScan to perform a 'BCM Self-Test' and/or 'Reset All Adaptations' for the BCM. This often clears the internal fault counters.
- If a BCM reset fails and a U3000:49 code is also present, the BCM has permanently locked out the circuit driver and must be replaced. The external short MUST be fixed first.
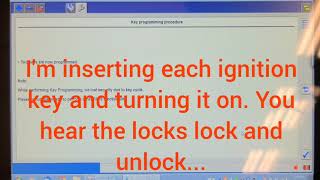
- BCM replacement requires programming the new module with the vehicle's As-Built data, followed by a PATS (Passive Anti-Theft System) Parameter Reset, which requires a 10-minute security wait and two valid keys.
Parts You'll Likely Need
- Body Control Module (BCM) — Needed only in the worst-case scenario where the circuit driver is permanently disabled (indicated by U1000 + U3000:49) and cannot be reset. The external short circuit MUST be repaired first, or the new BCM will also fail.
Trusted brands: Motorcraft
OEM price range: $500-$800
Aftermarket price range: $300-$600 - Headlight or Taillight Assembly — Often required if the original cause of the short was water intrusion from a cracked housing or a faulty internal component in an aftermarket assembly.
Trusted brands: Motorcraft, Diode Dynamics, Morimoto, Recon
OEM price range: $300-$700
Aftermarket price range: $200-$1500 - Third Brake Light Gasket/Assembly — The factory foam gasket is a known failure point, causing water to leak into the cab, potentially shorting wiring or damaging modules.
Related Codes That Often Appear With This One
- U3000 — U3000:49 (Control Module: Internal Electronic Failure) often appears with U1000 when the BCM has detected so many faults on a circuit that it has permanently disabled the driver. Seeing both codes together strongly suggests a new BCM will be needed after the external short is fixed.
- Bxxxx or Cxxxx codes — A body (B-series) or chassis (C-series) code will always be present with U1000 to indicate the specific circuit that is at fault. For example, a code for 'Left Stop Lamp Circuit Short to Ground' would pinpoint the exact problem area that needs to be inspected and repaired.
Hidden / Shadow Codes Worth Checking
- U1000:00: Indicates 'Solid State Driver Protection Activated - Driver Disabled: No Sub Type Information'. This is the most common suffix for this fault on this platform, confirming the BCM has shut down a circuit due to a repetitive overload. (see via A professional scan tool like Ford's IDS or an advanced DIY tool like FORScan.)
Scan Tool Commands That Help
- FORScan / Ford IDS: BCM Self-Test — This command should be run after a physical repair (like fixing a shorted wire) has been completed. A successful self-test with no on-demand DTCs will automatically clear the U1000 code and the associated circuit fault code, restoring normal function to the disabled output.
- FORScan / Ford IDS: Clear DTCs — This is the simplest reset procedure. After fixing the underlying short, clearing the DTCs from the BCM and cycling the ignition will often reset the temporary FET protection and restore the circuit.
- FORScan / Ford IDS: PATS Parameter Reset — This is mandatory when replacing the BCM. It performs a security handshake between the new BCM, the PCM, and the vehicle keys. It requires a 10-minute security wait and two valid keys to complete. Failure to perform this step will result in a no-start condition.
- FORScan / Ford IDS: BMS Reset — This should be performed after replacing the BCM or the battery. It resets the Battery Management System's learned data, ensuring the new module correctly charges the existing battery based on its actual state of health, rather than assuming it's brand new.
Wiring & Ground Locations
- BCM Location — Located in the passenger front kick panel area, below the right side of the instrument panel.. Physical access is required for inspection of connectors, replacement, and to check the primary BCM ground point often located nearby.
- BCM Ground — A primary ground point for the BCM is located on the chassis metal just to the right of the BCM itself in the passenger kick panel area.. A loose or corroded BCM ground can cause erratic behavior and false fault codes. This should be one of the first checks when diagnosing any BCM-related DTC.
- G302 / G303 — G302 is located under the driver's front seat. G303 is behind the driver's side kick panel near the parking brake.. These are major chassis ground points. While not directly for the BCM, components that are shorting out (e.g., power seats, door modules) may use these grounds, and corrosion here can cause issues that the BCM detects as faults.
- G400 / G401 — G400 is under the tailgate area on the driver's side. G401 is above the rear axle on the left frame rail.. These are the primary grounds for rear-body components, including taillights, trailer lighting connectors, and the fuel pump module. A fault in the rear lighting is a common cause of U1000, and a bad ground at G400/G401 is a frequent culprit.
- C2280B — This is one of the main multi-pin connectors on the Body Control Module.. Technicians often need to test specific pins on this connector for voltage, ground, or continuity when diagnosing a short circuit. For example, pin 35 on C2280B is often used for accessory power, and improper tapping into this circuit can trigger a BCM fault.
Real Owner Repair Stories
- Ford F150 Forum user (2013 F-150) — Hazard lights staying on, brake warning light on, low brake fluid message, power locks not working, interior lights not working with door open.
❌ Tried (didn't work) Initially replacing the BCM with a used unit fixed the primary symptoms but caused the heater controls to become inoperative and introduced new network codes.
✅ What actually fixed it The issue was resolved by installing the original BCM, using Ford's IDS software to perform a 'Programmable Module Installation' to copy the As-Built data from the original module, then swapping in the used BCM and writing the data to it. This was followed by a PATS security relearn procedure to make the truck start, and finally a TPMS sensor relearn. This highlights that simply swapping the module is not enough; it must be correctly programmed with the vehicle's specific configuration data. - Ford F150 Forum user (2011-2014 F-150 (general procedure)) — A specific light (e.g., right rear tail light) not working after bulb replacement.
❌ Tried (didn't work) Replacing the bulb again., Checking fuses (which are not used for these BCM-controlled circuits).
✅ What actually fixed it The user learned that the BCM had disabled the circuit due to a fault (FET protection). The fix was to connect to the truck with FORScan software, go to the BCM module, and use the 'Clear DTCs' function. After clearing the codes and cycling the key, the internal electronic fuse (FET) was reset and the light began working again.
Documented NHTSA Reports
While U1000 is often a circuit-specific lockout on Ford vehicles, other manufacturers use this code for broader communication and ground issues. For instance, NHTSA ODI #10681194 describes U1000 as a ground harness problem where cleaning battery terminals did not resolve a no-start condition. Similarly, NHTSA ODI #10171770 notes that U1000 appeared alongside B1372 when a vehicle lost ignition input and stalled, eventually requiring an ignition switch replacement. In some cases, as seen in NHTSA ODI #10970695, the code is associated with instrument cluster communication failures where the system could not retrieve mileage data. Furthermore, NHTSA ODI #11461728 reports U1000 in conjunction with transmission control module (TCM) communication loss due to overheating, while NHTSA ODI #10150585 mentions the code appearing when a vehicle entered "limp mode" due to CAN communication circuit issues.
OEM Part Supersession History
9L3Z-15604-A→AL3Z-15604-A, AL3Z-15604-B, AL3Z-15604-C— Module revision and update for early 2009-2010 models.
Heads up: While later part numbers often supersede earlier ones, it is critical to order a BCM based on the vehicle's VIN. Using an incorrectly programmed or incompatible BCM can lead to features not working (like HVAC controls) or a no-start condition.AL3Z-15604-C→BL3Z-15604-A, CL3Z-15604-A— Module revision for later model years within the generation.
Heads up: Always confirm the part number from the original module or use the VIN to get the correct replacement. These modules are not plug-and-play and require programming.
Diagnostic Flowchart
Other Known Issues on This Vehicle
Issues unrelated to this code that are worth knowing about as an owner of this generation:
- Fuel Pump Fuse 27 Melting 🔴 High — Very common across all engines. Can cause a crank/no-start or stalling condition without warning. (Ref: TSB 15-0137)
- 6R80 Transmission Molded Lead Frame Failure 🔴 High → Shop Transmission Assembly — Common issue causing sudden, unexpected downshifts. Covered under extended warranty program 19N01 for certain years. (Ref: Customer Satisfaction Program 19N01)
- 3.5L EcoBoost Timing Chain Rattle on Cold Start 🟠 Medium — Common on 2011-2014 models, often starting around 80,000 miles. Caused by a stretched timing chain and/or worn phasers.
- 5.4L 3V Cam Phaser Noise / VCT Solenoid Failure 🟠 Medium — Affects 2009-2010 models. Causes a diesel-like ticking or knocking sound at idle.
- Leaking Third Brake Light (CHMSL) 🟡 Low — Extremely common. The foam gasket fails, allowing water into the cab, staining the headliner and potentially causing electrical shorts.
- Integrated Wheel End (IWE) Actuator Grinding 🟠 Medium — Common on 4x4 models. A vacuum leak causes the front hubs to partially engage, creating a grinding noise while driving in 2WD.
Used vs. New Parts: Buying Guide for This Vehicle
When a used part is the smart pick: A used BCM from a junkyard can be a cost-effective option, but ONLY if you have access to Ford's IDS software or a high-level tool like FORScan and the knowledge to perform a 'Programmable Module Installation'. You must be able to copy the As-Built data from your original BCM (if it's still readable) or download it from Ford, write it to the used module, and then perform the PATS security relearn. Without this capability, a used module is not a viable DIY option.
Donor-vehicle mileage cap: roughly under 150000 miles for the part to have meaningful remaining life.
What to inspect on the donor part:
- Match the part number EXACTLY. Even a single letter difference can indicate an incompatible hardware or software version.
- Source the part from a vehicle with the same model year and trim level if possible to minimize programming conflicts.
- Inspect the donor vehicle for signs of flood damage or major electrical fires. Avoid any modules from such vehicles.
- Ask the salvage yard if they offer a warranty or return period in case the module is dead on arrival.
OEM-only on this vehicle (don't cheap out):
- Body Control Module (BCM)
Aftermarket brands forum-validated for this vehicle:
- Cardone (Remanufactured OEM)
- Blue Streak Electronics (BSE) (Remanufactured OEM)
Brands owners have reported issues with on this vehicle:
- Unbranded, no-name modules from online marketplaces. These often lack proper programming support and quality control, making a successful installation very unlikely.
Real Owner Stories
Aggregated from forums and TSBs cited above. Mileages and costs reflect what owners reported in those sources.
2011-2014 Ford F-150
Symptoms: Aftermarket headlights caused the BCM to throw codes, eventually leading to a permanent lockout of the lighting circuit.
What fixed it: The owner had to address the U1000 and U3000 codes which confirmed the BCM's permanent lockout due to the aftermarket lighting current draw mismatch.
Source hint: https://www.f150forum.com/f38/bcm-code-u3000-u1000-558197/
2009-2014 Ford F-150
Symptoms: Turn signal fault followed by U1000 and U3000 codes; discussion regarding the Field-Effect Transistor (FET) protection in the BCM.
What fixed it: Used FORScan to diagnose the circuit and discussed the BCM's internal FET protection which disables circuits to prevent hardware damage.
Source hint: https://www.f150forum.com/f38/forscan-applications-281806/index218/
2009-2014 Ford F-150
Symptoms: Water leaking into the cab from the back window area, staining the headliner and causing electrical concerns.
What fixed it: Identified the third brake light (CHMSL) foam gasket as the failure point and replaced the seal to prevent further water intrusion into the wiring.
Source hint: https://www.ford-trucks.com/forums/1353743-3rd-brake-light-leaking.html
Related OBD-II Codes
Frequently Asked Questions
Why is my turn signal flashing rapidly even though I just installed new LED bulbs on my 2012 F-150?
Can a leaking third brake light cause a U1000 code on my Ford truck?
Does Ford have a TSB for the melting fuse issue that causes my truck to stall?
I have a U1000 and a U3000:49 code; can I just clear them with a basic code reader?
Is there an extended warranty for the transmission issues mentioned in the common faults?
Do I need to do anything special after replacing the battery to clear electrical codes?
Helpful Videos


We Have This Part in Stock


The information in this article is provided for general reference and educational purposes only. Vehicle specifications, procedures, and part compatibility can vary by production date, trim level, and region. Always consult your vehicle's factory service manual and verify part numbers before purchasing or performing repairs. Safety-critical components such as airbags, seat belts, and braking systems should be installed by a qualified professional.
- Ford F-150:
- 🧭 Diagnostic Flowchart
- 🎬 Helpful Videos
- 🛍️ Shop This Part
- What's Unique About the 2009-2014 Ford F-150
- Symptoms You May Notice
- Most Likely Causes
- Rare But Worth Checking
- Diagnosis Steps
- Parts You'll Likely Need
- Related Codes That Often Appear With This One
- Hidden / Shadow Codes Worth Checking
- Scan Tool Commands That Help
- Wiring & Ground Locations
- Real Owner Repair Stories
- Documented NHTSA Reports
- OEM Part Supersession History
- Other Known Issues on This Vehicle
- Used vs. New Parts: Buying Guide for This Vehicle
- Real Owner Stories
- 2011-2014 Ford F-150
- 2009-2014 Ford F-150
- 2009-2014 Ford F-150
- Related OBD-II Codes
- Frequently Asked Questions
- 🎟️ Get 5% Off