
OBD-II Code U1002: Loss of Communication with a Control Module
What U1002 means, why it triggers, and how to fix it
- U1002 flags a Controller Area Network (CAN) communication failure, meaning at least 1 of your vehicle's computers has stopped sending or receiving data.
- Test the battery and clean all main ground connections first; a cranking voltage drop below 10.0V is the leading cause of this code.
- Never replace a $500+ control module (ECM, BCM, or ABS) until you verify its dedicated power and ground circuits are fully intact.
- On Nissan and Infiniti vehicles, inspect the Intelligent Power Distribution Module (IPDM) and check the passenger floorboard for water damage to the BCM before paying $150+ for advanced diagnostics.
What Does U1002 Mean?

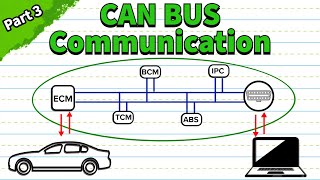
U1002 is a network trouble code indicating one or more of your car's computers (modules) suddenly stopped communicating. Your car uses a Controller Area Network (CAN) to let modules like the Engine Control Module (ECM) and Anti-lock Brake System (ABS) share data. This code triggers when a module stops sending or receiving messages, even for a millisecond.
Technical definition: U1002 is a manufacturer-specific code indicating a Controller Area Network (CAN) communication circuit malfunction. Nissan and Infiniti use this code to flag a loss of communication with a tighter (shorter) timing requirement than the generic U1000 code, meaning it detects faster or more persistent communication drops.
Can I Drive With U1002?
Yes, But With Caution. Driving is possible but dangerous. Depending on which computer lost communication, you will experience sudden stalling, unpredictable shifting, or the complete failure of safety systems like ABS and Vehicle Dynamic Control (VDC). Ignoring the issue leads to costly damage, such as a transmission stuck in 'limp mode' causing internal wear, or a no-start condition requiring an expensive tow.
Common Causes

- Weak or Failing Battery (Very Common) — Control modules are highly sensitive to voltage. A weak battery causes voltage to drop below 10V during engine cranking, forcing modules to temporarily shut down and lose communication.
- Corroded, Loose, or Broken Ground Wires (Very Common) — Ground straps from the battery to the chassis and engine to the chassis corrode or loosen, creating high resistance that disrupts communication between modules.
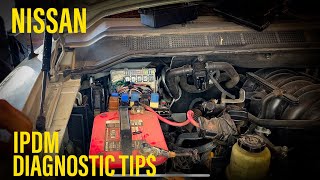
- Faulty Intelligent Power Distribution Module (IPDM) (Common) — On Nissan and Infiniti vehicles, the IPDM acts as a smart fuse box. Internal failure of its non-serviceable relays cuts power to critical modules, causing them to drop off the network.
- Damaged Wiring Harness or Connectors (Common) — The CAN bus wiring harness gets damaged by chafing, road debris, or rodents. Connectors corrode from moisture, leading to a loss of connection.
- Faulty Control Module (e.g., ABS, BCM, ECM) (Less Common) — A single control module fails internally, causing it to stop communicating or flood the network with bad data. A failing ABS module or water-damaged BCM are known causes. 🎬 Watch: How water damage under the carpet ruins the BCM.
- Failing Alternator (AC Ripple) (Less Common) — A failing alternator produces excessive AC ripple voltage onto the DC electrical system. This 'dirty' power disrupts internal processors, causing communication errors.
- Improperly Installed Aftermarket Electronics (Less Common) — An aftermarket alarm, remote starter, or stereo system interferes with the CAN bus wiring if tapped into the wrong wires or creating a parasitic draw.
- Faulty Unrelated Module (Rare) — Because all modules share the same network, a failure in a seemingly unrelated module, like a Tire Pressure Monitoring System (TPMS) sensor, disrupts the entire CAN bus.
Symptoms

- Check Engine Light is On — This is the first and sometimes only indicator of a problem.
- Engine Will Not Start or Stalls — The engine cranks but fails to start, or starts and immediately stalls because the Engine Control Module lost communication with the ignition system or fuel pump.
- Multiple Warning Lights On — The ABS, VDC, SLIP, or AWD lights illuminate on the dashboard because those modules no longer communicate.
- Erratic Transmission Shifting — The transmission gets stuck in one gear (limp mode), shifts harshly, or has delayed engagement because it is not receiving necessary data from the engine module.
- Gauges and Displays Malfunction — The speedometer, tachometer, or other gauges drop to zero, behave erratically, or stop working entirely.
- Car Starts with Remote Start but Not with Key — The vehicle starts via the remote starter (bypassing security checks) but not with the push-button, pointing to a fault in a module involved in the normal start sequence.
- Intermittent Electrical Failures — Functions controlled by the Body Control Module, such as power windows, door locks, or the HVAC system, stop working correctly.
Diagnostic Flowchart
Tap your situation to follow the diagnostic path that matches what you're seeing on this code.
Common Fixes & Costs
- Replace Vehicle Battery — Parts: $150-$350, Labor: $50-$100, ~0.5 hr book time (DIY)
- Clean or Replace Battery Terminals and Ground Straps — Parts: $10-$75, Labor: $100-$200, ~1.5 hr book time (DIY)
- Replace Intelligent Power Distribution Module (IPDM) — Parts: $150-$650, Labor: $100-$250, ~1 hr book time (Intermediate)
- Replace ABS Control Module/Actuator — Parts: $300-$1800, Labor: $200-$500, ~2.5 hr book time (Professional)
- Replace Body Control Module (BCM) — Parts: $150-$800, Labor: $200-$600, ~2.5 hr book time (Professional)
- Repair Damaged CAN Bus Wiring — Parts: $20-$100, Labor: $250-$1500+, ~5 hr book time (Professional)
DIY vs Professional
- Replace Vehicle Battery 🟢 Beginner
Tools: Socket set. - Clean or Replace Battery Terminals and Ground Straps 🟢 Beginner
Tools: Socket set, wire brush, battery terminal cleaner. - Replace Intelligent Power Distribution Module (IPDM) 🟢 Beginner
Tools: Socket set, pliers. - Replace ABS Control Module/Actuator 🟢 Beginner
Tools: Socket set, flare nut wrenches, advanced scan tool. - Replace Body Control Module (BCM) 🟢 Beginner
Tools: Basic hand tools for removal, professional-grade scan tool for programming. - Repair Damaged CAN Bus Wiring 🟢 Beginner
Tools: Multimeter, wire strippers, high-quality crimpers/solder iron, wiring diagrams.
Used vs. New Parts: Buying Guide
When a used part is worth it: For expensive electronic modules like a BCM, ABS module, or IPDM on a vehicle older than 8-10 years, a used or remanufactured part offers significant savings. A remanufactured part from a reputable vendor is safer than a used 'as-is' part from a junkyard.
Donor-vehicle mileage cap: roughly under 80000 miles for the part to have meaningful remaining life.
Donor quality checklist:
- Part number must be an exact match. Do not rely on visual similarity.
- Visually inspect connector pins for any signs of corrosion (green or white powder) or damage.
- Purchase from a reputable seller offering at least a 30-90 day warranty.
- Verify the donor vehicle was not scrapped for a related electrical or flood-damage issue.
Decision logic:
- If The vehicle is less than 5 years old or has low mileage (<60k) → Buy new OEM to ensure longevity and compatibility, especially if the part requires complex programming.
- If The vehicle is over 10 years old and the new part cost is over 25% of the vehicle's value → A warrantied used or remanufactured part is a financially sensible choice.
- If The part requires VIN programming (like a BCM or ABS module) → Factor in the cost of dealer/specialist programming for a new/used part, or opt for a 'cloning' service where your original module's data is transferred.
Warranty tradeoff: Used parts from a salvage yard are sold 'as-is' or with a 30-day warranty. Reputable remanufacturers offer a 1-year or lifetime warranty. New OEM parts typically carry a 1-year warranty.
Worst-case if a used part fails: $300-$800 if a used part is faulty or fails shortly after installation, representing the cost of repeat labor and sourcing another part.
What Happens If You Wait — Timeline
- 0-1 month: Intermittent Check Engine Light, possibly with ABS/VDC lights. The car has occasional starting difficulty or a brief hesitation, but generally drives normally. The underlying cause is minor. (MPG impact: 0%% · Added cost: $0)
- 1-3 months: The fault becomes more frequent. No-start conditions are common, requiring multiple attempts. The transmission occasionally shifts harshly or enters 'limp mode'. The root cause is worsening. (MPG impact: 0-5%% · Added cost: $100-$300 (Potential tow and diagnostic fee from being stranded))
- 3-6 months: Cascading problems begin. Unstable voltage from a bad alternator/ground stresses other modules. A water-damaged BCM fails completely, causing major electrical havoc. The car is unreliable. (MPG impact: 5-10%% · Added cost: $500-$1500 (A previously simple ground fix now requires a BCM or IPDM replacement due to electrical stress))
- 6+ months: Permanent module damage. An electronic module that was once just losing communication is permanently damaged from sustained unstable voltage. The repair involves replacing expensive computers. (MPG impact: 10-15%% · Added cost: $1500-$3500+ (Cost of major module replacement, VIN programming, and labor))
Cost of Not Fixing It
- 0-1 month: Intermittent no-start conditions or stalling in traffic, creating a safety hazard and the risk of being stranded. Unpredictable behavior of safety systems like ABS and VDC. (Added cost: $100-$300 (Towing and diagnostic fees))
- 1-6 months: Driving with the transmission in 'limp mode' causes accelerated internal wear. Unstable system voltage from a bad alternator slowly damages other sensitive electronic modules. (Added cost: $500-$2500 (Potential damage to transmission or other control modules))
- 6+ months: Cascading electronic failures. A minor issue like a bad ground leads to the failure of an expensive, non-repairable computer like the BCM or ABS module due to electrical stress. (Added cost: $800-$3500+ (Cost of major module replacement, programming, and extensive diagnostics))
Diagnosis Steps

- Read All Trouble Codes from All Modules
Use an advanced OBD-II scanner to access all vehicle systems. Note which modules report the U1002 code and which are 'Not Communicating'. Do not clear the codes; this list is your primary clue.
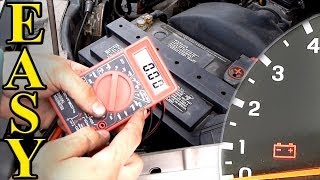
Tools: Advanced OBD-II Scanner (Beginner) - Perform a Comprehensive Battery and Charging System Test
Check the battery's state of charge; it must be above 12.4 volts with the engine off. Perform a load test; a drop below 10.0V during cranking indicates a weak battery. With the engine running, alternator output must be stable between 13.2 and 14.8 volts.
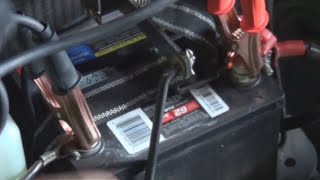
Tools: Multimeter, Battery Load Tester (Beginner) - Inspect and Clean All Main Grounds
Locate, disconnect, and thoroughly clean the main ground connections to bare metal. This includes the negative battery cable-to-chassis ground, engine-to-chassis ground strap, and transmission-to-chassis strap. Use a wire brush to remove all corrosion.
Tools: Socket Set, Wire Brush, Pliers (Intermediate) - Check Fuses and Power Distribution
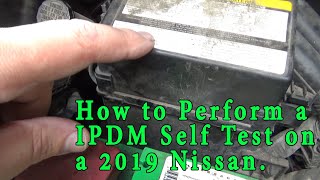
Visually inspect all fuses related to control modules in the engine bay fuse box (IPDM) and interior panel. On applicable Nissan models, perform the IPDM self-test by turning the ignition on, pressing the driver's door jamb switch 10 times, and cycling the ignition.
Tools: Fuse Puller or Pliers (Beginner) - Perform a 'Wiggle Test'
With the ignition on, carefully wiggle wiring harnesses and connectors for the modules flagged in the initial scan. Pay close attention to the IPDM, ABS module, and ECM connectors. If wiggling causes symptoms to appear or disappear, you found a loose connection.
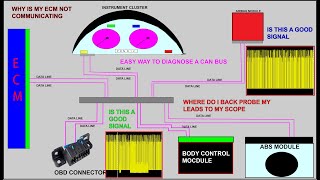
Tools: Hands, Flashlight (Intermediate) - Check CAN Bus Resistance
Disconnect the negative battery terminal. At the OBD-II port, measure resistance between Pin 6 (CAN High) and Pin 14 (CAN Low). A healthy network reads 60 ohms. A reading of 120 ohms indicates an open circuit; near 0 ohms indicates a short circuit.
Tools: Multimeter (Advanced) - Perform a Parasitic Draw Test
Connect a multimeter in series with the negative battery cable to measure amperage draw with the vehicle off. After modules enter sleep mode (up to 45 minutes), the draw must be under 50 milliamps (0.05A). If higher, pull fuses one by one to identify the faulty circuit.
Tools: Multimeter with Amperage Function (Advanced) - Check for Alternator AC Ripple Voltage
Set a multimeter to AC voltage. With the engine running at 1,500 RPM, connect leads to the battery terminals. A healthy alternator produces less than 0.5 volts (500 mV) of AC ripple. Higher readings indicate failing diodes creating 'dirty' power.
Tools: Multimeter with AC Voltage Function (Advanced) - Analyze CAN Bus Signal with Oscilloscope
Connect an oscilloscope to Pin 6 (CAN-H) and Pin 14 (CAN-L). A healthy signal shows two clean, mirroring square waves. A flat line indicates an open, both lines stuck high/low indicates a short, and a noisy waveform indicates interference.
Tools: Automotive Oscilloscope (Professional)
When This Code Triggers (Freeze-Frame Conditions)
- Engine Coolant Temp: 180-200°F (The fault logged when the engine was fully warmed up.)
- RPM: 750-2500 (The fault occurred at idle or during steady-state cruise, not necessarily during heavy acceleration.)
- Engine Load: 20-50% (Indicates the engine was under a light to moderate load, consistent with city or highway cruising.)
- Vehicle Speed: 0-65 mph (This fault triggers at any speed, from a standstill (no-start) to highway speeds, reflecting the versatile nature of electrical causes.)
Related Codes
- U1000 / U1001 — These are general CAN communication failure codes. U1002 is a more specific version used by some manufacturers with a stricter timing requirement. The diagnostic process is identical.
- U0121 — Means 'Lost Communication With Anti-Lock Brake System (ABS) Control Module.' If a faulty ABS module is the source of the network failure, this code appears alongside U1002.
- U0100 — Means 'Lost Communication with ECM/PCM.' It appears with U1002 if the IPDM fails and cuts power to the Engine Control Module, or if the ECM itself is the problem.
- C1109 / C1111 — These Nissan/Infiniti codes point to a power supply issue or internal motor fault within the ABS actuator. They are strong indicators that the ABS module is the root cause of the U1002 failure.
Climate & Environmental Factors
- Road Salt (Winter Climates): Salt spray creates a conductive electrolyte solution that dramatically accelerates corrosion on underbody wiring harnesses, connectors, and ground points. This corrosion creates high resistance, directly causing communication codes like U1002.
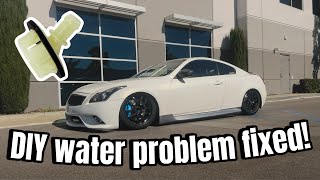
- High Humidity / Water Intrusion: Moisture leads to corrosion on connector pins and module circuit boards. Specific vehicle issues, like clogged sunroof drains on an Infiniti G37, cause direct water leaks onto sensitive electronics like the BCM, leading to failure.
How to Talk to a Mechanic About This Code
Say this: "I have a U1002 communication code and need a diagnostic. Please start by testing the battery under load and performing a voltage drop test on the main power and ground cables. Do not replace any modules until those basic electrical checks are confirmed good."
This signals you understand the most common causes of a U1002 are foundational electrical issues (bad battery or grounds), not a failed computer. It directs the shop to perform logical diagnostic steps first and prevents them from quoting an expensive module replacement without proof.
Avoid saying:
- 'My check engine light is on, can you look at it?' (Too vague; invites a wide-ranging, expensive diagnostic).
- 'The car is acting weird, just fix whatever is wrong.' (Gives the shop a blank check).
- 'My scanner says it's a communication problem, so I probably need a new computer.' (Leads a dishonest shop to sell you an unneeded part).
Questions to ask before authorizing the repair:
- What was the battery's voltage during a load test? Did it drop below 10 volts?
- Did you perform a voltage drop test on the main ground straps? What were the results?
- Which specific module was not communicating during your network scan?
- Can you show me the corroded ground or damaged wire you found?
- What is the warranty on this electrical diagnostic and repair?
Where to Take It: Dealer vs Independent vs Chain
- Dealer:
A good option if the fault is traced to a module needing programming, but an expensive first choice for diagnosis. An independent specialist is better at tracing root wiring faults.
Best for: Vehicles still under warranty., Repairs requiring manufacturer-specific software updates or module programming., Known manufacturer-specific quirks covered by a technical service bulletin (TSB).
Downsides: Highest labor rates., Defaults to replacing an entire expensive assembly rather than repairing a specific wire or connector. (Typical cost: +50% vs. baseline) - Independent Shop:
Best fit. A reputable independent shop with strong electrical diagnostic skills is the ideal choice for a U1002 code to trace and repair the underlying wiring or ground issue.
Best for: Out-of-warranty vehicles where cost is a factor., Diagnosing complex electrical faults at a shop specializing in auto electrics., Getting a second opinion on a costly dealer estimate.
Downsides: Shop quality and diagnostic skill vary widely; vetting through reviews is critical., Lacks the latest manufacturer-specific diagnostic tools for programming. (Typical cost: +0% vs. baseline) - Chain Shop:
AVOID for diagnosis. They are not equipped to diagnose the complex wiring, ground, or module issues associated with a U1002 code.
Best for: Simple, routine jobs like battery replacement or oil changes.
Downsides: Technicians lack specialized training for complex network diagnostics., Business model incentivizes selling parts rather than performing detailed wiring diagnosis. (Typical cost: -10% vs. baseline)
When to Walk Away From the Repair
If the estimated repair cost exceeds 50% of your car's private-party value, sell or trade it in.
- Car worth $4000, fix is $2200: Walk away. The repair cost is over half the car's value. The risk of other age-related failures is high.
- Car worth $12000, fix is $800: Fix it. This repair is well below the threshold and restores significant reliability to the vehicle.
- Car worth $3000, fix is $400: Fix it. If the fix is a common issue like a ground strap or IPDM, the repair is a good investment.
What Scan Tool You Need for This Code
Minimum: A scanner that performs a full system scan (network scan) to see the status of ALL modules (ECM, BCM, ABS, TCM, etc.).
A basic $20 code reader only tells you the U1002 code exists. It cannot tell you which module stopped communicating, leaving you completely blind to the source of the problem.
Budget: Ancel AD410 / Foxwell NT301 (~$50) — Reads the code but CANNOT perform the required full network scan to isolate the faulty module.
Mid-range: BlueDriver Pro / Foxwell NT510 Elite (~$120) — Performs a full system health check and shows which specific modules are reporting 'Not Communicating,' instantly pointing your diagnosis in the right direction.
Professional: Autel MaxiCOM MK808 / Launch CRP919XBT (~$500-900) — Provides full bidirectional control to run self-tests, view manufacturer-specific data, and perform programming functions if a module replacement is necessary.
Rent vs buy: Buying a mid-range scanner is required for DIY diagnosis. Auto parts stores often loan basic readers, but they lack the network scan capability needed for a U1002 code.
How to Clear the Code After You Fix It
- Reconnect the battery if it was disconnected for the repair.
- Use an OBD-II scan tool to formally clear all Diagnostic Trouble Codes (DTCs) from all modules.
- Perform a complete drive cycle to allow the onboard computers to run their self-tests and confirm the fix.
Drive cycle (~30 minutes): Perform a cold start after the car sits for 8+ hours. Idle for 2-3 minutes with accessories on. Drive for 5-10 minutes in stop-and-go traffic. Accelerate to 55-60 mph and maintain steady speed for 5 minutes. Coast down to 20 mph without braking. Repeat a short city driving loop. Park and idle for 1 minute before shutting down.
Readiness monitors affected: Catalyst monitor, EVAP system monitor, Oxygen sensor monitor
Before emissions retest: drive at least 100 miles to fully set monitors.
Watch out for:
- Disconnecting the battery clears the Check Engine Light but does not reset readiness monitors required to pass an emissions test.
- The code returns immediately if the root cause (e.g., a corroded ground) was not correctly identified and repaired.
- In California, a 'permanent' DTC requires driving up to 200 miles and 15 warm-up cycles before passing a smog check, even if the light is off.
Will This Fail Emissions / State Inspection?
Yes — this code typically fails an OBD-II emissions inspection.
- California: An active U1002 code with the Check Engine Light on is an automatic fail. California's 'permanent code' rule requires driving 100-200 miles and completing up to 15 warm-up cycles before the system allows a pass, even after the light is cleared.
- New York: The NYS DMV inspection includes an OBD-II scan. An illuminated Check Engine Light for any reason, including a U1002 code, results in an automatic failure.
- Texas: In the 17 counties requiring emissions testing, an active U1002 code commanding the Check Engine Light on causes the vehicle to fail the inspection.
Most Commonly Affected Vehicles
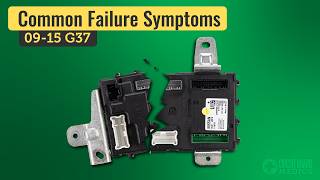
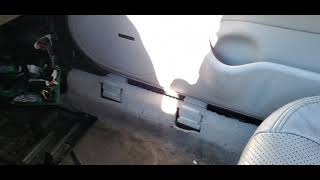
- Infiniti G37 (2008-2013) — Extremely prone to U1002 due to clogged sunroof drains causing water to leak onto the Body Control Module (BCM) in the passenger footwell. Check for damp carpets.
- Nissan Rogue (2008-2014) — A corroded braided ground strap on the transmission case is a very common failure point that causes this code. Accessing it is easier from underneath the vehicle on the driver's side.
- Nissan Versa (2007-2014) — Commonly experiences this code due to failures in the Intelligent Power Distribution Module (IPDM) and poor battery/ground connections.
- Nissan Maxima (2005-2012) — Susceptible to corroded grounds. On 6th gen models (2004-2008), specifically check the ECM ground points (M14, M78) located under the dashboard on a cross brace.
- Nissan 350Z / 370Z (2005-2015) — Frequently triggered by weak batteries and corroded main ground straps. Key ground points are in the battery compartment and on the engine's timing cover and chassis.
- Ford F-150 (2009-2014) — U-codes often point to wiring issues. A common culprit is a corroded or broken wire in the harness running along the driver-side frame rail.
- Chevrolet Silverado / Tahoe (2003-2007) — Common causes include a faulty instrument cluster, a bad radio, or corrosion at the splice packs (specifically SP205) located in the wiring channel under the driver's side door sill plate.
- Hyundai Ioniq Hybrid (2017-2020) — Presents a 'Check Hybrid System' warning with U1002. TSB 21-AT-009H addresses issues with poor harness contacts, which is a root cause.
Manufacturer-Specific Notes
- Nissan / Infiniti: This code is extremely common and is frequently caused by poor ground connections, a weak battery, or a faulty IPDM. A specific issue on the Infiniti G37 is water damage to the BCM from clogged sunroof drains.
- Hyundai: On models like the Ioniq, a U1002 code is part of a cluster of communication faults pointing to damaged wiring or connectors in the hybrid system harness.
- Toyota: For certain Toyota vehicles, a U1002 code has a completely different definition, such as 'Lost Communication with Gateway Module' or a fault with the Parking Assist Bus.
- General Motors (GM): On older GM vehicles using the Class 2 serial data bus, a primary suspect is corrosion in the splice packs located in the wiring trough under the driver's side door sill plate.
Real Owner Stories
2013 Infiniti G37x with 100K miles
After heavy rain, car exhibited multiple electrical issues: alarm going off randomly, key not detected, and eventually a crank-no-start condition. U1002 was present.
What they tried:
- Dried out the passenger footwell and BCM area. The car started temporarily but problems returned.
Outcome: The Body Control Module (BCM) suffered water damage from a clogged sunroof drain. Owner purchased a used BCM from eBay for $149 and had a mobile programmer sync it for $250. The root cause was fixed by rerouting the sunroof drain tubes.
Lesson: On Infiniti G37s, any sign of a damp passenger-side carpet must be addressed immediately by cleaning the sunroof drains to prevent catastrophic BCM failure.
2010 Nissan Rogue with 120K miles
Check Engine Light on with code U1002. No other major symptoms, but the owner was concerned about long-term reliability.
What they tried:
- Shop initially suspected a faulty, expensive control module.
Outcome: The actual cause was a heavily corroded braided ground strap connecting the transmission case to the chassis. Cleaning the contact points and replacing the strap for under $50 resolved the code.
Lesson: Always inspect and clean primary ground connections before condemning expensive electronic modules. A simple voltage drop test quickly identifies a bad ground.
2012 Nissan Versa with 95K miles
Car intermittently cranked but would not start, and sometimes stalled while driving. U1002 and U0100 (Lost Communication with ECM) codes were stored.
What they tried:
- Replaced the battery, checked fuses, and inspected for obvious wiring damage with no success.
Outcome: The fault was traced to the Intelligent Power Distribution Module (IPDM) located in the engine bay. An internal relay powering the ECM failed. Replacing the IPDM fixed the no-start condition and cleared the codes.
Lesson: On many Nissans, the IPDM is a known weak point. If you have a crank/no-start condition along with U1002, the IPDM is a primary suspect before assuming the ECM is bad.
2016 Nissan Sentra with 142K miles
Transmission was slipping and jerking, with fluctuating RPMs. The Check Engine Light occasionally came on with code U1002.
What they tried:
- Performed a transmission fluid change, which did not solve the issue.
Outcome: The primary symptoms pointed towards a failing CVT transmission, a known issue on this model. The U1002 was a secondary effect of the erratic electrical signals produced by the failing transmission components.
Lesson: Do not get tunnel vision on the U-code. If primary symptoms strongly suggest a major mechanical failure, that is the root cause, and the communication code is merely a symptom.
How to Prevent This Code From Triggering
- Periodically clean and protect main ground connections. (Every 2 years or every 30,000 miles, especially in Salt Belt regions.) — Corrosion on the main battery-to-chassis and engine-to-chassis grounds creates high resistance, a primary cause of communication codes. Applying a dielectric grease barrier prevents this.
- Clean sunroof drains (if applicable). (Once per year, especially for known problem vehicles like the Infiniti G37.) — Clogged drains cause water to overflow into the cabin, directly damaging sensitive electronics like the Body Control Module (BCM).
- Apply an undercarriage protectant or sealant before winter. (Once per year before winter.) — Road salt spray is highly corrosive and accelerates the degradation of exposed wiring harnesses, connectors, and ground straps on the vehicle's underbody.
- Ensure battery terminals are clean and tight. (During every oil change.) — Loose or corroded battery terminals cause intermittent voltage drops across the entire electrical system, forcing modules to reset.
- Avoid jump-starting other vehicles or being improperly jump-started. (As needed.) — Improper jump-starting creates voltage spikes that damage sensitive electronic control modules, leading to immediate or future communication failures.
Frequently Asked Questions
Can a bad battery really cause a U1002 code?
Yes, absolutely. During engine start-up, a weak battery causes voltage to drop below 10V. This forces control modules to temporarily shut down, creating a communication timeout that logs the U1002 code.
What is the difference between U1000 and U1002?
For manufacturers like Nissan, U1002 is essentially the same as U1000 but with a tighter timing specification. This means the communication loss was detected more quickly or was more persistent. For diagnostic purposes, treat them as the same fault.
What is an IPDM and why does it cause U1002?
The IPDM (Intelligent Power Distribution Module) is a smart fuse and relay box used in Nissan and Infiniti vehicles. Internal relays fail and cut power to a module like the ECM, causing it to drop off the network and trigger the U1002 code.
Can a bad alternator cause a U1002 code?
Yes. A failing alternator produces excessive AC ripple voltage that interferes with the sensitive electronics inside control modules, causing them to lose communication.
What are the most common misdiagnosis mistakes for U1002?
The biggest mistake is replacing the control module that stored the code. The reporting module is usually just listening for a signal it didn't receive from a silent module. Always use an advanced scanner to see which modules are 'Not Communicating' to pinpoint the actual source.
My car starts with the remote starter but not the key. Why?
This happens when the U1002 fault relates to a module involved in the normal ignition sequence (like the ABS or BCM) that is bypassed during a remote start.
Can I just ignore the U1002 code if my car drives fine?
Ignoring it is dangerous. The code indicates an unstable communication network, leading to sudden problems like stalling in traffic, a no-start condition, or the failure of your anti-lock brakes.
Key Takeaways
- U1002 flags a Controller Area Network (CAN) communication failure, meaning at least 1 of your vehicle's computers has stopped sending or receiving data.
- Test the battery and clean all main ground connections first; a cranking voltage drop below 10.0V is the leading cause of this code.
- Never replace a $500+ control module (ECM, BCM, or ABS) until you verify its dedicated power and ground circuits are fully intact.
- On Nissan and Infiniti vehicles, inspect the Intelligent Power Distribution Module (IPDM) and check the passenger floorboard for water damage to the BCM before paying $150+ for advanced diagnostics.
Helpful Videos


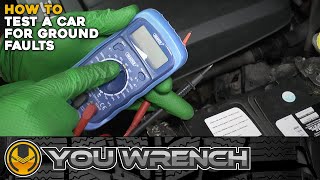
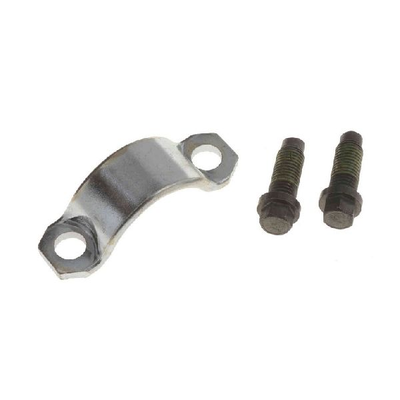
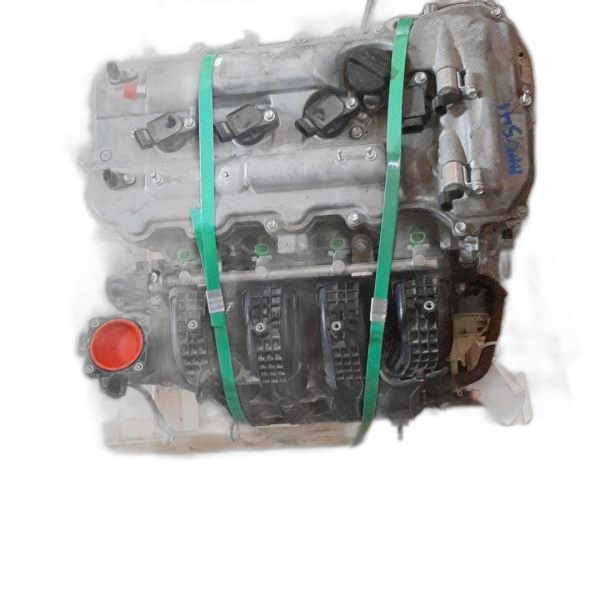
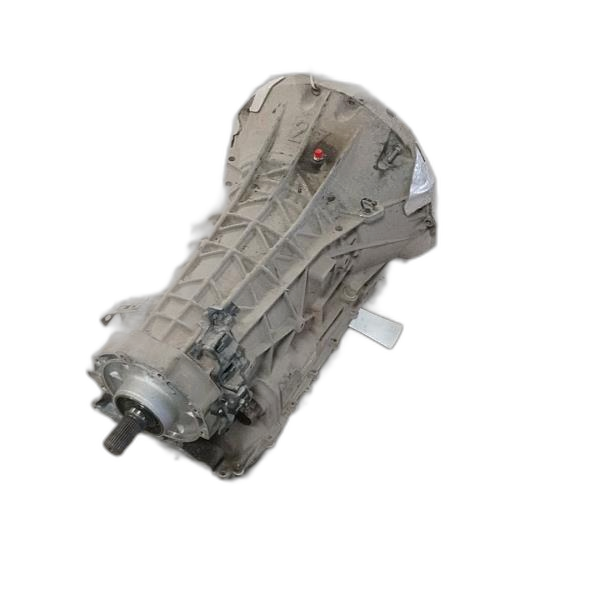
Shop the Parts Behind U1002
Below are the parts most often responsible for code U1002, ranked by how frequently each one is the actual culprit (per the diagnosis above). Tap any to see what we have for your vehicle.


The information in this article is provided for general reference and educational purposes only. Vehicle specifications, procedures, and part compatibility can vary by production date, trim level, and region. Always consult your vehicle's factory service manual and verify part numbers before purchasing or performing repairs. Safety-critical components such as airbags, seat belts, and braking systems should be installed by a qualified professional.
- 🧭 Diagnostic Flowchart
- 🎬 Helpful Videos
- 🛍️ Shop This Part
- What Does U1002 Mean?
- Can I Drive With U1002?
- Common Causes
- Symptoms
- Common Fixes & Costs
- DIY vs Professional
- Used vs. New Parts: Buying Guide
- What Happens If You Wait — Timeline
- Cost of Not Fixing It
- Diagnosis Steps
- When This Code Triggers (Freeze-Frame Conditions)
- Related Codes
- Climate & Environmental Factors
- How to Talk to a Mechanic About This Code
- Where to Take It: Dealer vs Independent vs Chain
- When to Walk Away From the Repair
- What Scan Tool You Need for This Code
- How to Clear the Code After You Fix It
- Will This Fail Emissions / State Inspection?
- Most Commonly Affected Vehicles
- Manufacturer-Specific Notes
- Real Owner Stories
- 2013 Infiniti G37x with 100K miles
- 2010 Nissan Rogue with 120K miles
- 2012 Nissan Versa with 95K miles
- 2016 Nissan Sentra with 142K miles
- How to Prevent This Code From Triggering
- Frequently Asked Questions
- Can a bad battery really cause a U1002 code?
- What is the difference between U1000 and U1002?
- What is an IPDM and why does it cause U1002?
- Can a bad alternator cause a U1002 code?
- What are the most common misdiagnosis mistakes for U1002?
- My car starts with the remote starter but not the key. Why?
- Can I just ignore the U1002 code if my car drives fine?
- Key Takeaways
- 🎟️ Get 5% Off