
U1002 on 2005-2009 Nissan Quest: Causes and Fixes for CAN Communication Loss
Code U1002 on a 2005-2009 Nissan Quest almost always points to a CAN communication failure caused by a poor electrical ground, especially the one located under the battery tray. Cleaning this corroded ground point is the most common and cost-effective fix, often resolving multiple electrical issues at once. A faulty IPDM (intelligent fuse box) is the second most likely cause.
- U1002 is a network communication code, not a single part failure. Do not replace expensive modules without proving they are the cause.
- The most likely cause on a 2005-2009 Quest is a corroded ground connection under the battery tray. This should be the first place you inspect.
- Always start diagnostics with the basics: check the battery's health and clean all primary power and ground connections.
- A faulty IPDM (engine bay fuse box) is the second most likely cause and has a built-in self-test you can perform.
- Symptoms can be widespread and seem unrelated, from a no-start condition to flickering lights, which is characteristic of a network-wide problem.
What's Unique About the 2005-2009 Nissan QUEST
For the 2005-2009 (V42 generation) Nissan Quest, this communication code is frequently traced back to a specific design vulnerability. A critical chassis ground connection is located directly under the battery tray. Due to its location, this point is highly susceptible to corrosion from road splash and battery acid venting. As this ground degrades, it creates high resistance and intermittent voltage drops that disrupt the entire CAN network, causing a cascade of seemingly unrelated electrical problems and triggering the U1002 code. This is a well-documented failure point across many Nissan platforms of this era.
Diagnostic Flowchart
Tap your situation to follow the diagnostic path that matches what you're seeing on this vehicle.
Symptoms You May Notice
- Multiple warning lights on the dashboard (Check Engine, ABS, VDC, SLIP, etc.)
- Engine will crank but not start, or intermittent no-start condition.
- Sudden stalling while driving, especially at low speeds.
- Erratic or non-functional gauges (speedometer, tachometer).
- Transmission may not shift correctly or may enter a fail-safe mode.
- Malfunctioning electrical components like radio, wipers, or lights.
- Cooling fans running on high speed constantly with the key on.
- Replacing the ECM, BCM, or ABS module without first thoroughly checking and confirming the integrity of the battery, its connections, and all major chassis/engine ground points.
Most Likely Causes
- Corroded or Loose Ground Connections 🔴 High Probability The primary ground connection under the battery tray is poorly protected from the elements and is a well-documented failure point on the Quest, leading to severe corrosion. Nissans of this era are generally known for grounding issues.
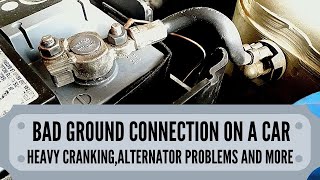
How to confirm: Remove the battery and battery tray. Visually inspect the ground cable and the chassis connection point for rust, green/white powder, or looseness. Perform a voltage drop test from the negative battery terminal to the chassis; a reading above 0.2 volts under load indicates a problem. 🎬 Watch: How to diagnose and solve bad ground connections. A resistance check from the ground point to the negative battery terminal should be less than 1 ohm.
Typical fix: Disconnect the ground cable, thoroughly clean the terminal and the chassis mounting point down to bare metal using a wire brush or sandpaper, apply dielectric grease to protect the connection, and re-secure it tightly. Replace the ground cable if it is frayed or the terminal is damaged.
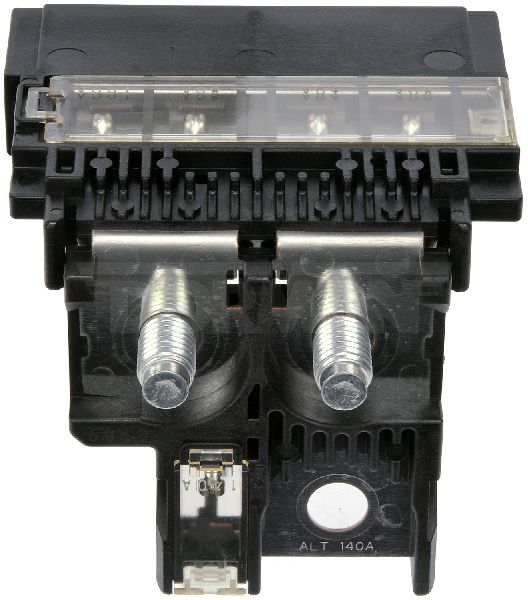
Est. part cost: $15-$70 - Faulty Intelligent Power Distribution Module (IPDM E/R) 🟡 Medium Probability → Shop Fuse Box The IPDM, which is a 'smart' fuse and relay box in the engine compartment, is a known weak point on many Nissan models from this period. Internal relay failures, particularly the non-serviceable ECM relay, can cut power to critical modules, disrupting the CAN network. Original factory-installed IPDMs were often white and known to fail; the updated replacement part is typically black.
How to confirm: Run the IPDM's built-in self-test. If some components don't activate during the test, or if the test doesn't run at all (indicated by no horn chirp), the IPDM is likely faulty. A scan tool can also help identify if the IPDM is not communicating.
Typical fix: Replacement of the IPDM E/R unit. This is typically a plug-and-play part, though it is critical to match the part number to the vehicle's VIN.
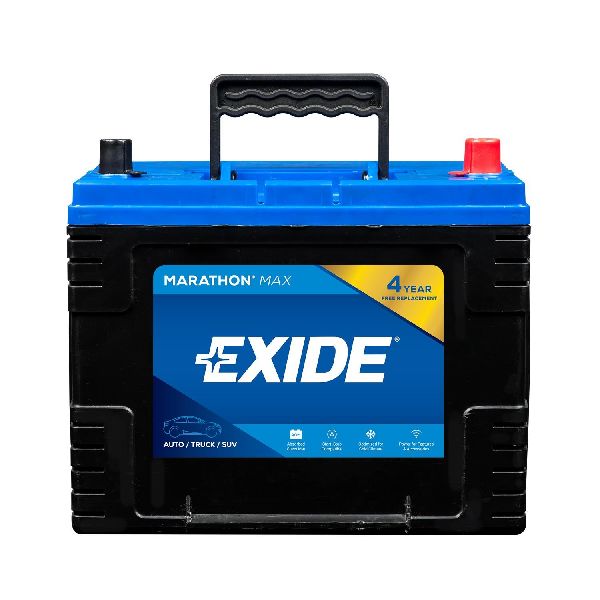
Est. part cost: $150-$400 - Weak or Failing Battery 🟡 Medium Probability → Shop Vehicle Battery
How to confirm: Test the battery voltage with a multimeter. A healthy battery should read approximately 12.6 volts with the engine off and above 13.7 volts with the engine running. A low voltage situation (below 10V) can cause modules to stop communicating at different voltage thresholds, triggering network codes. Most auto parts stores can perform a load test for free.
Typical fix: Replace the vehicle's battery.
Est. part cost: $150-$250 - Damaged CAN Bus Wiring ⚪ Low Probability
How to confirm: Visually inspect harnesses for chafing, breaks, or corrosion, especially around the battery tray and IPDM. With the battery disconnected, measure resistance between Pin 6 (CAN-H) and Pin 14 (CAN-L) at the OBD-II port. A reading of ~60 ohms is normal. 120 ohms indicates an open circuit or missing termination, while ~0 ohms indicates a short.
Typical fix: Repair the damaged section of the wiring harness.
Est. part cost: $5-$100
Rare But Worth Checking
- Failing Control Module: A single module (like the ABS actuator or BCM) can short internally and disrupt the entire network. This should only be suspected after all power, ground, and wiring checks have been completed.
- Aftermarket Electronics: Improperly installed remote starters, alarms, or stereos that are tapped into CAN bus wires can corrupt the network and cause communication codes.
Diagnosis Steps
- Check Battery Health: Ensure the battery is fully charged (12.6V+) and the terminals are clean and tight. A weak battery is a common cause of communication codes.
- Perform a Full System Scan: Use an OBD-II scanner capable of reading manufacturer-specific codes to see which modules are reporting the U1002 code and which modules are not communicating at all.
- Inspect Main Ground Connections: Disconnect the battery. Remove the battery and battery tray to access the main chassis ground. Inspect this point for corrosion or looseness. Clean the connection point to bare metal and re-secure it. Also check the ground strap from the engine to the firewall.
- Check Fuses: Inspect all fuses in both the interior and engine bay fuse boxes (IPDM E/R), paying close attention to high-level fuses labeled for the ECM, BCM, and 'Elec B' that power multiple modules.
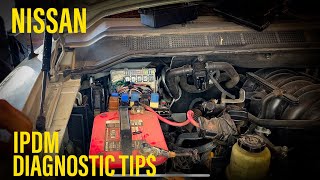
- Run IPDM Self-Test: This test confirms if the IPDM can power various circuits. Close the hood and doors. Turn the ignition ON, and within 20 seconds, press the driver's door jamb switch 10 times. Turn the ignition OFF, then turn it back ON within 10 seconds. The horn should chirp once, and the test will begin, cycling wipers, lights, and fans. 🎬 Watch: How to perform a Nissan IPDM self-test. If the horn does not chirp or tests fail, the IPDM is a likely suspect.
- Test CAN Network Resistance: With the battery disconnected, use a multimeter to measure the resistance between Pin 6 (CAN-H) and Pin 14 (CAN-L) at the OBD-II port. The reading should be approximately 60 ohms. Deviations point to a wiring problem (open/short) or a faulty terminating module.
- Isolate the Fault: If resistance is incorrect (e.g., 120 ohms or 0 ohms), begin unplugging modules from the CAN bus one at a time (starting with easily accessible ones like the ABS unit or BCM) and re-checking resistance to identify which module or wiring branch is causing the fault.
Parts You'll Likely Need
- Battery Ground Cable
(OEM #24080-8Y000)— The original cable's chassis connection point under the battery tray is prone to severe corrosion, making replacement a common fix.
Trusted brands: Nissan OE (Genuine), Standard Motor Products (SMP)
OEM price range: $40-$60
Aftermarket price range: $15-$30 - Intelligent Power Distribution Module (IPDM E/R)
(OEM #284B7-ZE03B (Verify with VIN))— This module is a common failure point on Nissans of this era and can cause widespread communication issues when its internal, non-serviceable relays fail. The original white-cased modules are particularly prone to failure and were often superseded by black-cased units.
Trusted brands: Nissan OE, Hitachi
OEM price range: $250-$400
Aftermarket price range: $150-$250
Related Codes That Often Appear With This One
- U1000 — This is a general CAN communication failure code. U1002 is a more specific version with a stricter timing requirement, so they often appear together or interchangeably.
- U0100 — This code indicates 'Lost Communication with ECM/PCM'. It can appear with U1002 if a bad ground or faulty IPDM cuts power to the Engine Control Module.
- U0121 — This code means 'Lost Communication With Anti-Lock Brake System (ABS) Control Module'. If the ABS module is the source of the network disruption or is not receiving power, this code will often accompany U1002.
Technical Service Bulletins (TSBs) & Recalls
- NTB10-066A: This is a primary TSB for diagnosing CAN codes U1000, U1001, U1002, and U1010 on most 2005-2015 Nissan vehicles. It clarifies that U1002 has a 'tighter timing spec' than U1000 and advises technicians to always diagnose communication codes first. It also provides basic electrical check procedures.
Platform-Specific Known Issues
- Corroded Ground Under Battery Tray: → Shop Vehicle Battery The most common and well-documented cause for U1002 on the 2005-2009 Quest. The main battery-to-chassis ground point is located in an area highly exposed to moisture and battery fumes, causing severe corrosion that creates high resistance and disrupts the entire vehicle's electrical network. Cleaning or replacing this ground is the first and most crucial diagnostic step.
Mechanic-Grade Diagnostic Values
- CAN High Voltage (Pin 6 at OBD-II port to chassis ground) — expected: Switches between ~2.5V (recessive) and ~3.5V (dominant). A multimeter will show an average of ~2.7V on an active bus.. Failure: Stuck at 2.5V (possible short to low), 0V (open circuit), or a voltage below ~2.0V (potential module transceiver failure).
- CAN Low Voltage (Pin 14 at OBD-II port to chassis ground) — expected: Switches between ~2.5V (recessive) and ~1.5V (dominant). A multimeter will show an average of ~2.3V on an active bus.. Failure: Stuck at 2.5V (possible short to high), 0V (open circuit), or a voltage above ~3.0V (potential module transceiver failure).
- Ground Point Resistance — expected: Less than 1.0 ohm between the ground point/cable and the negative battery terminal.. Failure: Resistance greater than 1.0 ohm indicates a poor ground connection that can cause intermittent issues.
- ECM Power Supply via IPDM E/R — expected: Within 0.5 volts of battery voltage at the Mass Airflow (MAF) sensor power wire (often a brown wire on Nissans).. Failure: A significant voltage drop (e.g., reading only 5-6 volts) points to a failing ECM relay inside the IPDM.
Scan Tool Commands That Help
- Nissan CONSULT-III plus: Auto CAN diagnosis / CAN Diag Support Monitor — This is the primary diagnostic function for CAN codes. It generates a 'V-CAN diagram' that visually displays the communication status of all modules on the network, using color codes to identify which modules have current (Red), past (Orange), or internal (Pink) errors, and which are communicating normally (Green). This quickly isolates the area of the fault.
Wiring & Ground Locations
- Main Battery Ground — Directly under the battery tray, connecting the negative battery cable to the chassis frame rail.. This is the most common failure point. Its location exposes it to battery acid and road spray, causing severe corrosion and high resistance that disrupts the entire CAN network.
- Engine-to-Firewall Ground Strap — Typically a braided strap from the engine block or cylinder head to the vehicle's firewall.. Ensures the engine and its sensors/modules have a solid ground reference to the body. A poor connection here can cause erratic sensor readings and communication faults.
- Interior Ground Points — Commonly found behind the driver and passenger kick panels and sometimes under the front seats, where harnesses are grounded to the floor pan.. The BCM and other interior modules rely on these grounds. A loose or corroded interior ground can take a specific module offline, triggering a U1002 code.
- Service Manual Section PG — In the factory service manual, the 'PG' (Power Supply, Ground & Circuit Elements) section contains detailed diagrams of all ground point locations.. Provides the authoritative map for locating and inspecting all ground distribution points (e.g., E15, E24) when a general inspection fails to find the cause.
OEM Part Supersession History
Various (White Case)→Various (Black Case)— The original IPDM E/R modules with white plastic casings were known for a high failure rate of the internal, non-serviceable ECM relay. Nissan superseded these with updated parts, which are typically housed in black plastic casings and are more reliable.
Heads up: While the updated black-cased IPDMs are generally more robust, the specific part number must still be matched to the vehicle's VIN to ensure compatibility with the vehicle's options and configuration.
Model Year Variations Within This Range
- 2007-2009: A significant interior facelift for the 2007 model year moved the instrument cluster from the center of the dashboard to a conventional location in front of the driver. This change involved a different dashboard wiring harness and potentially different CAN bus routing for the cluster and associated controls compared to the 2004-2006 models.
Helpful Videos


We Have This Part in Stock


The information in this article is provided for general reference and educational purposes only. Vehicle specifications, procedures, and part compatibility can vary by production date, trim level, and region. Always consult your vehicle's factory service manual and verify part numbers before purchasing or performing repairs. Safety-critical components such as airbags, seat belts, and braking systems should be installed by a qualified professional.
- Nissan QUEST:
- 🧭 Diagnostic Flowchart
- 🎬 Helpful Videos
- 🛍️ Shop This Part
- What's Unique About the 2005-2009 Nissan QUEST
- Symptoms You May Notice
- Most Likely Causes
- Rare But Worth Checking
- Diagnosis Steps
- Parts You'll Likely Need
- Related Codes That Often Appear With This One
- Technical Service Bulletins (TSBs) & Recalls
- Platform-Specific Known Issues
- Mechanic-Grade Diagnostic Values
- Scan Tool Commands That Help
- Wiring & Ground Locations
- OEM Part Supersession History
- Model Year Variations Within This Range
- 🎟️ Get 5% Off