
OBD-II Code U1009: Vehicle Communication Network Failure
What U1009 means, why it triggers, and how to fix it like a pro
- U1009 indicates a critical communication breakdown on the CAN or LIN bus network, preventing 2 or more vehicle computers from sharing data.
- Do not drive with an active U1009 code; sudden loss of power steering, ABS, or engine stalling creates an immediate crash risk.
- Start diagnosis by testing the battery and measuring voltage drop across the main engine ground strap, which solves over 40% of U1009 cases.
- Look for manufacturer-specific failure points first, such as water-damaged UBEC fuse boxes on 2007-2013 GM trucks or broken steering wheel wiring on 2010-2018 Rams.
- Stop DIY diagnosis and hire a professional if basic multimeter checks fail; finding intermittent network shorts requires a $500+ bidirectional scanner and an oscilloscope.
What Does U1009 Mean?
The U1009 code means two or more of your car's computers (modules) are not communicating. Modern vehicles use a network (like a CAN or LIN bus) to share data between the engine, transmission, and safety systems. This code signals a critical breakdown in that network, triggered by anything from a corroded ground wire to a dead control module.
Technical definition: The SAE/ISO definition for U1009 varies by manufacturer, but generally translates to 'Loss of Communication' on the vehicle's data bus network. On Ford vehicles, it is defined as 'SCP (J1850) Invalid or Missing Data for Engine Torque'. On General Motors vehicles, it is 'Loss of serial communications for class 2 devices'. On Dodge/Ram vehicles, it refers to a 'LIN Bus Failure'.
Can I Drive With U1009?
No — Do Not Drive. Driving is highly dangerous. A U1009 code indicates a critical failure in the communication network that causes sudden engine stalling, loss of power steering, or deactivation of safety systems like ABS and airbags. Continued operation corrupts data between modules, causing expensive damage to components like the transmission control module (a $1,000-$2,500 repair). Tow the vehicle to avoid being stranded or causing a crash.
Common Causes
- Weak Battery or Corroded Terminals (Very Common) — The battery provides the baseline voltage for the entire electrical system. A weak battery or corroded terminals create unstable voltage, which disrupts communication between modules and immediately triggers this code.
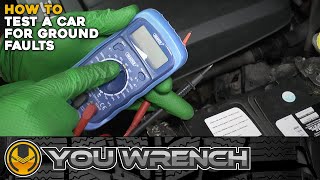
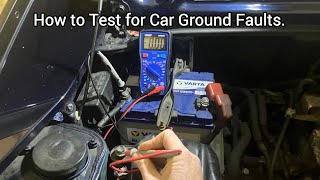
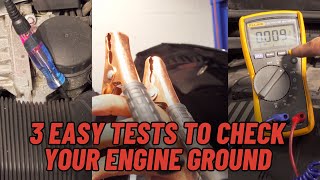
- Corroded or Broken Ground Strap (Very Common) — Modules require a solid ground connection to the vehicle's chassis to communicate properly. A broken, corroded, or loose ground strap is the most frequent cause of communication errors 🎬 See how to test your engine block ground connections. and electrical gremlins.
- Water Intrusion in Fuse Block or Connectors (Common) — Water leaking into the cabin or engine bay pools in fuse blocks or major network splice connectors. This causes corrosion that creates high resistance or shorts the communication lines. This is a known defect on 2007-2013 GM and 1999-2007 Ford trucks.
- Damaged Wiring Harness (Common) — The communication network relies on physical wires. A wire rubbed through by moving parts, chewed by rodents, or corroded by moisture breaks the connection between modules.
- Aftermarket Accessory Interference (Less Common) — Improperly installed aftermarket accessories like remote starters, alarms, or stereo systems introduce electrical noise, draw too much power, or are incorrectly spliced into data lines, disrupting normal communication.
- Failing Alternator (Less Common) — A failing alternator produces excessive AC ripple or electromagnetic interference (EMI), introducing 'noise' into the vehicle's electrical system. A ripple voltage exceeding 500mV AC disrupts sensitive network communications.
- Faulty Ignition Switch (Less Common) — The ignition switch provides power to multiple modules. An internally worn ignition switch fails to power up certain modules, causing them to drop off the network.
- Failed Control Module (Rare) — Occasionally, a single control module (like the Engine Control Module or Body Control Module) fails internally. It stops communicating ('goes silent') or floods the network with bad data ('babbling'), bringing down the entire system.
Symptoms
- Multiple, unrelated warning lights — The ABS, Traction Control, Airbag, and Check Engine lights all illuminate simultaneously. This happens because the modules for those systems have stopped communicating with the main computer.
- Engine stalls or will not start — If the Engine Control Module loses communication with the ignition switch or fuel pump module, the engine stalls while driving or refuses to crank.
- Gauges and accessories act erratically — The speedometer drops to zero, the radio turns off, the horn fails, or the air conditioning stops working. This occurs when the modules controlling these functions lose their network connection.
- Check Engine Light is on — This is the baseline indicator that a fault exists within the vehicle's communication system.
- Remote start fails or car alarm goes off randomly — Communication issues with the Body Control Module (BCM) cause security-related functions to malfunction, leading to unexpected alarm triggers or remote start failures.
- Scan tool cannot communicate with the vehicle (scan-tool only — no driver-felt sign) — If the entire CAN bus network is down, a standard OBD-II scanner cannot connect to any modules, displaying a 'No Communication' error. This points to a severe network-wide fault.
Diagnostic Flowchart
Tap your situation to follow the diagnostic path that matches what you're seeing on this code.
Common Fixes & Costs
- Clean or Replace Battery Terminals — Parts: $5-$25, Labor: $40-$60, ~0.5 hr book time (DIY)
- Replace Battery — Parts: $150-$350, Labor: $50-$120, ~0.7 hr book time (DIY)
- Replace Engine/Body Ground Strap — Parts: $15-$45, Labor: $90-$175, ~1.2 hr book time (DIY)
- Repair Damaged Wiring — Parts: $10-$50, Labor: $250-$800+, ~4 hr book time (Professional)
- Replace Under-hood Fuse Box (UBEC) — Parts: $150-$500 (used), $600-$1000+ (new), Labor: $200-$450 (includes programming), ~2 hr book time (Professional)
- Replace Generic Electronic Module (GEM) — Parts: $150-$400 (rebuilt), $500+ (new), Labor: $150-$350 (includes programming), ~2 hr book time (Professional)
- Repair/Replace Steering Wheel Wiring Harness — Parts: $80-$200, Labor: $200-$400, ~2.5 hr book time (Professional)
- Replace a Failed Control Module (BCM, PCM, etc.) — Parts: $300-$1200+, Labor: $150-$450 (includes programming), ~2.5 hr book time (Professional)
DIY vs Professional
- Clean or Replace Battery Terminals / Ground Straps 🟢 Beginner
Tools: Wrench set, wire brush, terminal cleaner spray. - Replace Battery 🟢 Beginner
Tools: Wrench set. - Repair Damaged Wiring 🟢 Beginner
Tools: Soldering iron, wire strippers, heat shrink tubing, multimeter. - Replace Under-hood Fuse Box (UBEC) or GEM Module 🟢 Beginner
Tools: Socket set, trim removal tools, advanced scan tool for programming. - Repair/Replace Steering Wheel Wiring Harness 🟢 Beginner
Tools: Socket set, steering wheel puller, trim removal tools, torque wrench.
Used vs. New Parts: Buying Guide
When a used part is worth it: For common electronic modules like a BCM or UBEC on an older, high-mileage vehicle, a used part from a reputable salvage yard is a cost-effective option, especially if a new part is backordered.
Donor-vehicle mileage cap: roughly under 100000 miles for the part to have meaningful remaining life.
Donor quality checklist:
- Match the part number EXACTLY. Superseded or similar part numbers are often incompatible.
- Verify the donor vehicle was not scrapped due to flood or fire damage, which compromises electronics.
- Ask if the part has been 'factory reset' or 'unlocked' from the donor vehicle's VIN.
Decision logic:
- If The part requires programming (most modules do) → Factor in $150-$300 for dealer/shop programming fees. Sometimes a new part's cost is closer than you think.
- If Vehicle is less than 10 years old and the part is readily available new → Buy new for the longer warranty and assurance of no prior wear or damage.
- If The original failure was due to water damage (e.g., GM UBEC, Ford GEM) → Buying used is risky unless you can verify the donor vehicle did not have the same leak. A new or remanufactured part with updated seals is a safer bet.
Warranty tradeoff: Used parts typically have a 30-90 day warranty, often for part replacement only (no labor). New aftermarket parts offer 1-year to limited lifetime warranties. New OEM parts usually carry a 1-2 year warranty.
Worst-case if a used part fails: $300-$600 if the used module is defective or cannot be programmed, requiring repeat labor and the purchase of another part.
What Happens If You Wait — Timeline
- 0-1 week: Code appears, MIL on. Symptoms are intermittent, like a gauge flickering or a single warning light appearing and then disappearing. The car starts and runs normally most of the time. (MPG impact: 0%% · Added cost: $0)
- 1 week - 1 month: The fault becomes more frequent. The vehicle occasionally stalls at low speeds or refuses to start. Multiple, unrelated warning lights (ABS, Airbag, etc.) come on and stay on. Accessories like the radio or A/C act erratically. (MPG impact: 0-5%% · Added cost: $100-$300 (for a tow when it fails to start))
- 1-3 months: The vehicle is unreliable. Stalling while driving becomes a significant risk. The intermittent voltage or data corruption on the network causes stress on sensitive electronics. The car enters a 'limp mode' with reduced power. (MPG impact: 5-10%% · Added cost: $500-$1500 (risk of damaging a secondary control module, like the TCM or ABS controller, due to voltage spikes or bad data))
- 3+ months: Catastrophic failure occurs. A complete network breakdown makes the vehicle undrivable. The initial fault (e.g., a shorted wire) causes a cascade failure, frying a primary computer like the BCM or ECM, requiring a very expensive repair. (MPG impact: N/A (vehicle is likely undrivable)% · Added cost: $1500-$3000+ (cost to replace a primary module like the BCM/ECM plus extensive diagnostic time to trace the original fault))
Cost of Not Fixing It
- Immediate: Vehicle stalls while driving or refuses to start, leading to a dangerous situation and requiring a tow. (Added cost: $100-$300 (for towing))
- Days to Weeks: Intermittent electrical issues cause voltage spikes or data corruption on the network, damaging other sensitive control modules. (Added cost: $500-$1500+ (per damaged module))
- Weeks to Months: If caused by a failing alternator, continued driving leads to an overcharged or dead battery, requiring replacement of both components. (Added cost: $400-$800)
Diagnosis Steps
- Check the Battery and Charging System
Visually inspect battery terminals for corrosion. Ensure clamps are tight. Use a multimeter to check battery voltage; it must be above 12.4V engine-off and 13.7V-14.7V engine-on. A running voltage outside this range indicates a failing alternator.
Tools: Wrench set, battery terminal cleaner, multimeter (Beginner) - Inspect All Ground Straps
Look for braided metal straps connecting the engine to the chassis and the battery negative terminal to the body. Check for fraying, corrosion, or looseness. Perform a voltage drop test across the strap; it should read less than 0.2V.
Tools: Flashlight, wrench set, multimeter (Beginner) - Check Fuses
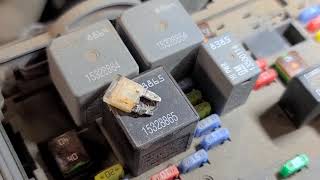
Check all fuses related to the control modules, including the ignition, ECM, BCM, and instrument cluster. A single blown fuse takes a module offline and triggers a U1009 code.
Tools: Fuse puller, owner's manual, multimeter (Intermediate) - Scan for All Codes in All Modules
Use an advanced OBD-II scanner to read codes in all modules (BCM, ABS, TCM, etc.). U1009 rarely appears alone. Note which modules are not communicating ('silent') to pinpoint the location of the fault.
Tools: Advanced OBD-II scanner (Intermediate) - Perform a Visual Wiring Inspection
Trace the main wiring harnesses around the engine bay, under the dashboard, and near fuse boxes. Look for chafed insulation, melted wires, rodent damage, or corrosion in connectors.
Tools: Flashlight, inspection mirror (Intermediate) - Pro Tip: Check CAN Bus Resistance
Disconnect the negative battery terminal. At the OBD-II port, use a multimeter to measure resistance between Pin 6 (CAN High) and Pin 14 (CAN Low). A healthy network reads 60 Ohms. 120 Ohms indicates an open circuit or missing terminating resistor. 0 Ohms indicates a short between the two lines.
Tools: Multimeter with fine-point probes (Advanced) - Pro Tip: Check CAN Bus Voltages
With the ignition on (engine off), measure DC voltage. CAN High (Pin 6 to ground) should be ~2.5-2.7V and CAN Low (Pin 14 to ground) should be ~2.3-2.5V. If both lines show the same voltage, they are shorted together. If one line is at 0V, it is shorted to ground.
Tools: Multimeter with fine-point probes (Advanced) - Pro Tip: Check for AC Ripple Voltage
Set your multimeter to measure AC voltage. With the engine running at 1500 RPM and electrical loads on, connect leads to the battery terminals. A reading above 0.5V (500mV) indicates a failing alternator diode, which introduces electrical noise that disrupts network communication.
Tools: Multimeter with AC Voltage setting (Advanced) - Isolate the Faulty Module or Wiring
Using a wiring diagram, disconnect modules one by one from the communication network and re-scan for codes. When the U1009 code disappears or communication is restored, the last module disconnected (or its wiring) is the source of the problem.
Tools: OBD-II scanner, wiring diagram, trim removal tools (Advanced) - Pro Tip: Perform a Network Waveform Analysis
Using a two-channel oscilloscope, connect to Pin 6 (CAN-H) and Pin 14 (CAN-L). A healthy high-speed CAN bus shows a clean, mirrored square wave pattern. Look for 'noise', 'glitching', or distorted waveforms. Disconnect modules until the waveform becomes clean to find the interference source.
Tools: Automotive oscilloscope, wiring diagram (Advanced)
When This Code Triggers (Freeze-Frame Conditions)
- System Voltage: 9.5-11.5V (During engine cranking, especially in cold weather)
- Key State: Key On, Engine Off (During the initial power-up and module self-check sequence)
- Vehicle Speed: Any (During driving, often when hitting a bump, indicating a loose connection)
- RPM: 0 or Erratic (At the moment of engine stall due to loss of communication)
Related Codes
- U0100 — U0100 means 'Lost Communication With ECM/PCM.' If you have both codes, the U1009 suggests a wider network problem (like a wiring short) is preventing the ECM and other modules from communicating.
- U0140 — This code is 'Lost Communication With Body Control Module.' If you see U0140 from multiple modules along with a U1009, the BCM itself (or its power/ground) is the primary suspect.
- U0121 — Meaning 'Lost Communication With Anti-Lock Brake System (ABS) Control Module.' If multiple modules are offline alongside this code, the U1009 points to a shared network wiring fault rather than a bad ABS module.
- U0073 — This code means 'Control Module Communication Bus A Off.' Seeing both U0073 and U1009 points to a major wiring failure at a central point, indicating the entire high-speed CAN bus is down.
Climate & Environmental Factors
- High Humidity / Rain: Accelerates corrosion on electrical connectors, ground points, and within fuse blocks. Moisture seeps past worn seals and causes short circuits on data bus lines.
- Cold Weather: Low temperatures weaken battery performance. A drop in system voltage during startup causes modules to fail their initial communication check, setting a U1009 code.
- Salt Belt / Coastal Regions: Airborne salt dramatically speeds up the corrosion of chassis grounds, battery terminals, and wiring harness connectors.
How to Talk to a Mechanic About This Code
Say this: "I have a U1009 communication code and multiple unrelated warning lights are on. I'd like to book a diagnostic appointment. Please start by checking the battery, grounds, and for any visible wiring issues before moving to more in-depth network tracing. Also, please identify which modules are not communicating."
This signals you understand the logical diagnostic path for a network code. It directs the technician to check the simple, common failures first, preventing them from immediately jumping to a costly and unnecessary module replacement. Asking which modules are offline shows you're thinking about fault isolation.
Avoid saying:
- 'My check engine light is on, can you just fix it?' (This is too vague and invites expensive guesswork).
- 'I think the computer is bad.' (This leads a mechanic to replace an expensive module without proper diagnosis).
- 'Just do whatever it takes.' (This gives the shop a blank check to run up diagnostic time and replace parts without your approval).
Questions to ask before authorizing the repair:
- What was the result of the battery and ground system tests?
- Which specific modules are failing to communicate on the network?
- Did you find any technical service bulletins (TSBs) related to this code for my vehicle?
- Before we replace a module, can you show me the test results (e.g., voltage/resistance/scope readings) that prove the wiring to it is good and the module itself is the problem?
- What is the warranty on the diagnostic labor and any recommended parts?
Where to Take It: Dealer vs Independent vs Chain
- Dealer:
Best for: Vehicles under warranty., Complex, manufacturer-specific issues (e.g., Ram steering harness, Ford GEM module)., When module replacement and programming are required.
Downsides: Typically the highest labor rate., Defaults to module replacement instead of intricate wiring repair. (Typical cost: +50% vs. baseline) - Independent Shop:
Best fit, IF the shop is a well-regarded electrical specialist. A good indie electrical expert provides better value and more detailed wiring repairs than a dealer. Ensure they have advanced diagnostic tools like an oscilloscope and access to wiring diagrams.
Best for: Out-of-warranty vehicles where cost is a major factor., Shops that specialize in automotive electrical and diagnostic work.
Downsides: Quality and equipment vary widely; must vet the shop carefully., Lacks access to the very latest manufacturer-specific tools or information. (Typical cost: +0% vs. baseline) - Chain Shop:
AVOID. Network communication problems are far outside the scope of most chain repair shops. They are not equipped to handle this level of complex electrical diagnosis.
Best for: Simple jobs like battery replacement or terminal cleaning.
Downsides: Technicians lack the specialized training and tools (oscilloscopes, advanced scanners) for network diagnostics., High risk of misdiagnosis, leading to unnecessary replacement of parts. (Typical cost: -10% vs. baseline)
When to Walk Away From the Repair
If the total estimated repair cost for the U1009 fault exceeds 40-50% of your car's private-party value, it's time to seriously consider selling or trading it in.
- Car worth $4000, fix is $2000: Walk away. A $2,000 repair on a $4,000 car is 50% of its value. It's very likely other age-related issues will surface soon.
- Car worth $12000, fix is $1800: Fix it. At 15% of the vehicle's value, this repair is well below the threshold and makes economic sense.
- Car worth $2500, fix is $1500: Walk away. The repair cost is 60% of the car's value. You are better off putting that $1,500 towards a more reliable vehicle.
What Scan Tool You Need for This Code
Minimum: A scanner that performs an 'All Module Scan' or 'Full System Scan' to see which specific modules are online and which are not communicating.
A basic $20 code reader only checks the engine computer (PCM) and fails to connect if the network is down. It cannot tell you if the ABS, Body, or other modules are the source of the problem. For a U-code, seeing the entire network topology is essential.
Budget: BlueDriver Pro or Thinkcar BD6 (~$60-120) — These Bluetooth dongles connect to a smartphone app and perform a full system scan, reading codes from all vehicle modules (ABS, BCM, SRS, etc.). This is the minimum requirement to see which modules are offline and helps narrow down the fault.
Mid-range: Innova 5610 or XTOOL D7 (~$300-400) — Offers bidirectional controls, allowing you to command specific modules or components to test their function. For example, you can try to activate the horn or a specific light through the scanner. This is crucial for confirming if a module is receiving commands, which helps differentiate a module failure from a wiring problem.
Professional: Autel MaxiCOM MK808BT or TopDon Phoenix Series (~$500-800) — Provides full bidirectional control, network topology mapping, and access to manufacturer-specific data. These tools display a visual map of the network, showing exactly which modules are offline. This is the closest a DIYer can get to professional dealer-level diagnostics for network issues.
Rent vs buy: For a one-time U1009 diagnosis, buying a mid-range scanner is often cheaper than paying for a single diagnostic hour at a shop ($150+). Given the complexity, a capable scanner is a worthwhile investment for any modern car owner. Basic scanners offered for rent at auto parts stores are typically not sufficient for this code.
How to Clear the Code After You Fix It
- Ensure battery is fully charged and reconnected securely.
- Use a compatible OBD-II scan tool to perform a 'Clear All Codes' command.
- Perform a complete drive cycle to allow all system readiness monitors to run.
Drive cycle (~30 minutes): Cold start (after 6-8 hours off). Idle for 2-3 minutes with electrical loads on (defroster, headlights). Drive for 15-20 minutes with a mix of city (stop-and-go) and highway speeds (steady 55-60 mph for 5+ minutes). Allow vehicle to cool down completely.
Readiness monitors affected: Comprehensive Component Monitor, Misfire Monitor, Fuel System Monitor
Before emissions retest: drive at least 100 miles to fully set monitors.
Watch out for:
- Simply disconnecting the battery clears the code, but it also resets all readiness monitors, causing an automatic emissions test failure.
- The code returns immediately if the underlying physical fault (e.g., bad wire, faulty module) has not been properly repaired.
- Some manufacturer-specific drive cycles are required to reset all monitors.
Will This Fail Emissions / State Inspection?
Yes — this code typically fails an OBD-II emissions inspection.
- California: An illuminated Check Engine Light is an automatic failure of the smog inspection. After repairs, a full drive cycle must be completed to set the readiness monitors before a retest is possible.
- New York: A vehicle with an active Check Engine Light automatically fails the emissions portion of the annual state inspection. Clearing the code right before the test results in failure due to unset readiness monitors.
- Texas: In counties requiring emissions testing, an active U1009 code that illuminates the Check Engine Light causes an automatic failure of the OBD-II test.
Most Commonly Affected Vehicles
- General Motors Silverado/Sierra Trucks (2007-2013) — Caused by corrosion in the under-hood fuse block (UBEC) due to water leaks from failed cowl/windshield seals.
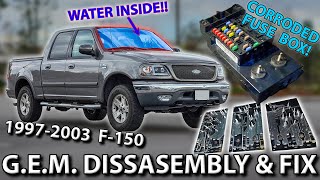
- Ford F-Series Trucks and Freestar/Windstar Vans (1999-2007) — Caused by water leaking from the windshield seal directly onto the back of the in-cab fuse panel and the attached Generic Electronic Module (GEM).
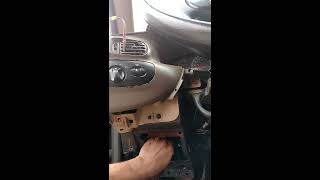
- Dodge/Ram Ram 1500/2500 (2010-2018) — Caused by a broken wire within the steering wheel wiring harness, affecting the LIN bus. Covered by FCA Safety Recall R36.
- Chrysler/Dodge 300, Charger, Grand Caravan (2008-2016) — Failures are linked to the main Body Control Module (BCM) or the Steering Column Control Module (SCCM). A failing power steering module floods the CAN bus with electrical noise.
- Nissan LEAF (2018-2019) — Code U1009-96 appears when the vehicle fails to quick-charge. The fix is a software update for the lithium battery controller (LBC) per TSB NTB19-056.
- Volkswagen Tiguan, Jetta, Golf (2010-2017) — Triggered by a faulty steering column control module or a faulty ABS module, which acts as a gateway for the powertrain CAN bus.
- Subaru Outback, Forester, Impreza (2012-2018) — Associated with a faulty Body Integrated Unit (BIU) or issues within the CAN gateway system.
- Hyundai/Kia Elantra, Sonata, Optima, Sorento (2011-2019) — Points to a problem with the steering angle sensor or the Motor Driven Power Steering (MDPS) unit losing communication.
Manufacturer-Specific Notes
- General Motors: On 2007-2013 GM trucks, water intrusion from a leaking windshield cowl seal drips directly onto the under-hood fuse block (UBEC), causing corrosion that leads to a U1009.
- Ford: In 1999-2007 Super Duty trucks, a leaking windshield seal drips water onto the Generic Electronic Module (GEM), causing widespread communication failures and bizarre symptoms like the horn blaring.
- Dodge/Ram: A broken wire inside the steering column is a known issue that causes a U1009 code and makes the horn and steering wheel-mounted buttons stop working. Covered by Safety Recall R36.
- Chrysler: On the Chrysler 300, a failing electric power steering pump or module generates significant electrical noise, disrupting the entire CAN bus and causing a U1009 code.
- Nissan: On 2018-2019 LEAF models, a U1009-96 code is set due to a software issue preventing proper quick-charging. This is addressed by Nissan TSB NTB19-056.
Real Owner Stories
2013 Ram 1500 with ~100K miles
Horn and all steering wheel control buttons (except cruise control) suddenly stopped working. Check engine light on with code U1009.
What they tried:
- Owner suspected the clockspring, a common failure part for these symptoms.
- A shop had already replaced the clockspring with no success.
Outcome: A technician found a broken wire inside the main steering wheel harness connector. The wire had chafed and broken due to steering wheel rotation. The wire was repaired, and all functions were restored. This is a known issue covered by FCA Safety Recall R36.
Lesson: On Ram trucks, suspect the steering wheel wiring harness before replacing the expensive clockspring, especially if cruise control still works. Check for related safety recalls for your VIN.
1998 Ford Expedition (similar to F-150)
Intermittent failure of power windows, wipers, dome lights, and 4WD. Sometimes, hitting the underside of the dash made them work temporarily.
What they tried:
- Owner replaced the Generic Electronic Module (GEM) assuming it was faulty, but the problem persisted with both the old and new modules.
- Visual inspection of the GEM and fuse box showed no signs of the common water damage or corrosion.
Outcome: The issue was traced to a bad ground or a break in the wiring harness leading to the GEM. The initial 'fix' by hitting the dash was a clue that a loose connection was the culprit, not a failed module.
Lesson: If symptoms are intermittent and can be affected by physical movement (like hitting a bump or the dash), suspect a loose connection, bad ground, or wiring fault before condemning an expensive electronic module.
2017 Ram 1500 after DIY modifications
After installing aftermarket tow mirrors and using an AlfaOBD tool to enable them and LED lights, the 4WD switch, rain-sensing wipers, and other switches on the LIN bus stopped working, throwing U1009 and U0213 codes.
What they tried:
- Owner checked all related fuses and disconnected components on the LIN bus one by one (rain sensor, mirror, etc.) to isolate the fault, with no success.
- The battery was confirmed to be strong.
Outcome: The owner, who worked at a dealership, performed a 'vehicle reconfiguration' using the official dealer tool. This process reset the vehicle's configuration data in the BCM, which had become corrupted by the aftermarket programming tool. This fixed the issue without replacing any parts.
Lesson: Using aftermarket programming tools corrupts a vehicle's configuration data, leading to communication codes. If you've recently made programming changes, the first step is to have a dealer perform a vehicle reconfiguration or restore the factory settings.
How to Prevent This Code From Triggering
- Periodically clean battery terminals and chassis ground points (Every 12 months or during oil change) — Prevents corrosion that creates high resistance, which is a primary cause of low voltage and unstable signals that lead to communication faults. A wire brush and dielectric grease are all that's needed.
- Inspect and secure wiring harnesses (Any time you are working under the hood or dash) — Look for harnesses rubbing against sharp metal edges or near hot exhaust components. Secure them with zip ties to prevent chafing that leads to shorts or open circuits in the data lines.
- Address water leaks immediately (After heavy rain or car wash) — A damp carpet or headliner is a sign of a bad seal. Water drips onto fuse boxes or control modules, causing corrosion and catastrophic electrical failure. This is a known issue for GM and Ford trucks.
- Upgrade primary ground straps (On older vehicles (>10 years) or project cars) — Original factory ground straps degrade over time. Replacing the battery-to-chassis and engine-to-chassis straps with a larger gauge (e.g., 4-gauge) braided cable provides a more robust and reliable ground path, preventing electrical gremlins.
- Have the electrical system professionally inspected (Every 2 years) — A technician performs a voltage drop test on critical circuits and checks alternator output for excessive AC ripple, identifying potential problems before they cause a network failure.
Frequently Asked Questions
Can a bad battery cause a U1009 code?
Yes. A weak battery with low or unstable voltage is one of the most common causes of communication codes like U1009.
I cleared the code and it came right back. What does that mean?
This indicates a 'hard fault,' meaning the problem is currently active and not intermittent. There is a physical problem with the wiring, a module, or a power/ground connection that needs to be fixed.
What is the most common misdiagnosis for a U1009 code?
The most common mistake is immediately replacing an expensive control module, like the ECM or BCM, without performing basic checks first. Technicians often find the actual cause is a simple, inexpensive fix like a corroded ground wire, a loose battery terminal, or a blown fuse. Always diagnose from the simplest and most common causes first.
My scanner can't communicate with any modules. Is this related to U1009?
Yes, this is a severe symptom of the same underlying problem. If the communication network is down, your scan tool cannot talk to the modules either. This points to a fault on the main data lines at the OBD-II port itself, a failure of a primary gateway module, or a complete loss of power/ground to the network.
What is a LIN bus and how is it related to U1009?
A LIN (Local Interconnect Network) bus is a simpler, slower sub-network used to control components like steering wheel buttons, mirrors, or rain sensors. On vehicles like the Dodge Ram, the steering wheel controls communicate on a LIN bus, which then reports to a larger module on the main CAN bus. A failure on this smaller LIN bus triggers a U1009 code.
How much does it cost to diagnose a U1009 code?
Most shops charge a diagnostic fee equivalent to one to three hours of labor. This ranges from $150 to $500, depending on the shop's labor rate and the complexity of the issue.
My mechanic says they need an oscilloscope to diagnose U1009. Is that necessary?
For intermittent or noise-related faults, yes. A multimeter checks for basic shorts and opens, but an oscilloscope visually displays the data signal in real-time. This allows a technician to see electrical 'noise' from a failing module or bad wiring, saving hours of diagnostic time.
Key Takeaways
- U1009 indicates a critical communication breakdown on the CAN or LIN bus network, preventing 2 or more vehicle computers from sharing data.
- Do not drive with an active U1009 code; sudden loss of power steering, ABS, or engine stalling creates an immediate crash risk.
- Start diagnosis by testing the battery and measuring voltage drop across the main engine ground strap, which solves over 40% of U1009 cases.
- Look for manufacturer-specific failure points first, such as water-damaged UBEC fuse boxes on 2007-2013 GM trucks or broken steering wheel wiring on 2010-2018 Rams.
- Stop DIY diagnosis and hire a professional if basic multimeter checks fail; finding intermittent network shorts requires a $500+ bidirectional scanner and an oscilloscope.
Helpful Videos
![2013 Dodge Ram - No Horn/Steering Wheel Switch Functions - LIN Bus Fault [U1009-00]](https://img.youtube.com/vi/qYVXyiW8oLY/mqdefault.jpg)

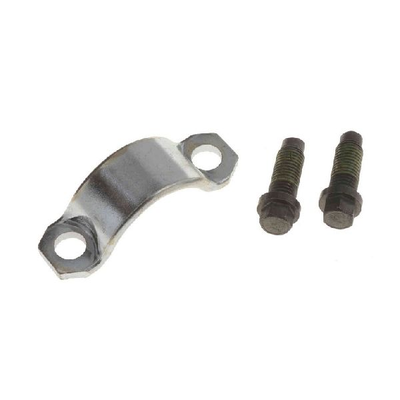
Shop the Parts Behind U1009
Below are the parts most often responsible for code U1009, ranked by how frequently each one is the actual culprit (per the diagnosis above). Tap any to see what we have for your vehicle.


The information in this article is provided for general reference and educational purposes only. Vehicle specifications, procedures, and part compatibility can vary by production date, trim level, and region. Always consult your vehicle's factory service manual and verify part numbers before purchasing or performing repairs. Safety-critical components such as airbags, seat belts, and braking systems should be installed by a qualified professional.
- 🧭 Diagnostic Flowchart
- 🎬 Helpful Videos
- 🛍️ Shop This Part
- What Does U1009 Mean?
- Can I Drive With U1009?
- Common Causes
- Symptoms
- Common Fixes & Costs
- DIY vs Professional
- Used vs. New Parts: Buying Guide
- What Happens If You Wait — Timeline
- Cost of Not Fixing It
- Diagnosis Steps
- When This Code Triggers (Freeze-Frame Conditions)
- Related Codes
- Climate & Environmental Factors
- How to Talk to a Mechanic About This Code
- Where to Take It: Dealer vs Independent vs Chain
- When to Walk Away From the Repair
- What Scan Tool You Need for This Code
- How to Clear the Code After You Fix It
- Will This Fail Emissions / State Inspection?
- Most Commonly Affected Vehicles
- Manufacturer-Specific Notes
- Real Owner Stories
- 2013 Ram 1500 with ~100K miles
- 1998 Ford Expedition (similar to F-150)
- 2017 Ram 1500 after DIY modifications
- How to Prevent This Code From Triggering
- Frequently Asked Questions
- Can a bad battery cause a U1009 code?
- I cleared the code and it came right back. What does that mean?
- What is the most common misdiagnosis for a U1009 code?
- My scanner can't communicate with any modules. Is this related to U1009?
- What is a LIN bus and how is it related to U1009?
- How much does it cost to diagnose a U1009 code?
- My mechanic says they need an oscilloscope to diagnose U1009. Is that necessary?
- Key Takeaways
- 🎟️ Get 5% Off