
OBD-II Code U1061: Module Communication Failure
What U1061 means, why it triggers, and how to fix it
- Code U1061 indicates a critical communication failure between vehicle computers, requiring immediate attention before the vehicle stalls or loses power steering.
- Never replace a control module without first verifying it receives a minimum of 11.5 volts and has a solid ground connection.
- Water intrusion from clogged sunroof drains or bad seals causes over 30% of catastrophic network failures, especially in European vehicles.
- Diagnosing this code requires a bi-directional scan tool capable of reading all modules; a basic $20 OBD-II engine code reader cannot diagnose U1061.
What Does U1061 Mean?
U1061 is a network trouble code indicating one or more of your car's computers (modules) stopped communicating. Your car relies on a network to share data between the engine, transmission, brakes, and dashboard. This code triggers when a module sends a message but receives no reply from an essential partner module.
Technical definition: The formal SAE/OBD-II definition is "SCP (J1850) Invalid or Missing Data for Primary Id". This means a message sent on the Standard Corporate Protocol (SCP) network did not receive a valid response. While originally specific to Ford's J1850 SCP protocol, manufacturers now use U1061 generically to indicate a module communication timeout on any network type, including CAN bus.
Can I Drive With U1061?
No — Do Not Drive. Do not drive. This code indicates a major communication failure between essential vehicle computers. This causes unpredictable and dangerous behavior, such as the engine stalling in an intersection, sudden loss of power steering, erratic transmission shifting, or anti-lock brakes failing. Continuing to drive causes complete vehicle shutdown, leaving you stranded.
Common Causes
- Low Battery Voltage or Poor Ground Connection (Very Common) — Control modules require a stable voltage supply (typically above 11.5V). A weak battery, failing alternator, or corroded main ground wire causes unpredictable module behavior and immediate communication dropouts.
- Water Intrusion and Connector Corrosion (Very Common) — Water leaking through bad window seals or clogged sunroof drains saturates main harness connectors hidden under carpets. This causes severe pin corrosion, interrupting communication signals.
- Chafed or Damaged Wiring Harnesses (Common) — Network wires are susceptible to damage from heat, vibration, or physical stress. A chafed wire shorting against the chassis or another wire is a frequent culprit for network failure.
- Faulty Control Module (Common) — Any computer on the network (ECM, TCM, ABS) can fail internally. A failed module stops communicating and sometimes shorts the entire network, triggering U1061 in other modules.
- Aftermarket Device Interference (Common) — Improperly installed remote starters, alarms, or stereos tapped into CAN bus wires corrupt data signals or create shorts, crashing the network.
- Faulty Gateway Module (Less Common) — A 'gateway' module acts as a central hub translating messages between network branches. If it fails, entire sections of the vehicle's network go offline.
- Failed Network Terminating Resistor (Rare) — The main network uses two 120-ohm resistors to prevent signal reflections. If one fails, it disrupts the entire network's ability to transmit data.
- Software Glitches (Rare) — A software bug within a module causes it to stop communicating, requiring a manufacturer firmware update to resolve.
Symptoms
- Multiple Warning Lights on Dashboard — A 'Christmas tree' effect occurs, illuminating Check Engine, ABS, and Traction Control lights simultaneously because the modules controlling these systems cannot share data.
- Engine Stalls or Will Not Start — If the Powertrain Control Module (PCM) loses communication with the immobilizer or fuel pump module, the engine fails to start or shuts off while driving.
- Instrument Cluster Malfunction — Gauges drop to zero, warning lights flicker, and the digital odometer displays dashes ('-------').
- Erratic Transmission Shifting — Without engine data, the transmission shifts harshly, gets stuck in one gear, or enters 'limp mode'.
- Loss of Accessory Functions — Power windows, radio, air conditioning, and central locking stop working if the Body Control Module (BCM) drops offline.
Diagnostic Flowchart
Tap your situation to follow the diagnostic path that matches what you're seeing on this code.
Common Fixes & Costs
- Replacing a Weak or Faulty Battery — Parts: $150 - $350, Labor: $50 - $100, ~0.5 hr book time (DIY)
- Cleaning and Securing a Main Ground Connection — Parts: $0 - $10, Labor: $100 - $200, ~1 hr book time (Intermediate)
- Repairing Damaged Wiring or Connectors — Parts: $5 - $50, Labor: $200 - $900+, ~3 hr book time (Professional)
- Replacing a Failed Control Module (ECU, BCM, ABS) — Parts: $300 - $1500, Labor: $150 - $400, ~1.5 hr book time (Professional)
- Module Reprogramming or Software Update — Parts: $0, Labor: $150 - $300, ~1 hr book time (Professional)
Used vs. New Parts: Buying Guide
When a used part is worth it: For vehicles over 10 years old or 150,000 miles, a used module from a reputable recycler is cost-effective. It is also necessary when OEM parts are discontinued.
Donor-vehicle mileage cap: roughly under 100000 miles for the part to have meaningful remaining life.
Donor quality checklist:
- Verify the donor vehicle was not scrapped due to flooding or electrical fire.
- Match the part number exactly; a single digit difference guarantees incompatibility.
- Purchase from a specialized recycler offering a warranty and basic communication testing.
Decision logic:
- If The vehicle is less than 8 years old → Buy a new or remanufactured OEM part to ensure longevity and access to the latest software updates.
- If The part has a known factory design flaw (e.g., Ford Focus instrument cluster) → Use a professional remanufacturing service to correct the original flaw rather than buying a used part with the same weakness.
- If The budget is tight and the vehicle is high-mileage → Buy a used part, but budget for professional programming and accept the higher risk of premature failure.
Warranty tradeoff: Used parts carry a 30-90 day warranty. New OEM parts carry a 1-2 year warranty. Remanufactured parts often include a 1-year to lifetime warranty.
Worst-case if a used part fails: $400-$1500 if a used module fails, requiring repeat labor, programming, and a second replacement part.
What Happens If You Wait — Timeline
- Immediate: Code appears, warning lights illuminate, vehicle stalls or fails to start. Essential systems become erratic. (MPG impact: N/A% · Added cost: $150-$350 (Towing required))
- 1-7 days: Intermittent faults cause parasitic battery drain as modules fail to enter 'sleep mode', killing the battery overnight. (MPG impact: N/A% · Added cost: $150-$350 (New battery))
- 1-4 weeks: A shorted module sends incorrect voltage down data lines, corrupting software or damaging sensitive electronics in healthy modules. (MPG impact: N/A% · Added cost: $500-$1500 (Replacement of secondary damaged modules))
- 1+ month: Catastrophic failure. Persistent shorts destroy the main Engine Control Module (ECM) or Body Control Module (BCM), resulting in a permanent no-start condition. (MPG impact: N/A% · Added cost: $2000-$4000+ (Replacement of critical modules and extensive diagnostic labor))
Cost of Not Fixing It
- Immediate: Vehicle fails to start or stalls while driving, creating a severe safety hazard. (Added cost: $150-$350 (Towing))
- 0-1 Month: Unstable networks cause parasitic battery drain because modules fail to enter 'sleep mode', destroying the battery. (Added cost: $150-$350 (New Battery))
- 1-6 Months: Voltage spikes or shorts from a failing module damage other expensive modules sharing the same network. (Added cost: $500-$2000+ (Replacement of secondary damaged modules))
Diagnosis Steps
- Check Battery and Charging System
Verify the battery is fully charged (12.4V+ engine off) and the alternator charges correctly (13.7V-14.7V engine running). Clean battery terminals and ensure the main chassis ground is tight. A weak power supply is the easiest and most common cause to rule out.
Tools: Multimeter, Battery Terminal Brush (Beginner) - Perform a Full Vehicle Scan
Use an advanced bi-directional OBD-II scanner to read all modules. Identify exactly which modules report 'No Communication'. This pinpoints the offline section of the network.
Tools: Advanced Bi-Directional Scan Tool (Intermediate) - Inspect Wiring and Connectors
Visually inspect the wiring harnesses connected to the offline module. Look for chafing, pinched wires, or green/white corrosion inside connectors. Check common water intrusion points under carpets and kick panels.
Tools: Flashlight, Inspection Mirror, Trim Removal Tools (Intermediate) - Check Power and Ground at the Module
Before condemning an offline module, use a multimeter to test its electrical connector. Verify it receives stable battery voltage (12V+) and has a solid ground (less than 0.1V). Modules cannot communicate without power.
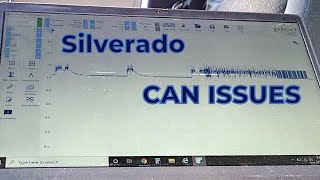
Tools: Multimeter, Vehicle-Specific Wiring Diagram (Advanced) - Test the CAN Bus Resistance
With the battery disconnected, measure resistance between Pin 6 (CAN High) and Pin 14 (CAN Low) on the OBD-II port. A healthy network reads ~60 ohms. A reading of 120 ohms indicates an open circuit or missing terminating resistor. A reading near 0 ohms indicates a short circuit.
Tools: Multimeter (Advanced) - Check CAN Bus Voltages
With key on/engine off, measure DC voltage at the OBD-II port. Pin 6 (CAN-H) should read ~2.5V to ~3.5V. Pin 14 (CAN-L) should read ~2.5V to ~1.5V. If either wire reads 0V or 12V, the network is shorted to ground or power.
Tools: Multimeter (Advanced) - Isolate the Faulty Module
If resistance is near 0 ohms, unplug modules one by one. Re-check resistance at the OBD-II port after each. When resistance returns to 60 ohms, the last module unplugged contains the internal short.
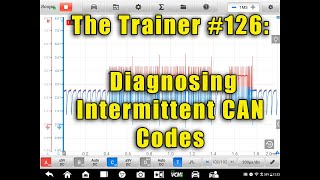
Tools: Multimeter, Trim Removal Tools (Advanced) - [PRO TIP] Perform an Oscilloscope Waveform Analysis
Connect an oscilloscope to Pins 6 and 14. A healthy CAN bus shows clean, square, mirror-image signals. 'Ringing' indicates an impedance mismatch. Flatlines pinpoint a hard short.
Tools: Dual-Channel Oscilloscope (Professional) - [PRO TIP] Perform a 'Pin Drag' Test
Use pin drag tools to check female terminals in the offline module's connector. The tool must have a slight, consistent drag. Loose terminals cause intermittent communication drops and must be re-tensioned.
Tools: Terminal Test Kit (Pin Drag Tools) (Professional)
When This Code Triggers (Freeze-Frame Conditions)
- Engine Coolant Temp: 180-200°F (The fault frequently appears after the vehicle reaches full operating temperature, causing heat-expanded solder joints to separate.)
- RPM: 0 (Key On, Engine Off) or 700-2500 (During Operation) (Triggers during the initial network handshake at key-on or during steady highway cruising.)
- Battery Voltage: Below 11.5V or Fluctuating (Low or unstable voltage during startup directly causes module communication dropouts.)
- Vehicle Speed: 0 mph or 35-65 mph (Failures happen at a standstill (no-start condition) or at speed when network traffic is highest.)
Related Codes
- U0100 — U1061 is a general code stating a module didn't reply. U0100 specifically means 'Lost Communication With ECM/PCM'. If both are present, the engine computer is the offline module.
- U0121 — Specifically means 'Lost Communication With Anti-Lock Brake System (ABS)'. If paired with U1061, start diagnosis at the ABS module.
- U0073 — Means the entire 'Control Module Communication Bus A' is off. U1061 means one module failed to respond; U0073 means the entire network crashed.
- U0140 — Means 'Lost Communication With Body Control Module (BCM)'. The BCM acts as a central gateway; its failure triggers U1061 in multiple other modules.
Climate & Environmental Factors
- High Humidity / Water Intrusion: Moisture enters unprotected connectors, causing copper pins to corrode. This creates high resistance or short circuits, directly triggering U1061.
- Road Salt (Winter Climates): Saline moisture dramatically accelerates corrosion of wiring harnesses, ground straps, and module connectors.
- Extreme Cold: Cold increases battery internal resistance, reducing stable voltage output. It also causes cracked solder joints inside modules to contract and separate, creating open circuits.
- High Heat: Sustained engine bay heat degrades wire insulation, making it brittle and prone to cracking and shorting.
How to Talk to a Mechanic About This Code
Say this: "I have a vehicle with a U1061 network communication code and multiple warning lights. I need to book a diagnostic appointment with a technician experienced in CAN bus electrical diagnosis to trace the fault."
Signals that you understand the code's complexity, steering the shop toward a qualified electrical diagnostician rather than a parts-changer.
Avoid saying:
- 'My check engine light is on, can you look at it?'
- 'The car is acting weird, just fix whatever is wrong.'
- 'I think it needs a new computer, can you replace it?'
Questions to ask before authorizing the repair:
- Which specific module was not communicating?
- Did you verify the non-communicating module has proper power and ground at its connector?
- What were the CAN bus resistance and voltage readings at the OBD-II port?
- Will you provide me with the old parts if a module is replaced?
Where to Take It: Dealer vs Independent vs Chain
- Dealer:
Strong option for late-model cars or vehicles with known TSBs, but the most expensive route.
Best for: Vehicles under warranty., Known manufacturer-specific issues requiring software updates., Complex European brands requiring specialized tools.
Downsides: Significantly higher labor rates., Defaults to replacing entire assemblies rather than repairing specific wires. (Typical cost: +50% vs. baseline) - Independent Shop:
Best overall fit. A reputable independent shop with strong electrical diagnostic skills offers the best balance of expertise and value.
Best for: Out-of-warranty vehicles., Shops specializing in electrical or diagnostic work., Tracing root-cause wiring faults affordably.
Downsides: Quality varies greatly; requires vetting ASE certifications., May lack access to the latest manufacturer software. (Typical cost: +0% vs. baseline) - Chain Shop:
AVOID. This code requires specialized electrical diagnostic expertise beyond the scope of chain repair shops.
Best for: Simple maintenance like oil changes or new batteries.
Downsides: Technicians lack training for complex network diagnostics., High risk of misdiagnosis and unnecessary parts replacement. (Typical cost: -10% vs. baseline)
When to Walk Away From the Repair
If the estimated repair cost exceeds 50% of the car's private-party value, seriously consider not fixing it.
- Car worth $4000, fix is $2200: Walk away. The repair cost is over 50% of the car's value.
- Car worth $12000, fix is $1800: Fix it. The repair cost is well below the 50% threshold.
- Car worth $3000, fix is $1600: Walk away. The repair cost is more than half the car's value, and other age-related failures are likely.
What Scan Tool You Need for This Code
Minimum: A scanner capable of a 'full system scan' to identify specific offline modules. Basic engine-only code readers are useless for this fault.
A $20 code reader only reads engine ('P') codes. It cannot communicate with the BCM, ABS, or TCM to locate the network breakdown.
Budget: Launch CR529 (~$40) — Shows network status and lists modules, but lacks bi-directional control to pinpoint faults.
Mid-range: Innova 5610 or Foxwell NT680 Pro (~$350) — Offers full-system scanning to see exactly which modules are offline, plus bi-directional controls to actively test components.
Professional: Autel MaxiCOM MK808S / Xtool D7 (~$450-600) — Provides full bi-directional control, live data graphing, and OE-level diagnostics essential for isolating intermittent wiring faults.
Rent vs buy: Buy a mid-range scanner or take the vehicle to a professional. Auto parts store rental tools are basic code readers insufficient for network diagnostics.
How to Clear the Code After You Fix It
- Reconnect the battery if disconnected during repair.
- Use an advanced OBD-II scan tool to clear all Diagnostic Trouble Codes (DTCs) from every module.
- Perform a complete drive cycle to reset the vehicle's readiness monitors.
Drive cycle (~30 minutes): A complete drive cycle requires a cold start, 5 minutes of idling, 15 minutes of mixed city/highway driving with varied speeds, and 5 minutes of steady-state cruising. Shut the vehicle off and let it cool completely.
Readiness monitors affected: Comprehensive Component Monitor, Misfire Monitor, Fuel System Monitor
Before emissions retest: drive at least 100 miles to fully set monitors.
Watch out for:
- Disconnecting the battery does not clear permanent DTCs (PDTCs) and resets all readiness monitors to 'Not Ready', guaranteeing an emissions test failure.
- The code returns immediately upon key-on if the root electrical short or hardware failure remains unaddressed.
Will This Fail Emissions / State Inspection?
Yes — this code typically fails an OBD-II emissions inspection.
- California: An active U1061 code illuminating the Check Engine Light causes an automatic Smog Check failure. Disconnecting the battery to hide it results in a 'Not Ready' failure.
- New York: An illuminated Check Engine Light is an automatic NYS emissions failure. The vehicle must complete a full drive cycle after repairs before re-inspection.
- Texas: In emissions-testing counties, an active U1061 code results in an automatic failure. The OBD system must communicate perfectly with state testing equipment.
Most Commonly Affected Vehicles
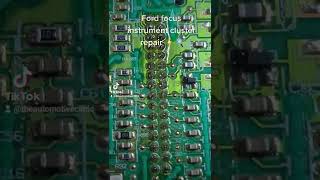
- Ford Focus, Mondeo, Kuga, C-Max (2004-2016) — The instrument cluster is a primary failure point. Internal solder joint cracks cause total CAN bus breakdown and a no-start condition.
- Chevrolet / GMC Silverado, Sierra, Suburban, Cruze (2011-2019) — Known for CAN bus issues caused by chafed wiring under the driver's side door sill plate and behind the dashboard.
- Nissan Qashqai, Titan, Rogue (2011-2020) — U1061 is frequently related to faults in the Intelligent Power Distribution Module (IPDM) or electric parking brake module.
- BMW 3 Series (E90), 5 Series (E60), X5 (E53) (2004-2015) — Complex networks mean one module failure (e.g., ABS, Footwell Module) causes a cascade of communication codes.
- Mercedes-Benz C-Class (W204), E-Class (W211), ML-Class (W164) (2004-2014) — Clogged sunroof drains cause water to saturate a major CAN bus connector block under the front passenger carpet, destroying the network.
- Audi / Volkswagen A4, A6, Passat, Touareg (2005-2016) — Gateway module failures and wiring issues under the carpet are known causes for network faults.
- JCB Track Loaders and Heavy Equipment (2008-2024) — Appears with a string of other U-codes indicating a total network shutdown, usually due to harness damage in harsh environments.
Manufacturer-Specific Notes
- Ford: On 2004-2011 Focus models, the immobilizer system runs through the instrument cluster. When the cluster's internal solder joints fail, it takes down the network and prevents the car from starting. Rebuilding the cluster is the standard fix.
- General Motors (Chevrolet/GMC): GM issued TSBs (PIT5457D, PIT5288H) pointing to specific wiring harness chafe points under the driver's door sill plate or near the parking brake pedal.
- Mercedes-Benz: On the W204 C-Class, clogged front sunroof drains leak rainwater directly onto a critical CAN bus connector block under the front passenger's carpet, causing severe corrosion and total network failure.
- Nissan: Nissan issued service campaigns for Rogue models to reconfigure the IPDM to prevent no-start conditions. The IPDM features a self-diagnostic test mode activated without a scan tool.
- Chrysler/Dodge/Jeep/Ram: Diagnosis requires checking the 'STAR' connector block, a central junction point for CAN bus wires. Corrosion here takes down multiple modules simultaneously.
Real Owner Stories
2007 Ford Focus with intermittent no-start and dashboard failure.
The instrument cluster randomly died while driving—gauges dropped to zero, warning lights flashed, and the car failed to start. Tapping the dashboard temporarily fixed it.
What they tried:
- Tested battery and alternator, which passed.
- Received a £400 quote for a replacement cluster.
- Removed the cluster and cleaned the main connector's solder points on the circuit board.
Outcome: Cleaning and re-seating the connector fixed the problem. The root cause was cracked solder joints on the cluster's circuit board, a notorious fault in this model.
Lesson: For 2004-2011 Ford Focus models experiencing a 'Christmas tree' dash and no-start, the instrument cluster is the primary suspect. Professional resoldering saves hundreds over replacement.
2012 Mercedes C-Class (W204) with wet carpets and multiple communication codes.
After heavy rain, the passenger floor soaked through. Warning lights appeared, and the radio and windows failed. The dealer quoted $2,500+ to remove the interior for diagnosis.
What they tried:
- Researched symptoms and identified clogged sunroof drains.
- Removed the front wheel liner to access and clean the rubber drain valve.
- Used compressed air to clear the drain tube from the sunroof downward.
Outcome: Cleaning the drain tube permanently solved the water leak. Drying the carpets and connectors under the floor resolved the electrical issues.
Lesson: On Mercedes W204s, water intrusion from clogged sunroof drains causes catastrophic network failure. Check for damp carpets and clean drains before paying for module diagnosis.
2016 Ram 1500 went into limp mode and then fixed itself.
The truck entered limp mode, locked in first gear, and threw codes U0402 and U0001 (PCM/TCM communication issue).
What they tried:
- Drove home slowly.
- Turned the truck off and let it sit for 6 hours.
Outcome: Upon restart, all warning lights were off and the truck drove normally. The module failed to communicate on one drive cycle but reset upon a full power-down.
Lesson: If a U-code appears and the vehicle is drivable, park safely and let it sit for 30 minutes to allow modules to power down. This clears temporary glitches, though recurring codes require diagnosis.
2011 Chevy Colorado with U0101 code after a battery replacement.
After installing a new battery, the truck displayed a U0101 (Lost Communication with TCM) code, incorrect gear indicator, and 'Serv TPM' message.
What they tried:
- Cycled the key multiple times.
- Scanned codes at an auto parts store.
Outcome: Modules lose 'keep alive' memory during battery swaps. Clearing the codes with a scanner and performing a full drive cycle resolved the issue.
Lesson: Communication codes frequently appear after battery replacement. Ensure the new battery is fully charged, clear the codes, and perform a drive cycle before chasing repairs.
How to Prevent This Code From Triggering
- Clean sunroof drains and cowl area (Twice a year (Spring and Fall)) — Prevents debris from clogging drain tubes, which causes rainwater to overflow into the cabin and saturate critical wiring connectors.
- Apply dielectric grease to major electrical connectors (When performing other repairs) — Seals weather-pack connectors against moisture and road salt, preventing pin corrosion.
- Inspect and secure wiring harnesses (During under-hood maintenance) — Prevents vibrations from chafing wiring looms against sharp metal edges, avoiding short circuits.
- Address battery corrosion immediately (At every oil change) — Maintains stable voltage by preventing resistance at the terminals. Clean with baking soda and apply anti-corrosion gel.
Frequently Asked Questions
Can a bad battery cause a U1061 code?
Yes. A weak battery provides unstable voltage, causing vehicle computers to malfunction and drop offline, directly triggering a U1061 code.
What is the most common misdiagnosis for a U1061 code?
The most costly mistake is immediately replacing the module reporting 'no communication'. The code means the module cannot be reached, usually due to a fault in the power, ground, or network wiring leading to it. Always verify wiring integrity first.
Why are so many different warning lights on my dashboard?
The computers controlling those systems lost communication. When a module lacks required data, it illuminates its warning light and disables the system as a safety precaution.
Can moisture or bad weather cause a U1061 code?
Yes. Moisture from rain or high humidity enters unsealed electrical connectors, causing pin corrosion. This high resistance disrupts communication signals and triggers network codes.
How long does it take to diagnose a U1061 code?
A typical professional diagnosis takes 1 to 3 hours. Complex cases involving intermittent wiring faults hidden deep inside a harness take significantly longer.
What is the difference between a 'U' code and a 'P' code?
'U' codes indicate network communication problems between vehicle computers. 'P' codes indicate specific powertrain issues with the engine or transmission.
Can I fix a U1061 code myself?
Fixing this code is extremely difficult for a DIY mechanic. It requires advanced bi-directional scan tools, vehicle-specific wiring diagrams, and specialized CAN bus knowledge. Take the vehicle to a professional auto electrician.
Key Takeaways
- Code U1061 indicates a critical communication failure between vehicle computers, requiring immediate attention before the vehicle stalls or loses power steering.
- Never replace a control module without first verifying it receives a minimum of 11.5 volts and has a solid ground connection.
- Water intrusion from clogged sunroof drains or bad seals causes over 30% of catastrophic network failures, especially in European vehicles.
- Diagnosing this code requires a bi-directional scan tool capable of reading all modules; a basic $20 OBD-II engine code reader cannot diagnose U1061.
Helpful Videos
![How To Test CAN BUS With A Multimeter [CAN Bus Resistance Check] Mechanic Mindset](https://img.youtube.com/vi/JPE42HSJxAk/mqdefault.jpg)
Shop the Parts Behind U1061
Below are the parts most often responsible for code U1061, ranked by how frequently each one is the actual culprit (per the diagnosis above). Tap any to see what we have for your vehicle.


The information in this article is provided for general reference and educational purposes only. Vehicle specifications, procedures, and part compatibility can vary by production date, trim level, and region. Always consult your vehicle's factory service manual and verify part numbers before purchasing or performing repairs. Safety-critical components such as airbags, seat belts, and braking systems should be installed by a qualified professional.
- 🧭 Diagnostic Flowchart
- 🎬 Helpful Videos
- 🛍️ Shop This Part
- What Does U1061 Mean?
- Can I Drive With U1061?
- Common Causes
- Symptoms
- Common Fixes & Costs
- Used vs. New Parts: Buying Guide
- What Happens If You Wait — Timeline
- Cost of Not Fixing It
- Diagnosis Steps
- When This Code Triggers (Freeze-Frame Conditions)
- Related Codes
- Climate & Environmental Factors
- How to Talk to a Mechanic About This Code
- Where to Take It: Dealer vs Independent vs Chain
- When to Walk Away From the Repair
- What Scan Tool You Need for This Code
- How to Clear the Code After You Fix It
- Will This Fail Emissions / State Inspection?
- Most Commonly Affected Vehicles
- Manufacturer-Specific Notes
- Real Owner Stories
- 2007 Ford Focus with intermittent no-start and dashboard failure.
- 2012 Mercedes C-Class (W204) with wet carpets and multiple communication codes.
- 2016 Ram 1500 went into limp mode and then fixed itself.
- 2011 Chevy Colorado with U0101 code after a battery replacement.
- How to Prevent This Code From Triggering
- Frequently Asked Questions
- Can a bad battery cause a U1061 code?
- What is the most common misdiagnosis for a U1061 code?
- Why are so many different warning lights on my dashboard?
- Can moisture or bad weather cause a U1061 code?
- How long does it take to diagnose a U1061 code?
- What is the difference between a 'U' code and a 'P' code?
- Can I fix a U1061 code myself?
- Key Takeaways
- 🎟️ Get 5% Off