
Ultimate Guide to OBD-II Code U1117: Lost Communication With Accessory Gateway
What U1117 means, why it triggers, and how to fix it like a pro
- Code U1117 indicates a communication failure on your car's CAN bus network, specifically isolating the accessory gateway module from other computers.
- Always test the battery and inspect the interior fuse box first, as voltage drops below 12.4V or a single blown 10-amp fuse frequently trigger this code.
- Vehicle-specific symptoms dictate the severity; Nissan models often lose ABS functionality, while Mitsubishi vehicles face a complete crank-no-start immobilizer lockout.
- Never replace the gateway module without first measuring the CAN bus resistance at OBD-II pins 6 and 14 to confirm a healthy 60-ohm baseline.
What Does U1117 Mean?

Code U1117 signifies the 'Accessory Gateway Module' has ceased communication with other electronic modules. This gateway acts as a central router, translating and directing messages between the engine, brakes, and interior accessories. When it goes offline, dependent modules fail to function and report a communication loss.
Technical definition: The official definition is "Lost Communication With Accessory Gateway." However, meanings vary by manufacturer. Key variations include "SCP (J1850) Invalid or Missing Data for Electrical Energy Management" (Ford), "Immobilizer-ECU Time-out" (Mitsubishi), "Lost communication with ABS" (Nissan), and "High Speed CAN 2 Communication Failure" (Hyundai).
Can I Drive With U1117?
Yes, But With Caution. You can drive, but avoid long distances. Critical safety systems like ABS and stability control are often disabled, significantly increasing braking distances and skidding risks—especially on Nissan models. On Mitsubishi vehicles, this code relates to the immobilizer, creating a high risk of a sudden no-start condition. Address the code promptly to prevent complex network failures.
Common Causes

- Damaged or Corroded Wiring/Connectors (Very Common) — This is the primary cause. CAN bus wires fray, chafe, or cut over time. Connectors corrode due to water intrusion, especially in kick panels, under seats, or near tail light assemblies.
- Blown or Misplaced Fuses (Common) — A blown fuse cuts power to the gateway module or a related module (like the radio or ABS unit), dropping it off the network. On models like the Toyota Corolla, a misplaced fuse in the interior panel triggers this code. 🎬 Watch: How to fix U1117 on a Toyota Corolla.
- Faulty Connected Module (e.g., ABS, Radio, BCM) (Common) — The gateway is often fine, but another module on the network fails. A shorted ABS module, radio, or Body Control Module (BCM) broadcasts corrupt data or brings down the entire network.
- Low or Unstable Battery Voltage (Common) — A weak or improperly connected battery causes unpredictable electrical issues. Modules lack the stable voltage required to operate and communicate, leading to intermittent faults.
- Faulty Gateway Module (Less Common) — The accessory gateway module itself fails due to internal electronic failure, software corruption, or physical damage from water. Do not make this your first assumption.
- Software Glitches or Required Updates (Less Common) — Modules require software updates (reflashes) to communicate effectively. This is necessary after a battery replacement or if a Technical Service Bulletin (TSB) addresses known software bugs.
- Improper Aftermarket Accessory Installation (Less Common) — Poorly installed remote starters, alarms, or stereo systems interfere with or damage the CAN bus wiring, causing factory modules to log communication faults.
- Missing or Damaged Terminating Resistors (Rare) — The CAN bus network requires a 120-ohm resistor at each end. If a module containing one of these resistors is unplugged or fails, the network resistance reads 120 ohms instead of 60, stopping communication.
Symptoms

- Multiple Warning Lights — The Check Engine Light, ABS light, traction control light, and brake warning light illuminate. You also see system-specific messages like 'Service Trailer Brake System'.
- Accessory and Feature Malfunctions — Network-controlled features fail or act erratically. This includes power windows, infotainment screens, air conditioning, automatic headlights, and power door locks.
- Engine Cranks But Will Not Start — This is a critical symptom on Mitsubishi vehicles where U1117 points to an immobilizer fault. The engine turns over but the immobilizer prevents it from starting.
- No Communication with Scan Tool (scan-tool only — no driver-felt sign) — A diagnostic scan tool fails to communicate with any module, or only with a select few, indicating a major network failure.
- No Symptoms at All (History Code) (scan-tool only — no driver-felt sign) — U1117 is often stored as a 'history' code with no active symptoms. This happens from a temporary voltage drop or a briefly disconnected module. If everything works, clear the code and monitor.
Diagnostic Flowchart
Tap your situation to follow the diagnostic path that matches what you're seeing on this code.
Common Fixes & Costs
- Repairing Damaged Wiring or Connectors — Parts: $10-$100, Labor: $200-$800, ~2.5 hr book time (Intermediate)
- Replacing Blown Fuses — Parts: $1-$20, Labor: $0-$125, ~0.2 hr book time (DIY)
- Replacing a Faulty Battery — Parts: $150-$300, Labor: $50-$100, ~0.5 hr book time (DIY)
- Replacing a Faulty ABS Module — Parts: $800-$1500, Labor: $300-$600, ~2.5 hr book time (Professional)
- Replacing the Gateway Module — Parts: $150-$600, Labor: $300-$1000, ~2 hr book time (Professional)
- Software Update / Module Reprogramming — Parts: $0, Labor: $150-$300, ~1 hr book time (Professional)
Used vs. New Parts: Buying Guide
When a used part is worth it: A used ABS module is a cost-effective solution for older vehicles (10+ years) where a new OEM part is prohibitively expensive (over $1,000) or discontinued. Purchase from a reputable supplier who tests the part and offers a warranty.
Donor-vehicle mileage cap: roughly under 100000 miles for the part to have meaningful remaining life.
Donor quality checklist:
- Match the part number exactly. Do not rely on year/make/model alone, as multiple versions exist.
- Buy from a seller that provides photos of the actual part, not stock images.
- Verify the seller has a clear warranty (90 days or more) and return policy.
- Ask if the part was tested on the donor vehicle before removal.
Decision logic:
- If The part is for a common, high-value failure (e.g., Nissan Rogue ABS module) AND the original can be repaired → Choose a repair service. This avoids the need for VIN programming.
- If The vehicle is newer and the part cost is under $500 → Buy a new OEM part for the longer warranty and guaranteed compatibility.
- If Budget is the primary concern and the vehicle is older → A tested used part from a reputable source is an acceptable risk.
Warranty tradeoff: Used parts typically come with a 30-90 day warranty, covering only the part itself. New aftermarket parts offer 1-3 years. New OEM parts offer a 1-year warranty, often including labor if installed by a dealer.
Worst-case if a used part fails: $400-$800 if a used part is dead on arrival or fails shortly after install. This includes repeat labor for installation, bleeding, and programming, plus the cost of another replacement part.
What Happens If You Wait — Timeline
- Immediate: Code U1117 is stored, often intermittently. The Check Engine Light or other system-specific light (ABS, Traction Control) illuminates. Critical safety systems like ABS are disabled without warning. (MPG impact: 0%% · Added cost: $0 (but significant safety risk))
- 1-4 weeks: A faulty module that is not powering down correctly begins to cause a parasitic battery drain. The first symptom is often a weak or slow-cranking engine after the car sits for a couple of days. (MPG impact: 0%% · Added cost: $150-$300 for a parasitic draw test to diagnose the battery drain.)
- 1-3 months: The constant parasitic draw repeatedly deep-cycles the battery, causing sulfation and permanent damage. The vehicle now requires a jump-start almost every morning. The original communication fault is now masked by a 'dead battery' problem. (MPG impact: 0%% · Added cost: $200-$400 for a new battery, in addition to the diagnostic cost for the original fault.)
- 3-6+ months: The failing module degrades further and begins to broadcast corrupt data on the network (a 'babbling idiot' failure). This disrupts communication between healthy modules, causing widespread, unpredictable failures of unrelated systems (e.g., erratic gauges, transmission shifting problems, non-functional climate control). (MPG impact: 0-5%% · Added cost: $500-$1500+. Diagnostics become extremely complex and costly, and multiple modules now appear faulty, leading to expensive misdiagnoses.)
Cost of Not Fixing It
- Immediate: Loss of critical safety features. If the ABS module is offline, you lose anti-lock brakes and stability control, increasing the risk of skidding and accidents. (Added cost: Potential for accident-related costs, from insurance deductibles to total vehicle loss.)
- 0-1 month: Risk of being stranded. If the code relates to the immobilizer system (common in Mitsubishi), the car fails to start at any time, requiring a tow. (Added cost: $100-$300 for towing and diagnostic fees.)
- 1-6+ months: Progressive network failure or battery drain. An intermittently failing module creates a parasitic draw, draining the battery overnight. (Added cost: $200-$400 for a new battery, plus escalating diagnostic costs as more systems are affected.)
Diagnosis Steps

- Perform a Full Vehicle DTC Scan
Before clearing codes, perform a full system scan and document all codes in every module. U1117 is often a secondary code. Other codes (like U0121 for ABS or U0140 for BCM) provide critical clues to which part of the network is failing.
Tools: Professional OBD-II Scanner (Beginner) - Check the Battery and Charging System
Ensure battery voltage is above 12.4V with the engine off and between 13.2V and 14.8V with the engine running. Low or fluctuating voltage is a primary cause of network codes. Clean and tighten all terminals.
Tools: Multimeter (Beginner) - Inspect All Fuses
Visually inspect fuses in all fuse boxes. Pay close attention to fuses for the Gateway, BCM, ABS, Radio, and any non-functional accessories. Use a multimeter to test for continuity across each fuse.
Tools: Fuse puller, Multimeter (Beginner) - Perform a Thorough Visual Inspection
Look for obvious damage. Check for water intrusion on floorboards near kick panels, rodent damage to wiring harnesses, and corrosion on connectors—especially on modules exposed to the elements like ABS controllers or blind spot monitors.
Tools: Flashlight, Inspection mirror (Beginner) - Clear Codes, Cycle Ignition, and Re-scan
Clear the codes and turn the ignition off. Wait at least 30 seconds before turning the ignition back on. Re-scan the vehicle. If the code returns immediately, you have a hard fault. If it doesn't, you have an intermittent issue.
Tools: OBD-II Scanner (Beginner) - Check CAN Bus Resistance
Disconnect the battery. At the OBD-II port, measure resistance between Pin 6 (CAN High) and Pin 14 (CAN Low). A healthy network reads approximately 60 ohms. A reading of ~120 ohms indicates an open circuit or missing terminating resistor. A reading near 0 ohms indicates a short between the two CAN wires.
Tools: Multimeter, OBD-II pinout diagram (Intermediate) - Pro Tip: The 'Wiggle Test'
Loose pins or chafed wires cause intermittent faults. While monitoring scan tool data or network voltage, carefully wiggle wiring harnesses and connectors related to the non-communicating module. A change in status or a voltage flicker pinpoints the physical fault location.
Tools: OBD-II Scanner, Hands (Intermediate) - Pro Tip: Isolate the Faulty Module
If the CAN bus resistance is shorted (near 0 ohms), unplug modules on the affected network one by one, re-checking resistance after each. When the resistance returns to 60 ohms, the last module you unplugged is causing the short. A vehicle wiring diagram is essential.
Tools: Multimeter, Vehicle-specific wiring diagram, Basic hand tools (Advanced) - Advanced: Check CAN Bus Voltages
With the battery connected and ignition on, back-probe Pin 6 (CAN-H) and Pin 14 (CAN-L) to chassis ground. In a healthy, idle state, both lines read ~2.5V. During active communication, CAN-H fluctuates up to ~3.5V and CAN-L fluctuates down to ~1.5V. A line stuck high, low, or at 0V indicates a short to power, short to ground, or open circuit.
Tools: Multimeter with back-probe pins (Advanced) - Pro Tip: Scope the Network
Use an oscilloscope to view the CAN bus signal. Back-probe Pins 6 and 14 at the OBD-II port. A healthy CAN bus shows a clean, mirror-image square wave pattern. A flat line, excessive noise, or a distorted waveform indicates a specific network problem like a short between wires, short to power, or short to ground.
Tools: Automotive Oscilloscope (Professional)
When This Code Triggers (Freeze-Frame Conditions)
- Engine Coolant Temp: Below 122°F (50°C) (During a cold start. Communication checks often run specifically when the engine is cold.)
- RPM: 0 (Ignition ON, Engine OFF) (Key-On, Engine-Off. Network integrity checks are performed the moment the ignition turns on, before the engine starts.)
- Vehicle Speed: Any (The fault is detected at any speed, depending on which module fails and when it is required to communicate.)
- Battery Voltage: Below 11.5V (During or immediately after engine cranking with a weak battery. Low voltage causes modules to drop off the network temporarily.)
Related Codes
- U0121 — Means 'Lost Communication With Anti-Lock Brake System (ABS) Control Module.' If you have U1117 and U0121 together, especially on a Nissan, the ABS module (or its wiring/power/ground) is the prime suspect. Start diagnosis there.
- U0140 — Means 'Lost Communication With Body Control Module (BCM).' The BCM is a major network hub. If you cannot communicate with the BCM but can with other modules, the BCM is the problem. If you cannot communicate with anything, the gateway or network itself is the issue.
- U1002 — Often appears with U1117. U1002 indicates a more general 'Lost Communication with Gateway Module.' If both are present, it strongly suggests the gateway module itself, its main power/ground, or the primary CAN bus is at fault.
- B12CD — This is a Toyota-specific code for 'Accessory Gateway Communication Stop.' It is the Body-code equivalent of the U-code U1117 and points to the same network failure, reinforcing the diagnosis.
Climate & Environmental Factors
- Humidity and Water Intrusion: High humidity or direct water leaks (from clogged sunroof drains, bad seals, etc.) introduces moisture into connectors and modules. This leads to pin corrosion, which increases resistance or creates short circuits on the CAN bus, disrupting communication.
- Road Salt (Winter Climates): In regions that use road salt, a saline slush splashes onto under-vehicle components like the ABS module and its wiring. This highly corrosive mixture accelerates the degradation of connectors and wiring, leading to a higher incidence of communication faults.
- Extreme Temperatures (Hot and Cold): High heat causes insulation to degrade and become brittle over time, while extreme cold makes it stiff and prone to cracking if disturbed. This physical damage exposes the copper wire, leading to shorts or opens.
How to Talk to a Mechanic About This Code
Say this: "I have a U1117 communication code and would like to schedule a network diagnostic. I need a full-system scan to check for codes in all modules, and for the technician to measure the CAN bus resistance at the OBD-II port before starting any repairs."
This signals you understand that U1117 is a network problem, not a simple part failure. It directs the shop to perform the correct initial tests and prevents them from immediately suggesting an expensive gateway module replacement without proper diagnosis.
Avoid saying:
- 'My check engine light is on, can you look at it?'
- 'The code is U1117, just replace the gateway module.'
- 'My car is acting weird, just fix whatever is wrong.'
Questions to ask before authorizing the repair:
- What other DTCs were found in other modules, like the ABS or BCM?
- What was the CAN bus resistance reading between pins 6 and 14? Was it 60 ohms, 120 ohms, or shorted?
- Have you isolated the fault to a specific wire, connector, or module?
- If a module needs to be replaced, does it require programming, and is the cost of programming included in the estimate?
Where to Take It: Dealer vs Independent vs Chain
- Dealer:
Best for: Vehicles under warranty., Complex, manufacturer-specific issues (e.g., Nissan ABS fault, Mitsubishi immobilizer)., Repairs that require module programming and dealer-specific software.
Downsides: Highest labor rates., May default to replacing entire modules instead of attempting wiring repairs. (Typical cost: +50% vs. baseline) - Independent Shop:
Best fit. Stop DIYing and take it here if you lack an oscilloscope or wiring diagrams. Ensure they specialize in CAN bus troubleshooting.
Best for: Out-of-warranty vehicles where cost is a factor., Shops that specialize in electrical or diagnostic work., Finding wiring faults or testing individual components.
Downsides: Shop quality and expertise vary widely. Must vet carefully., May not have the latest OEM software for programming new modules. (Typical cost: +0% vs. baseline) - Chain Shop:
AVOID for diagnosing a U1117 code. The problem is almost always beyond their scope of expertise.
Best for: Simple jobs like battery replacement or fuse checks.
Downsides: Technicians are generally not equipped or trained for complex network diagnostics., High risk of misdiagnosis and being sold unnecessary parts. (Typical cost: -10% vs. baseline)
When to Walk Away From the Repair
If the estimated repair cost exceeds 40-50% of the car's private-party value, sell or trade it in instead of repairing it.
- Car worth $4000, fix is $2200: Walk away. A $2,200 repair on a $4,000 car represents 55% of its value and is not a good investment.
- Car worth $15000, fix is $2200: Fix it. The repair cost is only 15% of the vehicle's value and is well below the walk-away threshold.
- Car worth $2500, fix is $1500: Walk away. The repair cost is 60% of the car's value. It's time to move on.
What Scan Tool You Need for This Code

Minimum: A scanner that can perform a full-system scan to read codes from all modules (Engine, ABS, BCM, etc.).
A basic $20 code reader only shows engine codes and misses critical codes stored in other modules (like a U0121 in the ABS). The free scan at most auto parts stores has the same limitation and cannot read ABS or other system codes. Diagnosing U1117 requires seeing the whole picture.
Budget: BlueDriver Pro (~$100) — Connects to your smartphone and reads codes from all vehicle systems (Engine, ABS, Airbag, etc.), which is the essential first step for diagnosing U1117. It also provides live data.
Mid-range: Autel MaxiCheck MX808S / Foxwell NT809 (~$250-400) — These are tablet-style scanners that offer full-system diagnostics, extensive live data graphing, and some bidirectional controls (active tests). This allows you to command a specific module or component to operate, helping to confirm if it's working.
Professional: Autel MaxiCOM MK906BT / Launch X431 series (~$600-1200) — Provides full bidirectional control, advanced ECU coding, and programming capabilities. These tools are necessary if the fix requires replacing and programming a new module, like an ABS or gateway module.
Rent vs buy: For a one-time diagnosis, paying a shop's diagnostic fee ($150-$300) is more cost-effective than buying a pro-level tool. Do not rely on free auto parts store scans, as their tools are typically too basic for this code. Buy a budget or midrange scanner only if you plan to perform your own diagnostics regularly.
How to Clear the Code After You Fix It
- Reconnect battery if it was disconnected for the repair.
- Use a quality OBD-II scan tool to clear all Diagnostic Trouble Codes (DTCs) from all modules.
- Perform a specific drive cycle to allow the vehicle's readiness monitors to run and complete their self-tests.
Drive cycle (~30 minutes): A generic drive cycle includes a cold start (engine temp below 122°F), a 2-3 minute idle, 10-15 minutes of mixed city/highway driving (including steady speeds around 55 mph), and several decelerations without using the brake. The exact procedure varies by manufacturer.
Readiness monitors affected: Comprehensive Component Monitor (CCM), Misfire Monitor, Fuel System Monitor, EGR System, Oxygen (O2) Sensor Monitor, Catalyst Monitor, Evaporative (EVAP) System
Before emissions retest: drive at least 100 miles to fully set monitors.
Watch out for:
- Simply clearing the code with a scanner resets readiness monitors to 'Not Ready', causing an automatic emissions test failure.
- Driving at a constant highway speed for a long distance does not set all monitors; varied driving with accelerations, decelerations, and idle periods is required.
- The code returns if the root cause of the communication failure is not properly repaired.
Will This Fail Emissions / State Inspection?
Yes — this code typically fails an OBD-II emissions inspection.
- California: An active U1117 code is an automatic failure. After clearing the code, all readiness monitors must be 'Ready' (for model year 2000+ vehicles, one monitor may be 'Incomplete'). This requires 50-100 miles of specific driving before a re-test.
- New York: NYS vehicle safety inspection includes an OBD-II check. An illuminated Check Engine Light or the presence of this fault code results in an automatic failure. Readiness monitors must also pass.
- Texas: In counties requiring emissions testing, an illuminated Check Engine Light from a U1117 code is an automatic fail. If readiness monitors are 'Not Ready' due to a recent code clear or battery disconnect, the vehicle also fails.
Most Commonly Affected Vehicles
- Toyota / Lexus Tacoma, Corolla, IS, ES (2014-2023) — Often a 'ghost' code triggered by aftermarket remote starters or low-cost OBD-II scanners disrupting the network. On Tacomas, ECU updates for unrelated issues like transmission shifting (TSB T-SB-0045-21) sometimes resolves communication bugs. On Corollas, check for misplaced fuses in the cabin fuse box.
- Ford F-150 / Mustang (2015-2022) — The code definition is often 'SCP (J1850) Invalid or Missing Data for Electrical Energy Management'. Water intrusion into tail light assemblies shorts the Blind Spot (BLIS) module, bringing down the network and triggering U1117. Check TSB 19-2375 for F-150 taillight leaks.
- Chevrolet / GMC Silverado / Sierra (2014-2019) — Frequently linked to the trailer brake control system. A faulty Trailer Brake Control Module (TBCM) or switch disrupts the low-speed CAN bus, causing this code and a 'Service Trailer Brake System' message.
- Dodge / Ram / Chrysler Grand Caravan, Ram 1500, various (2011-2020) — Often points to a failure of the Serial Data Gateway Module or the Totally Integrated Power Module (TIPM). The TIPM acts as both a fuse box and control module and its failure causes widespread communication issues.
- Nissan Rogue / Sentra / Kicks (2017-2022) — On these models, U1117 specifically means 'Lost Communication with ABS'. The fault is very often the ABS actuator and electric unit itself, or the wiring/connector to it. A replacement ABS module costs over $2,000.
- Hyundai Veloster, Tucson (with DCT) (2012-Present) — Indicates a 'High Speed CAN 2 Communication' failure specifically between the engine computer (EMS) and the Dual-Clutch Transmission (DCT). This points to a fault in the dedicated powertrain network, not the main body/accessory network.
- Mitsubishi Outlander, Lancer, Eclipse (2008-Present) — The code is defined as 'Immobilizer-ECU Time-out'. This is a critical fault that directly causes a crank-no-start condition. The problem lies in the communication link between the engine ECU and the ETACS-ECU (the immobilizer module).
- Subaru Outback / Forester (2015-2020) — Triggered by a weak battery causing multiple simultaneous 'lost communication' codes. Also look for issues with the Starlink telematics system or infotainment head unit, as a failure there disrupts the network.
Manufacturer-Specific Notes
- Toyota / Lexus: This code appears without symptoms as a 'history' code, sometimes triggered by a maintenance reminder or the use of a simple plug-in OBD-II scanner. If the car runs normally, clearing the code is the first step. On some models, a persistent 'Service Connect Activation' message is linked to a U1117 fault.
- Mitsubishi: The 'Immobilizer-ECU Time-out' definition is critical. Diagnosis must focus on the CAN bus line between the engine ECU and the immobilizer ECU (often part of the ETACS module). This is a high-priority fix as it directly causes a no-start condition.
- Ford: Water intrusion into the F-150's rear tail light housings is a known issue that shorts the Blind Spot Information System (BLIS) module. Since the BLIS module is on the CAN network, this triggers a U1117 code. See TSB 19-2375. Be aware that some Ford extended warranties cover the cost of replacing a faulty module but not the labor for a required software update, which is an unexpected cost.
- Nissan: Unlike other makes, U1117 on modern Nissans almost always means 'Lost Communication with ABS'. The diagnostic procedure should immediately focus on the ABS actuator and electric unit, its power, ground, and CAN connections. This is often an expensive repair.
Real Owner Stories
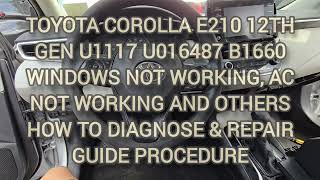
2019 Toyota Corolla with multiple electrical failures
After having an aftermarket alarm system removed, the car had multiple issues: power windows and A/C were not working, and an airbag light was on. The car would not start and threw codes U1117, U016487, and B1660.
What they tried:
- The owner first suspected issues related to the recent alarm removal.
- A detailed inspection of the interior fuse panel (under the dash) was performed.
Outcome: The fix was simple and cost nearly nothing. Two fuses were found to be blown, and a third fuse for the radio had been put back in the wrong slot. After replacing the blown fuses and correcting the misplaced one, all symptoms disappeared and the codes were cleared.
Lesson: Always check the simple things first, especially after recent electrical work. A misplaced or blown fuse causes multiple, seemingly unrelated system failures and triggers network communication codes.
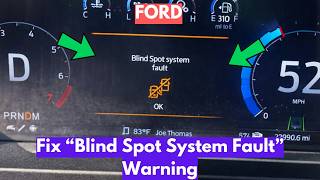
2018 Ford F-150 with 'Blind Spot System Fault'
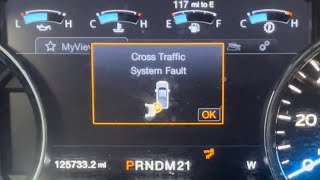
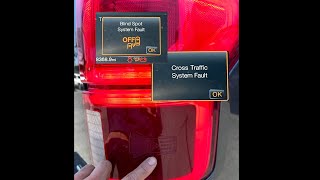
Owner received 'Blind Spot System Fault' and 'Cross Traffic Alert Fault' messages on the dash, along with code U1117. The issues were intermittent at first, often appearing after a car wash or heavy rain.
What they tried:
- A visual inspection of the tail lights revealed one was holding a significant amount of water.
- The owner removed the tail light assembly, drained the water, and unplugged the Blind Spot Information System (BLIS) module located inside.
- The BLIS module's connector showed signs of corrosion.
Outcome: The root cause was a failed seal on the tail light housing, allowing water to enter and short the BLIS module. The owner dried out the module and connector, and sealed the tail light housing with clear automotive silicone. This resolved the fault messages and the U1117 code. In some cases, the BLIS module is permanently damaged and requires replacement.
Lesson: U1117 is often caused by a failure in a connected module, not the gateway itself. On Ford F-150s, water in the tail lights is a known issue (TSB 19-2375) that takes down the entire network.
2008 Mitsubishi Eclipse with a crank-no-start condition
The vehicle would crank but would not start. The only code present was U1117, which on a Mitsubishi means 'Immobilizer-ECU Time-out'.
What they tried:
- Owner verified the battery was good and the starter was engaging.
- Diagnosis focused on the communication line between the engine computer and the immobilizer system.
Outcome: The problem was an intermittent failure in the CAN bus wiring between the engine ECU and the immobilizer ECU. Repairing the damaged section of the harness restored communication, allowing the immobilizer to give the 'start' signal to the engine computer. The car started normally and the code did not return.
Lesson: The definition of U1117 is manufacturer-specific and critical. On a Mitsubishi, it points directly to a high-priority immobilizer fault that will leave you stranded. The diagnosis should immediately focus on that system.
2018 Toyota Tacoma with a symptom-free U1117 code
Owner used a Bluetooth OBD-II scanner (BlueDriver) to perform a routine health check and discovered a stored U1117 code. There were no check engine lights or any noticeable problems with the truck's operation.
What they tried:
- The owner posted on a forum asking if it was a serious issue.
- Other users reported similar experiences, suggesting the code was likely a 'ghost' code.
Outcome: The consensus was that low-cost scanners sometimes momentarily disrupt CAN bus communications while connecting, causing a history code to be stored. The owner cleared the code, and it did not return during subsequent scans. No repair was needed.
Lesson: If code U1117 appears with no warning lights or symptoms, especially after using a plug-in device, it may be a non-issue. Clear the code and monitor. If it returns without a scanner plugged in, then further diagnosis is warranted.
How to Prevent This Code From Triggering
- Apply Dielectric Grease to Connectors (During any repair involving an electrical connector) — Dielectric grease is a non-conductive, silicone-based sealant that blocks moisture, dirt, and oxygen from reaching the metal pins of a connector. This prevents the formation of corrosion, which is a primary cause of high resistance and communication failures.
- Clean Battery Terminals and Ensure Tight Connection (Every 12 months or with every oil change) — Corrosion on battery terminals acts as a resistor, impeding current flow and causing low/unstable voltage across the entire vehicle. Modules require stable voltage to communicate properly; cleaning terminals with a baking soda solution and wire brush ensures a solid power foundation.
- Inspect and Clear Water Drains (Every 12-24 months, especially if parked under trees) — Clogged sunroof drains, cowl drains (below the windshield), and A/C evaporator drains cause water to leak into the vehicle's cabin. This water saturates carpets and reaches critical modules and connectors located in kick panels or under seats, leading to severe corrosion.
- Use Weatherproof Splices for Exterior Wire Repairs (Whenever repairing wiring outside the cabin) — Standard butt connectors are not waterproof and allow moisture to enter, causing the wire to corrode and break at the connection point. Using heat-shrink butt connectors with an adhesive lining creates a sealed, waterproof repair that prevents future corrosion-related failures.
- Inspect and Reseal Ford F-150 Tail Lights (Inspect after every car wash; reseal if moisture is ever found) — The factory seals on 2015+ Ford F-150 tail lights are prone to failure, allowing water to destroy the internal Blind Spot (BLIS) radar module. Proactively applying a bead of clear RTV silicone around the housing seam prevents this expensive, code-triggering failure.
Frequently Asked Questions
Can I fix a U1117 code myself?
DIYers can handle the basics: checking the battery, testing all fuses with a multimeter, and performing a thorough visual inspection for damaged wires or corrosion. However, pinpointing a fault on the CAN bus network typically requires wiring diagrams and advanced tools like an oscilloscope. Stop DIYing and take it to a shop if basic checks pass.
My scanner shows U1117 but there are no symptoms. What should I do?
If there are no warning lights and all vehicle features work, it is likely a stored 'history' code from a past, temporary event like a momentary voltage drop. Clear the code and drive the vehicle. If it does not return, no further action is needed.
What is a common misdiagnosis for U1117?
The most common mistake is replacing the gateway module without proper diagnosis. The code indicates the gateway lost communication, which usually means the fault lies with a different module on the network or the wiring itself. Always test the CAN bus resistance and check for other codes before condemning the gateway.
How much does it cost to diagnose a U1117 code?
Expect to pay a diagnostic fee of $150 to $300. This is not a simple code read. Tracing a network fault is labor-intensive and requires specialized knowledge, with this fee covering the first 1-2 hours of diagnostic time.
Can a cheap OBD-II scanner cause a U1117 code?
Yes. Lower-quality Bluetooth or handheld scanners sometimes disrupt communication on the CAN bus when plugged in, causing the vehicle to log a U1117 code. If the code only appears when the scanner is plugged in and there are no other symptoms, the tool itself is the cause.
What is the difference between U1117 and U0121?
U1117 is a general code from the gateway saying it lost contact with an accessory. U0121 is a very specific code saying communication is lost with the ABS module. If you have both, it strongly suggests the problem is with the ABS system, and U1117 is just the gateway reporting that fact.
What does 'Terminating Resistor' mean?
A CAN bus needs a 120-ohm resistor at each end, giving the network a total measurable resistance of 60 ohms. These resistors are built into specific modules like the ECU. If one of these modules fails or is unplugged, network resistance jumps to 120 ohms and communication stops.
Key Takeaways
- Code U1117 indicates a communication failure on your car's CAN bus network, specifically isolating the accessory gateway module from other computers.
- Always test the battery and inspect the interior fuse box first, as voltage drops below 12.4V or a single blown 10-amp fuse frequently trigger this code.
- Vehicle-specific symptoms dictate the severity; Nissan models often lose ABS functionality, while Mitsubishi vehicles face a complete crank-no-start immobilizer lockout.
- Never replace the gateway module without first measuring the CAN bus resistance at OBD-II pins 6 and 14 to confirm a healthy 60-ohm baseline.
Helpful Videos

![How To Test CAN BUS With A Multimeter [CAN Bus Resistance Check] Mechanic Mindset](https://img.youtube.com/vi/JPE42HSJxAk/mqdefault.jpg)

Shop the Parts Behind U1117
Below are the parts most often responsible for code U1117, ranked by how frequently each one is the actual culprit (per the diagnosis above). Tap any to see what we have for your vehicle.


The information in this article is provided for general reference and educational purposes only. Vehicle specifications, procedures, and part compatibility can vary by production date, trim level, and region. Always consult your vehicle's factory service manual and verify part numbers before purchasing or performing repairs. Safety-critical components such as airbags, seat belts, and braking systems should be installed by a qualified professional.
- 🧭 Diagnostic Flowchart
- 🎬 Helpful Videos
- 🛍️ Shop This Part
- What Does U1117 Mean?
- Can I Drive With U1117?
- Common Causes
- Symptoms
- Common Fixes & Costs
- Used vs. New Parts: Buying Guide
- What Happens If You Wait — Timeline
- Cost of Not Fixing It
- Diagnosis Steps
- When This Code Triggers (Freeze-Frame Conditions)
- Related Codes
- Climate & Environmental Factors
- How to Talk to a Mechanic About This Code
- Where to Take It: Dealer vs Independent vs Chain
- When to Walk Away From the Repair
- What Scan Tool You Need for This Code
- How to Clear the Code After You Fix It
- Will This Fail Emissions / State Inspection?
- Most Commonly Affected Vehicles
- Manufacturer-Specific Notes
- Real Owner Stories
- 2019 Toyota Corolla with multiple electrical failures
- 2018 Ford F-150 with 'Blind Spot System Fault'
- 2008 Mitsubishi Eclipse with a crank-no-start condition
- 2018 Toyota Tacoma with a symptom-free U1117 code
- How to Prevent This Code From Triggering
- Frequently Asked Questions
- Can I fix a U1117 code myself?
- My scanner shows U1117 but there are no symptoms. What should I do?
- What is a common misdiagnosis for U1117?
- How much does it cost to diagnose a U1117 code?
- Can a cheap OBD-II scanner cause a U1117 code?
- What is the difference between U1117 and U0121?
- What does 'Terminating Resistor' mean?
- Key Takeaways
- 🎟️ Get 5% Off