
OBD-II Code U1206: Lost Communication Between Modules
What U1206 means, why it triggers, and how to fix it
- Code U1206 indicates a communication failure on the CAN bus network, meaning two or more control modules cannot exchange data.
- Test your battery first; system voltage dropping below 12.2V is the leading cause of false network codes and costs under $300 to fix.
- Disconnect all aftermarket accessories like remote starters or OBD-II dongles immediately, as they frequently introduce electrical noise that crashes the network.
- Do not replace expensive modules without measuring the CAN bus resistance at the OBD-II port; a healthy network must read exactly 60 ohms.
What Does U1206 Mean?
Trouble code U1206 indicates your vehicle's control modules have lost communication with each other over the CAN bus or SCP network. When a module fails to receive an expected message within a specific timeframe, it triggers this code. This represents a breakdown in the vehicle's central communication system, directly impacting engine performance, safety systems, and dashboard displays.
Technical definition: The SAE/ISO definition for U1206 is "SCP (J1850) Invalid or Missing Data for Primary Id" or a general network communication error. A specific control module failed to receive an expected data packet from another essential module. Manufacturers sometimes apply specific definitions; for example, Honda hybrids use it for communication loss between the traction motor control module and battery condition monitor.
Can I Drive With U1206?
Yes, But With Caution. Do not drive long distances. A U1206 code means critical systems like ABS, stability control, or the engine computer can lose communication instantly. This causes sudden stalling, loss of power, or erratic gauge behavior, significantly increasing accident risk. The primary danger is the unpredictable failure of key vehicle functions while in motion.
Common Causes
- Weak or Failing Battery/Alternator (Very Common) — System voltage below 12.2V causes modules to act erratically and drop off the network. Always check the battery and charging system first.
- Wiring or Connector Issues (Very Common) — CAN bus wires frequently suffer damage, corrosion, or disconnection from vibrations and moisture ingress, especially near the wheels or under the vehicle.
- Faulty Instrument Panel Cluster (IPC) (Common) — The instrument cluster acts as a central network gateway. Internal failures, like broken solder joints on Ford and GM trucks, disrupt the entire network.
- Aftermarket Accessories Causing Interference (Common) — Poorly installed remote starters, alarms, or plug-in OBD-II devices introduce electrical noise that crashes factory module communication.
- Faulty Control Module (BCM, PCM, TIPM) (Less Common) — A failed Body Control Module (BCM) or Totally Integrated Power Module (TIPM) shorts the network and halts communication.
- Poor Ground Connection (Less Common) — Loose or corroded ground straps introduce electrical noise. Modules require a solid ground to transmit clean data signals.
- Failed Terminating Resistor (Uncommon) — The CAN network relies on two 120-ohm resistors. If one fails, network resistance jumps to 120 ohms, breaking communication.
- Software or Firmware Glitch (Rare) — A module's software requires an update to resolve communication conflicts. Manufacturers release Technical Service Bulletins (TSBs) to reprogram modules with updated software.
Symptoms
- Multiple Warning Lights on Dash — The Check Engine, ABS, traction control, and other warning lights turn on simultaneously in a 'Christmas tree' effect.
- Engine Stalling or No-Start Condition — The engine suddenly stalls while driving or fails to start because the engine computer (PCM) cannot communicate with the ignition or fuel pump module.
- Gauges Behaving Erratically or Not Working — The speedometer, tachometer, or other gauges drop to zero, freeze in place, or give incorrect readings intermittently.
- Loss of Electrical Functions — Features controlled by the BCM like power windows, radio, climate control, or interior lights stop working suddenly.
- Transmission Shifting Issues — The transmission shifts harshly, gets stuck in one gear (limp mode), or the gear indicator disappears from the dash.
Diagnostic Flowchart
Tap your situation to follow the diagnostic path that matches what you're seeing on this code.
Common Fixes & Costs
- Replacing a Weak Battery — Parts: $150-$400, Labor: $50-$100, ~0.5 hr book time (DIY)
- Repairing Damaged Wiring or Connectors — Parts: $10-$100, Labor: $250-$1,200+, ~3.5 hr book time (Professional)
- Replacing the Instrument Panel Cluster (IPC) — Parts: $250-$800, Labor: $150-$300, ~1.5 hr book time (Intermediate)
- Replacing a Faulty Control Module (BCM, TIPM) — Parts: $300-$1,500, Labor: $150-$500, ~1.5 hr book time (Professional)
- Cleaning or Repairing a Main Ground Connection — Parts: $5-$20, Labor: $100-$300, ~0.8 hr book time (DIY)
DIY vs Professional
- Replacing a Weak Battery 🟢 Beginner
Tools: Socket set or wrench set - Cleaning or Repairing a Main Ground Connection 🟢 Beginner
Tools: Socket set, wire brush, sandpaper - Replacing the Instrument Panel Cluster (IPC) 🟢 Beginner
Tools: Trim removal tools, socket set - Replacing a Faulty Control Module (BCM, TIPM) 🟢 Beginner
Tools: Socket set - Repairing Damaged Wiring or Connectors 🟢 Beginner
Tools: Multimeter, wire strippers, crimpers, soldering iron, heat gun, advanced scan tool
Used vs. New Parts: Buying Guide
When a used part is worth it: For an older vehicle (over 150k miles) where a new module is a significant percentage of the car's value. The owner accepts the risk for upfront savings.
Donor-vehicle mileage cap: roughly under 100000 miles for the part to have meaningful remaining life.
Donor quality checklist:
- Verify the part number matches EXACTLY, including hardware/software versions.
- Check the donor vehicle's VIN to avoid flood-damaged cars.
- Buy from a salvage yard offering a 30-90 day warranty.
- Inspect connector pins for corrosion or moisture before purchase.
Decision logic:
- If The part requires complex programming or security relearning → Favor a new or remanufactured part that comes with programming support.
- If The vehicle is newer or has low mileage → Buy new or remanufactured for the longer warranty and higher reliability.
- If The part is a known high-failure item (e.g., Dodge TIPM) → Favor a remanufactured unit, as they have original design flaws corrected.
Warranty tradeoff: Used parts typically have a 30-90 day warranty. Remanufactured and new aftermarket parts offer 1-year to limited lifetime warranties.
Worst-case if a used part fails: $300-$800 if a used part is dead on arrival, including non-refundable labor for installation and programming.
What Happens If You Wait — Timeline
- 0-1 month: Intermittent dash lights or gauges flicker briefly, then return to normal. Code U1206 is stored but may not trigger a constant check engine light. (MPG impact: 0%% · Added cost: $0)
- 1-3 months: Fault occurs multiple times a week. The driver experiences brief engine stalls or no-start events. The check engine light remains on permanently. (MPG impact: 0-2%% · Added cost: $100-$300 for a potential tow.)
- 3-6 months: Vehicle becomes highly unreliable. Stalling or no-start conditions are common. Electronic features stop working entirely. Corrosion causes permanent damage to connector pins. (MPG impact: 0-5%% · Added cost: $500-$1500 for connector pigtail or harness section replacement.)
- 6+ months: Vehicle is undrivable. Widespread corrosion destroys significant portions of the wiring harness or multiple control modules, requiring major electrical restoration. (MPG impact: N/A% · Added cost: $2,000-$5,000+ for full harness replacement.)
Cost of Not Fixing It
- 0-1 month: High risk of intermittent stalling, no-start conditions, or sudden loss of power. Safety systems like ABS become inoperable without warning. (Added cost: $100-$300 for a potential tow.)
- 1-6 months: The intermittent fault becomes permanent, leaving the vehicle undrivable. Electrical instability puts stress on other sensitive electronic modules. (Added cost: Cost of the primary repair plus increasing inconvenience and towing fees.)
- 6+ months: The vehicle is unusable. Unaddressed root causes, like water intrusion, lead to widespread corrosion and expensive wiring harness replacement. (Added cost: $2,000+ if secondary damage from corrosion spreads.)
Diagnosis Steps
- Check the Battery and Charging System
Ensure the battery is fully charged (above 12.4 volts with the engine off) and test the charging system. A running engine must show an alternator output of 13.7 to 14.7 volts.
Tools: Multimeter, Battery Tester (Beginner) - Perform a Thorough Visual Inspection
Check for loose battery cables, corroded main ground straps, and visible damage to wiring harnesses under the dash, in the engine bay, and near the wheels. Inspect areas with aftermarket accessories.
Tools: Flashlight, Inspection Mirror (Beginner) - Scan for All Codes in All Modules
Use a scanner that performs a full network scan. If multiple modules report a 'Lost Communication' code with one specific module (e.g., U0155 for the Instrument Cluster), that module is the culprit.
Tools: Advanced OBD-II Scanner (Intermediate) - Test the CAN Bus Terminating Resistors
With the battery disconnected, measure resistance between Pin 6 (CAN High) and Pin 14 (CAN Low) on the OBD-II port. A healthy network reads exactly 60 ohms. 120 ohms means a broken network; 0 ohms means a short.
Tools: Multimeter (Advanced) - Isolate the Faulty Module
If the network is shorted, disconnect the battery, then unplug the suspect module. Reconnect the battery and re-check CAN bus resistance. If the network returns to 60 ohms, the disconnected module is faulty.
Tools: Socket set, Trim removal tools, Multimeter (Professional) - Check CAN Bus Voltages
With the ignition ON (engine off), measure voltage on the CAN lines at the OBD-II port. CAN High (Pin 6) should be 2.6-3.5V, and CAN Low (Pin 14) should be 1.5-2.4V. A line stuck at 0V indicates a short to ground.
Tools: Multimeter (Advanced) - Perform a "Wiggle Test"
Connect a multimeter to monitor CAN line voltage. Gently wiggle sections of the wiring harness and connectors. If the voltage fluctuates wildly when moving a specific area, you have located the wiring fault.
Tools: Multimeter (Advanced) - Use an Oscilloscope for Waveform Analysis
An oscilloscope provides a visual representation of CAN signals. A healthy bus shows two clean, mirroring square-wave patterns. Distortion, noise, or incorrect voltage levels point directly to the electrical fault.
Tools: Oscilloscope (Professional)
When This Code Triggers (Freeze-Frame Conditions)
- Vehicle Speed: 0 mph or Varies (Fault often occurs at key-on, before moving, or intermittently during driving when a wiring fault is disturbed.)
- RPM: 0 or Varies (Logs with engine off (key-on) or during any engine speed, reflecting the electronic nature of the fault.)
- Battery Voltage: <12.2V or Fluctuating (Low or unstable system voltage is a primary trigger for communication faults between modules.)
- Module Status: Not Communicating (Accompanied by a list of which modules are and are not responding on the network at the time of the fault.)
Related Codes
- U0155 — Lost Communication With Instrument Panel Cluster (IPC). Frequently appears with U1206 because the IPC acts as the network gateway. The IPC is the primary suspect.
- U0100 — Lost Communication With ECM/PCM. Indicates the Engine Control Module is offline, causing a no-start condition. Other modules set U1206 because they cannot reach the ECM.
- U0140 — Lost Communication With Body Control Module (BCM). Points to the BCM as the source of the network failure, accompanied by issues with lights, locks, and windows.
- U1000 — Manufacturer-specific code for Class 2 Communication Malfunction (GM) or CAN Communication Circuit (Nissan). Functionally identical to U1206.
Climate & Environmental Factors
- High Humidity / Water Intrusion: Water from clogged sunroof drains or bad window seals seeps into connectors, causing corrosion on CAN bus pins. This increases resistance and disrupts communication.
- Road Salt (Winter Climates): Salty slush splashes onto under-vehicle wiring harnesses. This highly corrosive solution accelerates the degradation of wiring insulation and connector pins.
- Extreme Cold: Cold temperatures cause failing solder joints (like those in GM instrument clusters) to contract and break contact, leading to network failures that disappear as the cabin warms.
How to Talk to a Mechanic About This Code
Say this: "I have a U1206 communication code and I'd like to schedule a diagnostic. Please start by checking the battery, charging system, and main grounds. I want to rule out the simple things before moving to network or module testing."
Directs the shop to follow a logical, cost-effective diagnostic path. It prevents them from immediately jumping to a conclusion that an expensive module has failed.
Avoid saying:
- 'Just fix whatever's wrong'
- 'My check engine light is on, can you look at it?'
- 'My car is acting weird, I think it's the computer'
Questions to ask before authorizing the repair:
- Did you test the battery and charging system first? What were the results?
- What was the CAN bus resistance reading at the OBD-II port?
- How did you isolate the fault to this specific wire or module?
- If a module needs to be replaced, can you show me how you proved the wiring going to it is good?
- What is the warranty on this electrical repair?
Where to Take It: Dealer vs Independent vs Chain
- Dealer:
A strong, safe choice for newer or complex vehicles. They have guaranteed access to proprietary wiring diagrams and diagnostic tools.
Best for: Vehicles still under warranty, Complex, brand-specific electrical issues (VW, Audi, BMW), When a Technical Service Bulletin (TSB) or software update is the likely fix
Downsides: Highest labor rates, often 1.5-2x an independent shop., Defaults to replacing an entire module or harness rather than attempting a wiring repair. (Typical cost: +50% vs. baseline) - Independent Shop:
The best choice if you find a reputable shop specializing in auto electrics. Ask if they have an oscilloscope and CAN bus experience.
Best for: Out-of-warranty vehicles where cost is a major factor., Common, well-documented failures (Ford instrument clusters or Dodge TIPMs)., Finding a technician who will repair a wiring harness instead of replacing it.
Downsides: Quality varies dramatically. You MUST find a shop that specializes in electrical diagnostics., May not have expensive, manufacturer-specific scan tools for deep-level programming. (Typical cost: +0% vs. baseline) - Chain Shop:
AVOID. A U1206 code is far beyond the scope of a typical chain shop. They are highly likely to misdiagnose the issue.
Best for: Simple maintenance like oil changes, tires, and batteries.
Downsides: Technicians are not equipped or trained for complex network diagnostics., High pressure to sell parts leads to misdiagnosis and unnecessary repairs. (Typical cost: -10% vs. baseline)
When to Walk Away From the Repair
If the estimated repair cost for the U1206 fault exceeds 50% of the car's Kelley Blue Book (KBB) private-party value, seriously consider not fixing it.
- Car worth $5000, fix is $2500: Borderline. A $2500 repair for a wiring harness is a major investment in a $5000 car. Get a second opinion before authorizing.
- Car worth $15000, fix is $1800: Fix it. The repair cost is well below the 50% threshold and restores significant value and function.
- Car worth $3000, fix is $1800: Walk away. The repair cost is over 50% of the vehicle's value. The money is better put towards a replacement vehicle.
What Scan Tool You Need for This Code
Minimum: A scanner that performs an 'All System Scan' to see the status of all modules. It must read manufacturer-specific 'U' codes (ABS, BCM, IPC), not just generic 'P' codes.
A basic $20 code reader only tells you the Check Engine module stored a U1206. It will not tell you WHICH other module went offline. You cannot diagnose a network fault without seeing the whole network.
Budget: BlueDriver Pro (~$99) — Connects to a smartphone app and reads enhanced codes for major brands. Performs a full system scan to show which modules report communication faults.
Mid-range: Foxwell NT510 Elite (~$180) — A handheld tool offering full-system diagnostics and bidirectional controls for a specific car brand. Commands modules to perform self-tests to isolate the problem.
Professional: Autel MaxiCOM MK808S (~$450) — Offers full bidirectional control and a 'Topology Map'. Visually displays the entire vehicle network layout, showing which modules are online or offline, instantly pointing to the communication break.
Rent vs buy: Free scanner rentals at auto parts stores offer basic code readers insufficient for a U1206. Spend your money on an hour of diagnostic time at a professional shop unless you plan to perform diagnostics regularly.
How to Clear the Code After You Fix It
- Reconnect the battery if it was disconnected for the repair.
- Use a professional OBD-II scan tool to clear all Diagnostic Trouble Codes (DTCs) from all modules.
- Perform a complete drive cycle to allow the vehicle's onboard computers to run their self-tests.
Drive cycle (~30 minutes): Start the vehicle cold. Idle for 3 minutes with electrical loads on. Drive in stop-and-go traffic for 15 minutes. Accelerate to 55 mph and maintain speed for 10 minutes. Decelerate without braking. Let the vehicle cool down.
Readiness monitors affected: Comprehensive Component Monitor, Misfire Monitor, Fuel System Monitor, Catalyst Monitor, EVAP System Monitor, O2 Sensor Monitor
Before emissions retest: drive at least 100 miles to fully set monitors.
Watch out for:
- Disconnecting the battery clears the code but resets all readiness monitors to 'Not Ready', guaranteeing an emissions failure.
- The Check Engine Light returns immediately if the underlying electrical fault is not repaired.
- Failing to complete a full drive cycle leaves monitors 'Not Ready'.
Will This Fail Emissions / State Inspection?
Yes — this code typically fails an OBD-II emissions inspection.
- California: An active U1206 code results in an automatic smog check failure. A full drive cycle must be completed to set readiness monitors before a re-test.
- New York: The NYVIP3 inspection fails any vehicle with an active check engine light. Only one readiness monitor is allowed to be 'not ready' to pass.
- Texas: An illuminated check engine light is an automatic failure. The vehicle must be driven to set readiness monitors after clearing the code.
Most Commonly Affected Vehicles
- Ford F-150 (2004-2016) — Often related to a faulty instrument cluster with bad solder joints. Water intrusion into the fuse box or connectors is also common.
- Chevrolet/GMC Silverado/Sierra (2003-2014) — Prone to instrument cluster failures where cold solder joints interrupt communication. Poor ground connections on the engine block are frequent culprits.
- Dodge/Ram Ram 1500/2500 (2006-2013) — The Totally Integrated Power Module (TIPM) is a common failure point, causing widespread communication and electrical issues.
- Volkswagen Golf, Passat, Tiguan, Touareg (2007-2016) — Network communication faults are often related to the CAN Gateway module. Water intrusion in the cabin corrodes wiring under the carpet.
- Mercedes-Benz C-Class, E-Class, ML-Class, GLK (2006-2016) — Susceptible to CAN bus faults due to complex electronics. The wiring harness in the driver and passenger footwells frequently corrodes.
- Audi A4, A6, Q5, Q7 (2008-2017) — Logs general network faults due to issues with the CAN Gateway, grounds, or control modules. Sunroof drain leaks corrode CAN bus wiring.
- Honda Clarity, Accord Hybrid (2014-2024) — Indicates a loss of communication with the Battery Control Module, sometimes due to physical undercarriage damage to the high-voltage wiring harness.
- Ford Focus, Mondeo, Kuga (2008-2018) — Common causes include corrosion on the instrument cluster connectors and wiring harness damage behind the wheel arch liners.
- BMW 3 Series, 5 Series, X3, X5 (2005-2015) — The Junction Box Electronics (JBE) module acts as a gateway and frequently fails. Water ingress in the trunk damages other modules.
Manufacturer-Specific Notes
- Ford: A failing instrument cluster is a common cause for U1206. The cluster acts as a gateway, and internal solder joint failures take the network down. Tapping the dashboard to make gauges flicker is a classic diagnostic sign.
- General Motors (GM): GM defines this as a 'Class 2 Communication' error. A faulty Body Control Module (BCM) or weak G201 ground pack under the driver's side dash are frequent triggers.
- Chrysler/Dodge/Ram: The Totally Integrated Power Module (TIPM) contains internal circuit boards that fail, causing random communication issues. Symptoms range from a dead fuel pump to the horn honking unexpectedly.
- Mitsubishi: U1206 points to a conflict between signals from the door switches and the main body ECU (ETACS-ECU), or a fault within the instrument cluster when the ignition is off.
Real Owner Stories
2008 Dodge Ram
Owner experienced strange codes related to the hood switch, AAT sensor, and intermittent 4WD system problems.
What they tried:
- Troubleshooting with a service manual and multimeter.
- Initially suspected multiple separate component failures.
Outcome: Discovered corrosion on the male pins inside a connector on the TIPM. Cleaning the corrosion with a small file resolved all issues without replacing the TIPM.
Lesson: With widespread electrical issues on a Chrysler product, physically inspect the TIPM connectors for corrosion before assuming the module is bad. A simple cleaning saves over $1,200.
2015 VW Passat
Multiple warning lights and erratic gauge behavior occurred specifically on cold mornings. The car worked normally later in the day.
What they tried:
- Changed the battery, but the problem persisted.
- A mechanic was unable to diagnose the intermittent issue.
Outcome: The owner replaced the CAN Gateway Interface Module, which permanently resolved the problem.
Lesson: Temperature-sensitive electrical problems point to a failing electronic module with a bad solder joint. On VWs, the CAN Gateway module is a primary suspect for cold-weather network collapse.
2015 Ford F-150 Platinum, 4,900 miles
The digital instrument cluster screen went black, gauges froze, steering wheel buttons stopped working, and turn signals failed.
What they tried:
- Drove directly to the dealership for diagnosis.
Outcome: The dealership traced the issue to a single faulty gateway module. Replacing the module restored all functions.
Lesson: Even on low-mileage vehicles, a single gateway module failure mimics a catastrophic network-wide shutdown. Do not assume widespread symptoms require a full wiring harness replacement.
How to Prevent This Code From Triggering
- Clean battery terminals and main chassis grounds (Every 12 months) — Corrosion creates unwanted resistance, leading to low or unstable voltage that causes modules to drop off the network.
- Apply dielectric grease to critical connectors (When servicing a related part) — Seals exposed connectors from moisture, preventing the pin corrosion that causes wiring-related U-codes.
- Inspect and secure wiring harnesses (Every 24 months) — Securing loose harnesses with zip ties prevents chafing against sharp metal edges or exhaust pipes, avoiding short circuits.
- Address water leaks promptly (As needed) — Water from a clogged sunroof drain saturates control modules and wiring harnesses under the carpet, causing severe network failure.
Frequently Asked Questions
What does SCP (J1850) mean?
SCP stands for Standard Corporate Protocol, an older communication language used primarily by Ford. J1850 is the official standard name for this protocol. Modern vehicles have replaced this with the faster CAN bus system.
What are common misdiagnosis mistakes for a U1206?
The biggest mistake is replacing a module simply because a code mentions it, without testing the wiring first. Proper diagnosis requires an advanced scanner to view the entire network and pinpoint the offline module. Always rule out a weak battery or bad ground before buying expensive parts.
Can aftermarket parts cause a U1206 code?
Yes, poorly designed aftermarket devices like remote starters or cheap OBD-II dongles create electrical noise. This interference disrupts CAN bus communication and triggers a U1206 code. Disconnect all aftermarket accessories as your first diagnostic step.
Can I fix a U1206 code myself?
DIYers can easily test the battery, check fuses, and inspect wiring for obvious damage. However, pinpointing a specific network short requires an advanced scanner and a multimeter. If basic checks pass, take the vehicle to an automotive electrical specialist.
Will clearing the code fix the problem?
No, clearing the code only temporarily turns off the check engine light. Because U1206 indicates a physical hardware or wiring fault, the code returns immediately once the module tries to communicate again. You must repair the underlying electrical issue.
Can a bad module damage other modules on the network?
A failing module rarely sends a voltage spike strong enough to destroy other modules. Instead, a bad module shorts the network, preventing other modules from communicating. Once the faulty module is disconnected or replaced, the rest of the network typically recovers.
What is a CAN Gateway Module?
A CAN Gateway Module acts as a central router connecting different communication networks within the vehicle. It transfers data between high-speed networks (engine/ABS) and low-speed networks (windows/radio). If the gateway fails, large segments of the vehicle's electronics stop communicating simultaneously.
Key Takeaways
- Code U1206 indicates a communication failure on the CAN bus network, meaning two or more control modules cannot exchange data.
- Test your battery first; system voltage dropping below 12.2V is the leading cause of false network codes and costs under $300 to fix.
- Disconnect all aftermarket accessories like remote starters or OBD-II dongles immediately, as they frequently introduce electrical noise that crashes the network.
- Do not replace expensive modules without measuring the CAN bus resistance at the OBD-II port; a healthy network must read exactly 60 ohms.
Helpful Videos
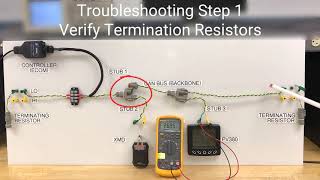
![How To Test CAN BUS With A Multimeter [CAN Bus Resistance Check] Mechanic Mindset](https://img.youtube.com/vi/JPE42HSJxAk/mqdefault.jpg)

Shop the Parts Behind U1206
Below are the parts most often responsible for code U1206, ranked by how frequently each one is the actual culprit (per the diagnosis above). Tap any to see what we have for your vehicle.


The information in this article is provided for general reference and educational purposes only. Vehicle specifications, procedures, and part compatibility can vary by production date, trim level, and region. Always consult your vehicle's factory service manual and verify part numbers before purchasing or performing repairs. Safety-critical components such as airbags, seat belts, and braking systems should be installed by a qualified professional.
- 🧭 Diagnostic Flowchart
- 🎬 Helpful Videos
- 🛍️ Shop This Part
- What Does U1206 Mean?
- Can I Drive With U1206?
- Common Causes
- Symptoms
- Common Fixes & Costs
- DIY vs Professional
- Used vs. New Parts: Buying Guide
- What Happens If You Wait — Timeline
- Cost of Not Fixing It
- Diagnosis Steps
- When This Code Triggers (Freeze-Frame Conditions)
- Related Codes
- Climate & Environmental Factors
- How to Talk to a Mechanic About This Code
- Where to Take It: Dealer vs Independent vs Chain
- When to Walk Away From the Repair
- What Scan Tool You Need for This Code
- How to Clear the Code After You Fix It
- Will This Fail Emissions / State Inspection?
- Most Commonly Affected Vehicles
- Manufacturer-Specific Notes
- Real Owner Stories
- 2008 Dodge Ram
- 2015 VW Passat
- 2015 Ford F-150 Platinum, 4,900 miles
- How to Prevent This Code From Triggering
- Frequently Asked Questions
- What does SCP (J1850) mean?
- What are common misdiagnosis mistakes for a U1206?
- Can aftermarket parts cause a U1206 code?
- Can I fix a U1206 code myself?
- Will clearing the code fix the problem?
- Can a bad module damage other modules on the network?
- What is a CAN Gateway Module?
- Key Takeaways
- 🎟️ Get 5% Off