
OBD-II Code U1300: In-Depth Guide to Vehicle Network Communication Failure
What U1300 means, manufacturer-specific causes, and how to diagnose and fix it like a pro
- U1300 indicates a severe data bus failure, not a single broken part, and requires a full-system OBD-II scan to identify which of the 10+ vehicle modules is offline.
- Test the 12V battery first; voltage drops below 12.0V during engine cranking frequently cause modules to crash and trigger false U1300 codes.
- Expect to pay $150 to $450 for 1 to 3 hours of professional diagnostic labor before any parts are replaced, as tracing network faults requires specialized oscilloscopes and wiring diagrams.
- Never blindly replace expensive computers like the PCM or BCM; isolating the fault by unplugging modules one by one often reveals a cheaper culprit like a $200 remanufactured ABS module or a corroded ground wire.
What Does U1300 Mean?

U1300 is a network communication code indicating a serious data bus failure connecting your car's computers (modules). These modules control the engine, anti-lock brakes, instrument cluster, and radio. This code means one or more modules are failing to send or receive messages due to a faulty module, wiring damage, or electrical failure. This causes widespread and erratic system malfunctions.
Technical definition: The official definition of U1300 varies by manufacturer. For General Motors, it is 'Class 2 Data Link Low,' indicating the communication circuit is shorted to ground. For Ford, it means 'SCP (J1850) Invalid or Missing Data for ABS,' pointing to a communication loss with the Anti-lock Brake System module. For Nissan, it points to a fault in the 'AV Comm Circuit'. On Subaru vehicles, it signifies a 'CAN-LS MALFUNCTION,' a fault on the low-speed controller area network.
Can I Drive With U1300?
Yes, But With Caution. Driving is possible, but carries significant risks. Expect unpredictable electrical problems, multiple warning lights, or sudden stalling in traffic. The vehicle often fails to start, leaving you stranded. Critical systems like ABS and airbags are disabled, compromising safety. Continued driving with a network fault causes a shorted module to damage other expensive electronic components. Limit driving to a short trip to a repair facility.
Common Causes

- Poor Battery Voltage or Bad Grounds (Very Common) — Low or unstable battery voltage is the primary cause of communication errors. Modules require a stable 12V+ to operate; if voltage drops during cranking, they crash and log fault codes. Corroded ground wires also prevent modules from communicating.
- Failed Control Module (Very Common) — A single computer module fails internally, stopping communication or flooding the network with bad data, bringing the entire bus down. A failed ABS module is the primary cause on Ford vehicles, while the BSI (body control module) fails frequently on Peugeot and Citroën models.
- Faulty Splice Pack or Junction Block (Common) — Vehicle networks use splice packs (junction blocks) where communication wires meet. Water intrusion causes corrosion here, or a single bad pin takes down multiple modules at once. Diagnosis requires isolating circuits at these junctions.
- Wiring Harness Damage (Common) — Communication wires (CAN bus, Class 2) chafe against metal, melt from exhaust heat, or suffer rodent damage. A short-to-ground or an open circuit in the network wiring physically prevents modules from talking.
- Corroded or Loose Connectors (Less Common) — Water intrusion into a module connector (especially in wheel wells) corrodes pins, disrupting sensitive communication signals. A loose pin causes intermittent failures that only appear with vibration or temperature changes.
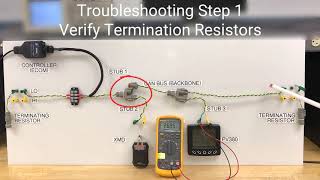
- Failed Termination Resistor (Rare) — CAN bus systems use two 120-ohm resistors at the ends of the network to prevent signal reflections. If one resistor (often inside the PCM or instrument cluster) fails, total network resistance changes from 60 ohms to 120 ohms, disrupting communication.
- Aftermarket Electronics (Rare) — Improperly installed remote starters, alarms, or stereo equipment interfere with or improperly tap into the vehicle's communication network, causing unpredictable data collisions.
Symptoms

- Multiple Warning Lights on Dash — The check engine, ABS, airbag, and traction control lights illuminate simultaneously because the modules for these systems cannot communicate with the instrument cluster.
- Engine Stalls or Will Not Start — The engine cranks but does not start, or stalls unexpectedly while driving, because the engine computer (PCM) loses communication with the security module (immobilizer).
- Gauges and Displays Not Working — The speedometer, tachometer, and temperature gauge drop to zero or behave erratically.
- Erratic Electrical Behavior — Power windows fail, central locking stops working, or wipers turn on by themselves. This confirms the body control module (BCM) is involved in the network fault.
- Parasitic Battery Drain (also visible on scanner) — A faulty module fails to enter 'sleep mode' when the vehicle is off, causing a persistent 100mA+ drain that kills the battery overnight.
Diagnostic Flowchart
Tap your situation to follow the diagnostic path that matches what you're seeing on this code.
Common Fixes & Costs
- Replace a Dead or Weak Battery — Parts: $150-$300, Labor: $50-$100, ~0.5 hr book time (DIY)
- Diagnostic Labor — Parts: $0, Labor: $150-$450, ~2.0 hr book time (Professional)
- Repair or Re-man a Failed Control Module (ABS, BCM, etc.) — Parts: $150-$350, Labor: $100-$250, ~1.2 hr book time (Intermediate)
- Replace a Failed ABS Module — Parts: $700-$1200, Labor: $150-$350, ~1.5 hr book time (Professional)
- Repair Damaged Wiring Harness — Parts: $20-$150, Labor: $250-$1500, ~4.0 hr book time (Professional)
Used vs. New Parts: Buying Guide
When a used part is worth it: For older, high-mileage vehicles where a new module exceeds $800, a used module from a reputable salvage yard is a viable option. It succeeds only when the part number is an exact match and the donor vehicle's history is known.
Donor-vehicle mileage cap: roughly under 100000 miles for the part to have meaningful remaining life.
Donor quality checklist:
- Match the part number exactly, including hardware or software version numbers printed on the label.
- Inspect the part for any signs of physical damage, corrosion, or water intrusion.
- Obtain the VIN and mileage of the donor car.
- Verify if the used module requires professional VIN programming to function in your vehicle.
Decision logic:
- If The fix is sending your original module for repair/remanufacturing → Choose this option first. It costs $150-$300 and avoids expensive dealer programming fees.
- If Vehicle is less than 10 years old and a new part is available for under $800 → Buy a new OEM or high-quality aftermarket part for the longest life and warranty coverage.
- If Vehicle is over 10 years old and budget is the primary concern → Buy a used part, but factor in $100-$200 for professional VIN programming.
Warranty tradeoff: Used parts from a salvage yard carry a 30-90 day warranty. Remanufactured modules include a 1-year or lifetime warranty. New OEM parts installed by a dealer carry the manufacturer's parts and labor warranty.
Worst-case if a used part fails: $300-$800 if a used part is dead on arrival, covering repeat diagnostic labor and the cost of a replacement part.
What Happens If You Wait — Timeline
- 0-1 month: Code U1300 sets, MIL illuminates. Symptoms are intermittent, like an occasional flicker of warning lights or a single no-start event that resolves itself. The underlying fault (minor corrosion, loose pin) is not yet constant. (MPG impact: 0%% · Added cost: $0)
- 1-4 months: Symptoms become frequent. The vehicle fails to start often, requiring multiple key cycles. A faulty module causes a parasitic drain, leading to a weak or dead battery if the vehicle sits for several days. (MPG impact: 0%% · Added cost: $150-$300 for a prematurely failed battery.)
- 4-8 months: The fault becomes permanent. Critical systems (ABS, Airbags) are consistently offline. The vehicle is unreliable, with a high risk of stalling in traffic. A shorted module constantly draws power or sends garbage data, stressing the electrical system. (MPG impact: 0-5%% · Added cost: $300 (battery) + potential towing costs.)
- 8+ months: Catastrophic failure. A module shorted internally back-feeds incorrect voltage onto the shared data bus, permanently damaging the sensitive transceivers in other connected modules (PCM, BCM). A single-part failure cascades into multiple expensive module replacements. (MPG impact: N/A (vehicle undrivable)% · Added cost: $1500-$4000 to replace the original failed module plus collateral damage.)
Cost of Not Fixing It
- Immediate: Critical safety systems like ABS and airbags are disabled. The vehicle stalls in traffic or fails to start, leaving you stranded. This poses a severe and immediate safety risk. (Added cost: $0)
- 1-3 Months: A faulty module with an internal short remains 'awake' when the car is off, causing a parasitic battery drain. This repeatedly kills the battery, destroying its internal cells and requiring premature replacement. (Added cost: $150-$300)
- 3+ Months: A module shorted to power or ground back-feeds incorrect voltage onto the shared communication network. This permanently destroys other expensive electronic modules (like the PCM or Instrument Cluster) connected to the same data bus, turning a single-part failure into a catastrophic multi-part failure. (Added cost: $1500-$3000)
Diagnosis Steps

- Check Battery and Charging System
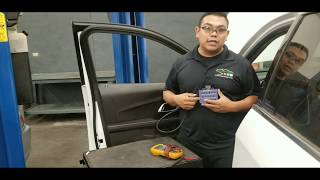
Ensure the battery is fully charged (12.4-12.6V with engine off) and the alternator charges correctly (13.5-14.5V running). Perform a load test on the battery. Low voltage is the most frequent cause of false communication errors.
Tools: Digital Multimeter, Battery Load Tester (Beginner) - Perform a Full System Scan
Use a professional-grade scan tool to communicate with all modules (Engine, ABS, BCM, Airbag). Note exactly which modules report as 'Not Responding' or 'Offline' to map the failure point.
Tools: OBD-II Scan Tool (professional grade) (Beginner) - Check Fuses for All Modules
Locate and test all fuses related to the offline control modules (BCM, ABS, PCM). A blown fuse takes a module offline instantly, causing a network fault.
Tools: Fuse Puller, Test Light or Multimeter (Intermediate) - Visual Inspection of Wiring and Connectors
Inspect all visible wiring harnesses for rubbing, melting, or rodent damage. Check harnesses near the engine, wheels, under the dashboard, and at known water ingress points (A-pillar, sunroof drains) for corroded connectors.
Tools: Flashlight, Inspection Mirror (Intermediate) - Isolate the Faulty Module
Using a wiring diagram, unplug modules one by one from the communication network. After unplugging each, re-check communication with the scan tool. The module that restores network function when unplugged is the internally shorted culprit.
Tools: Scan Tool, Trim Removal Tools, Wiring Diagrams (Advanced) - [PRO TIP] Check CAN Bus Resistance at DLC
Turn ignition OFF and disconnect the battery. Measure resistance between OBD-II Pin 6 (CAN High) and Pin 14 (CAN Low). A healthy network reads 60 Ω. A reading of 120 Ω indicates an open circuit or missing termination resistor. A reading near 0 Ω indicates the CAN wires are shorted together.
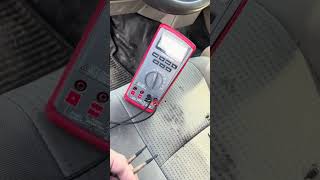
Tools: Digital Multimeter (Advanced) - [PRO TIP] Check Network Voltage and Signal
Reconnect battery, turn ignition ON. For high-speed CAN, measure Pin 6 to ground (~2.6V) and Pin 14 to ground (~2.4V). For GM Class 2 (Pin 2), voltage toggles between 0V and 7V. Use an oscilloscope to verify clean, opposing square waves.
Tools: Digital Multimeter, Oscilloscope (Advanced) - Test Network Wiring Integrity
If no single module is at fault, test the wiring. Check for shorts to ground (continuity between a CAN wire and chassis ground), shorts to power (voltage on a CAN wire with key off), or open circuits (high resistance on the same wire).
Tools: Digital Multimeter, Wiring Diagrams (Advanced) - [PRO TIP] Perform a Parasitic Draw Test
If a module won't sleep, connect a multimeter in series with the negative battery cable. A normal draw is 25-85mA. If the reading exceeds 100mA, pull fuses one by one until the draw drops to identify the active, faulty circuit.
Tools: Digital Multimeter with 10A fused capability (Advanced)
When This Code Triggers (Freeze-Frame Conditions)
- Fault Trigger: Key On or Cranking (The fault logs the moment modules power on and fail their initial communication check, or during engine start when voltage dips disrupt a weak module.)
- Battery Voltage: 11.8V - 14.5V (The code sets under low voltage conditions (weak battery) or normal operating voltage if a hardware fault exists. Freeze frame captures the exact voltage at the moment of failure.)
- Vehicle Speed: 0 - 70 mph (Unlike performance codes, U1300 sets at any speed, including 0 mph. Vibration or temperature changes during driving trigger intermittent connections to fail.)
- Module Status: Not Communicating (The freeze frame data is generated by an online module (like the PCM) reporting it cannot communicate with a critical offline module (like the ABS or BCM).)
Related Codes
- U1000 — A generic code for 'Class 2 Communication Malfunction'. U1000 confirms the network is down, while U1300 provides the specific electrical clue (e.g., short to ground).
- U1301 — On GM vehicles, this means 'Class 2 Data Link High,' indicating the communication wire is shorted to voltage. This is the direct opposite of U1300 ('Data Link Low'), which indicates a short to ground.
- U1900 — On Ford vehicles, this indicates a 'CAN Communication Bus Fault.' U1300 on older Fords refers to the slower J1850 SCP network, while U1900 refers to the separate, faster CAN network.
- P1626 — A theft deterrent code ('Fuel Enable Signal Lost') that is a direct consequence of U1300. The PCM sets P1626 because it cannot receive security authorization from the BCM due to the network being down.
Climate & Environmental Factors
- High Humidity / Water Ingress: High humidity promotes corrosion on electrical connectors and fuse boxes. Water leaks from bad seals (windshield, sunroof) saturate modules like the BCM or corrode splice packs in kick panels, causing direct shorts and communication failures.
- Cold Weather: Low temperatures increase electrical resistance and weaken marginal batteries, causing voltage to drop below the threshold required for stable module operation during startup. This triggers intermittent communication codes.
- Salt Belt / Corrosive Environments: Road salt creates a highly corrosive environment for under-vehicle components. This accelerates the degradation of wiring harnesses and connectors for exposed modules, such as the ABS module, leading to a higher failure rate.
How to Talk to a Mechanic About This Code
Say this: "I have a U1300 network communication code with multiple warning lights and erratic electrical symptoms. I need to schedule a diagnostic with a technician experienced in electrical and network tracing. I authorize 2 hours of diagnostic time to identify the specific cause—whether it is a module, wiring, or connector—before any parts are replaced."
This signals that you understand U1300 is a complex diagnostic issue, not a simple part swap. It directs the shop to perform a proper root cause analysis and prevents them from taking an expensive shortcut, like replacing a major computer without confirming it is the source of the problem.
Avoid saying:
- 'Just fix whatever's wrong'
- 'My check engine light is on, can you look at it?'
- 'I think the main computer is fried'
- 'Just do what is needed'
Questions to ask before authorizing the repair:
- What specific diagnostic steps did you take to isolate the fault?
- Can you show me which module was offline or what the resistance/voltage readings were on the data bus?
- Is the recommended repair a wiring fix, a module replacement, or something else?
- If a module needs to be replaced, does the new part require programming and is that cost included in the quote?
Where to Take It: Dealer vs Independent vs Chain
- Dealer:
A strong, reliable option if you suspect a complex, model-specific issue, but it is the most expensive route.
Best for: Vehicles still under warranty, Recalls or known manufacturer-specific issues (TSBs), Complex programming of new modules on 2020+ models
Downsides: Highest labor rates, often $200+ per hour., Defaults to replacing entire assemblies instead of repairing wires. (Typical cost: +50% vs. baseline) - Independent Shop:
Best fit, provided you find a shop with proven experience in electrical and network diagnostics. They provide better value and a more thorough diagnostic approach than a dealer.
Best for: Out-of-warranty vehicles where cost is a factor., Shops specializing in automotive electrical diagnostics (ASE A6 certification)., Building a long-term relationship with a trusted mechanic.
Downsides: Quality varies widely; you must verify their electrical diagnostic capabilities. (Typical cost: +0% vs. baseline) - Chain Shop:
AVOID. These shops are not equipped for the advanced electrical tracing required to solve a U1300 code correctly. Going here guarantees misdiagnosis and wasted money.
Best for: Simple, high-volume jobs like oil changes and brake pads.
Downsides: Technicians lack the specialized training and oscilloscopes needed for complex network faults., Business model encourages quick parts replacement over in-depth diagnosis. (Typical cost: -10% vs. baseline)
When to Walk Away From the Repair
If the estimated repair cost for the U1300 fault exceeds 50% of the car's private-party value, sell the car as-is or for salvage.
- Car worth $4000, fix is $2200: Walk away. The repair cost is over half the car's value. The risk of other age-related issues is high.
- Car worth $12000, fix is $1500: Fix it. The repair cost is well below the threshold and restores a significant amount of value and safety to the vehicle.
- Car worth $2500, fix is $800: Borderline. While below the 50% threshold, consider the car's overall condition. If it needs other work (tires, brakes), the total cost is not worth it.
What Scan Tool You Need for This Code

Minimum: A scanner that performs a full system scan of ALL modules (Engine, ABS, Airbag, BCM) to see which are communicating and which are offline. A basic code reader is not sufficient.
A $20 code reader only tells you the U1300 code exists. It cannot poll the individual modules on the network. The first step in diagnosing a U-code is identifying which computer is not responding, making basic readers useless.
Budget: BlueDriver Pro or TopDon TopScan (~$90) — These Bluetooth dongles connect to a smartphone app and perform a full system scan on most vehicles, showing which modules are online and which have stored fault codes.
Mid-range: Foxwell NT510 Elite or Autel MaxiCOM MK808 (~$350) — Provides full system diagnostics and displays live data from all modules. These tools have bidirectional control, allowing you to command components to test them, isolating a faulty module or wiring.
Professional: Autel MaxiSys Series (e.g., MS906) or Launch X431 Series (~$600-1500) — Offers full bidirectional control, network topology mapping, and OEM-level functions. These tools are essential for deep diagnosis, allowing a technician to see the entire network structure and pinpoint the break in communication.
Rent vs buy: For a U1300, buying a budget-level tool is a better investment than renting. Diagnosis requires multiple scans after performing steps like wiggling wires or unplugging modules.
How to Clear the Code After You Fix It
- Ensure the underlying hardware fault (bad module, broken wire) is physically repaired.
- Reconnect the vehicle's battery.
- Use a compatible OBD-II scan tool to select 'Clear/Erase Codes' in all affected modules.
- Perform a complete drive cycle to allow emissions readiness monitors to run their self-tests.
Drive cycle (~20 minutes): A generic drive cycle includes a cold start (engine temp below 122°F), a 3-minute idle, 10 minutes of stop-and-go city driving, and 10 minutes of steady highway driving at 55-60 mph.
Readiness monitors affected: Comprehensive Component Monitor, Misfire Monitor, Catalyst (CAT) Monitor, Oxygen (O2) Sensor Monitor
Before emissions retest: drive at least 50 miles to fully set monitors.
Watch out for:
- Clearing the code without fixing the root cause results in the U1300 code returning instantly.
- Disconnecting the battery resets all readiness monitors to 'Not Ready', causing an automatic emissions test failure.
- Some vehicles require highly specific, manufacturer-defined drive cycles to set all monitors.
Will This Fail Emissions / State Inspection?
Yes — this code typically fails an OBD-II emissions inspection.
- California: An illuminated Check Engine Light results in an automatic smog check failure. After repairs, a full drive cycle must be completed to set all readiness monitors to 'Ready'.
- New York: Any active 'U' code that triggers the Malfunction Indicator Lamp (MIL) is an automatic failure during the OBD-II scan.
- Texas: An active U1300 code with the Check Engine Light on is an automatic failure. The inspection station rejects the vehicle if readiness monitors are 'Not Ready' due to recently cleared codes.
Most Commonly Affected Vehicles
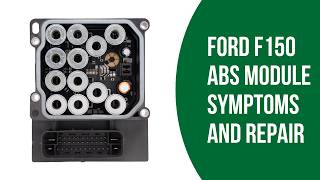
- Ford F-150 (2004-2008) — Extremely prone to internal ABS module failures that disrupt the SCP (J1850) communication network, triggering U1300. Remanufacturing the original ABS module is the standard fix.
- Peugeot 206, 307 (2001-2008) — Known for BSI (Built-in Systems Interface) module failures. Water ingress from a leaking windscreen causes corrosion and internal shorts in the BSI, triggering U1300 and widespread electrical chaos.
- Chevrolet / GMC Silverado, Sierra, Trailblazer (2003-2007) — U1300 indicates the Class 2 data bus is shorted to ground. Diagnosis requires testing the main splice pack (SP205) located behind the driver's side kick panel.
- Nissan Murano, Leaf, Pathfinder (2010-2020) — U1300 points to a fault in the Audio/Visual (AV) communication circuit (LIN bus) between the head unit and the multifunction switch.
- Subaru Outback, Forester, Impreza (2005-2015) — Indicates a CAN-LS (Low-Speed Controller Area Network) malfunction, often caused by a wiring issue or a failing Body Integrated Unit.
- Volkswagen / Audi Golf, Passat, A3, A4 (2005-2012) — A generic CAN bus communication fault requiring a full-system scan to identify the offline module, often pointing to the ABS module or a corroded floor connector.
Manufacturer-Specific Notes
- Ford: U1300 is almost exclusively caused by an internal electronic failure of the ABS module disrupting the SCP network. Diagnosis involves unplugging the ABS module to see if communication with other modules is restored.
- Peugeot / Citroën: This code points directly to a fault within the BSI (Built-in Systems Interface) module. Water ingress from a poorly sealed windscreen or bulkhead is the primary cause of BSI failure.
- General Motors (Chevrolet, GMC, Cadillac): U1300 specifically means the Class 2 communication wire is shorted to ground. Technicians diagnose this by disconnecting the main splice pack (behind the driver's kick panel) and testing each branch circuit for a ground short.
- Nissan: The code points specifically to the Audio-Visual (AV) communication network. The fault lies in the head unit, the steering wheel switch, or the LIN bus wiring between them.
Real Owner Stories
2005 GMC Sierra 2500HD with crank-no-start
After a DIY repair of the brake pedal bushing, the truck cranked but would not start. Multiple warning lights (ABS, Service 4WD) were on, and interior controls stopped working.
What they tried:
- Scanned for codes, revealing U1300 and P1626 (Theft Deterrent Fuel Enable Signal Lost).
- Disconnected the battery for 30 minutes hoping for a reset, which failed.
Outcome: The issue was a loss of communication on the Class 2 data line, disabling the theft deterrent system. The root cause was a disturbed connector near the steering column during the initial repair. Tracing the network wiring from the splice pack (SP205) found the open circuit.
Lesson: When a major electrical failure immediately follows a physical repair under the dash, the cause is almost always a connector knocked loose or a pinched wire. Always re-check nearby wiring after working in tight spaces.
2003 GMC Sierra with intermittent no-start and erratic key fob
The key fob failed unless the owner banged on the driver's door panel. The truck started and immediately died. Slamming the door temporarily allowed the truck to run properly.
What they tried:
- Scanned for codes and found U1300 and P1626.
Outcome: The symptoms strongly suggested an intermittent wiring fault in the door harness leading to the BCM. The physical shock of slamming the door temporarily restored the connection, allowing the modules to communicate.
Lesson: Intermittent faults that respond to physical shocks (slamming a door, hitting a bump) are classic signs of a bad connection, not a failed module. A 'wiggle test' on harnesses is a mandatory diagnostic step.
2020 Nissan Leaf with persistent U1300 code but no symptoms
A U1300 (AV Comm Circuit) code appeared and returned immediately after clearing, but the owner noticed no functional problems with the audio or visual systems.
What they tried:
- Used LeafSpy app to read the code.
- Checked 12V battery voltage.
Outcome: The 12V battery voltage was low (11.76V) during a cold day. The low system voltage caused the AV module to fail its initial communication check, logging the U1300 code without a hard fault present. Charging the 12V battery resolved the code.
Lesson: Always check the 12V battery first, even on an electric vehicle. A weak battery is a frequent cause of spurious communication codes that have no other obvious symptoms.
Peugeot 307 with multiple electrical failures after heavy rain
After heavy rain, the wipers ran constantly, central locking failed, and the car developed a no-start condition with code U1300.
What they tried:
- Initial diagnosis pointed towards a general network failure.
Outcome: A leaking windscreen seal allowed water to drip directly onto the BSI (Built-in Systems Interface) module, causing internal corrosion and short circuits. The fix required removing the BSI for professional repair and fixing the water leak.
Lesson: On Peugeot and Citroën vehicles, U1300 combined with water ingress points directly to a failed BSI module. Before replacing the expensive module, the water leak must be permanently fixed.
How to Prevent This Code From Triggering
- Perform Annual Battery and Ground Strap Maintenance (Once per year) — Corrosion on battery terminals and chassis ground points creates resistance, leading to unstable voltage for modules. Cleaning terminals and ensuring ground straps are tight provides a stable electrical foundation.
- Clear Sunroof and Cowl Drains (Twice per year (spring and fall)) — Clogged drains cause rainwater to overflow into the cabin, dripping directly onto critical electronics like the BCM or fuse box. Clearing these drains prevents catastrophic water damage.
- Apply Dielectric Grease to At-Risk Connectors (When servicing or exposing connectors) — For connectors exposed to moisture (ABS module, exterior lights), applying dielectric grease into the connector body seals out moisture and air, preventing corrosion and signal loss.
- Inspect Wiring Harnesses for Chafing (During any under-hood or under-vehicle service) — Visually check that wiring harnesses are properly secured and not rubbing against sharp metal edges or hot exhaust components. Securing a loose harness prevents it from shorting out the communication bus.
- Ensure Proper Installation of Aftermarket Electronics (During installation) — Improperly tapping into CAN bus or power wires for accessories introduces electrical noise or shorts. Always use dedicated circuits to avoid interfering with critical vehicle networks.
Frequently Asked Questions
Can a bad battery cause a U1300 code?
Yes. A weak battery provides unstable voltage, causing control modules to malfunction, drop off the network, and trigger U1300. Always test the battery and charging system first.
What are common misdiagnosis mistakes with code U1300?
The biggest mistake is replacing an expensive module without proving it is the cause. The actual fault is often a cheaper module bringing the network down, a corroded wire, or a bad splice pack. Always perform a full network diagnosis before replacing parts.
My mechanic wants to charge $300 just for diagnosis. Is this normal?
Yes, this is standard for network communication codes. Unlike a simple sensor code, a 'U' code requires 2 to 3 hours of diagnostic time to trace circuits and isolate the fault. This fee covers the expert labor to find the problem, not fix it.
What is the difference between U1000 and U1300?
U1000 is a generic 'lost communication' code confirming the network is down. U1300 provides a specific electrical clue, such as a data line shorted to ground on GM vehicles. Use the more specific U1300 code to guide your multimeter testing.
My ABS and Check Engine lights are on with code U1300. Are my brakes going to fail?
Your standard hydraulic brakes will still work, but the Anti-lock Braking System (ABS) and traction control are disabled. This causes wheels to lock up during a hard stop, increasing stopping distance. Drive with extreme caution straight to a repair facility.
Can I fix a U1300 code myself?
Replacing a bad battery or a blown fuse is a simple DIY fix. However, diagnosing a faulty module or repairing a wiring harness requires a professional scan tool, a multimeter, and advanced electrical knowledge. Stop DIY efforts and tow the vehicle to a shop if basic voltage checks pass.
The mechanic says my ABS module is bad, but a new one is very expensive. Are there other options?
Yes. Mail-in companies specialize in repairing or remanufacturing your original ABS module for $150 to $300, a fraction of the cost of a new dealer part. This is a highly reliable repair for the well-known ABS module failures on Ford trucks.
Can I just clear the U1300 code?
You can clear the code with a scan tool, but it returns immediately if the underlying hardware or wiring fault still exists. Clearing the code does not fix the problem. You must repair the physical electrical issue first.
Key Takeaways
- U1300 indicates a severe data bus failure, not a single broken part, and requires a full-system OBD-II scan to identify which of the 10+ vehicle modules is offline.
- Test the 12V battery first; voltage drops below 12.0V during engine cranking frequently cause modules to crash and trigger false U1300 codes.
- Expect to pay $150 to $450 for 1 to 3 hours of professional diagnostic labor before any parts are replaced, as tracing network faults requires specialized oscilloscopes and wiring diagrams.
- Never blindly replace expensive computers like the PCM or BCM; isolating the fault by unplugging modules one by one often reveals a cheaper culprit like a $200 remanufactured ABS module or a corroded ground wire.
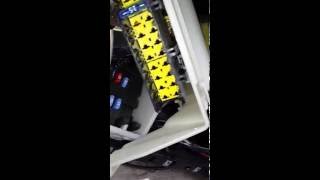
Helpful Videos


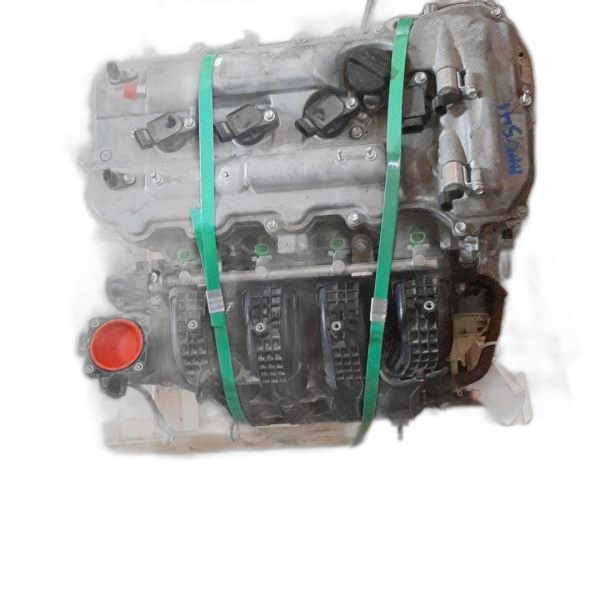
Shop the Parts Behind U1300
Below are the parts most often responsible for code U1300, ranked by how frequently each one is the actual culprit (per the diagnosis above). Tap any to see what we have for your vehicle.


The information in this article is provided for general reference and educational purposes only. Vehicle specifications, procedures, and part compatibility can vary by production date, trim level, and region. Always consult your vehicle's factory service manual and verify part numbers before purchasing or performing repairs. Safety-critical components such as airbags, seat belts, and braking systems should be installed by a qualified professional.
- 🧭 Diagnostic Flowchart
- 🎬 Helpful Videos
- 🛍️ Shop This Part
- What Does U1300 Mean?
- Can I Drive With U1300?
- Common Causes
- Symptoms
- Common Fixes & Costs
- Used vs. New Parts: Buying Guide
- What Happens If You Wait — Timeline
- Cost of Not Fixing It
- Diagnosis Steps
- When This Code Triggers (Freeze-Frame Conditions)
- Related Codes
- Climate & Environmental Factors
- How to Talk to a Mechanic About This Code
- Where to Take It: Dealer vs Independent vs Chain
- When to Walk Away From the Repair
- What Scan Tool You Need for This Code
- How to Clear the Code After You Fix It
- Will This Fail Emissions / State Inspection?
- Most Commonly Affected Vehicles
- Manufacturer-Specific Notes
- Real Owner Stories
- 2005 GMC Sierra 2500HD with crank-no-start
- 2003 GMC Sierra with intermittent no-start and erratic key fob
- 2020 Nissan Leaf with persistent U1300 code but no symptoms
- Peugeot 307 with multiple electrical failures after heavy rain
- How to Prevent This Code From Triggering
- Frequently Asked Questions
- Can a bad battery cause a U1300 code?
- What are common misdiagnosis mistakes with code U1300?
- My mechanic wants to charge $300 just for diagnosis. Is this normal?
- What is the difference between U1000 and U1300?
- My ABS and Check Engine lights are on with code U1300. Are my brakes going to fail?
- Can I fix a U1300 code myself?
- The mechanic says my ABS module is bad, but a new one is very expensive. Are there other options?
- Can I just clear the U1300 code?
- Key Takeaways
- 🎟️ Get 5% Off