
OBD-II Code U1500: Invalid Data from a Communication Network
What U1500 means, why it triggers, and how to fix it
- On General Motors vehicles from 2002-2014, U1500 almost always indicates a failed OnStar module that can be permanently fixed for $0 by simply unplugging it.
- While safe to drive, the failing module often causes a parasitic draw exceeding 100mA, which will permanently destroy a healthy car battery within 3 to 6 months if ignored.
- The root cause is highly manufacturer-specific: suspect the OnStar module on GM vehicles, the Active Grille Shutter assembly on Fords, and the keyless entry system on 2015-era Subarus.
- Use a professional scan tool to check for symptom byte '31' (e.g., U1500-31); this specific code confirms an internal module hardware failure and eliminates the need for tedious wiring tests.
What Does U1500 Mean?
U1500 is a network trouble code indicating a specific computer module has stopped communicating with the rest of the vehicle. Think of it like a team member in a group project who suddenly goes silent. The other modules notice the silence and report the problem, with the Body Control Module (BCM) typically logging the code.
Technical definition: The SAE/ISO definition for U1500 translates to an 'Inter-Device Dedicated Bus Malfunction' or a fault on a 'Local Interconnect Network (LIN) Bus.' This means a smaller sub-network between a primary computer (master) and its related components (slaves) has a communication failure. The master module sets U1500 when it detects invalid or missing data transmissions on the network it supervises.
Can I Drive With U1500?
Yes, But With Caution. Yes, the vehicle is safe to drive. This code typically affects non-essential systems like telematics (OnStar), cabin features, or active grille shutters. However, a failing module causes a parasitic battery drain. Repeatedly draining the battery causes sulfation, permanently damaging it and stressing the alternator, leading to $600-$1,600 in additional repair costs.
Common Causes
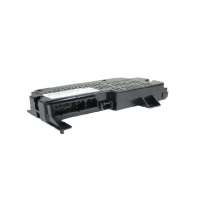
- Internal Failure of the OnStar Module (VCIM/TCIM) (Very Common) — On General Motors (GM) vehicles, this is the primary cause. The OnStar module fails internally and stops talking to the network. This is due to hardware age or the shutdown of older 2G/3G cellular networks the modules relied on.
- Faulty Active Grille Shutter (AGS) Motor/Actuator (Common) — On modern Ford and GM vehicles, the active grille shutter system communicates via a LIN bus. A failure in the shutter's motor or position sensor disrupts this network and sets a U1500 code, often accompanied by U0284.
- Blown Fuse (Less Common) — A blown fuse for a specific module (e.g., 'ONSTAR', 'TELE') cuts its power, causing it to drop off the network and trigger a U1500 code. This is the easiest hardware fault to check and fix.
- Faulty Component on a LIN Bus Network (Less Common) — On non-GM vehicles, this code points to a failure of a different slave module. On Chrysler products, a bad turn signal switch triggers it. On Subarus, it relates to the keyless entry system.
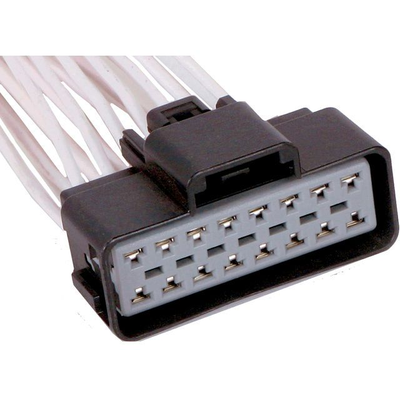
- Wiring or Connector Issue (Less Common) — A wire in a communication circuit is chafed, corroded, shorted to power, shorted to ground, or broken. A connector is loose, backed out, or filled with moisture.
- Water Intrusion (Rare) — A leaking seal or clogged sunroof drain allows water to enter the cabin and saturate an electronic module, shorting the internal circuit board.
- Software/Firmware Corruption (Rare) — A module's software becomes corrupt during a failed update attempt or an internal glitch, causing it to stop communicating.
- Faulty Body Control Module (BCM) (Rare) — The BCM acts as the central gateway for communication networks. While it usually reports the U1500 code because another module failed, the BCM itself is occasionally the source of the network problem.
Symptoms
- Check Engine Light is On — An illuminated Check Engine or Service Engine Soon light on the dashboard.
- OnStar System Inoperative — On GM vehicles, a red light appears on the OnStar rearview mirror buttons and the system fails to connect. You also hear an audible 'Phone Unavailable' message.
- Malfunctioning Cabin Features — Depending on the vehicle, power windows, the compass display, or the keyless entry system stop working.
- Erratic or Non-Functioning Gauges — When the Body Control Module (BCM) is overwhelmed by network errors, dashboard gauges behave erratically or drop to zero.
- Parasitic Battery Drain (also visible on scanner) — A failing module fails to 'go to sleep' when the car is off, slowly draining the battery. This leaves you with a dead battery after the car sits for 24 to 48 hours. A normal draw is under 85 milliamps (mA), but a faulty module causes a draw of 200mA to 1,000mA.
Diagnostic Flowchart
Tap your situation to follow the diagnostic path that matches what you're seeing on this code.
Common Fixes & Costs
- Disconnect the OnStar Module (GM Vehicles) — Parts: $0, Labor: $50-$150 (if done by a shop), ~1 hr book time (DIY)
- Replace Active Grille Shutter Assembly — Parts: $150-$400, Labor: $200-$800, ~3 hr book time (Intermediate)
- Replace a Blown Fuse — Parts: $1-$5, Labor: $0, ~0.1 hr book time (DIY)
- Replace the OnStar Module (VCIM/TCIM) — Parts: $150-$500, Labor: $250-$750 (includes mandatory programming), ~1.8 hr book time (Professional)
- Repair Damaged Wiring or Connector — Parts: $5-$20, Labor: $150-$450, ~2.5 hr book time (Professional)
Used vs. New Parts: Buying Guide
When a used part is worth it: For active grille shutters, a used assembly from a low-mileage donor is cost-effective. For GM OnStar modules, used parts are strongly discouraged as dealers cannot reprogram a used module to a new vehicle's VIN.
Donor-vehicle mileage cap: roughly under 60000 miles for the part to have meaningful remaining life.
Donor quality checklist:
- Verify the exact part number matches; superseded numbers do not interchange.
- For mechanical parts like grille shutters, check for physical damage, cracks, or signs of debris impact.
- Avoid electronic modules from flood-damaged vehicles due to internal corrosion.
Decision logic:
- If The failed part is a GM OnStar module → Buy a new OEM part to restore function, or disconnect the old one for $0. Do not buy used.
- If The failed part is an Active Grille Shutter → New aftermarket assemblies offer a good balance of cost and reliability. A used OEM part is a budget option.
- If The part requires dealer programming → Factor the programming cost ($150-$300) into the total repair cost. Buying online and bringing it to the dealer rarely saves money.
Warranty tradeoff: Used parts typically have a 30-90 day warranty. New aftermarket parts offer a 1-year to limited lifetime warranty. New OEM parts carry a 12-month/12,000-mile warranty.
Worst-case if a used part fails: $400-$800 if a used part requires a second round of labor for replacement.
What Happens If You Wait — Timeline
- 0-1 month: Code U1500 appears, Check Engine Light is on. A parasitic drain of 100-400mA begins, but a healthy battery still starts the car daily. (MPG impact: 0%% · Added cost: $0)
- 1-3 months: The parasitic drain becomes noticeable. The engine cranks slowly in the morning, or the battery is dead if the vehicle sits for 2-3 days. Frequent jump-starts are required. (MPG impact: 0%% · Added cost: $50-$100 (inconvenience, jump-start service, or portable jump starter))
- 3-6 months: The battery is permanently damaged (sulfated) from repeated deep discharging. It no longer holds a charge and dies overnight consistently. A new battery is required. (MPG impact: 0%% · Added cost: $200-$400 (for a new battery that will also be ruined if the drain isn't fixed))
- 6+ months: The constant strain of recharging a deeply depleted battery overworks and damages the alternator's diodes and voltage regulator, leading to alternator failure. (MPG impact: 0%% · Added cost: $600-$1600 (cost of a new battery plus a new alternator))
Cost of Not Fixing It
- Immediate: Loss of functionality of the associated system (e.g., OnStar services, correct grille shutter operation). On Fords, this leads to a 1-2 MPG drop due to shutters staying open. (Added cost: Negligible)
- 1-3 Months: Repeated parasitic battery drain leads to frequent jump-starts and premature battery failure due to sulfation. (Added cost: $200-$400)
- 6+ Months: Continued battery drain permanently damages the battery and puts excessive strain on the alternator, leading to alternator failure. (Added cost: $600-$1600)
Diagnosis Steps
- Scan for All Trouble Codes & Symptom Bytes
Use a professional OBD-II scanner to read manufacturer-specific codes and symptom bytes. On GM vehicles, a symptom byte of '31' (ECU Performance General Checksum Failure) confirms an internal module failure, condemning the OnStar module without further electrical testing.
Tools: Professional OBD-II Scanner (e.g., GM Tech 2, Autel MaxiCOM) (Beginner) - Check Fuses
Consult your owner's manual to locate the fuse for the system associated with this code (e.g., 'ONSTAR', 'VCIM', 'INFO', or 'TELE'). Visually inspect the fuse and replace it if blown.
Tools: Owner's Manual, Fuse Puller or Pliers (Beginner) - Perform a Parasitic Draw Test
With the vehicle off and all modules asleep (wait 30-120 minutes), connect a multimeter in series with the negative battery cable. A reading consistently over 100mA indicates a problem. Pull the fuse for the suspect module; a significant drop in amperage confirms that module is the source of the drain.
Tools: Digital Multimeter with 10A capability (Intermediate) - Perform a Visual Inspection (GM-Specific)
Observe the OnStar status light on the rearview mirror. A solid red light, often paired with a 'Phone Unavailable' message, confirms the OnStar module (VCIM) is the problem.
Tools: None (Beginner) - Locate and Inspect the Suspect Module
Research the location of the failed module (e.g., the OnStar VCIM is often behind the glove box or in the trunk). Visually inspect the module's wiring connectors for looseness, corrosion, water damage, or pushed-back pins.
Tools: Trim removal tools, Screwdrivers, Flashlight (Intermediate) - Test the LIN Bus Voltage
Using a vehicle-specific wiring diagram, back-probe the LIN bus wire at the suspect module's connector. Set your multimeter to DC Volts. A healthy LIN bus shows a fluctuating voltage between 1V and 12V. A constant 0V indicates a short to ground. A constant 12V suggests an open circuit or short to power.
Tools: Digital Multimeter, Vehicle-specific wiring diagram, Back-probe kit (Advanced) - Isolate the Faulty Module
If a LIN bus is shorted (0V) or open (12V), find the faulty component by disconnecting modules one by one. After disconnecting a module, re-check the LIN bus voltage. If the voltage returns to a normal fluctuating state, you found the module pulling the network down.
Tools: Multimeter, Trim removal tools (Advanced) - Analyze the LIN Bus Signal
Connect an oscilloscope to the LIN bus signal wire and ground. A good LIN bus signal shows a series of square waves dropping from ~12V down to near 0V. If a slave module doesn't respond, its 'slot' is empty, pointing to a faulty slave or wiring issue.
Tools: Automotive Oscilloscope, Wiring Diagram (Professional)
When This Code Triggers (Freeze-Frame Conditions)
- Module Self-Test: Fail (The code sets during the module's power-on self-test immediately after the vehicle is started.)
- Ignition Status: On/Run (The fault is detected as soon as the ignition is turned on and modules are expected to communicate.)
- System Voltage: 11-14 Volts (Sets during normal operating voltage; it is not caused by a low battery, but the underlying fault causes a dead battery.)
- Vehicle Speed: 0 mph or Various (For telematics failures, it sets at 0 mph. For active grille shutters, it logs at highway speeds when the shutter is commanded to close.)
Related Codes
- B1000 — On GM vehicles, this appears with U1500. They are set by the same internal OnStar module fault. If both are present, it strongly confirms a failed VCIM.
- U0284 — Means 'Lost Communication With Active Grille Air Shutter Actuator'. On Ford vehicles, it appears alongside U1500 if the grille shutter motor fails.
- U1510-U154F — A range of codes for LIN Bus communication errors. A professional scan tool is needed to see which specific module is reporting the fault.
- B1500 — On 2014-2015 Subaru models, B1500 is the equivalent of U1500, pointing to the same 'Keyless UART Communication Malfunction'.
Climate & Environmental Factors
- High Humidity & Water Intrusion: High humidity leads to condensation inside electronic modules, while water leaks directly expose them to moisture. This causes corrosion on circuit boards and connector pins, leading to short circuits. This corrosion is a common underlying cause of the internal module failures that trigger a U1500 code.
How to Talk to a Mechanic About This Code
Say this: "I have a U1500 code and, based on my vehicle's make, I suspect a common failure of the [OnStar module/active grille shutter]. I'd like to schedule a diagnostic to confirm the faulty module. If it's a parasitic drain, please perform a draw test and isolate the specific circuit."
This signals you've done your research, directs the technician to the most probable cause, and prevents a generic, time-consuming diagnostic. It shows you understand the code is network-related.
Avoid saying:
- 'My check engine light is on, can you look at it?' (Invites expensive, open-ended diagnostics).
- 'Just fix whatever is wrong.' (Gives the shop a blank check).
- 'My friend said it's probably the BCM.' (Leads them down the wrong path; the BCM logs the code but isn't the cause).
Questions to ask before authorizing the repair:
- What were the results of the parasitic draw test? How many milliamps was it, and which fuse made it drop?
- Can you confirm which module was not communicating on the network?
- If you're recommending a module replacement, does it require programming and is that included in the quote?
- What is the warranty on the recommended parts and labor?
- Will you return the old part to me?
Where to Take It: Dealer vs Independent vs Chain
- Dealer:
Recommended if the fix requires dealer programming. For GM vehicles, if you want to replace the OnStar module to restore service, the dealer is necessary for programming.
Best for: Vehicles under warranty., Repairs requiring manufacturer-specific software programming (like replacing an OnStar module)., Well-documented issues covered by TSBs.
Downsides: Higher labor rates and parts costs., Less willing to offer cost-saving solutions like disconnecting an obsolete module. (Typical cost: +50% vs. baseline) - Independent Shop:
Best fit for most U1500 scenarios. A good independent shop with modern diagnostic tools easily handles the common causes of this code at a lower cost than the dealer.
Best for: Out-of-warranty vehicles where cost is a major factor., Common fixes like disconnecting a GM OnStar module or replacing a Ford active grille shutter., Diagnosing parasitic drains.
Downsides: Shop quality and diagnostic tool capabilities vary widely., May not have access to the latest manufacturer-specific programming software. (Typical cost: +0% vs. baseline) - Chain Shop:
AVOID for diagnosis. A chain shop is unlikely to have the expertise or tools to correctly diagnose a network communication fault.
Best for: Simple, non-diagnostic work like oil changes, tires, and battery replacement.
Downsides: Technicians lack advanced diagnostic training for network communication issues., Not equipped with manufacturer-level scan tools needed to diagnose U-codes. (Typical cost: -10% vs. baseline)
When to Walk Away From the Repair
If the estimated repair cost exceeds 40% of the car's private-party value, sell or trade in the vehicle.
- Car worth $4000, fix is $2000: Walk away. A $2,000 repair on a $4,000 car represents 50% of its value and is a poor investment.
- Car worth $15000, fix is $1200: Fix it. The repair cost is only 8% of the vehicle's value, well below the walk-away threshold.
- Car worth $2500, fix is $1500: Walk away. The repair cost is 60% of the car's value; it is not worth repairing.
What Scan Tool You Need for This Code
Minimum: A scanner that reads manufacturer-specific 'U' (network) codes and shows live data. A basic code reader that only shows 'P' (powertrain) codes is not sufficient.
A cheap code reader will not see the U1500 code at all, or it will give you the code number without context. For effective diagnosis, you need a scanner that reads symptom bytes (like '-31') to confirm internal module failures.
Budget: BlueDriver Pro (~$120) — Reads and clears enhanced codes including U-codes. It connects via Bluetooth to a smartphone app and displays live data, though it may not show manufacturer-specific symptom bytes.
Mid-range: Innova 5610 or Foxwell NT510 Elite (~$350) — These bidirectional tools access manufacturer-specific codes and data across all modules. They are more likely to read the critical symptom bytes needed for a confident diagnosis.
Professional: Autel MaxiCOM MK808BT (~$500) — Offers full bidirectional control, performs active tests, and provides access to all OEM-level diagnostic functions. It definitively diagnoses network faults by communicating with individual modules and displaying detailed symptom bytes.
Rent vs buy: Many AutoZone locations offer a tool loaner program where you borrow a scanner for free after paying a deposit. If this is a one-time issue, renting is the most cost-effective option.
How to Clear the Code After You Fix It
- Reconnect the negative battery terminal if it was disconnected.
- Use an OBD-II scan tool to erase the DTCs from all modules.
- Perform a complete drive cycle to allow all readiness monitors to run.
Drive cycle (~30 minutes): A universal drive cycle includes a cold start (sitting for 8+ hours), a 5-minute idle, 15-20 minutes of mixed city/highway driving, followed by a 5-minute steady cruise on the highway. Shut the vehicle off and let it cool.
Readiness monitors affected: This code does not directly affect emissions monitors like Catalyst or O2 sensors., However, clearing any 'U' code with a scan tool resets all emissions readiness monitors to 'Not Ready' status.
Before emissions retest: drive at least 100 miles to fully set monitors.
Watch out for:
- Simply clearing the code does not fix the underlying hardware fault; the code returns immediately.
- Taking the car for an emissions test immediately after clearing the code results in a 'Not Ready' failure.
- Not fixing the root cause of a parasitic drain leads to a failed battery, even if the code is cleared.
Will This Fail Emissions / State Inspection?
Yes — this code typically fails an OBD-II emissions inspection.
- California: An active Check Engine Light results in an automatic smog check failure. After clearing the code, you must complete a drive cycle to set readiness monitors.
- New York: An illuminated Check Engine Light from a U1500 code is an automatic failure of the OBD-II emissions inspection.
- Texas: In the 17 Texas counties requiring emissions testing, a vehicle with an active U1500 code fails the OBD portion of the inspection.
Most Commonly Affected Vehicles
- Chevrolet Silverado, Suburban, Tahoe, Avalanche (2002-2014) — Extremely common due to internal failure of the OnStar VCIM. Often causes a parasitic battery drain.
- GMC Sierra, Yukon, Acadia (2002-2014) — Identical to the Chevrolet trucks/SUVs, the U1500 code almost always points to a failed OnStar module.
- Chevrolet HHR, Malibu, Equinox (2005-2015) — These cars share the same OnStar VCIM failure pattern. On the HHR, the module is in the right rear cargo area.
- Cadillac Escalade, STS, ATS, XTS (2005-2017) — The code points to an internal fault in the Telematics Communication Interface Control Module (TCIM).
- Pontiac G6, Firebird (2000-2010) — The code is almost always caused by an internal failure of the OnStar (VCIM) module located behind the glove box.
- Ford Focus, Fusion, Escape, F-150 (2012-2018) — Caused by a faulty Active Grille Shutter (AGS) actuator. Repair often requires removing the front bumper.
- Subaru WRX, STI, Forester, Impreza (2014-2015) — Indicates a 'Keyless UART Communication Malfunction' between the Body Integrated Unit and the keyless entry control module.
- Hyundai Elantra (2011-2016) — Can be a general CAN bus error or related to the crankshaft position sensor rotor, a significant departure from typical communication faults.
Manufacturer-Specific Notes
- General Motors (Chevrolet, GMC, Cadillac, Buick, Pontiac): U1500 is almost exclusively caused by an internal failure of the OnStar module (VCIM/TCIM). Since older OnStar systems no longer function due to 2G/3G cellular network shutdowns, the most practical fix is to simply unplug the module.
- Ford: U1500 is most commonly triggered by a failure of the Active Grille Shutter (AGS) system. The repair cost is high due to the labor involved in removing the front bumper.
- Subaru: For specific 2014-2015 models, U1500 points to a communication malfunction in the keyless entry system, detailed in TSB 07-83-14.
- Chrysler / Dodge / Jeep: U1500 is a general LIN bus fault code triggered by a variety of components, such as a faulty turn signal switch or TPMS trigger module.
Real Owner Stories
2008 GMC Yukon at 155K miles with a dead battery
The battery died completely if the truck sat for more than 48 hours. The owner replaced the battery, but the problem persisted.
What they tried:
- Replaced the battery.
- Performed a parasitic draw test by pulling fuses one by one.
- Isolated the draw to the fuse for the OnStar/VCIM module.
Outcome: The owner located the OnStar module in the rear cargo area and unplugged its electrical connectors. This immediately stopped the parasitic drain and cleared the U1500 code for $0.
Lesson: On older GM SUVs and trucks, a parasitic drain with a U1500 code is almost certainly the obsolete OnStar module. Perform a parasitic draw test and isolate the OnStar fuse before replacing expensive parts.
2014 Ford Focus after a front-end collision
After a collision repair, the car began overheating when idling. A Ford dealer diagnosed the Active Grille Shutters (AGS) as stuck closed and quoted $1,300.
What they tried:
- Suspected the damage was related to the recent collision.
- Contacted the insurance company, arguing the AGS should have been replaced during the initial repair.
- Obtained a second quote of $1,100 for an aftermarket replacement.
Outcome: The insurance company agreed to cover the replacement of the active grille shutter assembly, resolving the overheating and clearing the U1500 and U0284 codes.
Lesson: On Ford vehicles, U1500 is often the Active Grille Shutter. If the code appears after a front-end impact, insist the collision shop inspects the AGS assembly for hidden damage.
2015 Subaru WRX with keyless entry problems
The check engine light illuminated, and the push-to-start and keyless entry system intermittently failed. The code was U1500.
What they tried:
- Searched online for U1500, finding confusing GM OnStar results.
- Researched Subaru-specific TSB 07-83-14, describing U1500 as a 'Keyless UART Communication Malfunction'.
Outcome: Following the TSB's diagnostic steps, the owner confirmed the fault was in the keyless entry module itself, which required replacement.
Lesson: The cause of U1500 is highly manufacturer-specific. Always search for Technical Service Bulletins (TSBs) for your exact year, make, and model.
2003 Chevy Silverado with a mysterious battery drain
The battery died overnight. Two auto electricians failed to find the cause, forcing the owner to install a manual battery disconnect switch.
What they tried:
- Replaced the battery multiple times.
- Pulled every fuse, but a 1.2 amp draw remained.
- Accidentally bumped the power mirror selector switch into a neutral position between 'L' and 'R'.
Outcome: Moving the mirror switch to the neutral position caused the 1.2 amp draw to drop to zero. The internal contacts of the power mirror switch had failed, constantly drawing power. Replacing the switch assembly fixed the problem permanently.
Lesson: If pulling fuses doesn't isolate a parasitic draw, the fault is in a component keeping a whole module awake, like a faulty physical switch.
How to Prevent This Code From Triggering
- Clean Sunroof and Cowl Drains Annually (Once per year) — Clogged drains cause water to leak into the cabin, soaking and short-circuiting electronic modules like the BCM or OnStar VCIM.
- Apply Dielectric Grease to Exposed Connectors (When replacing or servicing parts) — For components exposed to the elements, like an Active Grille Shutter actuator, dielectric grease prevents moisture intrusion and corrosion.
- Maintain a Healthy Battery and Terminals (Every 6 months) — A strong battery is more resilient to the damage caused by a parasitic drain, giving you more time to diagnose the root cause before the battery is permanently destroyed by sulfation.
- Periodically Inspect Active Grille Shutters (During oil changes) — Visually check the active grille shutters for debris like leaves or plastic bags. A jammed shutter strains the motor, leading to premature failure.
Frequently Asked Questions
Can I fix U1500 myself?
For many GM vehicles, yes. The most common fix is disconnecting the obsolete OnStar module, a DIY-friendly task costing $0. For other brands requiring part replacements like an active grille shutter, intermediate skills and tools are necessary.
Will clearing the code fix the problem?
No. If the code is 'current', it indicates an active hardware or wiring fault. Clearing the code only hides it temporarily; it returns immediately when the system runs its self-check.
What are the most common misdiagnosis mistakes for U1500?
On GM vehicles, the biggest mistake is replacing the Body Control Module (BCM) instead of the failed OnStar (VCIM) module. Another pitfall is performing extensive wiring checks when GM service bulletins state the fault is internal. Lastly, replacing a dead battery without fixing the underlying parasitic drain guarantees another dead battery.
My mechanic wants to do a software update. Can that fix it?
It is possible but highly unlikely. While a reflash fixes rare software glitches, the vast majority of U1500 codes stem from permanent internal hardware failures.
What does the symptom byte U1500-31 mean?
On GM vehicles, the '-31' symptom byte means 'Electronic Control Unit (ECU) Performance General Checksum Failure'. This confirms the module failed its internal self-test and is the root cause. Seeing this eliminates the need to test external wiring.
Is U1500 related to my engine or transmission?
No. U1500 is a network communication code ('U-code') relating to body electronics or telematics. It does not indicate a problem with the powertrain.
Why does my battery keep dying with a U1500 code?
The faulty module fails to enter its low-power 'sleep' mode when the car is off, causing a parasitic drain. A normal draw is under 85mA, but a faulty module pulls several hundred milliamps. This constant draw drains a healthy battery in just one or two days.
Key Takeaways
- On General Motors vehicles from 2002-2014, U1500 almost always indicates a failed OnStar module that can be permanently fixed for $0 by simply unplugging it.
- While safe to drive, the failing module often causes a parasitic draw exceeding 100mA, which will permanently destroy a healthy car battery within 3 to 6 months if ignored.
- The root cause is highly manufacturer-specific: suspect the OnStar module on GM vehicles, the Active Grille Shutter assembly on Fords, and the keyless entry system on 2015-era Subarus.
- Use a professional scan tool to check for symptom byte '31' (e.g., U1500-31); this specific code confirms an internal module hardware failure and eliminates the need for tedious wiring tests.
Shop the Parts Behind U1500
Below are the parts most often responsible for code U1500, ranked by how frequently each one is the actual culprit (per the diagnosis above). Tap any to see what we have for your vehicle.


The information in this article is provided for general reference and educational purposes only. Vehicle specifications, procedures, and part compatibility can vary by production date, trim level, and region. Always consult your vehicle's factory service manual and verify part numbers before purchasing or performing repairs. Safety-critical components such as airbags, seat belts, and braking systems should be installed by a qualified professional.
- 🧭 Diagnostic Flowchart
- 🛍️ Shop This Part
- What Does U1500 Mean?
- Can I Drive With U1500?
- Common Causes
- Symptoms
- Common Fixes & Costs
- Used vs. New Parts: Buying Guide
- What Happens If You Wait — Timeline
- Cost of Not Fixing It
- Diagnosis Steps
- When This Code Triggers (Freeze-Frame Conditions)
- Related Codes
- Climate & Environmental Factors
- How to Talk to a Mechanic About This Code
- Where to Take It: Dealer vs Independent vs Chain
- When to Walk Away From the Repair
- What Scan Tool You Need for This Code
- How to Clear the Code After You Fix It
- Will This Fail Emissions / State Inspection?
- Most Commonly Affected Vehicles
- Manufacturer-Specific Notes
- Real Owner Stories
- 2008 GMC Yukon at 155K miles with a dead battery
- 2014 Ford Focus after a front-end collision
- 2015 Subaru WRX with keyless entry problems
- 2003 Chevy Silverado with a mysterious battery drain
- How to Prevent This Code From Triggering
- Frequently Asked Questions
- Can I fix U1500 myself?
- Will clearing the code fix the problem?
- What are the most common misdiagnosis mistakes for U1500?
- My mechanic wants to do a software update. Can that fix it?
- What does the symptom byte U1500-31 mean?
- Is U1500 related to my engine or transmission?
- Why does my battery keep dying with a U1500 code?
- Key Takeaways
- 🎟️ Get 5% Off