
OBD-II Code U1523: Lost Communication With a LIN Bus Device
What U1523 means, why it triggers, and how to fix it
- U1523 indicates a severed network connection between the main computer and a sub-module, meaning replacing a burnt-out bulb will never fix this code.
- Incompatible aftermarket replacement parts trigger this code immediately; always verify OEM part numbers and programming requirements before installation.
- Prevent a $1,500 misdiagnosis by performing a voltage drop test first; ensure power and ground circuits show less than a 0.2V drop under load before condemning any module.
- Inspect the main wiring connector for visible melting on 2011-2018 Ram trucks, and check for water intrusion inside the headlight assembly on GM vehicles, as these are the top physical failure points.
What Does U1523 Mean?
Code U1523 means your car's main computer (usually the Body Control Module) lost connection with a specific electronic sub-module. They communicate on a single-wire network called the Local Interconnect Network (LIN) bus. When the master module sends a command and gets no valid return signal from a 'slave' module (like a headlight ballast or window switch), it triggers this code.
Technical definition: U1523 is a manufacturer-specific network communication code. General Motors defines it as 'Lost Communication with Right Headlamp Control Module on LIN Bus'. It indicates a total communication breakdown on the single-wire data line between a master module and a slave module. A professional scan tool identifies the exact offline module.
Can I Drive With U1523?
Yes, But With Caution. You can drive, but it carries significant safety risks if the code disables a critical feature like a headlight. A single malfunctioning headlight severely reduces nighttime visibility, impairs depth perception, and makes it difficult for other drivers to gauge your vehicle's position. It is illegal and leads to fines or failed inspections. Fix this immediately to restore full visibility and avoid legal penalties.
Common Causes
- Faulty or Incompatible Slave Module (Very Common) — The electronic module itself (headlight ballast, active grille shutter actuator, or window switch) failed. Installing incorrect or low-quality aftermarket parts is a primary trigger; the part physically fits but lacks the correct software to communicate.
- Damaged Wiring or Melted Connector (Common) — The single LIN bus wire suffers from breaks, pin corrosion, or short circuits. On 2011-2018 Ram trucks, the main headlight connector frequently melts due to high resistance, severing the connection.
- Water Intrusion into Component (Common) — Water leaking into the headlight assembly corrodes and destroys the internal control module. This is a documented failure point on the Cadillac XTS and Opel/Vauxhall Insignia.
- Poor Ground Connection (Less Common) — LIN bus modules require a solid ground to function. A loose, corroded, or broken chassis ground wire causes erratic behavior and drops the module offline.
- Low System Voltage (Less Common) — A weak battery, failing alternator, or poor battery cable connection causes voltage drops. Modules temporarily lose power and drop offline, triggering intermittent U1523 codes.
- Incorrect Configuration (Rare) — Upgrading from standard halogen to factory LED/HID headlights requires Body Control Module reprogramming. Skipping this step forces the BCM to search for a module it doesn't recognize.
- Faulty Body Control Module (BCM) (Rare) — The master module controlling the LIN bus fails, losing communication with all slave modules. This triggers multiple 'U' codes simultaneously.
Symptoms
- Specific Feature Fails Completely — The component controlled by the offline module stops working entirely (e.g., a headlight stays off, adaptive headlights refuse to swivel, or an active grille shutter sticks open).
- Dashboard Warning Message — A 'Service Headlamp', 'Service AFL', or 'Headlight System Malfunction' warning appears on the instrument cluster.
- Erratic or Intermittent Operation — The affected component works intermittently, or a headlight illuminates briefly at startup and then shuts off.
- Feature Works but Warning Remains — When using incompatible aftermarket parts, the component (like a headlight) illuminates, but the vehicle displays a service message because the communication link for status monitoring is missing.
Diagnostic Flowchart
Tap your situation to follow the diagnostic path that matches what you're seeing on this code.
Common Fixes & Costs
- Replace the Faulty Module (e.g., Headlight Ballast, Shutter Actuator) — Parts: $75-$450, Labor: $100-$300, ~1.5 hr book time (Intermediate)
- Repair Damaged Wiring or Connector Pigtail — Parts: $15-$60, Labor: $150-$450, ~2 hr book time (DIY)
- Clean or Repair a Ground Connection — Parts: $1-$10, Labor: $60-$175, ~0.8 hr book time (DIY)
- Replace Negative Battery Cable (Chevy Cruze) — Parts: $25-$50, Labor: $75-$150, ~0.8 hr book time (DIY)
- Replace the Entire Component Assembly (e.g., Headlight Housing) — Parts: $500-$2500+, Labor: $250-$800, ~2.5 hr book time (Professional)
Used vs. New Parts: Buying Guide
When a used part is worth it: A used module makes sense for an older, high-mileage vehicle when the budget is extremely tight and the cost of a new OEM part is prohibitive.
Donor-vehicle mileage cap: roughly under 100000 miles for the part to have meaningful remaining life.
Donor quality checklist:
- Match the OEM part number exactly; superseded numbers are often incompatible.
- Purchase from a reputable auto recycler offering a 30-day functional warranty.
- Avoid parts from vehicles with flood or extensive electrical damage.
- Confirm if the module is 'plug-and-play'; many used modules cannot be reprogrammed to a new vehicle.
Decision logic:
- If The part requires VIN-specific programming (common on GM, BMW, Ford) → Buy new OEM. The risk of a used part being permanently locked to the donor car is too high.
- If Vehicle is less than 10 years old and the part is under $500 → Buy new (OEM or highly-reputable aftermarket) for guaranteed compatibility and warranty.
- If The failure is a melted connector or wiring → Buy a new connector pigtail; never splice in a used, potentially degraded connector.
Warranty tradeoff: Used parts typically have a 30-90 day warranty covering only the part. New aftermarket parts offer 1-year to lifetime warranties. New OEM parts carry a 1-2 year warranty.
Worst-case if a used part fails: $300-$800 if a used module is incompatible, representing repeat labor costs and the price of another part.
What Happens If You Wait — Timeline
- Immediate: A specific component fails to operate, and a hard U1523 code is stored. Nighttime driving safety is immediately compromised if a headlight is affected. (MPG impact: 0%% · Added cost: $50-$250 in potential traffic citations or failed inspection fees.)
- 1-3 Months: If caused by water intrusion, corrosion spreads from the module connector to the pins within the main wiring harness, increasing repair complexity. (MPG impact: 0%% · Added cost: $200-$500, as a simple module swap now requires a wiring harness repair.)
- 3-9 Months: Persistent voltage fluctuations from a bad ground or faulty battery cable place stress on unrelated electronic modules, causing premature failure. (MPG impact: 0-1%% · Added cost: $500-$1500 to diagnose and replace newly damaged modules like the BCM.)
- 9+ Months: Catastrophic failure of the related harness. Widespread corrosion makes the wire harness unrepairable, requiring a complete replacement. (MPG impact: 0%% · Added cost: $1500-$3000+ for a full harness replacement.)
Cost of Not Fixing It
- Immediate: Major safety risk from reduced nighttime visibility if a headlight fails. Traffic tickets range from $50 to $250, plus failed safety inspections. (Added cost: $50-$250)
- 1-6 Months: Repeated citations increase insurance premiums. Unresolved water intrusion corrodes the main wiring harness, escalating repair costs. (Added cost: $200-$1000)
- 6+ Months: Persistent electrical issues (bad grounds, faulty cables) cause cascading failures in other systems. A severely corroded harness requires a complete replacement. (Added cost: $1500-$3000)
Diagnosis Steps
- Read Full Code Description & Symptom Bytes
Use a high-end scanner capable of reading manufacturer-specific codes to identify which module is offline. A basic reader shows 'U1523', but a better tool specifies 'Lost Communication with Right Headlamp'. Look for symptom bytes (e.g., U1523 00) for specific diagnostic direction.
Tools: Advanced OBD-II Scanner (e.g., GDS2, FORScan) (Beginner) - [PRO TIP] Stabilize System Voltage
LIN bus diagnostics are highly sensitive to system voltage. Connect a battery maintainer before proceeding. A weak battery causes false readings or prevents modules from communicating. A healthy system shows ~12.6V with the engine off.
Tools: Battery Maintainer/Charger, Digital Multimeter (Beginner) - Perform a Visual Inspection
Locate the non-communicating module and inspect its wiring harness and connector. Look for pinched wires, pin corrosion, or an unseated connector. On Ram trucks, specifically check for melting on the headlight connector.
Tools: Flashlight, Inspection Mirror (Beginner) - Check for Power and Ground at the Module
Verify the module receives battery voltage (12.6V+ engine off). Check the ground circuit's integrity by measuring resistance between the module's ground pin and a clean chassis point. A good ground measures less than 0.5 ohms.
Tools: Digital Multimeter, Wiring Diagram (Intermediate) - Perform a Voltage Drop Test
With the circuit active, measure the voltage between the negative battery terminal and the module's ground pin. A reading above 0.2 volts indicates excessive resistance. Test the power side similarly; a drop over 0.2 volts points to a power-side wiring issue.
Tools: Digital Multimeter (Advanced) - Test the LIN Bus Voltage (Multimeter)
With the key on, backprobe the LIN bus wire at the module's connector. A healthy LIN bus shows a fluctuating voltage, averaging 7-9V. A steady 0V means the wire is shorted to ground. A steady 12V+ means an open circuit or no communication from the slave module.
Tools: Digital Multimeter (with backprobes) (Intermediate) - [PRO TIP] Isolate and Test the Slave Module Signal
Disconnect the master module (BCM) and any other slave devices on the same LIN bus. With only the suspect slave module connected and powered on, probe the LIN bus wire. A healthy slave module outputs a steady reference voltage (approx. 1 volt less than system voltage). If you measure 0V, the module's internal transceiver is faulty.
Tools: Digital Multimeter, Wiring Diagram (Advanced) - Check for Module Compatibility and Programming
If the part was recently replaced, confirm it is the correct OEM part number. Many modern modules require programming or configuration to the vehicle after installation using dealer-level tools. An incompatible aftermarket part is a primary cause.
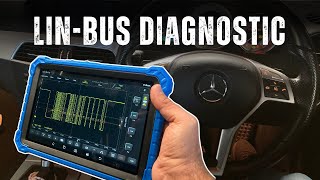
Tools: Manufacturer-Specific Scan Tool (Advanced) - Analyze the LIN Bus Signal (Oscilloscope)
For a definitive diagnosis, use an oscilloscope. A healthy LIN bus signal is a square wave toggling between near-battery voltage and near-ground voltage. The absence of this square wave confirms a communication failure.
Tools: Oscilloscope (Advanced) - Test with a Known Good Part
If you have access to an identical, working part from the other side of the vehicle (e.g., swapping left and right headlight ballasts), use it to confirm if the original module is the point of failure.
Tools: Basic Hand Tools (Intermediate)
When This Code Triggers (Freeze-Frame Conditions)
- System Voltage: 12.5-14.8V (Key On, Engine Running. The code sets when the master module polls the slave device and receives no response.)
- Module Command State: On/Active (The fault logs the moment the BCM attempts to activate or query the specific module (e.g., turning on headlights).)
- Time Since Key On: 1-10 seconds (The BCM performs a network integrity check shortly after vehicle startup, triggering the code immediately.)
- Component-Specific: N/A (The code triggers anytime the specific LIN bus device is called upon, such as activating a window switch.)
Related Codes
- U1521 — The equivalent code for a module on the opposite side of the vehicle. If U1523 is 'Right Headlamp', U1521 is 'Left Headlamp'. The diagnostic process is identical.
- B-codes (e.g., B14E7 on Ford) — A 'U' code means the module is offline. A 'B' (Body) code means the module IS communicating but detects an internal fault. Seeing them together points strongly to a failed module.
- U01xx (e.g., U0140) — General communication codes like U0140 indicate a broader network problem. If you have U1523 and U0140, the fault is likely the master BCM or a systemic low voltage problem.
- U0284 / P059F — Specific to the Active Grille Shutter on GM vehicles. If you see U1523 alongside these codes, it confirms the fault is entirely within the shutter system.
Climate & Environmental Factors
- High Humidity / Water Exposure: Accelerates pin corrosion and leads to water intrusion into sealed components like headlight assemblies, directly causing module failure (common on Opel Insignia and Cadillac XTS).
- Road Salt (Winter Climates): Significantly increases the severity of corrosion on wiring connectors and ground points, turning minor wire damage into a high-resistance fault much faster.
- Extreme Cold: Makes wire insulation brittle and susceptible to cracking. Cold also reduces battery efficiency, exposing underlying voltage stability issues and triggering intermittent communication codes.
How to Talk to a Mechanic About This Code
Say this: "I have a U1523 code and the scanner says it's for the [Right Headlamp/Grille Shutter]. I'd like to schedule a diagnostic appointment. Please start by checking the basics—power, ground, and the LIN bus wire at the module's connector—before recommending a full component replacement. I also know that on [Your Vehicle Make], things like [melted connectors/faulty replacement parts per TSB] are common issues."
This signals you are an informed customer. It directs the technician to perform a proper electrical diagnosis instead of just swapping expensive parts, potentially saving you hundreds. Mentioning vehicle-specific issues makes it harder for the shop to upsell an unnecessary repair.
Avoid saying:
- 'My check engine light is on, can you just fix it?'
- 'My headlight is out, I probably just need a new one.'
- 'Just do whatever you think is best.'
Questions to ask before authorizing the repair:
- Did you perform a voltage drop test on the power and ground circuits, and what were the readings?
- What was the voltage doing on the LIN bus wire when you tested it?
- Can you confirm the failure is the module itself and not the wiring or connector? Can I see the damaged part?
- Is the recommended replacement part an OEM part or aftermarket, and does it require programming?
- What is the warranty on the parts and the labor for this specific repair?
Where to Take It: Dealer vs Independent vs Chain
- Dealer:
Best for: Vehicles under warranty, Repairs related to a specific Technical Service Bulletin (TSB) or recall, Complex programming or software updates required after module replacement
Downsides: Highest labor rates, More likely to recommend replacing an entire assembly (e.g., full headlight) rather than repairing a wire or connector. (Typical cost: +50% vs. baseline) - Independent Shop:
Best fit for most cases. A good independent shop with strong electrical skills is ideal for diagnosing the root cause of a U1523 code, which is often a wiring or connection issue rather than a part needing dealership-level programming.
Best for: Out-of-warranty vehicles, Diagnosing complex electrical faults, Cost-effective repairs like fixing a wire or replacing a connector pigtail
Downsides: Quality and expertise vary; look for shops specializing in electrical diagnostics., May lack access to the very latest manufacturer software updates. (Typical cost: +0% vs. baseline) - Chain Shop:
Avoid for this code. U1523 requires specific network diagnostic expertise that chain shops lack.
Best for: Simple, non-diagnostic work like battery replacement or bulb changes.
Downsides: Technicians lack the specialized training for network communication diagnostics., Often incentivized to replace parts rather than perform detailed electrical testing. (Typical cost: -10% vs. baseline)
When to Walk Away From the Repair
If the total estimated repair cost exceeds 40% of your car's private-party value (check Kelley Blue Book), sell or trade it in.
- Car worth $4000, fix is $2000: Walk away. The repair cost is 50% of the car's value. That money is better put toward a more reliable vehicle.
- Car worth $12000, fix is $1800: Fix it. The repair cost is only 15% of the vehicle's value, which is well below the threshold.
- Car worth $2500, fix is $1500: Walk away. The repair cost is 60% of the car's value. It is not financially sensible to proceed with the repair.
What Scan Tool You Need for This Code
Minimum: A scanner that reads manufacturer-specific codes from the Body Control Module (BCM). A generic reader showing only 'U1523' is insufficient.
A basic $20 scanner cannot tell you WHICH module is offline (e.g., 'Right Headlamp' vs. 'Grille Shutter'). Without this crucial detail, you cannot begin to diagnose the problem.
Budget: BlueDriver Pro (~$99) — Connects to your phone via Bluetooth and reads manufacturer-specific codes from body modules, giving you the full description needed to identify the faulty component.
Mid-range: XTOOL D7 (~$350) — A tablet-style scanner with bidirectional control. It allows you to read the specific U1523 code and actively command the module (e.g., tell the headlight to turn on) to test functionality.
Professional: Autel MaxiCOM MK808BT / MK900BT (~$500-800) — Offers full bidirectional control, extensive live data graphing, and OE-level diagnostics. It performs advanced functions like module programming and configuration required after replacing a component.
Rent vs buy: For a one-time fix, renting is not ideal as auto parts stores only rent basic code readers. Buying a budget-friendly scanner like the BlueDriver is a smart investment for DIY diagnostics.
How to Clear the Code After You Fix It
- Use an OBD-II scan tool to clear the U1523 fault code from the Body Control Module (BCM).
- Turn the ignition off, then on again.
- Command the repaired component to activate (e.g., turn headlights on and off) to verify communication is restored.
Drive cycle (~20 minutes): A specific drive cycle is not required to validate the fix for a U-code. After clearing the code, start the vehicle and operate the affected component. If the wiring and component are fixed, the code will not return.
Readiness monitors affected: None directly, but clearing codes via battery disconnect resets all emissions monitors.
Before emissions retest: drive at least 50 miles to fully set monitors.
Watch out for:
- The code returns immediately upon the next key cycle if the root electrical cause is not fixed.
- Disconnecting the battery is not a reliable way to clear communication codes and erases emissions readiness status.
Will This Fail Emissions / State Inspection?
Yes — this code typically fails an OBD-II emissions inspection.
- California: A U1523 code illuminating a malfunction indicator light results in an automatic smog check failure. A full drive cycle must be completed after repairs to set readiness monitors.
- New York: The NYS vehicle safety inspection includes an OBD-II check. Any diagnostic trouble code turning on a warning lamp is grounds for failure.
- Texas: In emissions-testing counties, a vehicle fails if the malfunction indicator lamp is on. U1523 causes a failure if it triggers a warning light.
Most Commonly Affected Vehicles
- Cadillac XTS (2013-2019) — TSB PIC6435B notes this code is frequently caused by an incompatible replacement right headlamp assembly. Repair costs are high, with dealer costs of $2300-$2600 for a single assembly replacement.
- Chevrolet / Buick Traverse / Enclave (2008-2017) — TSB PIT6002A states the original adaptive lamp control module must be transferred from the old assembly to the new one during replacement to prevent this code.
- GMC / Chevrolet Sierra / Silverado (2016-2022) — Often related to the active grille shutter actuator. Diagnosis involves checking fuses, wiring splices, and for physical binding of the shutter vanes.
- Chevrolet Cruze (2011-2015) — Most commonly due to a faulty negative battery cable with a poor internal crimp. Covered by GM Special Coverage 14311B. The fix is replacing the cable (OEM #22754271).
- Dodge / Ram 1500 (2011-2018) — Notorious for the main headlight wiring connector melting due to poor pin fitment and high resistance. Requires splicing in a new pigtail (Dorman 645-943).
- Ford Fusion, Edge (2013-2020) — On models with adaptive LED headlights, an internal module failure is common. This requires replacement of the entire expensive headlamp assembly.
- Opel / Vauxhall Insignia, Mokka (2009-2017) — Commonly sees U1521/U1523 due to water ingress into the headlight assembly destroying the ballast. Using cheap aftermarket ballasts causes persistent codes.
- BMW 3-Series (E90/E92) (2006-2013) — Adaptive headlight control modules (SMC) are sensitive to shock and moisture. Replacement requires expensive programming and coding to the vehicle.
Manufacturer-Specific Notes
- General Motors (Cadillac, Chevrolet, Buick, GMC): TSB PIC6435B notes incompatible replacement headlamp assemblies cause an immediate U1523 code. On Lambda-platform SUVs, the original adaptive control module must be swapped to the new headlamp.
- Dodge / Ram / Chrysler: Ram trucks are notorious for the main headlight wiring connector melting due to poor pin fitment. A BCM reset or 'Proxi Alignment' with a tool like AlfaOBD is often required after component replacement.
- Ford: On models with adaptive LED headlights, the fault is often an internal module failure requiring replacement of the entire headlamp assembly. Diagnosis requires the FORScan tool to check module configuration.
- Volkswagen / Skoda: On models with Adaptive Front-lighting (AFS), a burnt-out cornering light bulb sometimes causes a system-wide failure warning. Replacement AFS modules require programming with VCDS or ODIS.
Real Owner Stories
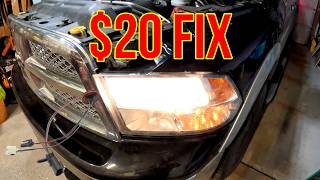
2013 Ram 1500 with 110K miles
Passenger headlight flickered and went out. 'Lamp Out' message appeared. Replacing the bulb did not fix the problem.
What they tried:
- Replaced the halogen bulb, but the new one failed to light up.
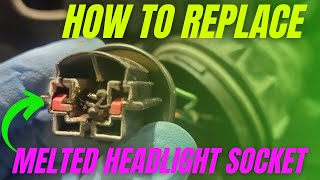
- Wiggled the main connector at the back of the headlight assembly, making the light flicker.
- Inspected the plastic connector and found it visibly burnt and melted around one pin.
Outcome: Owner cut off the melted connector and spliced in a new pigtail connector (Dorman 645-943). The repair cost $15 and took 30 minutes. Headlight function was fully restored.
Lesson: On Ram trucks, a melted headlight connector is a common failure. Always inspect the connector for burning before assuming the entire headlight assembly is bad.
2014 Chevy Cruze with 85K miles
Car experienced random electrical issues: radio screen going black, 'Service Stabilitrac' messages, and flickering headlights. Code U1523 was present alongside other communication codes.
What they tried:
- Suspected a bad Body Control Module (BCM) due to the number of unrelated faults.
- Tested the battery and alternator, finding both in good condition.
- Researched forums and found GM Special Coverage 14311B describing the exact symptoms.
Outcome: The owner replaced the negative battery cable. The original cable had a poor internal crimp causing high resistance. The revised GM cable resolved all electrical issues permanently.
Lesson: Widespread, intermittent electrical problems on a 2011-2015 Chevy Cruze are almost always caused by the faulty negative battery cable. This simple fix prevents a costly BCM misdiagnosis.
2013 Cadillac XTS after collision repair
After a minor collision, a body shop replaced the passenger headlight assembly. Immediately after, a 'Service Adaptive Headlamp' message appeared with code U1523.
What they tried:
- The body shop cleared the code, but it returned instantly.
- Swapped the headlight control module from the damaged headlight into the new one, but the code remained.
- Contacted a Cadillac dealership for diagnostics.
Outcome: The dealership identified the replacement headlight assembly as part of a faulty GM batch documented in TSB PIC6435B. Replacing it with a certified, corrected OEM headlamp resolved the code.
Lesson: If U1523 appears immediately after a headlight replacement, the new part is the culprit. Check for relevant TSBs, as even OEM replacement parts can have known defects.
2018 GMC Sierra with 60K miles
Check Engine Light illuminated, and the active grille shutters were stuck open. Scan revealed U1523: 'Lost Communication with Grille Shutter Actuator.'
What they tried:
- Performed a visual inspection and found no debris blocking the shutter assembly.
- Checked the active grille shutter fuse, which was intact.
- Used a multimeter to confirm 12V power and a solid ground at the actuator connector.
Outcome: Since wiring, fuse, and power/ground were perfect, the owner concluded the actuator motor failed internally. Replacing the actuator assembly and clearing the code restored normal operation.
Lesson: For active grille shutter faults, verify the fuse and confirm power/ground at the actuator before condemning the part. If the circuit is good, the actuator is the point of failure.
How to Prevent This Code From Triggering
- Apply Dielectric Grease to Connectors (Anytime a connector is disconnected) — Dielectric grease seals electrical connectors from moisture, dirt, and salt. Applying a small amount prevents pin corrosion, a primary cause of high resistance and communication failures.
- Secure and Protect Wiring Harnesses (During any under-hood maintenance) — Ensure wiring harnesses are secured away from sharp metal edges, moving parts, and high-heat sources. Using protective wire loom prevents chafing and melting that leads to shorts.
- Clean Battery Terminals and Ground Points (Every 12 months) — Corrosion creates unwanted resistance, leading to unstable voltage and intermittent module communication errors. Cleaning these points maintains electrical system stability.
- Keep Vehicle Drains and Seals Clear (Every 6-12 months) — Clogged plenum drains or failing weather seals allow water to enter sensitive electronics, such as headlight assemblies or the BCM. Proper drainage prevents direct water damage.
Frequently Asked Questions
Can a bad bulb cause a U1523 code?
No. U1523 is a communication code, not a circuit failure code. Replacing a burnt-out bulb will not fix the U1523 code, which points to the electronic control module.
How much does it cost to diagnose a U1523 code?
A professional diagnostic fee for an electrical issue typically ranges from $120 to $200. This covers 1-1.5 hours of a technician's time to trace the fault with specialized tools.
I just replaced my headlight and now I have this code. What happened?
The replacement part is incompatible with your vehicle's computer system. This is a very common issue with aftermarket parts, especially on GM vehicles as noted in TSB PIC6435B.
What is the most common misdiagnosis for U1523?
The most common mistake is immediately replacing the expensive component without verifying the basics. Always check for good power, a clean ground (<0.5 ohms), and the integrity of the LIN bus wire first. A 15-minute voltage drop test saves you from buying a $1,500 part you don't need.
Could a weak battery really cause this?
Yes. Modern vehicles are extremely sensitive to voltage. A failing battery or poor connection causes modules to drop offline intermittently, especially during engine cranking.
Can I fix this myself?
Simple fixes like cleaning a ground or replacing a connector pigtail are DIY-friendly. However, replacing modules often requires expensive, vehicle-specific programming tools, making it a job for a professional shop.
Will clearing the code make it go away?
No. Because this is a hard communication failure, the code returns immediately upon the next startup until the underlying electrical problem is fixed.
What is a LIN Bus?
A Local Interconnect Network (LIN) is a simple, low-cost, single-wire serial communication protocol used in vehicles. It allows a master controller (like the BCM) to manage smart sensors and actuators without the complexity of a faster CAN bus network. It operates on a single wire with a data rate up to 20 kb/s.
Key Takeaways
- U1523 indicates a severed network connection between the main computer and a sub-module, meaning replacing a burnt-out bulb will never fix this code.
- Incompatible aftermarket replacement parts trigger this code immediately; always verify OEM part numbers and programming requirements before installation.
- Prevent a $1,500 misdiagnosis by performing a voltage drop test first; ensure power and ground circuits show less than a 0.2V drop under load before condemning any module.
- Inspect the main wiring connector for visible melting on 2011-2018 Ram trucks, and check for water intrusion inside the headlight assembly on GM vehicles, as these are the top physical failure points.
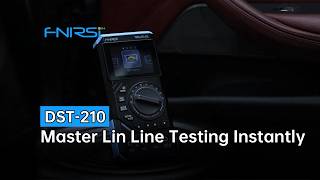
Helpful Videos
Shop the Parts Behind U1523
Below are the parts most often responsible for code U1523, ranked by how frequently each one is the actual culprit (per the diagnosis above). Tap any to see what we have for your vehicle.


The information in this article is provided for general reference and educational purposes only. Vehicle specifications, procedures, and part compatibility can vary by production date, trim level, and region. Always consult your vehicle's factory service manual and verify part numbers before purchasing or performing repairs. Safety-critical components such as airbags, seat belts, and braking systems should be installed by a qualified professional.
- 🧭 Diagnostic Flowchart
- 🎬 Helpful Videos
- 🛍️ Shop This Part
- What Does U1523 Mean?
- Can I Drive With U1523?
- Common Causes
- Symptoms
- Common Fixes & Costs
- Used vs. New Parts: Buying Guide
- What Happens If You Wait — Timeline
- Cost of Not Fixing It
- Diagnosis Steps
- When This Code Triggers (Freeze-Frame Conditions)
- Related Codes
- Climate & Environmental Factors
- How to Talk to a Mechanic About This Code
- Where to Take It: Dealer vs Independent vs Chain
- When to Walk Away From the Repair
- What Scan Tool You Need for This Code
- How to Clear the Code After You Fix It
- Will This Fail Emissions / State Inspection?
- Most Commonly Affected Vehicles
- Manufacturer-Specific Notes
- Real Owner Stories
- 2013 Ram 1500 with 110K miles
- 2014 Chevy Cruze with 85K miles
- 2013 Cadillac XTS after collision repair
- 2018 GMC Sierra with 60K miles
- How to Prevent This Code From Triggering
- Frequently Asked Questions
- Can a bad bulb cause a U1523 code?
- How much does it cost to diagnose a U1523 code?
- I just replaced my headlight and now I have this code. What happened?
- What is the most common misdiagnosis for U1523?
- Could a weak battery really cause this?
- Can I fix this myself?
- Will clearing the code make it go away?
- What is a LIN Bus?
- Key Takeaways
- 🎟️ Get 5% Off