
OBD-II Code U1524: Lost Communication on LIN Bus
What U1524 means, why it triggers, and how to fix it
- U1524 flags a communication failure on the single-wire LIN bus, immediately disabling accessory systems like trailer brakes, heated seats, or active grille shutters.
- Over 80% of U1524 codes stem from basic electrical faults: a blown 10-amp fuse, a corroded connector exposed to weather, or a pinched wiring harness.
- On 2015-2022 GM trucks, inspect the Trailer Brake Control Module located above the spare tire; corrosion here is the #1 cause of this code and related parasitic battery drains.
- Ford issued recall 26C10 for millions of 2021-2026 trucks and SUVs to fix a software glitch causing U1524, resolvable with a free 1-hour dealer update.
- Never replace a $500+ Body Control Module (BCM) without first using a professional scan tool to identify the specific offline slave module and verifying its 12V LIN bus signal.
What Does U1524 Mean?

U1524 means a 'master' computer in your car lost contact with a 'slave' device over the single-wire Local Interconnect Network (LIN) data bus. Think of it like a team leader (the master module, often the Body Control Module) calling out to a team member (the slave device, like a heated seat module) and getting no response. The car knows the part is installed but cannot communicate with it.
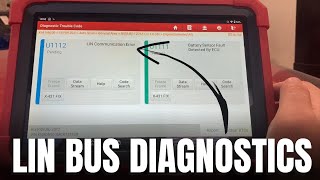
Technical definition: The SAE definition for U1524 is a generic LIN Bus communication failure. 🎬 See this guide on how to diagnose LIN bus errors. It indicates a master control module lost serial data communication with a specific smart device on a LIN bus circuit. The code does not mean the master module is bad; it means the master module is reporting another component is offline.
Can I Drive With U1524?
Yes, But With Caution. Yes, you can drive, but with a significant loss of accessory functions. The most severe safety risk occurs when U1524 disables the trailer brake system, reducing your ability to control a heavy load. Other disabled features include heated seats, active grille shutters, or the electronic parking brake. A related parasitic battery drain frequently accompanies this code and will leave you stranded with a dead battery if ignored.
Common Causes

- Corroded or Damaged Wiring/Connectors (Very Common) — The single LIN bus wire is highly susceptible to being pinched, frayed, or broken. Connectors exposed to the elements, such as trailer brake modules mounted above the spare tire, frequently fill with moisture and corrode, blocking the data signal.
- Blown Fuse for the Slave Module (Common) — The non-communicating module requires power to operate. A blown fuse instantly takes the module offline, forcing the master module to report a communication loss. Always verify the specific module's fuse before replacing parts.
- Faulty Slave Module (Common) — The accessory module itself (e.g., Trailer Brake Control Module, Heated Seat Module) can fail internally. It receives power and ground but loses the ability to process or transmit data on the network.
- Module in 'Logic Lock-Up' (Common) — A software glitch causes a module to freeze and become unresponsive. A 'hard reset'—disconnecting the vehicle's battery or pulling the module's fuse for 10 minutes to discharge capacitors—often resolves this.
- Poor Ground Connection (Less Common) — Electronic modules require a solid ground connection to the vehicle's chassis. A loose or corroded ground wire causes intermittent operation or complete failure, triggering the communication code.
- Master Module Software Anomaly (Less Common) — The master module (like the BCM or PCM) experiences a software glitch and falsely reports a communication loss. This is the root cause of a major recall on 2021+ Ford models, fixable via a software update.
- Aftermarket Accessories (Uncommon) — Improperly installed aftermarket electronics (remote starters, alarms, trailer wiring) interfere with or short out the LIN bus signal.
Symptoms

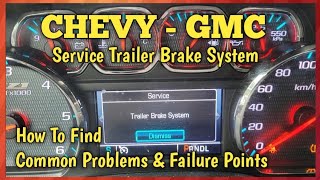
- Service Trailer Brake System Message — A warning appears on the driver information center. The trailer brake controller becomes inoperative, and trailer lights fail to illuminate. 🎬 Watch: How to fix common Chevy trailer brake system warnings.
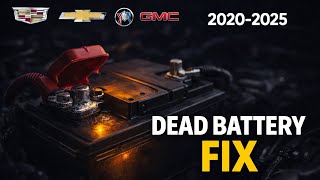
- Parasitic Battery Drain — A shorted LIN bus circuit keeps the Body Control Module 'awake' when the vehicle is off, draining the battery overnight. 🎬 Watch: How to find and fix a parasitic battery drain. This is a highly documented issue on GM trucks.
- Heated and/or Vented Seats Not Working — Seat switch lights flash briefly and turn off. The seats refuse to heat or cool, affecting one or both front seats.
- Multiple Warning Lights — A single LIN bus fault causes a cascade of warning lights for ABS, ESC, and steering to appear simultaneously, particularly on European vehicles like Volkswagen.
- Active Grille Shutter Inoperative (also visible on scanner) — The Active Grille Shutter (AGS) remains stuck open or closed. A stuck-closed shutter risks engine overheating in hot weather under high load.
Diagnostic Flowchart

Tap your situation to follow the diagnostic path that matches what you're seeing on this code.
Common Fixes & Costs
- Repairing Damaged Wiring or Connectors — Parts: $10-$50, Labor: $180-$750, ~2.5 hr book time (Intermediate)
- Replacing the Trailer Brake Control Module (TBCM)
— Parts: $70-$250, Labor: $120-$250, ~1.5 hr book time
(DIY)
Chevrolet Silverado / GMC Sierra (2015-2019): OEM GM 84811694 (Alt: Dorman 601-237)
Ford F-150 (2021-2023): OEM Ford ML3Z-19H332-AB (Alt: Dorman 601-297) - Reprogramming or Updating a Control Module — Parts: $0, Labor: $125-$250, ~1.0 hr book time (Professional)
- Replacing the Heated Seat Control Module
— Parts: $60-$270, Labor: $100-$200, ~1.0 hr book time
(DIY)
Chevrolet Silverado / GMC Sierra (2016-2019): OEM GM 13510339 (Alt: Dorman 645-900) - Replacing the Active Grille Shutter Assembly
— Parts: $150-$400, Labor: $150-$500, ~3.0 hr book time
(Intermediate)
Chevrolet Silverado 1500 (2017-2018): OEM GM 84363184 (Alt: Dorman 601-374)
Used vs. New Parts: Buying Guide
When a used part is worth it: For simple, non-programmed electronic modules like a Trailer Brake Control Module on older vehicles, a used part from a salvage yard is a cost-effective option.
Donor-vehicle mileage cap: roughly under 100000 miles for the part to have meaningful remaining life.
Donor quality checklist:
- Match the part number exactly.
- Inspect connector pins for any signs of corrosion.
- Choose parts from vehicles in dry climates to minimize pre-existing corrosion.
- Verify the donor vehicle was not scrapped due to a flood.
Decision logic:
- If The part requires programming to the vehicle's VIN → Buy new. A used module is 'locked' to the donor vehicle and cannot be reprogrammed.
- If The part is a known high-failure item due to internal faults → Favor a new part with a warranty.
- If The vehicle is less than 8 years old → Buy new (OEM or quality aftermarket) for reliability and warranty coverage.
Warranty tradeoff: Used parts offer a 30-90 day warranty covering only the part. New aftermarket parts come with a 1-year to limited lifetime warranty. New OEM parts carry a 1-2 year warranty.
Worst-case if a used part fails: $200-$600 if a used module fails, requiring repeat labor costs plus another replacement part.
What Happens If You Wait — Timeline
- 0-1 week: Code sets, and a specific accessory stops working. A warning message appears on the dash. No drivability symptoms. (MPG impact: 0%% · Added cost: $0)
- 1-4 weeks: If the fault is a short causing a parasitic drain, the battery discharges overnight, leading to a no-start condition requiring jump-starts. (MPG impact: 0%% · Added cost: $50-$150 (for service calls or a battery charger).)
- 1-3 months: Repeatedly draining the battery permanently damages it, requiring replacement. Continued towing without functional brakes significantly increases accident risk. (MPG impact: 0%% · Added cost: $200-$450 (for a new battery) or $1000+ (for traffic citations or accident deductibles).)
- 3+ months: A persistent wiring short potentially damages the master control module over time. The primary long-term cost is repeated battery failure and safety risks. (MPG impact: 0%% · Added cost: $500-$1500+ (Cost of a new BCM plus programming).)
Cost of Not Fixing It
- Immediate: Loss of function for the specific accessory. For trailer systems, this is a major safety risk, increasing the chance of an accident. (Added cost: Potential traffic citation or accident-related costs.)
- 1-4 weeks: If the fault causes a parasitic drain, the battery repeatedly discharges, leading to premature failure and replacement. (Added cost: $200-$450 (for a new battery and tow).)
- 1-6 months: If the Active Grille Shutter is stuck closed, the engine runs hotter than normal, causing accelerated wear or overheating in high-load conditions. (Added cost: $0-$2000+ (Potential engine damage in a worst-case scenario).)
Diagnosis Steps
- Identify the Non-Communicating Module
Use a professional-grade scan tool to read the BCM data and identify the specific 'slave' device that is offline (e.g., 'Trailer Brake Control Module' or 'Heated Seat Module'). You cannot diagnose this code without knowing which module is failing to communicate.
Tools: OBD-II Scan Tool (professional grade) (Intermediate) - Check Fuses and Perform a Hard Reset
Locate the fuse for the identified module in the owner's manual. Test it with a multimeter. If the fuse is good, remove it for 10 minutes to perform a hard reset on the module, clearing any 'logic lock-up'. If blown, replace it, but anticipate a short circuit.
Tools: Owner's Manual, Fuse Puller, Multimeter (Beginner) - Visually Inspect Wiring and Connectors
Locate the offline module. Unplug its electrical connector and inspect for green/white corrosion, bent pins, or obvious wire damage. On GM trucks, scrutinize the trailer module above the spare tire, the harness under the rear seat, and connector X225 in the A-pillar.
Tools: Flashlight, Trim Removal Tools (Beginner) - Test for Power and Ground at the Module
With the key on, use a multimeter to verify battery voltage at the power pin and good continuity (<1 ohm) to chassis ground at the ground pin on the module's connector. Without solid power and ground, the module cannot communicate.
Tools: Multimeter, Vehicle-Specific Wiring Diagram (Intermediate) - Check the LIN Bus Wire Voltage
With the module unplugged and key on, probe the LIN bus wire at the connector. A healthy, idle LIN bus shows a steady voltage approximately 1V below battery voltage (11-12V). A constant 0V indicates a short to ground or open wire. A constant 12V+ indicates a short to power.
Tools: Multimeter, Vehicle-Specific Wiring Diagram (Advanced) - Perform a Loaded Voltage Drop Test
Back-probe the power and ground wires at the module connector with a multimeter. Activate the component (e.g., turn on the heated seat). A voltage drop exceeding 0.2V on the power side or 0.1V on the ground side indicates high resistance in the wiring that must be repaired.
Tools: Multimeter with back-probe pins (Advanced) - Test Slave Module Reference Voltage
Disconnect the master controller and all other devices on that LIN bus. With only the suspect slave module plugged in and powered, measure the voltage on the LIN wire at the master's disconnected plug. A healthy slave module sends a steady reference voltage (approx. 1V below system voltage) back up the line. If 0V, the slave module is faulty.
Tools: Multimeter, Vehicle-Specific Wiring Diagram (Advanced) - Analyze the LIN Bus Signal with an Oscilloscope
For definitive proof, connect an oscilloscope. A healthy LIN bus signal is a square wave toggling between ~1V and ~12V. If the master sends a clear signal but there is no response from the slave, and all wiring tests good, the slave module has failed.
Tools: Oscilloscope (Professional)
When This Code Triggers (Freeze-Frame Conditions)
- Ignition Status: Key On (Code sets at startup when the master module polls the slave devices.)
- Battery Voltage: 11.8V - 14.5V (Normal operating voltage; low voltage causes communication errors.)
- Component Demand: On (Fault triggers when the specific accessory (e.g., heated seat, trailer connected) is activated.)
- Time Since Startup: 0 - 10 seconds (The fault is detected during the initial network 'wake-up' sequence.)
Related Codes
- U0137 — Specific code for 'Lost Communication With Trailer Brake Control Module.' If you have both U1524 and U0137, the fault is definitively in the trailer brake system.
- U1510 — Another LIN bus communication code, almost always related to the Active Grille Shutter (AGS) system. Diagnostically identical to U1524 but points to a different slave module.
- U1526, U1555, U155D — Other LIN bus communication codes set in the BCM. Seeing these appear together with U1524 strongly suggests a wiring harness issue where multiple LIN circuits are shorted together.
- U1524 00 — A specific sub-code displayed by professional scan tools. The suffix provides a direct clue to the specific device that is offline (e.g., 'Device 4').
Climate & Environmental Factors
- High Humidity & Heavy Rain: Water intrusion wicks into connectors and harnesses, causing corrosion that creates high resistance or shorts the LIN bus wire. This frequently affects trailer brake modules mounted externally.
- Cold Climates / Road Salt: Road salt dramatically accelerates corrosion. Salty spray coats underbody components, leading to premature failure of the LIN bus circuit at exposed connectors.
- Extreme Cold: Extreme cold makes wire insulation brittle and susceptible to cracking if disturbed, creating entry points for moisture or allowing wires to short to the chassis.
How to Talk to a Mechanic About This Code
Say this: "I have a U1524 code with the [Service Trailer Brake System / Heated Seats Inoperative] symptom. Based on my research, the issue is often a corroded connector or wiring near the [Trailer Brake Control Module / Heated Seat Module]. Please start the diagnosis by inspecting that specific circuit for power, ground, and LIN bus signal before recommending a replacement module."
This signals you are an informed customer. It directs the technician to the most common failure point, saving diagnostic time, and discourages them from immediately suggesting an expensive Body Control Module replacement.
Avoid saying:
- 'Just fix whatever's wrong'
- 'My check engine light is on, can you look at it?'
- 'Whatever you recommend'
Questions to ask before authorizing the repair:
- What specific module was not communicating?
- Did you test for power, ground, and the LIN bus signal at the module's connector, and what were the readings?
- If you are recommending a module replacement, how did you verify the wiring to it is good?
- If you are recommending a BCM replacement, what specific tests ruled out a wiring short?
Where to Take It: Dealer vs Independent vs Chain
- Dealer:
Recommended for warranty work or known software-based recalls. Otherwise, a qualified independent shop is a better value.
Best for: Vehicles under warranty, Repairs related to a known software recall (like on 2021+ Fords), Complex electrical issues requiring manufacturer-specific tools
Downsides: Significantly higher labor rates and parts costs., May default to module replacement instead of targeted wiring repair. (Typical cost: +40% vs. baseline) - Independent Shop:
Best fit for most out-of-warranty U1524 repairs, provided the shop has a strong reputation for electrical diagnostics.
Best for: Out-of-warranty vehicles where cost is a factor, Diagnosing common electrical faults (wiring, connectors), Building a long-term relationship with a trusted technician.
Downsides: Quality and expertise in electrical diagnostics vary widely. Vet the shop by checking for ASE certifications. (Typical cost: +0% vs. baseline) - Chain Shop:
AVOID for diagnosing a U1524 code. The risk of misdiagnosis is very high.
Best for: Simple jobs like battery replacement.
Downsides: Technicians often lack specialized training for complex network diagnostics., High pressure to sell parts leads to misdiagnosis and unnecessary module replacement. (Typical cost: -10% vs. baseline)
When to Walk Away From the Repair
If the estimated repair cost exceeds 40-50% of the car's Kelley Blue Book private-party value, it's time to pause and evaluate your options.
- Car worth $15000, fix is $750: Fix it. This is a routine repair cost and well below the threshold.
- Car worth $8000, fix is $2500: Borderline. Get a second opinion. A $2500 quote might be for a whole harness or BCM, while the real fault might be a $500 wiring repair.
- Car worth $4000, fix is $2000: Walk away. The repair cost is too high relative to the vehicle's value.
What Scan Tool You Need for This Code
Minimum: A scanner that can read manufacturer-specific codes from the Body Control Module (BCM), not just the engine computer.
A cheap $20 code reader only shows generic engine codes. It cannot access the BCM to tell you which LIN bus device is offline. Without this information, diagnosis is impossible.
Budget: BlueDriver Pro (~$90) — Connects to your smartphone and reads enhanced codes (ABS, Airbag, BCM) for most major brands. It identifies the specific module that lost communication.
Mid-range: Foxwell NT510 Elite (~$200) — A powerful handheld tool offering full-system diagnostics, live data graphing to see LIN bus voltage, and bidirectional controls. It provides near dealer-level access for a specific brand.
Professional: Autel MaxiCOM MK808S / MK808Z (~$350) — A tablet-based scanner with full bidirectional controls, allowing you to command modules to activate to test functionality. It provides comprehensive access to all vehicle modules.
Rent vs buy: Auto parts stores offer loaner tools, but their free scanners are typically basic code readers and insufficient for this code. Buying a capable budget or midrange scanner is a better investment.
How to Clear the Code After You Fix It
- Fix the underlying electrical fault (replace module or repair wire).
- Reconnect the module and battery.
- Use an OBD-II scan tool to clear the Diagnostic Trouble Code (DTC).
Drive cycle (~20 minutes): Since U1524 is a communication code, a specific drive cycle is not required to clear it. After repair, the code clears and stays off on the next key cycle. To verify emissions readiness: Start from a cold-soak. Idle for 3 minutes with electrical loads on. Drive for 15 minutes with mixed city/highway speeds, including steady cruising at 55 mph.
Readiness monitors affected: This code does not directly affect emissions monitors., Clearing the code or disconnecting the battery resets ALL readiness monitors to 'Not Ready'.
Before emissions retest: drive at least 50 miles to fully set monitors.
Watch out for:
- Clearing the code without fixing the wiring fault results in the code returning immediately.
- Disconnecting the battery clears the code but resets all readiness monitors, causing an automatic emissions test failure until a drive cycle is completed.
Will This Fail Emissions / State Inspection?
Yes — this code typically fails an OBD-II emissions inspection.
- California: An illuminated Check Engine Light results in an automatic failure. After repair, a full OBD-II drive cycle must be completed to set all readiness monitors before a re-test.
- New York: An active Check Engine Light is an automatic failure. Clearing the code is not enough; readiness monitors must be set to 'Ready' by driving the vehicle.
- Texas: An illuminated Check Engine Light is an automatic fail. Texas allows one readiness monitor to be 'Not Ready' on 2001+ vehicles, but clearing the code resets all monitors.
Most Commonly Affected Vehicles
- Chevrolet Silverado 1500/2500/3500 (2015-2022) — Extremely common for 'Service Trailer Brake System' messages due to a corroded Trailer Brake Control Module above the spare tire. Also known for parasitic battery drains from shorted heated seat LIN bus wires under the rear seat or in A-pillar connector X225.
- GMC Sierra 1500/2500/3500 (2015-2022) — Identical issues to the Silverado. TSB PIT5750B points to pinched LIN bus wiring for the heated seats as a primary cause of U1524 and parasitic drain.
- Ford F-150, Super Duty, Expedition, Maverick (2021-2026) — Subject to recall 26C10 (NHTSA 23S05) for a software fault in the Integrated Trailer Module (ITRM) causing a loss of communication. The fix is a free dealer software update.
- Chevrolet / GMC Tahoe, Suburban, Yukon, Yukon XL (2015-2019) — Prone to inoperative heated seats setting a U1524 code. GM TSB PIT5624 addresses diagnosing excessive voltage drop on the heated seat module's power circuit for these SUVs.
- Volkswagen Passat, Tiguan, Jetta (2013-2024) — A LIN bus failure often manifests as a cluster of warning lights (ABS, ESC, Power Steering, Park Brake) appearing simultaneously due to a single faulty component on the bus.
- Honda Accord, CR-V, Pilot (2016-2021) — Issues arise from LIN bus-connected components in the center console, such as the electronic gear selector. Spilled liquids are a known cause of shorts here.
- Chevrolet Corvette (2014-2019) — A known issue on the C7 involves a pinched wire in the seat assembly causing the heated seat to turn off and set a U1524 code, detailed in GM TSB PIC5994.
Manufacturer-Specific Notes
- General Motors (GM): GM TSB PIT5750B is critical for diagnosing a parasitic battery drain with U1524. It points to specific harness locations known to short out: under the rear seat and at connector X225 in the A-pillar. It explicitly warns that the BCM is often replaced unnecessarily for this.
- General Motors (GM): On 2015+ trucks, the Trailer Brake Control Module is located above the spare tire and is highly susceptible to corrosion from road salt and water. The connector pins are the primary failure point.
- Ford: Ford issued recall 26C10 (NHTSA 23S05) for millions of 2021-2026 trucks and SUVs where a software glitch in the Integrated Trailer Module causes it to lose communication at startup. The fix is a free software update.
Real Owner Stories
2019 Chevy Silverado with 'Service Trailer Brake' Message
The 'Service Trailer Brake System' warning appeared, and the code was U1524. The owner replaced the in-cab switch but the problem persisted.
What they tried:
- Replaced the trailer brake control switch in the cab.
- Visually inspected components.
Outcome: The owner located the Trailer Brake Control Module above the spare tire and found corroded terminals on the connector. Cleaning the corrosion and replacing the module solved the problem.
Lesson: Always physically inspect the module and connectors in harsh environments first. Corrosion on the TBCM above the spare tire is the most common fix for this code on GM trucks.
2014 Chevy Corvette with Intermittent Heated Seats
The heated seats turned on, then shut off by themselves after a few minutes, intermittently setting a U1524 code.
What they tried:
- Took the vehicle to the dealer for diagnosis.
Outcome: A GM Technical Service Bulletin (PIC5994) identified a pinched wire in the seat assembly harness. Repairing the pinched wire resolved the communication loss.
Lesson: For intermittent seat issues, check for TSBs. A pinched harness from seat movement is a known cause and cheaper to fix than replacing modules.
2018 Chevy Silverado with Dead Battery and U1524
The owner experienced a recurring dead battery and inoperative heated seats, with code U1524 present.
What they tried:
- Replaced the battery, but the drain continued. The shop recommended replacing the BCM.
Outcome: GM TSB PIT5750B points to shorted LIN bus wires under the left rear seat and at connector X225 in the A-pillar. Repairing the shorted wire fixed the drain and the code.
Lesson: A parasitic drain combined with U1524 on a GM truck is a wiring short, not a bad BCM. Insist the shop checks the locations in TSB PIT5750B before replacing the BCM.
How to Prevent This Code From Triggering
- Apply dielectric grease to exposed connectors. (Once every 1-2 years or whenever disconnected.) — Filling the connector body with non-conductive dielectric grease seals out moisture and road salt, preventing the corrosion that causes most U1524 failures.
- Inspect and secure underbody wiring harnesses. (Annually, especially after winter in salt-belt regions.) — Visually check harnesses for sagging or chafing. Secure them away from sharp edges and exhaust heat to prevent physical wire damage.
- Clean trailer 7-pin connectors. (Every 6 months if you tow frequently.) — Cleaning the truck-side and trailer-side 7-pin connectors with a dedicated brush and applying dielectric grease prevents faults induced by the trailer's wiring.
- Wrap vulnerable harness sections in protective loom or tape. (As needed during other repairs.) — Replacing brittle convoluted tubing with new loom or high-quality electrical tape protects the wires inside from heat, moisture, and abrasion.
Frequently Asked Questions
Can I fix a U1524 code myself?
Yes, if the cause is simple. Checking a fuse, performing a battery reset, or replacing an accessible module is DIY-friendly. Diagnosing a broken wire in a complex harness requires a professional.
Will clearing the code fix the problem?
No. U1524 is a hard fault, meaning the communication failure is active. The code returns immediately until the underlying electrical issue is repaired.
The shop says my BCM is bad. Is that likely?
It is possible, but unlikely to be the first cause. GM Service Bulletin PIT5750B explicitly warns that the BCM is often misdiagnosed and unnecessarily replaced when the true cause is a short in the LIN bus wiring. Always insist on thorough wiring diagnostics first.
My passenger heated seat works, but when I turn on the driver's, they both shut off. Why?
This specific symptom is caused by an excessive voltage drop on the power circuit to the heated seat module. When the higher electrical load of the driver's seat activates, the module shuts down to protect itself. The fault is in the power wiring or connections, not the module.
Is code U1510 the same as U1524?
They are different codes diagnosed identically. U1510 specifically flags the Active Grille Shutter, while U1524 points to other LIN devices like heated seats or trailer brake modules.
The shop wants to replace a whole wiring harness. Is that necessary?
In cases of severe, widespread corrosion or rodent damage, yes. Finding and repairing a single broken wire in a complex harness takes hours of labor, often costing more than replacing that section. For a single accessible wire break, a splice repair is standard.
What is a LIN bus and what does it do?
A LIN (Local Interconnect Network) bus is a simple, single-wire data network connecting smart devices to a main control module. It is slower and cheaper than the main CAN bus, used exclusively for non-critical functions like seat heaters or grille shutters.
Key Takeaways
- U1524 flags a communication failure on the single-wire LIN bus, immediately disabling accessory systems like trailer brakes, heated seats, or active grille shutters.
- Over 80% of U1524 codes stem from basic electrical faults: a blown 10-amp fuse, a corroded connector exposed to weather, or a pinched wiring harness.
- On 2015-2022 GM trucks, inspect the Trailer Brake Control Module located above the spare tire; corrosion here is the #1 cause of this code and related parasitic battery drains.
- Ford issued recall 26C10 for millions of 2021-2026 trucks and SUVs to fix a software glitch causing U1524, resolvable with a free 1-hour dealer update.
- Never replace a $500+ Body Control Module (BCM) without first using a professional scan tool to identify the specific offline slave module and verifying its 12V LIN bus signal.
Helpful Videos
Shop the Parts Behind U1524
Below are the parts most often responsible for code U1524, ranked by how frequently each one is the actual culprit (per the diagnosis above). Tap any to see what we have for your vehicle.


The information in this article is provided for general reference and educational purposes only. Vehicle specifications, procedures, and part compatibility can vary by production date, trim level, and region. Always consult your vehicle's factory service manual and verify part numbers before purchasing or performing repairs. Safety-critical components such as airbags, seat belts, and braking systems should be installed by a qualified professional.
- 🧭 Diagnostic Flowchart
- 🎬 Helpful Videos
- 🛍️ Shop This Part
- What Does U1524 Mean?
- Can I Drive With U1524?
- Common Causes
- Symptoms
- Common Fixes & Costs
- Used vs. New Parts: Buying Guide
- What Happens If You Wait — Timeline
- Cost of Not Fixing It
- Diagnosis Steps
- When This Code Triggers (Freeze-Frame Conditions)
- Related Codes
- Climate & Environmental Factors
- How to Talk to a Mechanic About This Code
- Where to Take It: Dealer vs Independent vs Chain
- When to Walk Away From the Repair
- What Scan Tool You Need for This Code
- How to Clear the Code After You Fix It
- Will This Fail Emissions / State Inspection?
- Most Commonly Affected Vehicles
- Manufacturer-Specific Notes
- Real Owner Stories
- 2019 Chevy Silverado with 'Service Trailer Brake' Message
- 2014 Chevy Corvette with Intermittent Heated Seats
- 2018 Chevy Silverado with Dead Battery and U1524
- How to Prevent This Code From Triggering
- Frequently Asked Questions
- Can I fix a U1524 code myself?
- Will clearing the code fix the problem?
- The shop says my BCM is bad. Is that likely?
- My passenger heated seat works, but when I turn on the driver's, they both shut off. Why?
- Is code U1510 the same as U1524?
- The shop wants to replace a whole wiring harness. Is that necessary?
- What is a LIN bus and what does it do?
- Key Takeaways
- 🎟️ Get 5% Off