
OBD-II Code U1531: Lost Communication With Side Obstacle Detection Control Module
The Ultimate Guide to What U1531 Means, Why It Triggers, and How to Fix It for Good
- Code U1531 indicates a total communication failure with a blind spot sensor, instantly disabling your blind spot and rear cross-traffic alert systems.
- Water intrusion and road salt corrosion cause over 80% of U1531 failures by destroying the vulnerable sensor modules mounted behind the rear bumper.
- Ignoring this code on GM vehicles corrupts the low-speed data network, leading to $500+ in unrelated electrical failures like dead instrument clusters or a no-start condition.
- Replacing the failed module costs $500 to $1,200 and requires mandatory dealer-level software calibration to sync the new sensor with the vehicle's network.
What Does U1531 Mean?
U1531 means a master control unit, typically the Body Control Module (BCM), lost its communication link with a Side Obstacle Detection Control Module (blind spot sensor). The system repeatedly tried to send or receive a signal from the sensor but failed. As a direct result, your blind spot monitoring and rear cross-traffic alert systems are disabled, and a warning message displays on the dashboard.
Technical definition: The official SAE/ISO definition for U1531 is "Lost Communication With Side Obstacle Detection Control Module" on a specific LIN Bus. This indicates a master control unit did not receive a valid signal from a slave module (the sensor) on the single-wire Local Interconnect Network (LIN) data bus, pointing to a complete communication breakdown.
Can I Drive With U1531?
Yes, But With Caution. Yes, the vehicle is mechanically safe to drive, but your blind spot monitoring and rear cross-traffic alert systems are completely disabled, increasing the risk of a lane-change collision. On many GM vehicles, ignoring the fault leads to the failing module corrupting the entire low-speed data network. This causes severe and seemingly unrelated issues like the radio failing, instrument cluster blackouts, or a no-start condition, adding $500-$1500 in additional diagnostic and repair costs.
Common Causes
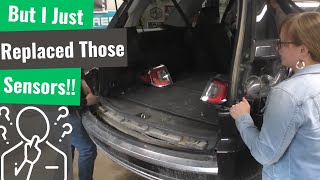
- Water Intrusion and Corrosion in the Module (Very Common) — Blind spot modules sit in the rear corners behind the bumper cover, making them 🎬 Watch: How to remove the bumper and replace Chevy modules. highly vulnerable to water, road salt, and tire debris. Moisture penetrates the module's casing or electrical connector, causing severe corrosion that destroys the internal circuit board and pins.
- Damaged Wiring Harness or Connector (Common) — Road debris, improper towing, or previous accident repairs damage the single LIN bus wire or power/ground wires. Corrosion on the connector pins from moisture frequently severs communication, even if the module remains intact.
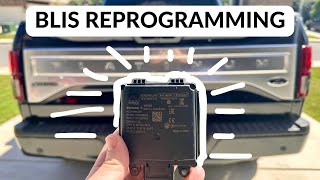
- Physical Damage from Accident (Common) — A minor rear-end or side-impact collision easily cracks the module's plastic housing, damages the mounting bracket, or severs its wiring, causing immediate failure. On vehicles like the Ford F-150, the module is integrated into the tail light assembly, 🎬 See how to reprogram Ford BLIS modules after a replacement. which breaks easily in minor impacts.
- Internal Failure of the Blind Spot Module (Common) — The module fails internally from thermal stress, vibration, or a manufacturing defect, even without external damage or water intrusion. This registers as a hard fault within the module's circuitry.
- Incorrect or Incompatible Replacement Module (Less Common) — If a module was recently replaced, the new part is likely incorrect, incompatible, or requires programming. Modern modules are VIN-specific and must be calibrated to the vehicle's network to function.
- Low Battery Voltage or Weak Ground (Less Common) — Communication modules are highly sensitive to voltage drops. A weak battery causes data errors, while a corroded ground connection prevents the module from powering on and communicating.
- Module Software/Firmware Glitch (Less Common) — A software bug occasionally drops communication. A hard reset (disconnecting the battery for 15 minutes) sometimes resolves it, though a dealer-level software update is often required for a permanent fix.
- Failed Master Control Module (e.g., BCM) (Rare) — The master module controlling the LIN bus network (like the BCM) fails. This sets communication codes for multiple components on the network simultaneously, not just the single U1531.
Symptoms
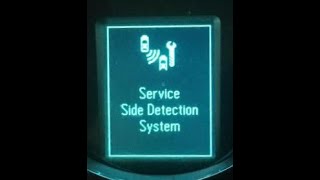
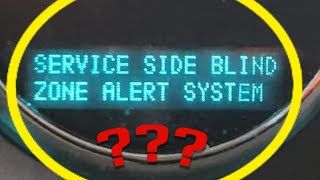
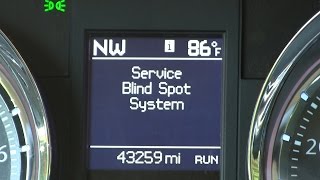
- "Service Side Blind Zone Alert" or "Check BSD System" Message — A direct warning message appears on the driver information center (DIC) in the instrument cluster.
- Blind Spot and Cross-Traffic Alerts Inoperative — The amber warning icons in the side mirrors will not illuminate, and the vehicle fails to provide warnings when backing out of a parking space.
- Blind Spot Warning Lights Stay On — The warning icon in one or both mirrors remains illuminated constantly, indicating a system fault rather than the presence of another vehicle.
- Unrelated Electrical Malfunctions (GM Specific) (also visible on scanner) — On many GM vehicles, a failing blind spot module broadcasts corrupt data over the low-speed GMLAN network. This causes bizarre issues like the radio screen going blank, chimes failing, instrument cluster gauges dropping out, or preventing the vehicle from starting. 🎬 Watch: Troubleshooting and fixing a Chrysler service blind spot message.
Diagnostic Flowchart
Tap your situation to follow the diagnostic path that matches what you're seeing on this code.
Common Fixes & Costs
- Replace One Blind Spot Module — Parts: $300-$800, Labor: $200-$400, ~1.5 hr book time (DIY)
- Repair Damaged Wiring or Connector — Parts: $20-$80, Labor: $150-$400, ~2.0 hr book time (Intermediate)
- Replace Both Modules and Harness (GM Kit) — Parts: $450-$850, Labor: $300-$500, ~2.5 hr book time (Intermediate)
- Module Reprogramming or Calibration — Parts: $0, Labor: $120-$250, ~1.0 hr book time (Professional)
- Replace and Program the Body Control Module (BCM) — Parts: $300-$800, Labor: $200-$400, ~1.5 hr book time (Professional)
Used vs. New Parts: Buying Guide
When a used part is worth it: For older vehicles where a new OEM module ($500+) is a significant portion of the car's value. A used module works if the part number is an exact match and you can perform the reprogramming.
Donor-vehicle mileage cap: roughly under 100000 miles for the part to have meaningful remaining life.
Donor quality checklist:
- Verify the part number is an exact match.
- Avoid parts from rust-belt states to prevent buying pre-corroded modules.
- Ensure the donor vehicle was not involved in a rear-end collision.
Decision logic:
- If Vehicle is under warranty or covered by a special coverage program (like GM's N172097060) → Use new OEM parts installed by a dealer.
- If The part requires mandatory VIN programming (common on Ford, Hyundai/Kia) → Favor a new part, as programming a used module is problematic for many shops.
- If Budget is the primary concern on an out-of-warranty vehicle → A used part is viable, but factor in the risk of premature failure.
Warranty tradeoff: Used parts carry a 30-90 day warranty. Aftermarket new parts offer 1-year to limited lifetime warranties. New OEM parts have a 1-2 year warranty.
Worst-case if a used part fails: $300-$600 if the used part fails shortly after installation, requiring repeat labor and programming.
What Happens If You Wait — Timeline
- 0-1 month: Code U1531 sets. Blind spot and cross-traffic systems disable. The issue is intermittent, appearing after rain. (MPG impact: 0%% · Added cost: $0)
- 1-6 months (GM-Specific Escalation): The failing module broadcasts corrupt data on the low-speed GMLAN network, causing radio cutouts and instrument cluster glitches. (MPG impact: 0%% · Added cost: $100-$300 (for initial diagnostic time chasing unrelated electrical gremlins))
- 3-9 months (All Makes): Corrosion worsens. A repairable connector issue destroys the module itself, guaranteeing an expensive part replacement. (MPG impact: 0%% · Added cost: $300-$800 (Cost of the destroyed module))
- 6+ months (GM-Specific Catastrophic Failure): Constant data corruption causes a critical communication breakdown. The BCM is damaged, or the car fails to start. (MPG impact: 0%% · Added cost: $800-$2000+ (Cost of new BCM and programming))
Cost of Not Fixing It
- Immediate: Loss of Blind Spot Monitoring and Rear Cross-Traffic Alert, increasing the risk of a collision. A persistent warning message displays on the dash. (Added cost: Negligible)
- 1-6 months (GM Vehicles): The failing module corrupts the low-speed data network, causing intermittent electrical issues like radio failure, instrument cluster blackouts, and non-functional chimes. (Added cost: $200-$500 (for diagnosing new electrical faults))
- 6+ months (GM Vehicles): Continued network corruption leads to a complete communication breakdown, resulting in a no-start condition or requiring BCM replacement. (Added cost: $800-$2000+ (for BCM replacement and programming))
Diagnosis Steps
- Perform Full System Code Scan
Use a professional-grade OBD-II scanner to read codes from ALL modules (BCM, ABS, etc.). Note if other 'U' (communication) codes are present, indicating a wider network problem. Look for manufacturer-specific codes like B127B/C on GM vehicles to pinpoint the exact side failing.
Tools: Professional OBD-II Scanner (Beginner) - Check for Relevant Technical Service Bulletins (TSBs)
Search for TSBs related to code U1531 for your specific vehicle before touching any parts. Manufacturers frequently release bulletins for known issues, such as GM's N172097060 for water intrusion or Ford's bracket issues, saving hours of diagnostic time.
Tools: Online Service Information Subscription (Beginner) - Scan Tool Live Data Analysis
Access the Body Control Module (BCM) data stream using a bi-directional scanner. Look for PIDs related to the Side Obstacle Detection modules. If the status reads 'Not Present' or 'Lost Comm', it confirms the BCM cannot see the module on the network.
Tools: Professional Bi-Directional Scanner (Advanced) - Visually Inspect Module and Harness
Locate the blind spot modules behind the rear bumper cover. Remove necessary trim to gain access. Look for physical damage, cracked housings, and evidence of water intrusion like rust stains running from the tail light area.
Tools: Flashlight, Trim removal tools (Beginner) - Inspect Connector for Corrosion
Unplug the electrical connector from the suspect module. Shine a bright light into the module's pin housing and harness connector. Look for green or white powder, bent pins, or backed-out terminals. Corrosion is the primary cause of this code.
Tools: Socket set (Intermediate) - Verify Power and Ground at the Connector
With the module unplugged and ignition on, use a multimeter to check for power and ground at the harness connector. You need battery voltage (12.0V+) on the power pin and less than 1.0 ohm of resistance on the ground circuit. Missing power or high-resistance ground prevents communication.
Tools: Multimeter (Intermediate) - Check LIN Bus Voltage
Probe the LIN bus wire at the connector with the key on. A healthy BCM sends a toggling reference voltage. Using a multimeter's Min/Max function, the MAX voltage should be near battery voltage (11-12V) and the MIN voltage approximately 1V or less. A constant 0V indicates a short to ground; a constant 12V indicates a short to power or open circuit.
Tools: Multimeter with Min/Max function (Advanced) - Isolate the Slave Module
If multiple modules share the LIN bus and set codes, disconnect the suspect U1531 module first. Clear the codes. If communication restores with the other modules, the disconnected module is internally shorted and bringing down the network.
Tools: OBD-II Scanner (Advanced) - Analyze LIN Bus Signal with an Oscilloscope
Connect an oscilloscope to the LIN bus wire. A healthy network shows a clean square wave data signal switching between <1V and >10V. A flat line or corrupted waveform definitively proves the fault is in the wiring or the module is internally shorted.
Tools: Oscilloscope (Advanced)
When This Code Triggers (Freeze-Frame Conditions)
- Ignition Status: ON / RUN (The fault is detected shortly after the vehicle starts, when the master module (BCM) performs its initial check-in with all network modules.)
- Module Status (Scanner PID): Not Present / Lost Comm (In the BCM's live data, the status for the specific Side Obstacle Detection Module changes from 'Present' to 'Lost Comm' when the fault occurs.)
- System Voltage: 11.5V - 14.8V (The code sets when the BCM attempts to communicate but receives no reply within the normal operating voltage range.)
- Vehicle Speed: Any (The communication check is independent of vehicle speed. The fault logs at 0 mph or highway speeds, as the master module periodically polls the sensor network.)
Related Codes
- U1532, U1530 — These indicate lost communication with other specific modules on the same LIN bus. Multiple codes in this range strongly suggest a network-wide problem, such as a wiring short or failed BCM.
- B127B or B127C — GM-specific BCM codes. B127B means 'Side Blind Zone Alert Sensor Communication Circuit' for the left side; B127C is for the right. Paired with U1531, they pinpoint the exact failing side.
- B101D — Generic code for 'Electronic Control Unit Hardware Failure'. Stored alongside U1531, it confirms the BCM self-tested the blind spot module and determined it failed internally.
- U1500 — A generic LIN bus communication failure code. Paired with U1531, it suggests the entire LIN bus is failing due to a common wiring issue or BCM failure.
Climate & Environmental Factors
- Road Salt / De-icing Agents: Saltwater is a powerful electrolyte that dramatically accelerates corrosion of the module's connector pins and internal circuit board. Regions with heavy snowfall see a significantly higher failure rate.
- High Humidity / Heavy Rain: Moisture penetrates the module's seals over time, leading to intermittent faults or outright failure, particularly after a car wash or rainstorm.
- Cold Weather: Extreme cold makes plastic components like the module housing and wiring insulation brittle, creating cracks that serve as entry points for moisture.
How to Talk to a Mechanic About This Code
Say this: "I have a U1531 code and a 'Service Side Blind Zone Alert' message. Can you confirm your technicians test the wiring for power, ground, and LIN bus signal at the module connector before recommending a new module? Also, please confirm you have the tools to program and calibrate a new blind spot module for my specific vehicle."
This signals you understand common failure points and the critical programming step. It prevents shops from replacing the expensive module without proper diagnosis.
Avoid saying:
- 'My blind spot light is on, can you fix it?'
- 'Just replace the sensor, I'm sure that's what it is.'
- 'Whatever you think is best.'
Questions to ask before authorizing the repair:
- Did you find the failure point? Was it the module itself, the connector, or the wiring?
- Does the new part require programming or calibration, and is that included in the estimate?
- Can you guarantee this fixes the U1531 code and any related electrical issues?
- What is the warranty on the new part and labor?
Where to Take It: Dealer vs Independent vs Chain
- Dealer:
A safe but expensive choice. They guarantee correct diagnostic software and procedures, critical for this repair.
Best for: Vehicles under warranty or covered by a special coverage program., Complex cases where other modules set codes.
Downsides: Highest labor rates and parts costs., Unwilling to install customer-supplied parts. (Typical cost: +50% vs. baseline) - Independent Shop:
Often the best fit. Ask specifically: 'Can you program a new blind spot module for my car?' A well-equipped independent shop saves hundreds.
Best for: Out-of-warranty vehicles where cost is a factor., Shops specializing in your vehicle's brand.
Downsides: MUST verify they have the capability to program/calibrate ADAS modules. (Typical cost: +0% vs. baseline) - Chain Shop:
AVOID. This repair requires specialized diagnostic and programming capabilities almost never present at a general-service chain shop.
Best for: Simple maintenance like oil changes and tires.
Downsides: Technicians lack advanced training or specific tools for ADAS calibration., High pressure to sell parts leads to misdiagnosis. (Typical cost: -10% vs. baseline)
When to Walk Away From the Repair
If the total estimated repair cost exceeds 50% of your car's current private-party value, pause and reconsider. This prevents investing more money into a vehicle than it's worth.
- Car worth $6500, fix is $1200: Fix it. The repair cost is 18% of the car's value.
- Car worth $25000, fix is $1400: Fix it. The repair is less than 6% of the truck's value.
- Car worth $4000, fix is $2200: Walk away. The repair cost is 55% of the car's value.
What Scan Tool You Need for This Code
Minimum: A scanner that reads codes from ALL vehicle modules, including the Body Control Module (BCM). A basic engine-only code reader will not see U1531.
A $20 scanner only reads 'P' (Powertrain) codes. It tells you nothing about the BCM, ABS, or SRS systems.
Budget: BlueDriver Pro Scan Tool (~$90) — Reads and clears codes from all modules, including the BCM. It confirms the fault code's presence but does NOT perform programming/calibration.
Mid-range: FORScan software with OBDLink EX or vLinker FS USB Adapter (~$150) — The go-to for Ford owners. FORScan reads all codes, views live data, and performs the required module initialization procedure after replacement.
Professional: Autel MaxiCOM MK808 / Launch CRP919XBT (~$450-600) — Professional-level bidirectional tools offering full-system diagnostics and special service functions for ADAS calibrations.
Rent vs buy: For diagnosis, buying a BlueDriver is a good investment. For Ford repairs, buying the FORScan adapter is highly cost-effective. For other makes, paying a shop for 1-hour programming labor is cheaper than buying a pro-level tool.
How to Clear the Code After You Fix It
- Reconnect battery if it was disconnected for the repair.
- Use a professional OBD-II scan tool to clear the U1531 code from the Body Control Module (BCM).
- Perform the necessary calibration/relearn procedure for the new module using OEM software.
- Start the vehicle and let it run for 2-3 minutes to allow modules to initialize.
Drive cycle (~15 minutes): ADAS modules do not require a complex drive cycle. After clearing the code and calibrating, drive the vehicle for 10-15 minutes, including lane changes above 25 mph, to confirm the warning message stays off and mirror indicators function.
Readiness monitors affected: None directly. However, disconnecting the battery resets all emissions readiness monitors to 'Not Ready'.
Before emissions retest: drive at least 100 miles to fully set monitors.
Watch out for:
- Clearing the code with a basic scanner fails; the code returns immediately if the physical fault remains.
- Skipping the manufacturer-specific calibration step after installing a new module guarantees the repair will not work.
- Disconnecting the battery clears the code from memory but resets emissions monitors, causing an emissions test failure if not followed by a drive cycle.
Will This Fail Emissions / State Inspection?
No — by itself this code doesn't fail OBD inspection (but it can keep readiness monitors from setting, which causes a separate fail).
- California: This code does NOT cause a smog check failure as it does not illuminate the Check Engine Light. However, if the battery was disconnected, all readiness monitors reset. California requires all monitors to be 'Ready' to pass.
- New York: A U1531 code will not cause a failure. The NY VIP2 inspection checks for Check Engine Light status and OBD readiness.
- Texas: This code will not cause an emissions test failure. The test focuses on powertrain-related DTCs that illuminate the Check Engine Light.
Most Commonly Affected Vehicles
- Chevrolet Cruze (2013-2016) — Extremely prone to water intrusion. GM issued Special Coverage Adjustment N172097060 for this exact issue, extending the warranty.
- GMC Acadia (2013-2017) — Covered under GM's Special Coverage Adjustment N172097060. The design places modules in a vulnerable position behind the rear wheels.
- Chevrolet Impala (2014-2020) — Included in GM's warranty extension program (N172097060) specifically for model years 2014-2015. Later models continued to see issues.
- Chevrolet Tahoe / Suburban (2015-2020) — Uses a similar module design highly susceptible to corrosion from road salt and moisture.
- Chevrolet Traverse (2014-2017) — Shares the flawed design where modules are exposed to the elements behind the bumper.
- Ford F-150 / Super Duty (2018-Present) — The module is often integrated into the tail light assembly. Replacement strictly requires reprogramming using dealer software or FORScan.
- Ford Escape (2020-2023) — Subject to TSB 23-2048 for false alerts caused by faulty mounting brackets, requiring bracket replacement and module re-configuration.
- Hyundai Tucson, Sonata, Santa Fe (2019-2024) — Persistent faults point to internal sensor failure. Replacement and calibration are mandatory, with OEM sensors costing upwards of $900.
- Kia Sorento, Telluride, Sportage (2020-Present) — The Blind-Spot Collision-Avoidance Assist (BCA) system fails due to a faulty radar unit requiring replacement and calibration.
Manufacturer-Specific Notes
- General Motors (Chevrolet, GMC, Cadillac, Buick): Failure of the Side Blind Zone Alert module is extremely common due to water intrusion, prompting Special Coverage Adjustment N172097060. A failing module corrupts the low-speed GMLAN data network, causing the radio, instrument cluster, and keyless entry to malfunction or creating a no-start condition.
- Ford: Replacement modules are often integrated with the tail lamp assembly and are VIN-specific. They MUST be programmed to the vehicle using FORScan or dealer software. Simply swapping the part will not resolve the code.
- Hyundai / Kia: Failures are preceded by intermittent "Check BSD System" warnings after rain. OEM replacement sensors are highly expensive, and mandatory calibration requires specialized equipment, making DIY repair nearly impossible.
- Subaru: A similar code (C1531) triggers for communication failure but links to a faulty stop light switch in some models (TSB 06-46-14R), highlighting the need for manufacturer-specific diagnostics.
Real Owner Stories
2018 Ford F-150 at 75K miles - The Incomplete DIY Fix
Owner noticed the "Blind Spot System Fault" message after heavy rain. The driver's side taillight assembly was visibly holding water.
What they tried:
- Purchased a new OEM taillight assembly and blind spot module.
- Physically replaced the parts and disconnected the battery to reset the system.
Outcome: The error messages remained. The owner learned the new module needed programming to the truck's VIN. A dealership appointment to use FDRS software programmed the module and cleared the faults.
Lesson: Replacing a module is only half the job. The new part must be electronically introduced to the vehicle's network via programming before it functions.
2015 Chevy Cruze at 85K miles - The GM Network Corruption Story
The "Service Side Blind Zone Alert" message appeared intermittently. Shortly after, the radio randomly turned off, turn signal clicks disappeared, and the car wouldn't start.
What they tried:
- Suspected a bad battery or alternator, but both tested good.
- A shop diagnosed a complete loss of communication on the low-speed GMLAN network.
- Disconnected the driver's side blind spot module. Communication restored immediately, and the car started.
Outcome: Replacing the corroded blind spot module fixed the U1531 code AND all unrelated electrical issues. The module flooded the data network with garbage data.
Lesson: On GM vehicles, a blind spot module failure is a pending electrical emergency. Address the U1531 code promptly to avoid a no-start condition.
2020 Hyundai Tucson at 40K miles - The Simple (but expensive) Fix
The "Check BSD System" warning appeared. The system worked briefly after starting, then shut off, worsening after car washes.
What they tried:
- Cleaned the rear bumper corners to remove dirt.
- Disconnected the 12V battery for 30 minutes to reset the system.
Outcome: The dealership diagnosed an internal failure of the right-side radar sensor. They replaced and calibrated the sensor under the 5-year/60,000-mile warranty, saving the owner over $1,100.
Lesson: Always check warranty coverage first. ADAS repairs are often too complex and expensive for DIY fixes.
How to Prevent This Code From Triggering
- Apply Dielectric Grease to the Connector (During any repair or inspection) — Dielectric grease seals electrical connectors, creating a barrier that repels water and road salt, preventing corrosion.
- Seal the Module Seams (Once, when the bumper is off for other service) — Applying a thin bead of automotive sealant around the plastic case seams prevents moisture from entering the module's circuit board.
- Ensure Bumper and Taillight Integrity (After any minor rear impact or car wash) — A cracked taillight lens or loose bumper cover directs water and debris straight into the modules.
- Regularly Clean Bumper Corners (Monthly, or after driving in mud/snow) — Caked-on mud and road salt hold moisture against the module, accelerating corrosion. Hosing out the wheel wells prevents this buildup.
Frequently Asked Questions
What is a LIN Bus?
A LIN (Local Interconnect Network) Bus is a simple, single-wire data network connecting a master computer to smart devices like sensors. It reduces wiring complexity, operating at speeds up to 20 kb/s. A failure on this single wire disables all connected devices.
Can I fix a U1531 code myself?
A skilled DIYer comfortable removing the rear bumper and using a multimeter can diagnose and physically replace the faulty module. However, the new module requires programming or calibration with a professional scan tool to be recognized by the car's network. Failure to program the module results in the repair not working.
My radio and gauges started acting weird right before the 'Service Side Blind Zone' message appeared. Are these related?
Yes, this is a very common symptom on GM vehicles. A failing blind spot module sends corrupt data packets onto the vehicle's communication network. This interferes with unrelated modules, causing them to malfunction or shut down.
What is the most common misdiagnosis for U1531?
The most frequent mistake is replacing the blind spot module without thoroughly testing the wiring first. Technicians overlook a corroded ground wire or a break in the LIN bus wire, preventing the new module from communicating. Another common error is failing to program the new module after installation.
Do I have to take my car to the dealer for this repair?
Not necessarily. Many qualified independent auto repair shops have the advanced diagnostic tools and service information needed to perform the repair correctly. Ensure the shop can perform the required module programming or calibration for your specific vehicle before booking.
Can I use a cheaper used blind spot module from a junkyard?
Using a used module is cost-effective but comes with significant risks. First, ensure the part number is an exact match, as superseded numbers often fail. Second, many vehicles require the used module to be reprogrammed with your car's VIN, which some shops refuse to do.
Will clearing the U1531 code make the problem go away?
No. U1531 indicates a hard fault, meaning a persistent physical or electrical problem exists. Clearing the code only hides it temporarily; it returns immediately when the BCM attempts to communicate with the module again.
Key Takeaways
- Code U1531 indicates a total communication failure with a blind spot sensor, instantly disabling your blind spot and rear cross-traffic alert systems.
- Water intrusion and road salt corrosion cause over 80% of U1531 failures by destroying the vulnerable sensor modules mounted behind the rear bumper.
- Ignoring this code on GM vehicles corrupts the low-speed data network, leading to $500+ in unrelated electrical failures like dead instrument clusters or a no-start condition.
- Replacing the failed module costs $500 to $1,200 and requires mandatory dealer-level software calibration to sync the new sensor with the vehicle's network.
Helpful Videos
Shop the Parts Behind U1531
Below are the parts most often responsible for code U1531, ranked by how frequently each one is the actual culprit (per the diagnosis above). Tap any to see what we have for your vehicle.


The information in this article is provided for general reference and educational purposes only. Vehicle specifications, procedures, and part compatibility can vary by production date, trim level, and region. Always consult your vehicle's factory service manual and verify part numbers before purchasing or performing repairs. Safety-critical components such as airbags, seat belts, and braking systems should be installed by a qualified professional.
- 🧭 Diagnostic Flowchart
- 🎬 Helpful Videos
- 🛍️ Shop This Part
- What Does U1531 Mean?
- Can I Drive With U1531?
- Common Causes
- Symptoms
- Common Fixes & Costs
- Used vs. New Parts: Buying Guide
- What Happens If You Wait — Timeline
- Cost of Not Fixing It
- Diagnosis Steps
- When This Code Triggers (Freeze-Frame Conditions)
- Related Codes
- Climate & Environmental Factors
- How to Talk to a Mechanic About This Code
- Where to Take It: Dealer vs Independent vs Chain
- When to Walk Away From the Repair
- What Scan Tool You Need for This Code
- How to Clear the Code After You Fix It
- Will This Fail Emissions / State Inspection?
- Most Commonly Affected Vehicles
- Manufacturer-Specific Notes
- Real Owner Stories
- 2018 Ford F-150 at 75K miles - The Incomplete DIY Fix
- 2015 Chevy Cruze at 85K miles - The GM Network Corruption Story
- 2020 Hyundai Tucson at 40K miles - The Simple (but expensive) Fix
- How to Prevent This Code From Triggering
- Frequently Asked Questions
- What is a LIN Bus?
- Can I fix a U1531 code myself?
- My radio and gauges started acting weird right before the 'Service Side Blind Zone' message appeared. Are these related?
- What is the most common misdiagnosis for U1531?
- Do I have to take my car to the dealer for this repair?
- Can I use a cheaper used blind spot module from a junkyard?
- Will clearing the U1531 code make the problem go away?
- Key Takeaways
- 🎟️ Get 5% Off