
OBD-II Code U1614: Lost Communication with a Specific Control Module
The Ultimate 2026 Guide: What U1614 means, why it triggers, and how to fix it for good.
- Code U1614 means a specific computer module stopped communicating on the CAN bus network, triggering multiple dashboard warning lights.
- On Chrysler, Dodge, and Jeep vehicles from 2007-2016, a failing Totally Integrated Power Module (TIPM) is the number one cause, requiring a $300-$1,200 replacement.
- Always test the battery under load first; a voltage drop below 12.2V causes sensitive modules to shut down and log false communication codes.
- Never replace an expensive control module without verifying CAN bus resistance is exactly 60 ohms at the OBD-II port.
What Does U1614 Mean?
Code U1614 means one of your car's computers (modules) stopped sending or receiving required messages on the CAN bus network. The other computers notice this silence and log a fault. It is the automotive equivalent of a severed network cable.
Technical definition: The SAE/ISO definition is a 'Lost Communication' error. The specific offline module is manufacturer-dependent. For example, GM defines it as 'Lost Communication with Image Processing Module 1'. The code sets when a supervisory module (like the Body Control Module) misses a periodic status message from another module within a programmed timeframe.
Can I Drive With U1614?
Yes, But With Caution. You can drive, but proceed with extreme caution. The primary risk is an unexpected engine stall in traffic. Critical safety features like ABS, traction control, and airbags shut down when their modules lose communication. Continued driving risks a complete no-start condition and potential secondary electrical damage.
Common Causes
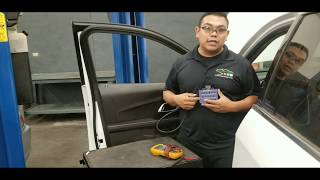
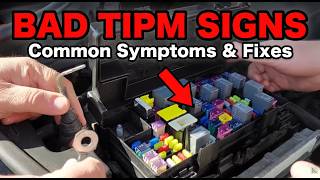
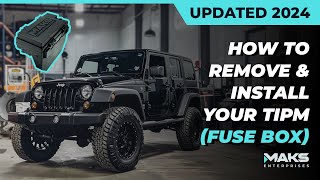
- Failing Totally Integrated Power Module (TIPM) (Very Common) — On Chrysler, Dodge, Jeep, and Ram vehicles, this is the primary cause. 🎬 See this tutorial on how to remove and install a TIPM. The TIPM is the main electrical hub. When its internal circuit boards or relays fail, it causes widespread communication blackouts and triggers a cascade of U-codes.
- Low Battery Voltage or Weak Battery (Common) — Modern modules require a stable voltage above 12.2V. A weak battery, corroded terminals, or a failing alternator causes modules to shut down or reset randomly. Cold weather worsens this; at 0°F (-18°C), a battery loses up to 60% of its cranking power.
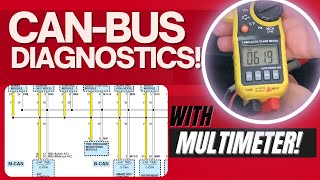
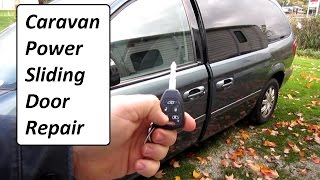
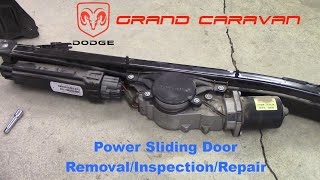
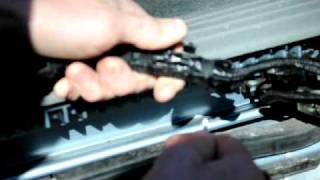
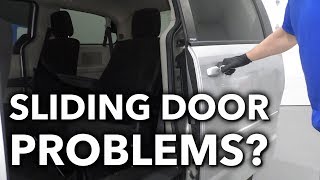
- CAN Bus Wiring Damage or Poor Grounds (Common) — The CAN bus uses a pair of twisted wires. Chafed insulation, water intrusion in connectors, or a loose chassis ground corrupts the communication signals. 🎬 Watch: How to test CAN bus resistance with a multimeter. Road salt dramatically accelerates this corrosion, especially in exposed areas like doors or liftgates. 🎬 Watch: How to fix common wiring damage in sliding doors.
- Improperly Installed Aftermarket Accessories (Common) — Aftermarket remote starters, alarms, or audio systems tapped incorrectly into the vehicle's wiring introduce electrical noise and data collisions on the CAN bus, instantly triggering communication codes.
- Control Module Software Glitch (Less Common) — The problem is sometimes a software bug. Manufacturers release Technical Service Bulletins (TSBs) with software updates to fix programming errors that cause modules to crash or send false error codes on startup.
- Faulty Control Module or Instrument Cluster (Rare) — The specific 'silent' module, or a central gateway like the Instrument Panel Cluster (IPC), fails internally due to cracked solder joints or processor failure, bringing down communication across the network.
Symptoms
- Random Electrical Problems — Headlights flicker, the radio cuts out, power windows fail, or windshield wipers turn on by themselves. This strongly points to a TIPM or Body Control Module (BCM) failure.
- Engine Stalling or No-Start Condition — The engine suddenly shuts off while driving or refuses to start intermittently. This is a classic symptom of a failing TIPM or a network failure involving the engine control module.
- Dashboard Warning Lights and Erratic Gauges — The dashboard lights up with ABS, airbag, and traction control warnings. The speedometer or tachometer drops to zero or sweeps randomly.
- Check Engine Light is on — The engine or transmission control module stores the U1614 code and illuminates the MIL.
Diagnostic Flowchart
Tap your situation to follow the diagnostic path that matches what you're seeing on this code.
Common Fixes & Costs
- Network Diagnostic Scan at a Professional Shop — Parts: $0, Labor: $150-$300, ~1.5 hr book time (Professional)
- Replace the Battery — Parts: $150-$300, Labor: $50-$100, ~0.5 hr book time (DIY)
- Replace or Repair the TIPM (Chrysler/Dodge/Jeep)
— Parts: $300-$1200, Labor: $150-$300, ~1.5 hr book time
(Professional)
2011 Jeep Grand Cherokee: OEM 04692316AG (Alt: Dorman 599-905)
2012 Dodge Grand Caravan: OEM 68105507AB (Alt: Dorman 599-931) - Repair Damaged CAN Bus Wiring — Parts: $20-$50, Labor: $250-$1000, ~3.5 hr book time (Intermediate)
- Update Control Module Software — Parts: $0, Labor: $150-$250, ~1.0 hr book time (Professional)
- Replace a Faulty Control Module — Parts: $400-$1500, Labor: $150-$400, ~2.0 hr book time (Professional)
Used vs. New Parts: Buying Guide
When a used part is worth it: For a TIPM, a professionally rebuilt unit is the best balance of cost and reliability. Used salvage yard parts are risky because they often contain the same factory defects.
Donor-vehicle mileage cap: roughly under 80000 miles for the part to have meaningful remaining life.
Donor quality checklist:
- Verify the exact OEM part number matches.
- Purchase from a rebuilder offering at least a 1-year warranty.
- Inspect for burnt pins or green corrosion before installation.
Decision logic:
- If The fix is a software update → Use a dealer; no parts to buy.
- If Vehicle is newer and under warranty → Always use a new OEM part installed by the dealer.
- If Budget allows and long-term reliability is key → Buy a new OEM part or a high-quality rebuilt unit.
- If Budget is the primary concern on an older vehicle → A used TIPM is an option, but it requires programming and carries a high failure risk.
Warranty tradeoff: Salvage yard parts offer 30-day warranties. Rebuilt TIPMs offer 1-year to lifetime warranties. New OEM parts carry a 2-year warranty.
Worst-case if a used part fails: $1000 if a used part fails, requiring repeat labor and a second replacement part.
What Happens If You Wait — Timeline
- 0-1 month: Intermittent warning lights appear and clear on their own. The car occasionally hesitates to start. (MPG impact: 0%% · Added cost: $0)
- 1-3 months: Random electrical issues escalate (radio cuts out, wipers activate). The risk of an unexpected engine stall increases. Safety systems like ABS disable intermittently. (MPG impact: 0-5%% · Added cost: $150 (Cost of a tow if stranded))
- 3-6 months: No-start conditions become frequent. Chronic voltage instability stresses other sensitive electronics on the network. (MPG impact: 5-10%% · Added cost: $500-$1200 (Cost to replace the primary failed component, e.g., TIPM))
- 6+ months: Catastrophic failure of the primary module. Voltage spikes corrupt software in secondary modules (ECM, IPC), rendering the vehicle undrivable. (MPG impact: 20%% · Added cost: $2000-$4000 (Cost of replacing multiple control modules and programming))
Cost of Not Fixing It
- 0-1 month: Intermittent stalling and disabled safety systems (ABS, airbags). The primary risk is an accident caused by a sudden stall in traffic. (Added cost: Negligible, unless an accident occurs.)
- 1-6 months: Increased risk of being stranded. A failing TIPM causes the fuel pump to stop working permanently. (Added cost: $500-$1200)
- 6+ months: Continuous network instability corrupts software in other modules, requiring expensive reprogramming or replacement of multiple components. (Added cost: $2000-$4000)
Diagnosis Steps
- Check for Technical Service Bulletins (TSBs)
Search for TSBs for your specific VIN. The fix is often a known software update. For example, GM TSB PIT5907E states that on 2022-2025 models, U1614 is a false code set by the Park Assist Module and should be ignored if no symptoms exist.
Tools: Internet access, VIN (Beginner) - Perform an Electronic Battery Load Test
Verify battery voltage is above 12.4V (engine off) and alternator output is 13.5V-14.7V. Use an electronic load tester to confirm battery health, as a battery showing good static voltage fails under load and crashes the network.
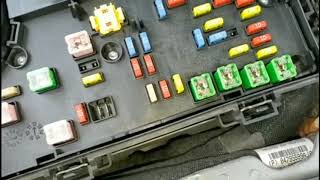
Tools: Multimeter, electronic battery load tester (Beginner) - Check Fuses for All Control Modules
Locate all fuse boxes and test the fuses for every major control module (ABS, BCM, TIPM, IPC). A single blown fuse takes a module offline instantly.
Tools: Owner's manual, multimeter, fuse puller (Beginner) - Perform a Detailed Visual Inspection
Inspect visible wiring harnesses for chafing or rodent damage. Check major ground straps. Look for water intrusion in module connectors, especially in exposed areas like bumpers or door jambs.
Tools: Flashlight, inspection mirror (Intermediate) - Test CAN Bus Network Resistance
Disconnect the battery. At the OBD-II port, measure resistance between Pin 6 (CAN High) and Pin 14 (CAN Low). A healthy network reads 60 ohms. 120 ohms indicates an open circuit or offline terminating module. 0 ohms indicates a short.
Tools: High-quality multimeter (Advanced) - Test CAN Bus Static Voltage
Reconnect the battery. Turn ignition ON. Measure DC voltage from Pin 6 to ground (should be 2.5V-2.7V). Measure Pin 14 to ground (should be 2.3V-2.5V). If both show identical voltage, they are shorted together. If one shows 0V, it is shorted to ground.
Tools: High-quality multimeter (Advanced) - Check Module Power and Ground via Voltage Drop
Identify the suspected module's power and ground pins. With the module connected and key ON, measure voltage drop from the ground pin to the negative battery terminal. It must be under 0.2V. Repeat for the power feed to the positive terminal.
Tools: Multimeter, wiring diagrams, back-probe pins (Advanced) - [PRO TIP] Isolate the Faulty Module
If CAN resistance is 120 ohms or 0 ohms, disconnect modules one at a time. When the resistance at the OBD-II port returns to 60 ohms, you have isolated the faulty module or wiring branch.
Tools: Multimeter, wiring diagrams, trim removal tools (Professional) - [PRO TIP] Analyze the CAN Bus Waveform
Connect an oscilloscope to Pins 6 and 14. A healthy CAN bus shows two clean, mirror-image square waves. Distorted signals or flat lines pinpoint shorts or electromagnetic interference.
Tools: Automotive oscilloscope, breakout leads (Professional)
When This Code Triggers (Freeze-Frame Conditions)
- Battery Voltage: 11.8V - 12.5V (Key On, Engine Off, or during cranking)
- Module Status: No Communication (Supervisory module fails to receive a signal from a specific module)
- RPM: 0 or > 2000 (During a no-start event or while driving at steady speed)
Related Codes
- U0140 — Lost Communication With Body Control Module. Often appears alongside U1614. Indicates the BCM specifically is offline, affecting interior lights, locks, and wipers.
- U0100 — Lost Communication with ECM/PCM. A severe code indicating the main engine computer is offline, resulting in a guaranteed no-start or stall.
- U0073 — Control Module Communication Bus 'A' Off. Indicates the entire network is down, usually due to a dead short between CAN High and CAN Low wires.
- P1614 — Immobilizer/Key Communication Error. A manufacturer-specific code (Nissan, Mazda) often confused with U1614. It requires diagnosing the key fob and security antenna.
Climate & Environmental Factors
- Cold Weather: A battery loses up to 60% of its power at 0°F (-18°C). This severe voltage drop causes sensitive modules to fail initialization on startup, triggering U1614.
- High Humidity and Road Salt: Saltwater creates a highly corrosive electrolyte that destroys connector pins and wiring insulation, breaking CAN bus circuits in exposed areas like bumpers and wheel wells.
How to Talk to a Mechanic About This Code
Say this: "I have a U1614 communication code and am experiencing [specific symptoms]. Please start by checking for TSBs and performing a full CAN bus network test, including resistance at the OBD-II port, before recommending module replacements."
Directs the technician to perform a logical network diagnosis rather than guessing. It prioritizes low-cost checks (TSBs, wiring) over expensive part swaps.
Avoid saying:
- 'My check engine light is on, can you just fix it?'
- 'I think it's the BCM, can you just replace it?'
- 'Just do whatever you think is best.'
Questions to ask before authorizing the repair:
- What were the CAN bus resistance and voltage readings at the OBD-II port?
- Did you check the power and ground voltage drops at the specific offline module?
- Are there any TSBs for this code, and is the fix a software update?
- What specific tests condemned the original module?
Where to Take It: Dealer vs Independent vs Chain
- Dealer:
Recommended. The dealer's specialized tools and direct access to engineering data provide the most efficient diagnosis for complex network codes.
Best for: Vehicles under warranty., Fixes requiring manufacturer-specific software updates., Complex electrical issues requiring proprietary tools (wiTECH, GDS2).
Downsides: Highest labor rate., May recommend expensive module replacement over wiring repair. (Typical cost: +50% vs. baseline) - Independent Shop:
Good fit ONLY if they are a diagnostic specialist with high-end scan tools (Autel/XTOOL) and CAN bus experience.
Best for: Out-of-warranty vehicles., Shops specializing in electrical diagnostics or your specific brand.
Downsides: May lack advanced scanners or software update capabilities. (Typical cost: +0% vs. baseline) - Chain Shop:
AVOID. The risk of misdiagnosis and unnecessary module replacement is very high.
Best for: Routine maintenance (oil, tires, brakes).
Downsides: Technicians lack training for complex electrical diagnostics., Not equipped with topology-capable scan tools. (Typical cost: -10% vs. baseline)
When to Walk Away From the Repair
If the estimated repair cost exceeds 40% of your car's private-party value, consider selling or trading in the vehicle.
- Car worth $5000, fix is $2500: Walk away. A $2,500 repair is 50% of the car's value. Put the money toward a replacement vehicle.
- Car worth $15000, fix is $1200: Fix it. A $1,200 repair is well below the threshold and restores a valuable vehicle.
- Car worth $3000, fix is $750: Borderline. The repair is 25% of the value. If the car needs other work (tires, brakes), it is better to sell.
What Scan Tool You Need for This Code
Minimum: A scanner that reads manufacturer-specific 'U' codes from all modules (ABS, BCM, IPC) and displays live data.
A $20 generic reader only checks the engine computer. It cannot communicate with the rest of the CAN bus to see which module is offline.
Budget: BlueDriver Pro or Autel AP200 (~$100) — Performs a full system scan to identify which specific module is reporting the communication loss. Provides freeze frame data.
Mid-range: Foxwell NT510 Elite or XTOOL D7 (~$180) — Adds bi-directional control. Allows you to send commands to modules to verify if they are truly dead or just not communicating.
Professional: Autel MaxiCOM MK906BT or XTOOL D8S (~$800) — Provides Network Topology Mapping. Graphically displays the entire CAN bus and color-codes modules based on communication status, instantly pinpointing the silent module.
Rent vs buy: Do not rent a basic scanner. Pay a professional shop $150 for a diagnostic scan using a topology-capable tool. Buy a pro scanner only if you tackle complex diagnostics regularly.
How to Clear the Code After You Fix It
- Reconnect battery if disconnected for repair.
- Use an OBD-II scan tool to erase all Diagnostic Trouble Codes (DTCs).
- Perform a complete drive cycle to allow readiness monitors to run.
Drive cycle (~30 minutes): Start with a cold soak (engine off for 8+ hours). Start engine and idle for 3 minutes. Drive at a steady 55 mph for 15 minutes. Perform several slow decelerations. Drive in stop-and-go traffic for 10 minutes.
Readiness monitors affected: Catalyst (CAT) monitor, Evaporative System (EVAP) monitor, Oxygen (O2) Sensor monitor
Before emissions retest: drive at least 50 miles to fully set monitors.
Watch out for:
- Disconnecting the battery clears codes but resets all readiness monitors to 'Not Ready', guaranteeing an emissions test failure.
- The code returns immediately if the root electrical fault is not repaired.
Will This Fail Emissions / State Inspection?
Yes — this code typically fails an OBD-II emissions inspection.
- California: An illuminated Check Engine Light is an automatic failure. For 2000+ model years, only one monitor (usually EVAP) is allowed to be 'Not Ready'.
- New York: An illuminated MIL causes an automatic failure of the OBD-II inspection.
- Texas: An illuminated Check Engine Light results in an automatic failure. For 2001+ vehicles, one monitor is allowed to be incomplete.
Most Commonly Affected Vehicles
- Dodge Grand Caravan (2008-2016) — Notorious for TIPM failures. The sliding door wiring harness also breaks frequently from flexing, disrupting the CAN bus.
- Jeep Grand Cherokee, Wrangler (2007-2018) — Suffers from high rates of TIPM failure. Dual-battery models experience network crashes when the auxiliary battery dies.
- Ram 1500, 2500, 3500 (2011-2012) — The TIPM-7 used in this era is a primary failure point leading to communication DTCs.
- Chrysler Town & Country (2008-2016) — Shares the problematic TIPM and sliding door wiring issues with the Dodge Grand Caravan.
- Chevrolet / GMC Silverado, Tahoe, Yukon (2022-2025) — Per TSB PIT5907E, U1614 sets falsely in the Park Assist Module due to a software timing issue and should be ignored if no symptoms exist.
- Ford Fusion, Edge, F-150 (2013-2018) — Water intrusion corrodes the Side Obstacle Detection (blind spot) modules in the rear bumper, crashing the network.
- BMW 3-Series, 5-Series (2006-2016) — A failing Footwell Module (FRM) or unregistered battery causes widespread electrical failures and U-codes.
- Mazda 3, 6, CX-5 (2008-2019) — Do not confuse U1614 with P1614. P1614 is an immobilizer code, not a general CAN bus fault.
Manufacturer-Specific Notes
- Chrysler / Dodge / Jeep / Ram: Any U-code points directly to a failing Totally Integrated Power Module (TIPM). This defect led to a class-action lawsuit and safety recall (NHTSA 14V-530) for fuel pump relays.
- General Motors (GM): If U1614 is found in 'History' on 2022-2025 models with no active symptoms, TSB PIT5907E instructs technicians to clear the code and ignore it as a harmless software glitch.
- Ford: U-codes frequently trace back to water intrusion in the blind spot modules located behind the rear wheels. Check these connectors for green corrosion first.
Real Owner Stories
2012 Dodge Grand Caravan with 115K miles
Vehicle intermittently refused to start. When running, wipers activated randomly and the radio cut out. Multiple warning lights illuminated.
What they tried:
- Replaced the battery.
- Checked all fuses.
- Paid a mechanic for 3 hours of wiring diagnostics with no result.
Outcome: The owner researched online and suggested checking the TIPM. The shop diagnosed a failed TIPM and installed a rebuilt unit for $700. All electrical problems vanished.
Lesson: On Chrysler/Dodge/Jeep products, bizarre electrical behavior is the hallmark of TIPM failure. Suspect the TIPM immediately to save diagnostic labor.
2018 Jeep Gladiator with 45K miles
While driving at highway speeds, the dashboard lit up with errors and the vehicle entered limp mode. Scans showed multiple network communication codes.
What they tried:
- Suspected a recently installed aftermarket light bar.
- Tested the primary battery, which passed.
Outcome: A forum member suggested disconnecting the auxiliary battery. The issue resolved instantly. The failing auxiliary battery caused voltage drops that crashed the network.
Lesson: On dual-battery vehicles (Jeep/Ram), a failing auxiliary battery frequently causes widespread electronic faults. Test both batteries under load first.
2012 Peugeot 3008
After replacing the battery, the car cranked but would not start. An 'Engine Fault' message appeared, and a scan showed CAN communication errors.
What they tried:
- Scanned for codes, finding P0500 and U-codes.
- Attempted to communicate with ECUs using a scan tool, but they were unresponsive.
Outcome: The owner performed a specific Body Systems Interface (BSI) reset procedure (a sequence of key turns and button presses). The car started and functioned normally.
Lesson: Modern European vehicles often require a specific reset or registration procedure after a battery change to re-synchronize modules.
How to Prevent This Code From Triggering
- Perform an electronic battery load test (Annually, before winter) — Catches a failing battery before voltage drops cause modules to shut down and trigger communication faults.
- Clean and tighten battery terminals and chassis grounds (Every 15,000 miles) — Eliminates high resistance that starves modules of stable power.
- Apply dielectric grease to exposed electrical connectors (During undercarriage or bumper service) — Seals out moisture and road salt, preventing the pin corrosion that breaks CAN bus circuits.
- Avoid low-quality aftermarket electronics (Ongoing) — Prevents electrical noise and data collisions on the CAN bus caused by poorly shielded devices.
Frequently Asked Questions
What is the most common misdiagnosis for a U1614?
The biggest mistake is replacing an expensive module before confirming the root cause. Technicians often find the actual problem is a weak battery, poor ground, or a corroded wire. Always rule out low voltage and check TSBs first.
Can an aftermarket remote starter cause a U1614 code?
Yes. Remote starters, alarms, and stereos cause this code if installed incorrectly. Poor connections like cheap T-taps disrupt CAN bus communication.
Can a bad ground wire cause code U1614?
Yes. Every module requires a solid chassis ground to function. A voltage drop test showing more than 0.2V on a ground wire indicates high resistance, causing the module to drop off the network.
What is a TIPM?
The Totally Integrated Power Module (TIPM) is the main electrical hub and computer in many Chrysler, Dodge, and Jeep vehicles. They frequently fail internally, causing bizarre electrical problems and U-codes.
Is it safe to clear the U1614 code?
You can clear it, but it returns immediately if the underlying fault remains. Clearing it helps determine if the error was a one-time voltage glitch or a hard fault.
Why are the CAN bus wires a 'twisted pair'?
CAN bus wires are twisted to cancel out electromagnetic interference from other vehicle components. If untwisted during a repair or routed near high-voltage parts, the communication signals become corrupted.
Do I have to go to the dealer to fix this?
Dealerships have proprietary diagnostic tools and software update capabilities required for complex network faults. If the fix requires a module reflash or deep CAN bus analysis, a dealer or specialized diagnostic shop is necessary.
How do I check the sliding door wiring on my Dodge Grand Caravan?
Inspect the flexible wiring harness between the sliding door and the body. Repeated bending breaks the internal CAN bus wires, requiring a spliced repair to restore communication.
Key Takeaways
- Code U1614 means a specific computer module stopped communicating on the CAN bus network, triggering multiple dashboard warning lights.
- On Chrysler, Dodge, and Jeep vehicles from 2007-2016, a failing Totally Integrated Power Module (TIPM) is the number one cause, requiring a $300-$1,200 replacement.
- Always test the battery under load first; a voltage drop below 12.2V causes sensitive modules to shut down and log false communication codes.
- Never replace an expensive control module without verifying CAN bus resistance is exactly 60 ohms at the OBD-II port.
Helpful Videos
![How To Test CAN BUS With A Multimeter [CAN Bus Resistance Check] Mechanic Mindset](https://img.youtube.com/vi/JPE42HSJxAk/mqdefault.jpg)

![TIPM [Dodge, Chrysler, Jeep] Removal and Solution](https://img.youtube.com/vi/qea1H85HBwU/mqdefault.jpg)

Shop the Parts Behind U1614
Below are the parts most often responsible for code U1614, ranked by how frequently each one is the actual culprit (per the diagnosis above). Tap any to see what we have for your vehicle.


The information in this article is provided for general reference and educational purposes only. Vehicle specifications, procedures, and part compatibility can vary by production date, trim level, and region. Always consult your vehicle's factory service manual and verify part numbers before purchasing or performing repairs. Safety-critical components such as airbags, seat belts, and braking systems should be installed by a qualified professional.
- 🧭 Diagnostic Flowchart
- 🎬 Helpful Videos
- 🛍️ Shop This Part
- What Does U1614 Mean?
- Can I Drive With U1614?
- Common Causes
- Symptoms
- Common Fixes & Costs
- Used vs. New Parts: Buying Guide
- What Happens If You Wait — Timeline
- Cost of Not Fixing It
- Diagnosis Steps
- When This Code Triggers (Freeze-Frame Conditions)
- Related Codes
- Climate & Environmental Factors
- How to Talk to a Mechanic About This Code
- Where to Take It: Dealer vs Independent vs Chain
- When to Walk Away From the Repair
- What Scan Tool You Need for This Code
- How to Clear the Code After You Fix It
- Will This Fail Emissions / State Inspection?
- Most Commonly Affected Vehicles
- Manufacturer-Specific Notes
- Real Owner Stories
- 2012 Dodge Grand Caravan with 115K miles
- 2018 Jeep Gladiator with 45K miles
- 2012 Peugeot 3008
- How to Prevent This Code From Triggering
- Frequently Asked Questions
- What is the most common misdiagnosis for a U1614?
- Can an aftermarket remote starter cause a U1614 code?
- Can a bad ground wire cause code U1614?
- What is a TIPM?
- Is it safe to clear the U1614 code?
- Why are the CAN bus wires a 'twisted pair'?
- Do I have to go to the dealer to fix this?
- How do I check the sliding door wiring on my Dodge Grand Caravan?
- Key Takeaways
- 🎟️ Get 5% Off