
OBD-II Code U1700: Lost Communication Between Control Modules
What U1700 means, why it triggers, and how to fix it
- Test your battery first; a voltage drop below 12.4V is the number one cause of U1700 communication failures.
- Clean the main engine and chassis ground straps before replacing any parts, as corrosion here disrupts the entire CAN bus network.
- Use a full-system OBD-II scanner to identify exactly which module is offline, rather than blindly replacing the module that triggered the code.
- Check the passenger footwell and BCM for water intrusion, a primary cause of U1700 on GM and FCA vehicles.
- Expect to pay $150 to $300 for a dealer software update if you drive a 2018-2020 Alfa Romeo or Fiat, as this code is often a known software bug.
What Does U1700 Mean?
The U1700 code indicates two or more of your vehicle's control modules lost communication over the CAN bus network. The code triggers when one module expects a message and does not receive it, signaling a physical break in the wiring, a power loss, or a software crash.
Technical definition: A manufacturer-specific network code indicating a loss of communication with a control module. On Fiat-Chrysler (FCA) vehicles, it specifically flags a communication failure between the Body Control Module (BCM) and another network node.
Can I Drive With U1700?
Yes, But With Caution. Yes, but limit driving to reaching a repair facility immediately. The risks are unpredictable and depend on the failing module. You risk sudden loss of power steering, headlights, wipers, or engine stalling if the immobilizer loses communication.
Common Causes
- Weak or Failing Battery (Very Common) — Low battery voltage is the primary cause of communication errors. Modern modules require stable voltage above 12.4V to operate; a weak battery causes random electronic glitches and triggers U-codes during startup.
- Poor Ground Connection (Very Common) — A corroded, loose, or broken ground strap for the body, engine, or a specific module disrupts the electrical circuit. Without a solid ground, modules cannot transmit data reliably.
- Water Intrusion into Modules or Connectors (Common) — Water from a clogged sunroof drain or leaky windshield seal drips directly onto control modules (like the BCM) or their connectors, causing immediate short circuits and long-term corrosion.
- Damaged Wiring or Connectors (Common) — The CAN bus wiring harness suffers damage from vibrations, rodent activity, or chafing. Corroded pins inside connectors interrupt the data signal between modules.
- Aftermarket Accessories (Stereo, Alarm, Remote Start) (Common) — Improperly installed aftermarket electronics splice into the CAN bus wiring incorrectly, corrupting network signals and generating communication faults.
- Faulty Control Module (Less Common) — A central computer, such as the Body Control Module (BCM) or Totally Integrated Power Module (TIPM), fails internally and takes down the entire communication network.
- Software Glitch / Outdated Module Software (Less Common) — The hardware is fine, but the module's internal software crashes. Manufacturers release software updates via Technical Service Bulletins (TSBs) to patch these communication bugs.
- Incorrect or Incompatible Control Module (Rare) — A recently replaced control module has the wrong part number or lacks proper programming. The network rejects the incompatible module, triggering a U1700 code.
Symptoms
- Check Engine Light or Multiple Warning Lights — The Check Engine Light illuminates, often accompanied by warnings for the ABS, power steering, or airbag systems.
- Gauges Dropping to Zero — The speedometer, tachometer, or fuel gauge drops to zero or flickers intermittently due to lost communication with the instrument cluster.
- Loss of Electrical Functions — Features controlled by the Body Control Module stop working, including power windows, central locking, radio, climate controls, or the key fob.
- No-Start Condition — If the communication failure isolates the engine computer or immobilizer, the vehicle cranks but refuses to start.
- Drive Mode Selector Inoperable — On vehicles with selectable driving modes (e.g., Alfa Romeo), the selector switch becomes unresponsive and locks into a default mode.
Diagnostic Flowchart
Tap your situation to follow the diagnostic path that matches what you're seeing on this code.
Common Fixes & Costs
- Replacing a Weak Battery — Parts: $150-$350, Labor: $50-$100, ~0.5 hr book time (DIY)
- Cleaning or Replacing Ground Straps
— Parts: $10-$50, Labor: $100-$200, ~1.0 hr book time
(DIY)
Dodge Ram / Jeep Grand Cherokee: OEM
Dodge/Chrysler: OEM - Replacing a Faulty Body Control Module (BCM)
— Parts: $200-$700, Labor: $250-$500, ~2.5 hr book time
(Professional)
Chevrolet Cruze (2011-2016): OEM
Alfa Romeo Stelvio (2018-2019): OEM - Replacing a Faulty TIPM (Dodge/Chrysler/Jeep)
— Parts: $300-$800, Labor: $150-$300, ~1.5 hr book time
(Professional)
Dodge Grand Caravan (2014): OEM
Dodge/Jeep: OEM - Repairing Damaged CAN Bus Wiring — Parts: $5-$20, Labor: $200-$1000, ~4.5 hr book time (Professional)
- Updating Module Software — Parts: $0, Labor: $150-$300, ~1.5 hr book time (Professional)
Used vs. New Parts: Buying Guide
When a used part is worth it: For non-security-critical modules on older vehicles where a new part is discontinued. A used BCM or TIPM from a non-flood-damaged donor is cost-effective if you have programming tools.
Donor-vehicle mileage cap: roughly under 100000 miles for the part to have meaningful remaining life.
Donor quality checklist:
- Verify the part number matches EXACTLY.
- Obtain the donor vehicle's VIN to check compatibility.
- Avoid parts from vehicles scrapped due to flood or fire.
- Inspect connectors for corrosion or bent pins.
Decision logic:
- If The part is a TIPM or BCM and a remanufactured unit with a warranty is available → Favor the remanufactured unit. It is cheaper than new OEM and more reliable than a used part.
- If The vehicle is a complex model and the part requires security programming → Buy new OEM or a professionally remanufactured part. The risk of a used part failing to program is too high.
- If The part is a simple ground strap or connector → Buy new. Do not use a corroded used part.
Warranty tradeoff: Used parts have a 30-90 day warranty covering the part only. Remanufactured parts offer a 1-year to lifetime warranty. New OEM parts carry a 1-2 year warranty.
Worst-case if a used part fails: $500-$1500
What Happens If You Wait — Timeline
- 0-1 month: Intermittent glitches. The radio resets, a warning light flashes, or power windows hesitate. (MPG impact: 0%% · Added cost: $0)
- 1-3 months: Symptoms become frequent. The instrument cluster flickers, and multiple warning lights stay on. A parasitic drain weakens the battery. (MPG impact: 0-2%% · Added cost: $50-$200)
- 3-6 months: The vehicle becomes unreliable. A no-start condition occurs. Critical safety systems fail without warning. (MPG impact: 2-5%% · Added cost: $200-$700)
- 6+ months: Cascading failure. A faulty module permanently damages other connected modules. The vehicle is undrivable. (MPG impact: 5-10%% · Added cost: $1000-$3000)
Cost of Not Fixing It
- 0-1 month: Intermittent electrical problems, such as flickering gauges and random warning lights. Parasitic battery drain leads to a dead battery. (Added cost: $50-$200)
- 1-6 months: Increased risk of a no-start condition. Safety-critical systems like headlights or power steering fail without warning while driving. (Added cost: $150-$500)
- 6+ months: A faulty module damages other connected modules on the CAN bus due to electrical shorts. The vehicle becomes unsafe to operate. (Added cost: $1000-$3000)
Diagnosis Steps
- Check and Charge the Battery
Ensure the battery is fully charged and terminals are clean. A healthy battery has a resting voltage of 12.6V or higher. Load-test the battery to confirm it maintains voltage under stress. Modules require a stable voltage above 12.4V to boot correctly.
Tools: Voltmeter, Battery Terminal Cleaner, Battery Load Tester (Beginner) - Inspect Main Ground Connections
Visually inspect the main battery ground strap, engine-to-chassis ground, and module-specific grounds for corrosion or looseness. Clean the metal contact points with a wire brush and tighten the bolts.
Tools: Wrench/Socket Set, Wire Brush (Beginner) - Scan for All Codes from All Modules
Use a full-system OBD-II scanner to read codes from every module (BCM, TCM, ABS). Identify which modules log the U1700 code and pinpoint any module that fails to respond to the scanner entirely. The non-responsive module is the root cause.
Tools: Advanced OBD-II Scanner (Intermediate) - Perform a 'Hard Reset'
Disconnect both battery terminals and hold the cable ends together for 60 seconds. This discharges the capacitors in the modules and clears temporary software glitches.
Tools: Wrench/Socket Set (Intermediate) - Visually Inspect Wiring Harnesses and Connectors
Inspect wiring harnesses near the engine bay, under the dashboard, and around the BCM. Look for chafed wires, rodent damage, or water intrusion inside connectors.
Tools: Flashlight, Mirror (Intermediate) - Test the CAN Bus Network Resistance
With the ignition off and battery disconnected, measure resistance between CAN-High (Pin 6) and CAN-Low (Pin 14) at the OBD-II port. A healthy network reads 60 ohms. A reading of 120 ohms indicates a broken wire or missing terminating resistor. A reading near 0 ohms indicates a short.
Tools: Multimeter, OBD-II Pinout Diagram (Advanced) - Perform a Voltage Drop Test on Ground Circuits
Connect the multimeter's positive lead to the negative battery post and the negative lead to the module's metal casing. With the ignition on, the reading must be below 0.1V. Higher readings indicate excessive ground resistance.
Tools: Multimeter (with long leads) (Advanced) - Perform a 'Wiggle Test'
While monitoring live data on a scan tool, wiggle the wiring harnesses and connectors leading to the suspect module. If communication drops or returns intermittently, you have located a broken wire or loose pin.
Tools: Advanced OBD-II Scanner, Gloves (Advanced) - Analyze CAN Bus Waveform with an Oscilloscope
Connect an oscilloscope to the CAN-High and CAN-Low lines. A healthy waveform shows two mirrored square waves. Flat lines, noise, or shorts to ground/power pinpoint specific wiring faults or a failed module dragging the bus down.
Tools: 2-Channel Automotive Oscilloscope, Back-Probes (Professional)
When This Code Triggers (Freeze-Frame Conditions)
- Vehicle Speed: 30-60 mph (Steady cruise. Communication codes set when modules expect periodic messages and a message is missed.)
- RPM: 1200-2500 (Light to moderate engine load. The fault relates to a stable operating state where communication is constant.)
- Battery Voltage: 11.5-13.0V (Low system voltage during or just after engine start causes modules to fail to initialize correctly.)
- Time Since Start: Variable (Occurs immediately at startup if a module fails to boot, or minutes into a drive if the failure is intermittent.)
Related Codes
- U0001 — A generic code for High-Speed CAN Communication Bus failure. U0001 means the entire network is down, whereas U1700 indicates a specific module cannot communicate.
- U0100 — Indicates lost communication with the Engine Control Module (ECM). If paired with U1700, focus diagnostics on the ECM's power and grounds.
- U0140 — Means Lost Communication With Body Control Module (BCM). U1700 is often the symptom code logged by other modules because the BCM went offline.
- U1701 — Another manufacturer-specific code. Seeing U1700 and U1701 together points to a network-wide wiring issue rather than a single module failure.
Climate & Environmental Factors
- High Humidity: High humidity accelerates corrosion on electrical connectors and ground points. Moisture penetrates seals and causes intermittent short circuits.
- Cold Weather: Extreme cold lowers a battery's effective voltage, increasing the likelihood of voltage-related communication codes on startup. Wiring insulation becomes brittle and cracks.
- Water Intrusion: Heavy rain exploits clogged sunroof drains or bad windshield seals. Water drips directly onto the BCM, causing immediate failure or long-term corrosion.
How to Talk to a Mechanic About This Code
Say this: "I have a U1700 communication code and need a diagnostic appointment. Please start by checking the battery, grounds, and performing a full network scan to see which modules are offline before recommending any part replacements."
This directs the shop to follow a logical diagnostic process and prevents them from incorrectly replacing the module that merely reported the code.
Avoid saying:
- 'Just fix whatever's wrong'
- 'My check engine light is on, can you look at it?'
- 'My scanner says U1700, so just replace the BCM'
Questions to ask before authorizing the repair:
- Which specific module was not communicating with your scan tool?
- Did you load-test the battery and inspect the main power and ground connections?
- What specific tests did you perform to condemn the old module?
- Does the replacement module require programming, and is that cost included in the quote?
Where to Take It: Dealer vs Independent vs Chain
- Dealer:
Recommended for software updates or complex late-model vehicles requiring OEM programming.
Best for: Vehicles under warranty, Late-model vehicles with known software bugs, Complex repairs requiring manufacturer-specific programming tools
Downsides: Highest labor rates, Inclined to replace entire assemblies rather than perform wiring repairs (Typical cost: +50% vs. baseline) - Independent Shop:
Best overall fit if you find an ASE-certified shop specializing in electrical diagnostics.
Best for: Out-of-warranty vehicles, Diagnosing common electrical faults like bad grounds or wiring damage
Downsides: Quality varies widely, May lack the latest OEM-specific programming tools (Typical cost: +0% vs. baseline) - Chain Shop:
Avoid for diagnosis. They are not equipped to handle a U1700 network fault.
Best for: Simple jobs like battery replacement
Downsides: Technicians lack training for complex network diagnostics, Business model focuses on high-volume, simple repairs (Typical cost: -10% vs. baseline)
When to Walk Away From the Repair
If the estimated repair cost for a major fault exceeds 40% of the car's private-party value, sell or trade in the vehicle.
- Car worth $4000, fix is $1800: Walk away. The repair cost is too high relative to the car's value.
- Car worth $15000, fix is $300: Fix it. This is a minor cost for a software update.
- Car worth $8000, fix is $1200: Borderline. Get a second opinion before proceeding.
What Scan Tool You Need for This Code
Minimum: A scanner that performs a full system network scan to show which modules are communicating and which are offline.
A basic code reader only shows the U1700 code stored in the engine computer. It cannot tell you that the BCM or Instrument Cluster is offline.
Budget: BlueDriver Pro (~$100) — Connects to a smartphone app and performs a full system scan to read codes from all modules.
Mid-range: Foxwell NT510 Elite / AlfaOBD (~$150-250) — Offers manufacturer-specific diagnostics. AlfaOBD performs a 'Proxy Alignment' needed after replacing a module on FCA vehicles.
Professional: Autel MaxiCOM MK808S (~$400-1200) — Provides full bidirectional control, all-system scans, and built-in service functions like Proxy Alignment.
Rent vs buy: Invest in at least a budget-level tool with all-system scan capability if you plan to diagnose it yourself. Free loaner tools are often too basic.
How to Clear the Code After You Fix It
- Ensure the root cause has been fixed.
- Reconnect the battery if it was disconnected.
- Use an OBD-II scan tool to erase the U1700 code from all modules.
- Perform a complete drive cycle to allow readiness monitors to run.
Drive cycle (~30 minutes): A generic drive cycle includes a cold start, 3 minutes of idling with electrical loads on, followed by 15 minutes of mixed city/highway driving.
Readiness monitors affected: Clearing codes resets ALL monitors, so they must be re-run before an emissions test.
Before emissions retest: drive at least 100 miles to fully set monitors.
Watch out for:
- Disconnecting the battery clears the code but resets all readiness monitors, leading to an emissions test failure.
- The code returns immediately if the underlying hardware fault remains.
- Basic code readers leave the U-code active in modules like the BCM.
Will This Fail Emissions / State Inspection?
Yes — this code typically fails an OBD-II emissions inspection.
- California: An illuminated Check Engine Light results in an automatic failure. Clearing the code resets readiness monitors, causing a 'Not Ready' failure.
- New York: A U1700 code with the Check Engine Light on is an automatic failure during the OBD-II check.
- Texas: An illuminated Check Engine Light is an automatic failure. Readiness monitors must be set to 'Ready' to pass.
Most Commonly Affected Vehicles
- Alfa Romeo Stelvio, Giulia (2018-2020) — A known software bug triggers U1700-87, disabling the DNA drive selector. TSBs direct dealers to perform a software update on the Drive Style Control Module (DSCM).
- Chevrolet Cruze (2011-2016) — Water intrusion from clogged drains or bad seals drips onto the Body Control Module (BCM), causing corrosion and network failure.
- Dodge Ram, Grand Caravan (2010-2018) — U1700 is a primary symptom of a failing Totally Integrated Power Module (TIPM). TIPM failure causes bizarre electrical issues identical to a faulty BCM.
- Fiat Stilo, 500 (2001-2015) — Prone to bad ground connections and BCM faults causing dead instrument clusters. The code has varied meanings depending on the specific sub-code.
- Ford Ka, Escape, Explorer (2008-2016) — Indicates a communication loss with the electronic power steering (EPAS) system. Failure of the torque position sensor within the steering column is common.
- Jeep Grand Cherokee, Gladiator (2010-2023) — U1700 points to specific circuit faults like a shift solenoid or DRL lamp, or serves as a symptom of TIPM failure.
- Nissan Rogue (2008-2015) — Often caused by a poor ground connection on the transmission or under the battery tray, or a faulty IPDM.
- Volkswagen Golf (MkV) (2004-2009) — Susceptible to intermittent CAN bus faults caused by water ingress into wiring harnesses or aftermarket infotainment systems.
Manufacturer-Specific Notes
- Fiat / Alfa Romeo (FCA): U1700 flags a communication break with the BCM. On 2018-2020 models, TSBs specify software updates to fix this code rather than hardware replacement.
- Dodge / Chrysler / Jeep (FCA): U1700 is highly variable and often serves as an early warning sign of a failing Totally Integrated Power Module (TIPM).
- Ford: U1700 links to a loss of communication with the electronic power steering module, frequently requiring steering column replacement.
- General Motors (GM): Communication codes trace back to a faulty Body Control Module (BCM) caused by water intrusion in the passenger footwell.
- Nissan: Nissan warns technicians not to replace the module logging the code, as the fault is almost always an external bad ground or wiring issue.
Real Owner Stories
2001 Fiat Stilo 1.6L with intermittent no-start and dead gauges.
Turning the key resulted in a dashboard full of warning lights, dead gauges, and a no-start condition. After waiting several minutes, everything started working again.
What they tried:
- Checked for water intrusion in the BCM.
- Had the BCM tested by a specialist.
- Replaced the fuse box assembly.
- Checked and cleaned main ground connections.
Outcome: The root cause was a poor ground connection specifically for the BCM. Once the BCM ground was secured, the U1700 code and all symptoms resolved.
Lesson: A total loss of multiple electrical systems points strongly to a BCM power or ground failure. The BCM acts as a gateway; if it loses power, the entire network collapses.
2019 Alfa Romeo Stelvio with 'DNA' drive mode selector stuck.
The Check Engine Light illuminated and the 'DNA' drive mode selector locked into 'Natural' mode. A scan revealed code U1700-87.
What they tried:
- Suspected a major hardware failure.
- Considered replacing the battery or the DNA rotary switch assembly.
Outcome: The issue was resolved by a dealer software update. Alfa Romeo TSB #08-022-21 directs technicians to reprogram the Drive Style Control Module (DSCM) to fix this bug.
Lesson: Always check for TSBs related to your specific code before authorizing hardware replacements. A simple software update often fixes the issue.
2006 Fiat Grande Punto 1.4L with U1700 after installing a used instrument cluster.
The owner replaced a broken instrument cluster with a used one. After installation, the speedometer failed, and codes U1700 and U1701 appeared.
What they tried:
- Took the car to a dealer.
- Performed a 'Proxy Alignment' procedure to synchronize the new module.
Outcome: The used instrument cluster was incompatible with the vehicle's BCM. The mismatch prevented the network from recognizing the part. The only solution was an exact-match cluster.
Lesson: When replacing control modules, the part number must be an exact match. An incompatible part causes communication codes that a Proxy Alignment cannot fix.
How to Prevent This Code From Triggering
- Perform regular battery health checks and keep terminals clean (Every 6 months) — Low voltage causes modules to fail initialization. Clean terminals ensure stable voltage delivery.
- Inspect and clean major ground connections (Every 1-2 years) — Corrosion creates resistance, causing voltage drops that destabilize the electrical system.
- Apply dielectric grease to important electrical connectors (When a connector is disconnected for service) — Dielectric grease seals out moisture and oxygen, preventing corrosion on connector pins.
- Keep sunroof drains and cowl drains clear of debris (Annually) — Clogged drains cause water to leak into the cabin and drip onto sensitive electronics like the BCM.
- Avoid using high-pressure washers directly on engine bay components (Every time the engine bay is cleaned) — High-pressure water forces past weather seals, introducing moisture that leads to short circuits.
Frequently Asked Questions
Can a bad battery really cause a U1700 code?
Yes. A weak battery is the most common cause of U1700. Modern modules require stable voltage above 12.4V to communicate properly.
What are the most common mistakes when diagnosing a U1700 code?
The biggest mistake is replacing the module that stored the code, as it is usually the one reporting the problem, not causing it. Always use a full-system scanner to find the truly offline module. Never skip testing the battery and cleaning grounds first.
Can aftermarket parts like a remote starter cause a U1700 code?
Yes. Improperly installed remote starters, alarms, or stereos frequently disrupt the CAN bus. If these devices splice into network wiring incorrectly, they corrupt signals and trigger U-codes.
What is a 'Proxy Alignment' and when is it needed?
A Proxy Alignment is an FCA-specific diagnostic procedure that synchronizes all modules with the Body Control Module (BCM). It is required after replacing a major control module to ensure the network recognizes the new part. A flashing odometer indicates this procedure is needed.
Is it safe to clear the U1700 code?
You can clear the code, but it returns if the underlying hardware or software fault remains. Clearing it also erases freeze-frame data needed for professional diagnosis. Only clear the code after performing a repair or hard reset.
My scanner says U1700 but gives no other information. What do I do?
Basic code readers only pull data from the engine computer. You need an advanced scanner capable of a 'network scan' to see which specific module is offline. This context is mandatory for diagnosing a U1700 code.
My car has a U1700 and a U1701 code. What does that mean?
Seeing U1700 and U1701 together indicates a network-wide failure rather than a single faulty part. This pattern points to a fault in the main CAN bus wiring, a bad ground, or a failing gateway module. Diagnosis must focus on the main network infrastructure.
Can I fix a U1700 code myself?
You can perform basic fixes like charging the battery or cleaning grounds yourself. Diagnosing broken CAN wires or programming a new module requires professional tools. Take the vehicle to a shop if the battery and grounds test fine.
Key Takeaways
- Test your battery first; a voltage drop below 12.4V is the number one cause of U1700 communication failures.
- Clean the main engine and chassis ground straps before replacing any parts, as corrosion here disrupts the entire CAN bus network.
- Use a full-system OBD-II scanner to identify exactly which module is offline, rather than blindly replacing the module that triggered the code.
- Check the passenger footwell and BCM for water intrusion, a primary cause of U1700 on GM and FCA vehicles.
- Expect to pay $150 to $300 for a dealer software update if you drive a 2018-2020 Alfa Romeo or Fiat, as this code is often a known software bug.
Helpful Videos
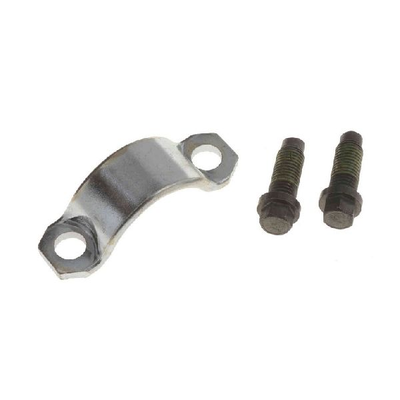
Shop the Parts Behind U1700
Below are the parts most often responsible for code U1700, ranked by how frequently each one is the actual culprit (per the diagnosis above). Tap any to see what we have for your vehicle.


The information in this article is provided for general reference and educational purposes only. Vehicle specifications, procedures, and part compatibility can vary by production date, trim level, and region. Always consult your vehicle's factory service manual and verify part numbers before purchasing or performing repairs. Safety-critical components such as airbags, seat belts, and braking systems should be installed by a qualified professional.
- 🧭 Diagnostic Flowchart
- 🎬 Helpful Videos
- 🛍️ Shop This Part
- What Does U1700 Mean?
- Can I Drive With U1700?
- Common Causes
- Symptoms
- Common Fixes & Costs
- Used vs. New Parts: Buying Guide
- What Happens If You Wait — Timeline
- Cost of Not Fixing It
- Diagnosis Steps
- When This Code Triggers (Freeze-Frame Conditions)
- Related Codes
- Climate & Environmental Factors
- How to Talk to a Mechanic About This Code
- Where to Take It: Dealer vs Independent vs Chain
- When to Walk Away From the Repair
- What Scan Tool You Need for This Code
- How to Clear the Code After You Fix It
- Will This Fail Emissions / State Inspection?
- Most Commonly Affected Vehicles
- Manufacturer-Specific Notes
- Real Owner Stories
- 2001 Fiat Stilo 1.6L with intermittent no-start and dead gauges.
- 2019 Alfa Romeo Stelvio with 'DNA' drive mode selector stuck.
- 2006 Fiat Grande Punto 1.4L with U1700 after installing a used instrument cluster.
- How to Prevent This Code From Triggering
- Frequently Asked Questions
- Can a bad battery really cause a U1700 code?
- What are the most common mistakes when diagnosing a U1700 code?
- Can aftermarket parts like a remote starter cause a U1700 code?
- What is a 'Proxy Alignment' and when is it needed?
- Is it safe to clear the U1700 code?
- My scanner says U1700 but gives no other information. What do I do?
- My car has a U1700 and a U1701 code. What does that mean?
- Can I fix a U1700 code myself?
- Key Takeaways
- 🎟️ Get 5% Off