
U1710 on 2014-2018 Ram ProMaster: HVAC Communication Fault Causes & Fixes
On a 2014-2018 Ram ProMaster, code U1710 almost always points to a software glitch in the HVAC control module. The most common and effective fix is having a dealer reprogram the module with updated software, as outlined in manufacturer technical service bulletins. If that fails, the HVAC control module itself likely needs replacement, followed by a mandatory 'PROXI alignment' procedure.
- Code U1710 means your ProMaster's climate controls have stopped communicating with the vehicle's main computer.
- The most common cause is a software bug. Before replacing any parts, have a dealer check if a software update (TSB 08-231-22 or 24-005-19) is available.
- Driving is safe, but you will likely not have control over your A/C, heat, or defrost functions.
- If a software update doesn't fix it, the HVAC control module (the dash unit with the knobs) likely needs to be replaced and programmed.
- This is not a typical DIY repair due to the need for dealer-specific software for both diagnosis and repair.
What's Unique About the 2014-2018 Ram PROMASTER

The Ram ProMaster, based on the Fiat Ducato, is known for having sensitive electronics. For this specific code, FCA (the parent company of Ram) has issued multiple Technical Service Bulletins (TSBs) over the years. This strongly indicates that the problem is a known software issue from the factory, rather than a widespread hardware failure. Unlike many vehicles where a communication code might point to a bad wire or module, the first step for a ProMaster is almost always to check if the software has been updated. Furthermore, replacing modules on this Fiat-based platform requires a 'PROXI alignment' procedure to make the new module 'talk' to the other computers in the vehicle, a step not common on all domestic trucks.
Diagnostic Flowchart
Tap your situation to follow the diagnostic path that matches what you're seeing on this vehicle.
Symptoms You May Notice

- Check Engine Light (Malfunction Indicator Lamp) is on.
- HVAC controls (fan speed, temperature, mode) are inoperative and not lit up.
- A/C or heater does not work.
- Rear defrost/heated mirror indicator light does not turn on (specifically noted for 2014 models).
- Fans are not blowing any air.
- Replacing the blower motor or blower motor resistor. These parts control the fan speed but do not typically cause a U-series communication code. A failure here would usually result in a B-series code or simply a non-working fan.
Most Likely Causes

- Outdated HVAC Module Software 🔴 High Probability Manufacturer has released multiple TSBs (08-231-22, 24-005-19) to address this exact issue, indicating it's a known software bug from the factory.
How to confirm: A Ram dealer or a shop with a wiTECH scan tool can check the current software version of the HVAC module against the latest available version specified in the TSBs.
Typical fix: Reprogramming (flashing) the HVAC control module with the latest software. TSB 08-231-22 also notes that the BCM software must be updated at the same time. The procedure takes approximately 0.3 labor hours under warranty.
Est. part cost: $0 - Faulty HVAC Control Module 🟡 Medium Probability → Shop HVAC Control If a software update doesn't resolve the issue, the internal electronics of the control module (the unit with the knobs on the dash) may have failed. This is the next most likely point of failure.
How to confirm: After confirming software is up to date and all wiring is intact, a diagnostic scan tool may show the module is unresponsive. If the module has power and ground but does not communicate on the CAN bus, it is condemned.
Typical fix: Replacement of the HVAC control module, followed by a 'PROXI alignment' procedure with a dealer scan tool to register the new module with the BCM.
Est. part cost: $150-$350 - Wiring or Connector Issue ⚪ Low Probability Vibrations and dash work can potentially loosen the single electrical connector on the back of the HVAC control module. On the related Fiat Ducato platform, corrosion and broken wires at sensor plugs are also a known cause of HVAC issues.
How to confirm: Visually inspect the connector on the back of the HVAC control unit to ensure it is fully seated. Check for any damage to the wiring harness leading to the module.
Typical fix: Reseating the connector or repairing the damaged section of the wiring harness.
Est. part cost: $0-$50 - Low Battery Voltage ⚪ Low Probability Like many modern vehicles with complex networks, low system voltage during startup can cause random communication codes as modules fail to initialize properly. The ProMaster's battery is located under the driver's side floor, and jump-start posts are located under the hood.
How to confirm: Test the battery voltage with a multimeter. A healthy, resting battery should be at or above 12.4 volts. Check for voltage drops during engine cranking. The battery is located under a panel in the driver's side floor.
Typical fix: Charge or replace the weak battery. After replacement, ensure all codes are cleared.
Est. part cost: $150-$300
Rare But Worth Checking
- Faulty Body Control Module (BCM): → Shop Body Control Module While rare, a failing BCM can cause a multitude of communication issues across the vehicle, including with the HVAC system. This would typically be accompanied by many other fault codes and a flashing odometer, indicating a general PROXI configuration problem.
- Damaged Fuse/Relay Box Terminals: One repair shop found that after replacing an HVAC module, the blower still didn't work. The cause was traced to missing internal pins inside the fuse/relay box, likely from a previous improper diagnostic attempt. This is an unusual scenario but highlights the need for careful diagnosis.
Diagnosis Steps
- Check for Technical Service Bulletins (TSBs). This is the most important first step. TSBs 08-231-22 and 24-005-19 directly address this code for vehicles built on or before Feb 7, 2019.
- Verify Battery Health. Ensure the battery voltage is above 12.4V and that it maintains good voltage during cranking. The battery is located under the driver's floor panel.
- Scan for All Codes. Use a quality OBD-II scanner that can read manufacturer-specific codes from all modules (BCM, HVAC, etc.). Note any other communication or configuration codes, like B10AA-4A.
- Check HVAC Functionality. Test all knobs and buttons on the climate control panel. Note if they are illuminated and what, if anything, works.
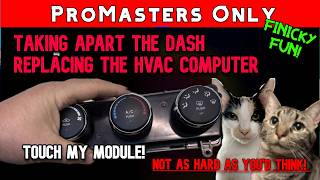
- Inspect HVAC Module Connector. Access the rear of the HVAC control unit in the dash and ensure the main electrical connector is secure 🎬 Watch: How to remove the dash to access HVAC controls and free of corrosion.
- Consult a Dealer for Software Update. If the above steps don't resolve the issue, the next logical step is to have a dealer perform the HVAC and BCM module software updates as per TSB 08-231-22.
- Perform Post-Flash Procedures. The TSB specifies that after the flash, the technician must clear all DTCs, restore configuration, and align PROXI. For 2014 models, an 'Actuator Calibration Test' must also be run.
- Diagnose the Module. If the software flash does not work, the dealer or an equipped independent shop will need to test for power, ground, and CAN bus signals at the module to determine if the module itself has failed.
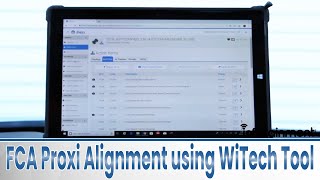
- Perform PROXI Alignment After Replacement. If a new HVAC module is installed, it will not function until a PROXI alignment is performed with a wiTECH tool to introduce the new module to the vehicle network.
Parts You'll Likely Need
- HVAC Control Module
(OEM #5NC24DX9AF, P5NC23DX9AF, 5NC23DX9AE)— This is the part that fails if a software update does not resolve the communication issue. It is the entire control head with the knobs and internal circuit board.
Trusted brands: Mopar
OEM price range: $250-$400
Aftermarket price range: $150-$250
Related Codes That Often Appear With This One
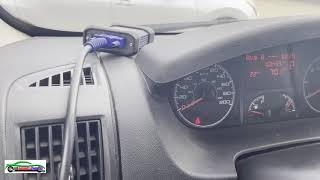
- B10AA-4A — This code for 'Check Configuration Failed, Incorrect Component Installed' can appear alongside U1710, especially if the HVAC module has been replaced without the proper PROXI alignment procedure. A flashing odometer is a key symptom 🎬 Watch: How to fix a blinking odometer on your ProMaster of this condition.
Technical Service Bulletins (TSBs) & Recalls
- 08-231-22: Flash: Heating, Ventilation and Air Conditioning (HVAC) Module Updates.
- 24-005-19: Flash: Heating, Ventilation and Air Conditioning (HVAC) Module Updates.
Platform-Specific Known Issues
- TSB #08-231-22 and #24-005-19: These bulletins from FCA explicitly state that U1710-86 and U1710-87 can be caused by a software issue. The prescribed fix is to reprogram the HVAC control module and the BCM with the latest software using the wiTECH diagnostic tool. The TSBs also note this can fix inoperative controls, especially after a BCM replacement.
- PROXI Alignment Requirement: A flashing odometer after replacing any electronic module (including the HVAC controller) is a tell-tale sign on Fiat-based platforms that a PROXI alignment is needed. This procedure synchronizes the configuration data from the BCM to all other modules on the CAN network.
Mechanic-Grade Diagnostic Values
- CAN Bus Voltage (Key On, Engine Off) — expected: CAN High (CAN+): ~2.5-3.5V. CAN Low (CAN-): ~1.5-2.5V. The two voltages should mirror each other around a 2.5V center point.. Failure: A wire shorted to ground will read 0V. A wire shorted to power will read 5V or 12V. If both wires read the same voltage, they may be shorted together.
- System Voltage During Flash Procedure — expected: Must be maintained between 13.2 and 13.5 volts.. Failure: Voltage dropping below 13.2V or climbing above 13.5V can cause the reprogramming to fail.
- HVAC Module Power and Ground — expected: With the key on, a test light should illuminate brightly when connected between the Fused B(+) circuit and ground, and between the Fused Ignition Switch Output circuit and ground. The test light should also illuminate brightly when connected between the Ground circuit and a known good 12V source.. Failure: If the test light does not illuminate, it indicates an open or short in the respective power or ground circuit.
Hidden / Shadow Codes Worth Checking
- U1710-86: Implausible Data Received From HVAC. This indicates the BCM is receiving data from the HVAC module that doesn't make sense or is corrupted. (see via A manufacturer-level scan tool like wiTECH. A basic OBD-II reader may only show U1710.)
- U1710-87: ACM (Automatic Climate Module) On B CAN - Missing Message. This indicates the BCM is not receiving any signal from the HVAC module at all. (see via A manufacturer-level scan tool like wiTECH. A basic OBD-II reader may only show U1710.)
Scan Tool Commands That Help
- wiTECH: Proxi Configuration Alignment — This is mandatory after replacing the HVAC module, BCM, or almost any other module on the vehicle's CAN network. It synchronizes the new part with the vehicle's configuration stored in the BCM. Failure to perform this will result in a flashing odometer and persistent communication codes.
- wiTECH: Actuator Calibration Test — This procedure is specifically required for 2014 models after performing the software flash outlined in TSB 08-231-22. It should also be run if blend door actuators have been replaced to allow the module to learn the door travel limits.
- wiTECH or high-level aftermarket scanner: HVAC Actuator Bidirectional Control — To test individual blend door or mode door actuators without physical removal. A technician can command an actuator to move to a specific position (e.g., 0% to 100%) and visually confirm its operation, helping to distinguish between a bad actuator, a wiring problem, or a control module issue.
Wiring & Ground Locations
- Main Chassis/Engine Ground — A primary ground strap connects the engine/transmission assembly to the chassis frame, often near the starter or on the bell housing.. A poor main ground can cause widespread, intermittent electrical issues and communication codes across multiple modules. Some owners have added a supplementary ground cable from the engine block to the frame to improve electrical stability.
- Interior Ground Points (e.g., G233) — Common interior ground points are located on the A-pillars, behind the kick panels on both the driver and passenger sides.. The HVAC control module and BCM rely on a clean ground connection. A corroded or loose ground point in the dash area can directly cause a loss of communication for the HVAC module.
- CAN Bus Connector — On the related ProMaster City, a recall (16V-202) was issued for a CAN-C bus communication connector that was susceptible to moisture and corrosion. While not the same vehicle, this highlights the potential for connector issues on the ProMaster platform.. Corrosion in any of the main CAN bus junction connectors can interrupt communication between modules, leading to codes like U1710.
Real Owner Repair Stories
- YouTube channel 'Quick Automotive Diagnostics' (2014 Dodge ProMaster 3.6L) — Flashing odometer after a garage replaced the airbag module.
❌ Tried (didn't work) The original garage replaced the airbag module but could not resolve the flashing odometer.
✅ What actually fixed it The technician used a diagnostic scan tool to access the Body Control Module (BCM), which showed an active code for 'Check Configuration Failed, Incorrect Component Installed'. He then ran the 'Proxy Alignment' special function. The procedure successfully configured the new airbag module to the BCM, and the odometer stopped flashing immediately.
Model Year Variations Within This Range
- 2014 only: TSB #24-005-19 and #08-231-22 specifically require an 'Actuator Calibration Test' to be run using wiTECH after the software flash is completed on 2014 models. This step is not required for 2015-2018 models.
- 2014-2016: Earlier model years of the ProMaster are generally reported by owners to have more 'teething troubles' and potential reliability issues compared to later models as factory updates and revisions were implemented.
- 2018: For the 2018 model year, the Uconnect 5.0 system became standard, along with steering wheel audio controls. This change in the infotainment module, which communicates on the CAN bus, can alter diagnostic procedures compared to earlier years with different radio head units.
Helpful Videos


The information in this article is provided for general reference and educational purposes only. Vehicle specifications, procedures, and part compatibility can vary by production date, trim level, and region. Always consult your vehicle's factory service manual and verify part numbers before purchasing or performing repairs. Safety-critical components such as airbags, seat belts, and braking systems should be installed by a qualified professional.
- Ram PROMASTER:
- 🧭 Diagnostic Flowchart
- 🎬 Helpful Videos
- What's Unique About the 2014-2018 Ram PROMASTER
- Symptoms You May Notice
- Most Likely Causes
- Rare But Worth Checking
- Diagnosis Steps
- Parts You'll Likely Need
- Related Codes That Often Appear With This One
- Technical Service Bulletins (TSBs) & Recalls
- Platform-Specific Known Issues
- Mechanic-Grade Diagnostic Values
- Hidden / Shadow Codes Worth Checking
- Scan Tool Commands That Help
- Wiring & Ground Locations
- Real Owner Repair Stories
- Model Year Variations Within This Range
- 🎟️ Get 5% Off