
OBD-II Code U1821: Lost Communication on Data Network
What U1821 means, why it triggers, and how to fix it
- Code U1821 indicates a CAN bus network failure where a specific computer module, such as the ABS or Accessory Power Module (APM), stops communicating with the rest of the vehicle.
- Do not drive with an active U1821 code, as it frequently causes a sudden loss of power steering or a complete engine stall if the 12V charging system fails.
- Always test the 12V battery first; a voltage drop below 12.2V during startup is the leading cause of modules failing their initial network handshake.
- Diagnosing this fault requires measuring the CAN bus resistance at the OBD-II port, looking for a target reading of exactly 60 ohms to confirm network integrity.
- Before spending $800 to $1,200 on a new ABS or Body Control Module, use a $150 to $300 mail-in rebuild service to repair cracked internal solder joints and avoid expensive dealer programming.
What Does U1821 Mean?
Code U1821 means one of your car's computers (modules) stopped talking to the others. Your car uses a network called the CAN bus to exchange information. This code triggers when a specific module fails to send or receive expected messages on that network.
Technical definition: The SAE defines U-codes as Network Communication faults. U1821 specifically means 'Lost Communication With [Specific Module] on Bus B'. For example, on GM hybrids, it means 'Lost Communication With DC to DC Converter Control Module A on Bus B'. This indicates a secondary data bus lost communication with a key module. The network relies on two wires, CAN High and CAN Low, and measuring their circuit integrity is critical for diagnosis.
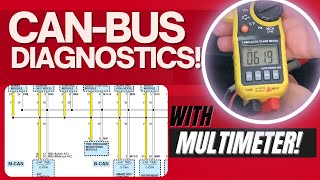
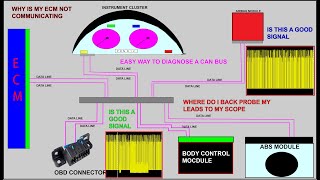
🎬 Watch: How to test CAN bus resistance and voltage with a multimeter.Can I Drive With U1821?
No — Do Not Drive. Do not drive. The offline module controls critical systems like power steering or battery charging, which fail unexpectedly. On GM hybrids, this code directly links to a loss of power steering assist. If the non-communicating module charges the 12V battery (like an APM), the battery drains while driving, causing the vehicle to stall completely. This adds the cost of a tow ($100-$300) and a new battery ($200-$400) to the final repair.
Common Causes
- Weak or Failing 12V Battery (Very Common) — Low battery voltage is the leading cause of communication codes. Modern computer modules require a stable power supply above 12.2 volts to boot up and communicate correctly during the initial key-on handshake.
- Damaged Wiring or Corroded Connectors (Common) — The CAN bus network relies on physical wires. A broken, chafed, or shorted wire, or a connector corroded by moisture ingress, interrupts the data signal and causes an immediate communication loss.
- Poor Ground Connection (Common) — Every electrical component needs a solid ground connection to complete its circuit. A loose, rusty, or broken ground strap for a specific module causes it to malfunction and drop off the network.
- Internal Module Failure (Common) — The offline module (like the BCM, APM, or ABS controller) has failed internally. Constant exposure to engine heat and vibration causes microscopic cracks in the circuit board's solder joints, leading to intermittent communication loss that worsens as the module heats up.
- Blown Fuse (Less Common) — A blown fuse cuts power to a control module entirely, preventing it from turning on and communicating with the rest of the vehicle's network.
- Aftermarket Device Interference (Less Common) — Improperly installed aftermarket accessories like remote starters or alarms interfere with the CAN bus network. Tapping into the wrong wires corrupts data signals and triggers communication codes.
- Software Glitch / Corrupted Data (Less Common) — A software issue within a module causes it to stop communicating correctly. A dealer-level software update or reflash of the module is required to solve the problem.
Symptoms
- Check Engine Light and Warning Lights — The Check Engine Light illuminates immediately. You will also see warnings for ABS, traction control, power steering, or 'Service Hybrid System'.
- Loss of Electrical Features — Functions controlled by the offline module stop working. This includes power steering, power windows, radio, climate control, or central locking.
- Vehicle Won't Start or Stalls — If the communication failure involves a critical module like the powertrain, body control, or fuel system computer, the engine fails to start or shuts off while driving.
- 'Reduced Engine Power' Message — The vehicle enters a 'limp mode' to protect the engine and drivetrain, displaying a message about reduced power and severely limiting acceleration.
- Erratic Gauge Behavior or Warning Chimes — The instrument cluster behaves erratically, with gauges sweeping, warning lights flashing, or random chimes sounding due to corrupted data on the network.
Diagnostic Flowchart
Tap your situation to follow the diagnostic path that matches what you're seeing on this code.
Common Fixes & Costs
- Diagnose CAN Bus Fault — Parts: $0, Labor: $150-$300 (Diagnostic Fee), ~1.5 hr book time (Professional)
- Repair/Rebuild ABS Control Module — Parts: $150-$350 (Mail-in Service), Labor: $150-$300 (Removal & Reinstallation), ~1.5 hr book time (Intermediate)
- Replace Accessory Power Module (APM) — Parts: $200-$2200 (Used vs. New OEM), Labor: $150-$300, ~1.5 hr book time (Professional)
- Replace Body Control Module (BCM) — Parts: $150-$600, Labor: $150-$400 (Includes Programming), ~2 hr book time (Professional)
- Replace ABS Control Module (New) — Parts: $800-$1200, Labor: $200-$400 (Includes Programming & Bleeding), ~2.5 hr book time (Professional)
- Repair Wiring Harness — Parts: $20-$100, Labor: $200-$800, ~4 hr book time (Intermediate)
DIY vs Professional
- Replace Accessory Power Module (APM) — Beginner: No
Tools: Basic hand tools, multimeter, scan tool to initialize. - Repair/Rebuild ABS Control Module — Beginner: Yes (Removal/Reinstallation only)
Tools: Socket set, wrenches, Torx bits. - Replace Body Control Module (BCM) — Beginner: No
Tools: Basic hand tools, OEM-level scan tool, software subscription. - Repair Wiring Harness — Beginner: No
Tools: Multimeter, wiring diagrams, wire strippers, soldering iron, heat shrink.
Used vs. New Parts: Buying Guide
When a used part is worth it: For older vehicles where a new OEM module is a significant percentage of the car's value. A used module from a reputable salvage yard is cost-effective for common parts like ABS modules or BCMs.
Donor-vehicle mileage cap: roughly under 100000 miles for the part to have meaningful remaining life.
Donor quality checklist:
- Match the part number exactly. Internal hardware and software differ by model year or trim level.
- Inquire about the donor vehicle's reason for being salvaged (accident damage is better than electrical failure).
- Inspect connectors for any signs of corrosion, bent pins, or water damage.
Decision logic:
- If The original module can be rebuilt (e.g., common ABS module failure) → Choose rebuilding. It is cost-effective and avoids VIN programming issues.
- If Part requires complex VIN and security programming (e.g., BCM, immobilizer) → Favor a new OEM part installed by a dealer, or use a 'cloning' service for a used part.
- If Vehicle is >12 years old and budget is the primary concern → A used part is a reasonable risk, provided you handle potential programming needs.
Warranty tradeoff: Used parts typically come with a 30-90 day warranty covering the part but not labor. Aftermarket new parts have a 1-year to limited lifetime warranty. OEM parts installed by a dealer carry the manufacturer's parts and labor warranty.
Worst-case if a used part fails: $500-$1500 if a used or improperly programmed module fails. This includes repeat labor, towing, and sourcing another replacement part.
What Happens If You Wait — Timeline
- 0-1 month: Intermittent fault. A warning light flashes briefly during startup on a very cold or damp day, then disappears. Code U1821 is stored in history. No persistent drivability issues. (MPG impact: 0%% · Added cost: $0)
- 1-3 months: Fault becomes frequent. Warning lights stay on for an entire drive cycle but reset overnight. A feature like power steering is missing at startup but returns after restarting. The 12V battery weakens from incomplete charging. (MPG impact: 0-1%% · Added cost: $0-$50 (Increased wear on 12V battery))
- 3-6 months: Hard failure. The loss of power steering becomes permanent, or the ABS system is disabled constantly. The vehicle intermittently fails to start. The risk of being stranded increases significantly. (MPG impact: 0-2%% · Added cost: $100-$300 (Potential towing cost))
- 6+ months: Cascading failure. Driving with a dead 12V charging system causes the vehicle to stall in traffic. A constantly failing BCM sends corrupt data that damages other modules. The vehicle is unsafe to drive. (MPG impact: N/A (Vehicle may not be drivable)% · Added cost: $500-$2500+ (Towing, new battery, plus the cost of a potentially damaged second module))
Cost of Not Fixing It
- Immediate: Sudden loss of power steering or vehicle stalling while driving, creating a major safety hazard. (Added cost: $300-$700 (Tow + new battery if charging system fails))
- 1-3 months: Continued intermittent electrical problems. Inability to start the vehicle, potentially leaving you stranded. Failure of an emissions test. (Added cost: $100-$300 (Towing costs))
- 3+ months: Cascading failures. A faulty module sends bad data that damages other connected modules on the network. A dead battery from a failed charging module shortens the battery's life. (Added cost: $500-$2500+ (Cost of additional damaged modules + diagnostics))
Diagnosis Steps
- Read All Trouble Codes
Use an advanced OBD-II scanner capable of reading codes from all modules (Engine, Body, Chassis, Network). Note all 'U' codes and identify exactly which modules report 'no communication'.
Tools: Advanced OBD-II Scanner (Beginner) - Check the 12V Battery and Charging System
Ensure the battery is fully charged (above 12.4V with engine off) and the charging system works correctly (13.7V-14.7V when running). Perform a load test on the battery, even if it shows good resting voltage.
Tools: Multimeter, Battery Load Tester (Beginner) - Inspect Fuses
Check all fuse boxes for blown fuses. Pay close attention to fuses labeled BCM, ECM, APM, ABS, or anything related to control modules.
Tools: Fuse puller, test light or multimeter (Beginner) - Perform a Visual Inspection
Inspect wiring harnesses for breaks, rodent damage, or melting. Check module connectors for green or white corrosion, especially in areas prone to water intrusion. Verify the main ground straps from the battery to the chassis and engine are tight and clean.
Tools: Flashlight (Intermediate) - Test the CAN Bus Wires for Resistance
With the battery disconnected, measure the resistance between CAN High and CAN Low at the DLC (pins 6 and 14). A healthy network shows exactly 60 ohms. A reading of 120 ohms indicates an open circuit; near 0 ohms indicates a short.
Tools: Multimeter (Intermediate) - Test for Power and Ground at the Module
Using a wiring diagram, locate the offline module. Unplug it and use a multimeter to verify it receives battery voltage and has a solid ground connection at the correct pins.
Tools: Multimeter, vehicle-specific wiring diagram (Advanced) - Perform a Voltage Drop Test on Power and Ground
Test the ground circuit by connecting the multimeter's positive lead to the battery negative and the negative lead to the module's ground pin (system on). A reading above 0.1V indicates a poor ground. Total system voltage loss must not exceed 0.5V.
Tools: Multimeter, vehicle-specific wiring diagram (Advanced) - Test CAN Lines to Ground
With the battery disconnected, measure resistance from CAN High (DLC Pin 6) to chassis ground, then CAN Low (DLC Pin 14) to ground. The reading must be in the mega-ohms (MΩ) or open circuit (OL). Low resistance indicates a short to ground.
Tools: Multimeter (Advanced) - Network Integrity 'Wiggle' Test & Pin Drag Test
With the network live and monitored by a scanner, gently wiggle wiring harnesses related to the offline module. If communication restores, you found the fault. Perform a 'pin drag' test on female terminals to ensure they grip the male pins tightly.
Tools: Advanced OBD-II Scanner, Terminal Test Kit (Advanced) - Oscilloscope CAN Bus Signal Analysis
Connect an oscilloscope to the CAN High and Low wires. A healthy signal shows a mirror-image square wave pattern. Any distortion, noise, or flat-lining pinpoints specific network problems (short to ground, short to power, open circuit) that a multimeter misses.
Tools: Automotive Oscilloscope (Professional)
When This Code Triggers (Freeze-Frame Conditions)
- Module Voltage: 10.5-12.0V (During startup or high electrical load)
- Engine State: N/A (Often occurs at key-on, before the engine starts)
- Ambient Temperature: -11°C to -20°C (12°F to -4°F) (On some GM Hybrids, triggers at cold start)
- Time Since Start: 0-10 seconds (Fault is detected during the initial module self-test and network handshake)
Related Codes
- U182A — On GM hybrids, U182A ('Lost Communication With Battery Energy Control Module') triggers alongside U1821 when the APM fails. They point to the exact same root cause.
- U0140 — U0140 is a generic code for 'Lost Communication With Body Control Module.' U1821 is a more specific code set by a particular module indicating it lost contact with another specific module.
- U0100 — Indicates a failure on the primary high-speed network involving the main engine computer (ECM). U1821 typically relates to a secondary expansion bus. U0100 is more severe and results in an immediate stall.
- C0895 — On GM hybrids, C0895 ('Control Module Power Voltage') is stored with U1821 during an APM failure. It indicates the Power Steering Control Module detected low system voltage because the APM stopped charging.
Climate & Environmental Factors
- Extreme Cold: On 2008-2013 GM Hybrids, temperatures below 12°F (-11°C) cause the Accessory Power Module (APM) to fail initialization on startup. This triggers U1821 and leads to an immediate loss of 12V charging and power steering assist.
- High Humidity / Water Ingress: Moisture seeps into unprotected module connectors or fuse boxes located in footwells or the engine bay. This causes pin corrosion, increasing resistance and degrading the data signal until communication drops entirely.
- High Heat: Sustained high temperatures in the engine bay accelerate the degradation of electronic components. Heat cycles cause microscopic cracks in circuit board solder joints, leading to intermittent open circuits when the vehicle warms up.
How to Talk to a Mechanic About This Code
Say this: "I have a U1821 'Lost Communication' code and I'd like to schedule a diagnostic appointment. I need a technician to identify which module is offline and determine if the cause is a wiring, power/ground, or module failure. Please authorize one hour of diagnostic time to start."
This signals you understand it's a complex electrical issue requiring skilled diagnosis. It sets clear expectations, authorizes a specific starting point, and prevents a shop from immediately quoting an expensive module replacement without proper testing.
Avoid saying:
- 'My check engine light is on, can you fix it?' (Too vague, invites a high bill)
- 'I think it's the BCM, just replace it.' (Don't diagnose for the mechanic, you might be wrong and pay for it)
- 'Just do whatever it takes to fix it.' (This is a blank check for unnecessary parts and labor)
Questions to ask before authorizing the repair:
- Which specific module was not communicating?
- What were the results of the CAN bus resistance and voltage tests?
- Did you confirm the module has proper power and ground at its connector?
- Can you show me the damaged wire or explain why you believe the module has failed internally?
- If a new module is needed, does it require programming and is that included in the quote?
Where to Take It: Dealer vs Independent vs Chain
- Dealer:
A safe, but expensive, choice. Necessary if the final repair is a new module that requires online programming to the vehicle's VIN.
Best for: Vehicles under warranty, Complex repairs requiring proprietary software programming (e.g., new BCM, APM), Well-known, manufacturer-specific TSBs (like the GM cold weather APM failure)
Downsides: Highest labor rates, often 1.5-2x more than independent shops., Favors replacing an entire module assembly when a smaller component or wiring repair suffices. (Typical cost: +50% vs. baseline) - Independent Shop:
Excellent choice, IF it's a top-tier independent shop specializing in electrical work. They provide better value and more experienced diagnosticians than dealers. Ask if they use an oscilloscope.
Best for: Out-of-warranty vehicles where cost is a concern., Diagnosing wiring, ground, or connector issues., Shops that specialize in automotive electrical diagnostics.
Downsides: Quality and equipment vary widely. Must vet the shop carefully., Lacks access to the very latest manufacturer software for programming brand new modules. (Typical cost: +0% vs. baseline) - Chain Shop:
AVOID. This type of fault is far outside their area of expertise. Taking your car here for a U1821 code wastes time and money.
Best for: Simple, high-volume jobs like oil changes, tires, and brake pads.
Downsides: Technicians are not trained or equipped for complex network diagnostics., High pressure to sell parts leads to misdiagnosis and unnecessary replacement of components like the battery., Unable to fix the issue and still charges a diagnostic fee before referring you to a dealer. (Typical cost: -10% vs. baseline)
When to Walk Away From the Repair
If the estimated repair cost for the U1821 fault exceeds 40-50% of your car's private-party value (use Kelley Blue Book or Edmunds), it's time to seriously consider selling or trading it in.
- Car worth $4000, fix is $2200: Walk away. The repair cost is over 50% of the car's value. The risk of future unrelated repairs is too high on a lower-value vehicle.
- Car worth $15000, fix is $2200: Fix it. The repair cost is less than 15% of the vehicle's value, well below the threshold.
- Car worth $6000, fix is $2500: Borderline. At ~42% of the car's value, this is a tough call. Get a second opinion on the diagnosis and quote before proceeding.
What Scan Tool You Need for This Code
Minimum: A scanner that performs an 'All System Scan' or 'Health Report' to check for codes in every module (ABS, BCM, SRS, etc.), not just the engine.
A basic $20 code reader only communicates with the engine computer (ECM). The U1821 fault almost always originates in another module like the BCM or ABS, which a cheap reader cannot see.
Rent vs buy: For U1821, a basic parts store loaner tool is insufficient. You must buy a 'Budget Pick' scanner capable of an all-system scan. If you are serious about DIY repair, a 'Mid-Range Pick' saves thousands in diagnostic fees over its lifetime.
How to Clear the Code After You Fix It
- Reconnect battery if disconnected for repair
- Use an OBD-II scan tool to perform a 'Clear All Codes' function
- Perform a complete drive cycle to allow all system monitors to run
Drive cycle (~30 minutes): Cold start (after 8+ hour soak). Idle for 2-3 minutes with electrical loads on. Drive a mix of city and highway speeds, holding a steady 55 mph for at least 5 minutes. Allow the vehicle to cool down completely.
Readiness monitors affected: Comprehensive Component Monitor, Misfire Monitor
Before emissions retest: drive at least 50 miles to fully set monitors.
Watch out for:
- Disconnecting the battery clears the code but resets all readiness monitors, causing an automatic emissions test failure.
- The code returns immediately if the root electrical or module fault is not properly repaired.
Will This Fail Emissions / State Inspection?
Yes — this code typically fails an OBD-II emissions inspection.
- California: An illuminated Check Engine Light results in an automatic failure. After repair, a full drive cycle must be completed to set readiness monitors before re-testing.
- New York: An active U1821 code with the MIL commanded on causes an automatic failure. For 2001 and newer vehicles, only one non-continuous monitor is allowed to be 'Not Ready'.
- Texas: In counties requiring emissions testing, an active U-code that illuminates the Check Engine Light causes the vehicle to fail the OBD portion of the inspection.
Most Commonly Affected Vehicles
- Chevrolet, GMC, Cadillac Tahoe, Yukon, Escalade, Silverado, Sierra (Hybrids) (2008-2013) — A known issue where the Accessory Power Module (APM) fails to initialize in extreme cold, causing a loss of power steering and battery charging. Addressed by GM TSB PI1191.
- Ford Focus, F-150, E-Series Vans (2009-2018) — Prone to internal electronic failures of the ABS module, causing a loss of communication on the network. Rebuilding the existing module is the most cost-effective repair.
- BMW 3-Series (E90), 5-Series, X3 (2006-2018) — Suffers from failing Junction Box Electronics (JBE) modules. The JBE acts as a gateway, and its failure causes widespread electrical chaos and network codes.
- Subaru Outback, Legacy, Forester (2013-2019) — Failures in the Body Integrated Unit (BIU) cause issues with windows, locks, and the immobilizer system. A replacement BIU requires dealer programming.
- Chevrolet Volt (2011-2019) — Prone to communication codes related to the Accessory Power Module (APM). A failed APM prevents the 12V battery from charging, leading to a stall condition.
- Chevrolet Silverado 3500 Hybrid (2011-2011) — Service manuals specifically list U1821 for a 'Lost Communication With DC to DC Converter Control Module on Bus B'.
- Chevrolet Cruze (2015-2016) — Known for poor ground connections that lead to communication faults and 'Reduced Engine Power' messages.
- Cadillac ATS (2013-2019) — Experiences failures of various electronic modules that cascade into network communication faults like U1821.
Manufacturer-Specific Notes
- General Motors (Chevrolet/GMC/Cadillac): Uses U1821 to pinpoint communication failures with hybrid-specific components like the Accessory Power Module (APM). TSB PI1191 addresses this code for cold weather failures.
- Ford: U1821 often points towards a communication breakdown with the ABS module. Rebuilding the electronic portion of the module is a common, cost-effective repair.
- Subaru: Subaru calls its BCM the Body Integrated Unit (BIU). Network codes related to body functions point to this module, which requires programming upon replacement.
- BMW: Network communication issues frequently trace to the Junction Box Electronics (JBE) module, which acts as a central hub. A faulty JBE causes a cascade of 'U' codes.
- Mazda: U1821 is specifically defined as 'CAN Communication or Input Data Malfunction With EHCU (ABS),' directly pointing to the ABS control unit as the source.
Real Owner Stories
2013 GM Hybrid in extreme cold
Owner found their Chevy Tahoe Hybrid would not start, or started with a 'Service Power Steering' message on days colder than 10°F. Codes U1821, U182A, and C0895 were present.
What they tried:
- Replacing the 12V battery, which did not solve the issue.
- Clearing codes, which worked until the next very cold start.
Outcome: The issue was a known cold-weather failure of the Accessory Power Module (APM) described in GM TSB PI1191. Replacing the APM with an updated part resolved the cold-start communication loss.
Lesson: For GM hybrids, if U1821 appears only in extreme cold with a power steering warning, it is almost certainly the APM. Check for related TSBs before replacing other parts.
2014 Ford F-150 with multiple warning lights
An F-150 displayed ABS, Traction Control, and the red 'BRAKE' warning light. The speedometer was erratic. Scans revealed U1821 related to the ABS module.
What they tried:
- Visually inspecting wheel speed sensor wires and repairing a chafed wire, but main codes returned.
- Replacing the 12V battery as a precaution, with no change.
Outcome: The owner removed the electronic portion of the ABS module and sent it to a mail-in repair service for $250. The service repaired cracked internal solder joints. Reinstalling the repaired module cleared all codes permanently.
Lesson: On Fords, a cluster of brake-related warning lights points to the ABS module. Repairing the original module is cheaper and easier than replacing it, avoiding costly VIN programming.
2017 Chevy Silverado with intermittent electrical issues
A Silverado owner experienced intermittent issues: trailer lights failing, driver's headlight out, and a cluster of 'Lost Communication' codes (U0100, U0140, U0101).
What they tried:
- Replacing the battery, which temporarily cleared codes before they returned.
- Checking fuses, which were all intact.
Outcome: The root cause was a corroded ground connection on the frame rail under the driver's side door. Cleaning the contact area to bare metal and re-securing it restored stable communication to all modules.
Lesson: A large number of seemingly unrelated 'Lost Communication' codes appearing at once points to a foundational electrical problem, not multiple module failures. Always check main battery and chassis grounds first.
How to Prevent This Code From Triggering
- Periodically clean and protect key electrical grounds (Every 2-3 years or during other maintenance) — Corrosion on main battery-to-chassis grounds creates resistance, causing unstable voltage for all modules. Cleaning these points prevents voltage drops that trigger communication faults.
- Apply dielectric grease to unsealed connectors (Whenever a connector is disconnected for service) — Dielectric grease is a non-conductive paste that seals out moisture and oxygen. Applying a thin layer to connectors in the engine bay prevents water intrusion and pin corrosion.
- Replace 12V battery at 4-5 year mark, regardless of status (Every 4-5 years) — An aging battery fails to provide stable voltage above 12.2V during startup. This momentary voltage drop is a primary cause of modules failing their initial 'handshake'.
- Secure loose wiring harnesses (During any under-hood or under-vehicle service) — Unsecured wiring harnesses rub against sharp edges, chafing through the insulation and causing shorts between CAN wires or to ground.
Frequently Asked Questions
What does the 'U' in U1821 stand for?
The 'U' stands for 'Network'. OBD-II codes are categorized: 'P' for Powertrain, 'B' for Body, 'C' for Chassis, and 'U' for Network Communication.
What's the difference between a U-code like U1821 and a P-code like P1821?
A 'U' code indicates a communication problem between computer modules. A 'P' code indicates a specific mechanical or electrical fault within the powertrain system itself. They are completely different types of faults.
Can I fix a U1821 code myself?
Basic checks like testing the battery and inspecting fuses are DIY-friendly. However, diagnosing the CAN bus network requires specialized knowledge, wiring diagrams, and an oscilloscope. Most module replacements require proprietary programming tools, making the final repair best left to a professional.
How much does it cost to diagnose a U1821 code?
Most shops charge a diagnostic fee covering one to two hours of labor. Expect to pay between $150 and $300 for a technician to trace the source of the communication failure. This fee covers complex network testing, not just reading the code.
Will clearing the code make it go away?
You can clear the code with a scanner, and it stays off temporarily if the fault is intermittent. However, the code always returns and symptoms persist until the underlying electrical problem is fixed.
Can a bad module be repaired, or must it be replaced?
It depends on the module. Common modules, like ABS controllers on Ford models, frequently fail in a predictable way and are sent to a specialist for rebuilding at a fraction of the cost of a new part. This avoids the need for dealer reprogramming.
What is a terminating resistor and why does it matter?
A CAN bus network uses a 120-ohm resistor at each end of the line to prevent signal reflections. A healthy network has a total resistance of exactly 60 ohms. Measuring this resistance quickly identifies if a module is unplugged (120 ohms) or if wires are shorted together (0 ohms).
Key Takeaways
- Code U1821 indicates a CAN bus network failure where a specific computer module, such as the ABS or Accessory Power Module (APM), stops communicating with the rest of the vehicle.
- Do not drive with an active U1821 code, as it frequently causes a sudden loss of power steering or a complete engine stall if the 12V charging system fails.
- Always test the 12V battery first; a voltage drop below 12.2V during startup is the leading cause of modules failing their initial network handshake.
- Diagnosing this fault requires measuring the CAN bus resistance at the OBD-II port, looking for a target reading of exactly 60 ohms to confirm network integrity.
- Before spending $800 to $1,200 on a new ABS or Body Control Module, use a $150 to $300 mail-in rebuild service to repair cracked internal solder joints and avoid expensive dealer programming.
Helpful Videos
![How To Test CAN BUS With A Multimeter [CAN Bus Resistance Check] Mechanic Mindset](https://img.youtube.com/vi/JPE42HSJxAk/mqdefault.jpg)
Shop the Parts Behind U1821
Below are the parts most often responsible for code U1821, ranked by how frequently each one is the actual culprit (per the diagnosis above). Tap any to see what we have for your vehicle.


The information in this article is provided for general reference and educational purposes only. Vehicle specifications, procedures, and part compatibility can vary by production date, trim level, and region. Always consult your vehicle's factory service manual and verify part numbers before purchasing or performing repairs. Safety-critical components such as airbags, seat belts, and braking systems should be installed by a qualified professional.
- 🧭 Diagnostic Flowchart
- 🎬 Helpful Videos
- 🛍️ Shop This Part
- What Does U1821 Mean?
- Can I Drive With U1821?
- Common Causes
- Symptoms
- Common Fixes & Costs
- DIY vs Professional
- Used vs. New Parts: Buying Guide
- What Happens If You Wait — Timeline
- Cost of Not Fixing It
- Diagnosis Steps
- When This Code Triggers (Freeze-Frame Conditions)
- Related Codes
- Climate & Environmental Factors
- How to Talk to a Mechanic About This Code
- Where to Take It: Dealer vs Independent vs Chain
- When to Walk Away From the Repair
- What Scan Tool You Need for This Code
- How to Clear the Code After You Fix It
- Will This Fail Emissions / State Inspection?
- Most Commonly Affected Vehicles
- Manufacturer-Specific Notes
- Real Owner Stories
- 2013 GM Hybrid in extreme cold
- 2014 Ford F-150 with multiple warning lights
- 2017 Chevy Silverado with intermittent electrical issues
- How to Prevent This Code From Triggering
- Frequently Asked Questions
- What does the 'U' in U1821 stand for?
- What's the difference between a U-code like U1821 and a P-code like P1821?
- Can I fix a U1821 code myself?
- How much does it cost to diagnose a U1821 code?
- Will clearing the code make it go away?
- Can a bad module be repaired, or must it be replaced?
- What is a terminating resistor and why does it matter?
- Key Takeaways
- 🎟️ Get 5% Off