
OBD-II Code U2017: Driver Side Crash Sensor Communication Fault
What U2017 means, why it triggers, and how to fix it
- Code U2017 indicates a communication failure with the driver-side impact sensor, which immediately disables the driver's side airbags and seatbelt pretensioners.
- Over 70% of U2017 faults stem from a loose yellow SRS connector under the driver's seat or broken wires inside the driver's door jamb boot.
- Do not drive normally with this code; a disabled driver-side airbag increases the risk of severe injury or fatality in a collision.
- Test the wiring circuit with a multimeter before spending $100 to $300 on a new impact sensor, as the sensor itself rarely fails.
- You must use an SRS-capable OBD-II scanner to clear the U2017 code from the Restraints Control Module after completing repairs; disconnecting the battery will not work.
What Does U2017 Mean?
The U2017 code means your car's main safety computer, the Restraints Control Module (RCM), is not receiving a signal from the crash sensor on the driver's side of the vehicle. This sensor tells the RCM when a collision occurs so it can deploy the airbags. Because of this communication break, the airbag warning light illuminates, and the driver-side airbags are disabled.
Technical definition: The official SAE/ISO definition for U2017 is "Driver Side Crash Sensor Communication Fault (Non SCP)". This indicates the Restraints Control Module (RCM) has detected a loss of communication with the driver-side impact sensor. The RCM continuously monitors the sensor's circuits for an open circuit, a short to voltage, a short to ground, or low resistance. If any fault is detected, the RCM stores U2017 and illuminates the SRS warning light.
Can I Drive With U2017?
Yes, But With Caution. The vehicle remains drivable, but it is highly unsafe. The illuminated airbag light means critical safety systems are disabled. Specifically, the driver's side front airbag, side curtain airbag, and seatbelt pretensioner will not activate in a collision, drastically increasing the risk of serious injury. Repair this immediately to restore occupant safety.
Common Causes
- Loose Connector Under Seat or in Door (Very Common) — On many vehicles, especially trucks like the Ram 1500, a primary wiring connector for the airbag system sits under the driver's seat. Items pushed under the seat, vigorous cleaning, or frequent seat adjustments easily dislodge this connector, instantly triggering the U2017 code. 🎬 Watch: How to fix common airbag light issues on trucks
- Damaged or Corroded Wiring/Connectors (Very Common) — Wiring and connectors for the driver-side impact sensor route through vulnerable areas like the door jamb, under the seat, or behind the front bumper. Constant flexing from opening the door, or exposure to dirt and moisture, causes wire breakage or terminal corrosion.
- Water Ingress / Interior Leaks (Common) — Water leaking into the cabin from a bad windshield seal, clogged sunroof drains, or a damaged cowl seeps into the carpet. This saturates critical wiring connectors in the driver-side kick panel or under the seat, causing rapid corrosion and communication loss.
- Faulty Driver-Side Impact Sensor (Common) — The impact sensor itself fails due to internal electronic faults, physical damage from a minor impact, or moisture intrusion. These sensors are highly sensitive and require a perfect seal to function. 🎬 See this walkthrough on replacing a side impact sensor
- Low Battery Voltage or Unstable Power Supply (Less Common) — A weak battery or a poor ground connection for the RCM causes low voltage conditions. Sensitive electronic modules malfunction and set false communication fault codes when they lack stable power.
- Faulty Restraints Control Module (RCM) (Rare) — The RCM controls the entire airbag system. The module itself occasionally fails internally, losing communication with various sensors. This also occurs if the RCM stores crash data from a previous accident and enters a locked state.
- Incorrect Sensor Mounting (Rare) — If the vehicle was in a previous accident and repairs were rushed, the impact sensor might be improperly mounted or torqued. The RCM detects this incorrect installation and sets a fault code.
Symptoms
- Airbag Warning Light On — This is the most common and often the only symptom. 🎬 Learn how to reset your airbag warning light The light stays illuminated on the dashboard as long as the fault is present.
- Airbags Will Not Deploy — The most critical symptom is invisible during normal driving: the driver-side airbags and seatbelt pretensioners are disabled and will not deploy in a collision.
- "Service Airbag System" Message — Many modern vehicles display a text message on the instrument cluster information screen alerting you to a specific SRS problem.
- Intermittent Warning Light — With a loose connection or early-stage corrosion, the airbag light turns on and off randomly. This frequently happens when hitting bumps, adjusting the seat, or opening the driver's door.
- Inability to Communicate with Airbag Module (scan-tool only — no driver-felt sign) — In severe cases, a standard OBD-II scanner fails to communicate with the Restraints Control Module (RCM) entirely, indicating a major network or module failure.
Diagnostic Flowchart
Tap your situation to follow the diagnostic path that matches what you're seeing on this code.
Common Fixes & Costs
- Securing Loose Under-Seat Connector — Parts: $0 - $10, Labor: $50 - $125, ~0.5 hr book time (Beginner)
- Repairing Damaged Wiring — Parts: $10 - $50, Labor: $150 - $450, ~1.5 hr book time (Intermediate)
- Replacing the Driver-Side Impact Sensor
— Parts: $70 - $250, Labor: $100 - $250, ~1.2 hr book time
(DIY)
Ford F-150 (2015-2020): OEM ML3Z-14B345-A (Alt: Dorman 590-series)
Chevrolet Silverado (2014-2018): OEM 13578677 or 20884470 (Alt: Dorman 590-271) - Resetting the Airbag Module (After a Crash) — Parts: $0, Labor: $50 - $150, ~0.8 hr book time (Professional)
- Replacing the Restraints Control Module (RCM)
— Parts: $200 - $700, Labor: $150 - $300, ~2 hr book time
(Professional)
Ford F-150 (2018-2020): OEM JL3T-14B321-CB (Alt: OEM or Remanufactured Only)
Used vs. New Parts: Buying Guide
When a used part is worth it: For safety-critical parts like impact sensors and control modules, buying new is strongly recommended. Only consider a used part if a new one is discontinued, and only source it from a reputable dismantler guaranteeing the part is from a non-wrecked, non-flooded vehicle.
Donor-vehicle mileage cap: roughly under 60000 miles for the part to have meaningful remaining life.
Donor quality checklist:
- Verify the donor vehicle was not in an accident.
- Ensure the part number matches exactly; airbag system components are highly VIN-specific.
- Avoid parts from flood-damaged or salt-belt vehicles due to high corrosion risk.
- Inspect connectors for any signs of green oxidation or pushed-back pins.
Decision logic:
- If The part is an impact sensor. → Buy new. The $50 cost savings of a used sensor are not worth the risk of it failing during a crash.
- If The part is a Restraints Control Module (RCM). → Buy new or use a professional reset service on your original module. A used RCM requires expensive dealership reprogramming to match your VIN.
- If The part is a wiring connector or pigtail. → Used is acceptable if the part is in excellent condition with zero corrosion.
Warranty tradeoff: Used parts typically carry a 30-day warranty. New OEM parts carry a 1-year or longer warranty. Given the life-or-death safety implications, the reliability of a new part is paramount.
Worst-case if a used part fails: $300 - $800 if a used part fails, requiring repeat labor costs plus the purchase of a new part.
What Happens If You Wait — Timeline
- Immediate: Code U2017 sets, illuminating the airbag warning light. The driver-side restraint system is immediately disabled as a fail-safe. (MPG impact: 0%% · Added cost: $0 (Immediate safety risk is the primary cost))
- 1-3 months (if caused by intermittent wiring): Constant flexing of a damaged wire causes microscopic arcing and fretting corrosion, making the connection progressively weaker and the fault permanent. (MPG impact: 0%% · Added cost: $100 - $200 (Diagnostic cost increases as intermittent faults are harder to find))
- 3-9 months (if caused by a slow water leak): Moisture wicks along the wiring harness. Corrosion spreads from the initial fault location to adjacent pins, causing new electrical gremlins. (MPG impact: 0%% · Added cost: $500 - $1500 (Requires replacing a larger connector or a section of the main body harness))
- 9+ months (if caused by an unaddressed water leak): Severe corrosion travels up the copper wire into the Restraints Control Module (RCM). The RCM's circuit board is destroyed by water. (MPG impact: 0%% · Added cost: $1500 - $3000 (Requires a new RCM, new wiring harness section, and significant labor))
Cost of Not Fixing It
- Immediate: The driver's side airbags and seatbelt pretensioner are disabled. In a collision, the risk of serious injury or fatality is significantly increased. (Added cost: N/A (Safety Risk))
- 1-6 months: If the cause is a water leak, continued moisture exposure causes corrosion to spread to other nearby connectors or modules, creating complex electrical gremlins. (Added cost: $500 - $2000)
- 6+ months: Severe corrosion destroys the main body harness or the Restraints Control Module (RCM) itself, turning a simple wire repair into a major component replacement. (Added cost: $1000 - $3000)
Diagnosis Steps
- Read the Fault Codes
Use an OBD-II scanner capable of reading SRS/airbag codes to confirm U2017 is the primary code. Note any other 'U', 'B', or 'C' codes present, as they provide critical clues to the root cause.
Tools: OBD-II Scanner (with SRS capability) (Beginner) - Visually Inspect Under the Driver's Seat
Check for loose or disconnected connectors under the driver's seat. Look for a large yellow or gray connector that may have been kicked or dislodged. Ensure it is securely plugged in and the locking tab is engaged.
Tools: Flashlight (Beginner) - Perform a 'Wiggle Test'
With the ignition on (engine off), have an assistant monitor the airbag light. Gently wiggle the wiring harness connectors under the seat and in the door jamb. If the light flickers, you have pinpointed the physical location of the fault.
Tools: Assistant (Beginner) - Inspect the Driver's Door Jamb Wiring
Carefully pull back the rubber boot running between the driver's door and the vehicle's body. Inspect the wires inside for breakage, chafing, or cracked insulation. This is a highly common failure point due to constant flexing.
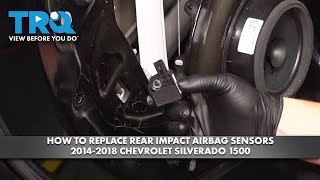
Tools: Flashlight, Trim removal tool (Intermediate) - Locate and Inspect the Driver-Side Impact Sensor
Find the sensor on the lower B-pillar, inside the driver's door, or behind the front bumper. Look for visible damage, connector corrosion, or loose mounting bolts. Consult a repair manual for the exact location.
Tools: Flashlight, Socket set, Trim removal tools, Repair manual (Intermediate) - Test the Sensor Circuit (Pinpoint Test)
Disconnect the battery for 15 minutes. Disconnect the sensor and the RCM connector. Use a multimeter to check for continuity on the two communication wires between the sensor and the RCM. Resistance must be less than 5 ohms. Check for shorts to ground or voltage.
Tools: Multimeter, Vehicle-specific wiring diagram (Advanced) - Check for Biased Voltage
With the battery reconnected and the sensor disconnected, turn the ignition on. Probe the two wires in the sensor connector with a multimeter set to DC volts. One wire should have a bias voltage supplied by the RCM (often around 2.5V). No voltage indicates an RCM or wiring problem.
Tools: Multimeter, Service manual (Advanced) - Test the Sensor with Live Data
Use an advanced bi-directional scan tool to view live data from the sensor PID. If the circuit tests good but the sensor data is absent, erratic, or shows a 'Fault' status, the sensor has failed and requires replacement.
Tools: Advanced Bi-directional Scan Tool (Professional)
When This Code Triggers (Freeze-Frame Conditions)
- System Voltage: 11.5 - 14.5V (Normal operating voltage. Code sets during startup self-test (KOEO) or while driving.)
- Ignition Status: ON (The Restraints Control Module (RCM) performs a self-test every time the ignition turns on. The fault is often detected during this initial check.)
- RCM Status: Active/Powered (The code sets when the RCM is powered on and fails to receive a valid signal from the driver-side impact sensor.)
Related Codes
- U0151 — Means 'Lost Communication With Restraints Control Module'. If you see U0151 alongside U2017, the entire airbag module is offline, pointing to a wider network or RCM power/ground issue rather than a single sensor.
- B1884/B1885 — These relate to the driver-side seatbelt pretensioner circuit. Because the pretensioner wiring routes in the same harness as the side impact sensor, a single damaged under-seat connector frequently triggers both codes simultaneously.
- B00A0 — Points to a fault in the Occupant Classification System. Wiring for the seat weight sensor bundles with the main SRS harness; physical stress under the seat easily triggers both B00A0 and U2017.
Climate & Environmental Factors
- High Humidity / Water Leaks: Moisture penetrates sensor housings and seeps into connectors, causing rapid corrosion on circuit boards and pins. This disrupts the low-voltage signals required for communication.
- Road Salt (Salt Belt Regions): A mixture of road salt and melting snow saturates carpets. This corrosive slurry attacks floor-mounted modules and under-seat connectors, causing severe communication failures.
- Temperature Fluctuations: Extreme temperature cycles accelerate 'fretting corrosion' on connector terminals. Micro-movements from vibration combined with temperature changes wear away protective plating on pins, leading to oxidation.
How to Talk to a Mechanic About This Code
Say this: "I have an airbag light on and my scanner shows code U2017, which is a communication fault for the driver-side impact sensor. I'd like to schedule a diagnostic. Can you please instruct the technician to focus on checking the common wiring failure points, like the door jamb harness and the connectors under the seat, before quoting a sensor replacement?"
This signals you understand the code's meaning. It directs the technician to the most probable and cheapest-to-fix causes first, preventing them from immediately quoting an expensive and unnecessary sensor replacement.
Avoid saying:
- 'My airbag light is on, can you look at it?'
- 'Just fix whatever is wrong.'
- 'I think I need a new airbag sensor.'
Questions to ask before authorizing the repair:
- Did you perform a 'wiggle test' on the wiring in the door jamb and under the seat to check for intermittent connections?
- If you are recommending a sensor replacement, can you confirm you've tested the circuit for continuity, shorts to ground, and shorts to power?
- If the issue is a broken wire, what is your method for repair (solder, butt connectors) and what is the warranty on the wiring repair?
- Does your estimate include clearing the U2017 code from the Restraints Control Module (RCM) after the repair?
Where to Take It: Dealer vs Independent vs Chain
- Dealer:
A safe but expensive choice. Best if you suspect an RCM failure or if the vehicle is still under warranty.
Best for: Vehicles under warranty., Complex cases involving Restraints Control Module (RCM) replacement and programming., Recalls related to the airbag system.
Downsides: Highest labor rates., May default to module replacement when a simple wiring repair is possible. (Typical cost: +50% vs. baseline) - Independent Shop:
Best fit for most U2017 repairs. Find a trusted local mechanic with good reviews for electrical work. They are well-equipped to handle broken wires or bad connectors.
Best for: Out-of-warranty vehicles where cost is a factor., Diagnosing common wiring and connector faults.
Downsides: Quality varies greatly; ensure the shop has strong electrical diagnostic skills and an SRS-capable scan tool. (Typical cost: +0% vs. baseline) - Chain Shop:
AVOID. Airbag system repair is a safety-critical task requiring diagnostic expertise rarely found at chain shops. The risk of misdiagnosis and unnecessary parts replacement is high.
Best for: Simple, routine maintenance like oil changes and brakes.
Downsides: Technicians lack the specialized training for complex SRS diagnostics., High pressure to sell parts leads to replacing the sensor without proper circuit testing. (Typical cost: -10% vs. baseline)
When to Walk Away From the Repair
If the estimated repair cost exceeds 50% of the car's private-party value, consider selling the car as-is. A car with a known, non-functional safety system has a significantly reduced value.
- Car worth $4000, fix is $450: Fix it. A wiring repair is a small fraction of the car's value and restores a critical safety feature.
- Car worth $15000, fix is $1800: Fix it. Even an expensive RCM replacement is well below the 50% threshold and is necessary for safety.
- Car worth $3000, fix is $1600: Walk away. The repair cost is over 50% of the vehicle's value. This is especially true if water damage is the cause, as other electrical problems are likely to appear.
What Scan Tool You Need for This Code
Minimum: An OBD-II scanner with SRS/Airbag system access. It must be able to read and clear codes from the Restraints Control Module (RCM).
A standard $20 code reader only communicates with the engine control unit (ECU) for emissions faults. It cannot see or clear airbag codes like U2017. Free loaner tools from parts stores are often basic readers.
Budget: Foxwell NT630 Plus / Autel AutoLink AL619 (~$90-130) — Reads and clears SRS/airbag codes, allowing you to turn off the light after a successful repair. Excellent entry-level tools for DIYers.
Mid-range: BlueDriver Pro / Autel MaxiLink ML629 (~$120-160) — Provides SRS code reading/clearing and offers live data streaming from SRS sensors, which helps diagnose intermittent wiring issues.
Professional: Autel MaxiCOM MK808 / MK808BT (~$450-600) — Offers full-system diagnostics, including reading SRS codes, viewing live data, and accessing ECU information to get exact part numbers for modules.
Rent vs buy: If you repair your own cars regularly, buying a scanner in the $100-$150 range is a worthwhile investment. If this is a one-time fix, paying a shop's diagnostic fee ($100-$200) is more economical.
How to Clear the Code After You Fix It
- Ensure all repairs are complete and connectors are securely locked.
- Reconnect the negative battery terminal.
- Use an SRS-capable OBD-II scan tool to access the Restraints Control Module (RCM).
- Select 'Clear/Erase DTCs' within the SRS/airbag menu.
- Cycle the ignition off, then on. The airbag warning light should illuminate for a 5-second bulb check and then turn off permanently.
Drive cycle (~5 minutes): The SRS system does not require a complex drive cycle. After clearing the code, the RCM performs a self-test upon the next key-on event. A short 5-minute drive with normal turns and stops helps confirm the fix is stable, especially for intermittent wiring issues.
Readiness monitors affected: None. SRS/airbag systems do not use emissions readiness monitors.
Watch out for:
- Using a basic $20 OBD-II code reader that cannot access the SRS module to clear the code.
- Failing to address the root cause (e.g., a broken wire), causing the code to return immediately upon startup.
- Assuming disconnecting the battery will clear a U2017 fault code from the RCM's hard memory.
Will This Fail Emissions / State Inspection?
No — by itself this code doesn't fail OBD inspection (but it can keep readiness monitors from setting, which causes a separate fail).
- California: An airbag light will not cause a failure of the smog check itself, which focuses strictly on emissions. However, it remains a serious safety concern.
- New York: An illuminated airbag warning light is noted as an advisory during the safety inspection but is not currently a cause for failure.
- Texas: An airbag light is not an item on the Texas vehicle safety inspection checklist and will not cause a failure.
- Virginia: In states with comprehensive annual safety inspections like Virginia, an illuminated airbag light results in an automatic inspection failure.
Most Commonly Affected Vehicles
- Ford F-150 (2015-2020) — Highly prone to wiring issues in the driver's door harness due to constant flexing. Inspect the rubber door boot before replacing any sensors.
- Dodge Ram 1500 (2017-2024) — A well-documented issue involves a large wiring connector under the driver's seat becoming loose. Owners frequently resolve this by securing the connector with a zip tie.
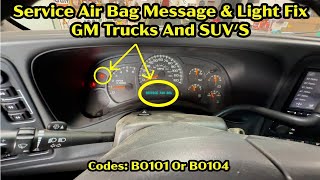
- Chevrolet Silverado (2014-2018) — Experiences communication failures on the GM-LAN network. TSB 16-NA-246 addresses airbag lights caused by connectors not being fully seated.
- Ford Focus (2005-2011) — Wiring and connector corrosion are the primary causes. Service manuals feature detailed pinpoint tests specifically for checking circuit resistance on this code.
- Hyundai / Kia Sonata / Optima (2011-2018) — Known to experience wiring damage in door harnesses and issues with under-seat connectors for the Occupant Classification System, triggering various communication codes.
- Jaguar Various Models (2000-2010) — The U2017 code indicates a communication fault but often fails to specify the exact sensor location, requiring manual diagnostic exploration by a technician.
Manufacturer-Specific Notes
- Ford: Ford vehicles frequently experience 'fretting corrosion' on low-current sensor connector pins. The official repair involves applying a specific, thin dielectric grease designed for sensitive circuits to the connector seal to prevent future oxidation.
- General Motors (Chevy/GMC): GM trucks often throw U-codes due to a bad ground connection or a fault in the high-speed GMLAN network. TSB 16-NA-246 advises technicians to perform a 'push/push' test on all SRS connectors to ensure they are fully seated before replacing parts.
- Dodge/Ram: The first diagnostic step for a U2017 code on a Ram truck is checking the large, multi-wire connector under the driver's seat. It disconnects so easily that Stellantis issued a recall (08C) for 2019-2024 models specifically for this loose connector.
Real Owner Stories
2017 Ram 1500 - Intermittent Airbag Light
The 'Service Air Bag' light came on randomly, especially after adjusting the driver's seat. The scanner confirmed code U2017.
What they tried:
- Took it to a shop that couldn't replicate the issue because the light was off upon arrival.
- Researched forums and found reports of a loose connector under the driver's seat.
Outcome: The owner found a large yellow and gray connector under the seat that was slightly loose. They pushed it together firmly until it clicked and secured it with a zip tie. The U2017 code cleared and never returned.
Lesson: For intermittent airbag lights on Ram trucks, check the main harness connector under the driver's seat first. A simple zip tie is often a permanent, zero-cost fix.
2015 Ford F-150 - Persistent Airbag Light
The airbag light stayed on permanently with code U2017. The owner assumed the sensor inside the door was bad.
What they tried:
- Replaced the driver-side impact sensor in the door. The light remained on.
- Took the truck to a mechanic who performed a 'wiggle test' on the wiring.
Outcome: The mechanic opened the rubber boot in the driver's door jamb and found two wires with broken insulation. The wires were repaired with solder and heat shrink tubing for $250. The code cleared successfully.
Lesson: Never assume the sensor is the problem. U2017 points to a circuit fault. Broken wires in the door jamb are extremely common on F-150s and must be inspected before buying parts.
2014 Chevy Silverado - Airbag light after heavy rain
The airbag light appeared after heavy rain. The owner noticed the driver's side carpet was damp near the kick panel.
What they tried:
- A diagnostic scan confirmed U2017 and U0151 (Lost Communication with RCM).
- A technician traced the water leak to a faulty seal on the roof-mounted antenna.
Outcome: Water corroded a major wiring connector in the driver's kick panel, disrupting communication. The connector was cleaned, several pins were replaced, and the antenna seal was fixed. Total cost exceeded $600.
Lesson: If U2017 appears alongside other communication codes and there are signs of moisture, suspect a water leak. Roof antennas and third brake lights are common culprits that cause expensive electrical damage.
How to Prevent This Code From Triggering
- Inspect and clean door jamb boots and under-seat connectors (Every 2 years or 30,000 miles) — The door jamb boot traps debris and moisture, accelerating wire fatigue. Keeping it clean prevents water intrusion. Checking under-seat connectors ensures they haven't been kicked loose.
- Clean out sunroof drains and cowl vents (Annually, especially before rainy seasons) — Clogged drains cause water to overflow into the cabin, saturating floor-level wiring and control modules like the RCM.
- Apply dielectric grease to key harness connectors (Whenever a connector is disconnected for service) — Applying a thin layer of dielectric grease around the seal of a connector waterproofs the connection, preventing moisture from causing terminal corrosion.
- Secure loose items in the cabin (Daily habit) — Preventing items like water bottles or tools from rolling under the driver's seat reduces the risk of them snagging or disconnecting critical SRS wiring harnesses.
Frequently Asked Questions
Can I reset the airbag light myself?
The airbag light will not turn off by itself, even after a successful repair. It must be cleared from the RCM using an OBD-II scanner with SRS capabilities. Disconnecting the battery will not reset the light.
I replaced the driver-side impact sensor, but the U2017 code came back. What's wrong?
The fault code indicates a problem in the circuit, not necessarily the sensor itself. If a new sensor didn't fix it, the problem is almost certainly broken wiring or a corroded connector between the sensor and the RCM. You must diagnose the entire circuit for continuity.
Is it safe to drive with the U2017 code?
No. The airbag light indicates the supplemental restraint system is disabled, meaning the driver-side airbags will not deploy in a crash.
Could a weak car battery cause the U2017 code?
Yes. Airbag control modules are highly sensitive to voltage drops. A dying battery or poor charging system causes modules to malfunction and generate random communication fault codes.
Will a bad clock spring cause a U2017 code?
No, a bad clock spring typically causes B-codes related to the steering wheel airbag circuit, not a U-code for a side impact sensor.
My car was in a minor accident, and now the airbag light is on with code U2017. What should I do?
The impact likely damaged the side impact sensor or its wiring. Additionally, the RCM stores 'crash data' after an event, which requires specialized tools to clear or mandates a module replacement.
How much does it cost just to diagnose the U2017 code?
Most repair shops charge a diagnostic fee ranging from $100 to $200. This covers reading the codes and performing an initial visual inspection of the system.
What is 'Non SCP' in the code's definition?
SCP stands for Standard Corporate Protocol, an older Ford communication network. 'Non SCP' simply means the fault is occurring on a modern communication system like the CAN bus.
Key Takeaways
- Code U2017 indicates a communication failure with the driver-side impact sensor, which immediately disables the driver's side airbags and seatbelt pretensioners.
- Over 70% of U2017 faults stem from a loose yellow SRS connector under the driver's seat or broken wires inside the driver's door jamb boot.
- Do not drive normally with this code; a disabled driver-side airbag increases the risk of severe injury or fatality in a collision.
- Test the wiring circuit with a multimeter before spending $100 to $300 on a new impact sensor, as the sensor itself rarely fails.
- You must use an SRS-capable OBD-II scanner to clear the U2017 code from the Restraints Control Module after completing repairs; disconnecting the battery will not work.
Helpful Videos

Shop the Parts Behind U2017
Below are the parts most often responsible for code U2017, ranked by how frequently each one is the actual culprit (per the diagnosis above). Tap any to see what we have for your vehicle.


The information in this article is provided for general reference and educational purposes only. Vehicle specifications, procedures, and part compatibility can vary by production date, trim level, and region. Always consult your vehicle's factory service manual and verify part numbers before purchasing or performing repairs. Safety-critical components such as airbags, seat belts, and braking systems should be installed by a qualified professional.
- 🧭 Diagnostic Flowchart
- 🎬 Helpful Videos
- 🛍️ Shop This Part
- What Does U2017 Mean?
- Can I Drive With U2017?
- Common Causes
- Symptoms
- Common Fixes & Costs
- Used vs. New Parts: Buying Guide
- What Happens If You Wait — Timeline
- Cost of Not Fixing It
- Diagnosis Steps
- When This Code Triggers (Freeze-Frame Conditions)
- Related Codes
- Climate & Environmental Factors
- How to Talk to a Mechanic About This Code
- Where to Take It: Dealer vs Independent vs Chain
- When to Walk Away From the Repair
- What Scan Tool You Need for This Code
- How to Clear the Code After You Fix It
- Will This Fail Emissions / State Inspection?
- Most Commonly Affected Vehicles
- Manufacturer-Specific Notes
- Real Owner Stories
- 2017 Ram 1500 - Intermittent Airbag Light
- 2015 Ford F-150 - Persistent Airbag Light
- 2014 Chevy Silverado - Airbag light after heavy rain
- How to Prevent This Code From Triggering
- Frequently Asked Questions
- Can I reset the airbag light myself?
- I replaced the driver-side impact sensor, but the U2017 code came back. What's wrong?
- Is it safe to drive with the U2017 code?
- Could a weak car battery cause the U2017 code?
- Will a bad clock spring cause a U2017 code?
- My car was in a minor accident, and now the airbag light is on with code U2017. What should I do?
- How much does it cost just to diagnose the U2017 code?
- What is 'Non SCP' in the code's definition?
- Key Takeaways
- 🎟️ Get 5% Off