
OBD-II Code U2053: Manufacturer-Specific Network Communication Fault
What U2053 means, why it triggers, and how to fix it
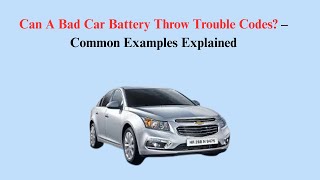
- U2053 indicates a network communication failure, most often triggered by a voltage drop below 12.4V rather than a failed computer module.
- Always test the battery and inspect main ground connections (like GM's G218) before spending hundreds on advanced diagnostics or replacement parts.
- On Chrysler, Jeep, and Dodge vehicles, a faulty CAN bus 'star connector' behind the glovebox is the leading cause of this code and costs under $60 in parts to fix.
- Do not replace an 'offline' module without first verifying its power, ground, and network wiring using a digital multimeter and a bidirectional OBD-II scanner.
What Does U2053 Mean?
U2053 is a manufacturer-specific trouble code signaling a communication breakdown on the vehicle's data network. Modern cars use dozens of computer modules to control everything from engine timing to power windows. This code triggers when one of these modules stops sending or receiving required data, disrupting the entire network.
Technical definition: U2053 lacks a universal SAE/ISO definition and varies by manufacturer (commonly Jaguar or Land Rover). The 'U' indicates a Network Communication fault, and the '2' signifies a non-generic code. It sets when a module fails to receive a periodic, expected message from another specific module within a programmed timeframe.
Can I Drive With U2053?
Yes, But With Caution. Yes, the vehicle is generally safe to drive, but features like the radio, climate controls, or power windows will likely fail. However, if communication drops with a critical module like the electronic shifter or ABS controller, the vehicle enters 'limp mode' or fails to start. Driving with network faults masks severe underlying issues; for example, an intermittent power steering control module failure on a Chrysler Pacifica causes a sudden, dangerous loss of steering assist.
Common Causes
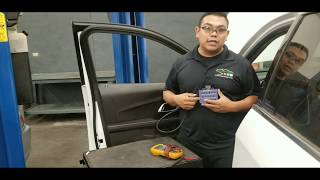
- Low or Unstable Battery Voltage (Very Common) — A weak battery or poor terminal connections cause unpredictable module behavior and communication errors. Modules fail to initialize correctly during startup when voltage drops below 12V, triggering network codes. 🎬 Watch: How a weak battery triggers communication trouble codes
- Poor Module Ground Connection (Very Common) — A loose or corroded ground wire for a major module destabilizes the entire network. On GM trucks, factory sound-deadening material often blocks the G218 ground, causing widespread communication loss.
- Faulty Network Junction/Star Connector (Common) — On Chrysler, Jeep, and Dodge vehicles, network wires meet at a central 'star connector'. Poor pin retention or corrosion inside this single block causes widespread communication failure between multiple modules.
- Faulty Wiring or Damaged Connectors (Common) — CAN bus network wires fray, corrode, or short out when exposed to moisture or vibration. A single damaged wire or bent pin in a connector halts communication for one or more modules.
- Software Glitch or Corrupted Module Firmware (Common) — Software bugs or data corrupted during a power surge cause modules to stop communicating. Manufacturers frequently address these glitches with Technical Service Bulletins (TSBs) requiring a firmware flash.
- Water Intrusion into Module or Connectors (Less Common) — Water leaking from a windshield seal or clogged sunroof drain drips onto modules under the dash. This creates corrosion and short circuits that instantly crash the network.
- Failed Electronic Control Module (Less Common) — Modules fail internally due to cracked solder joints, water damage, or component burnout. A module with compromised hardware cannot participate in network communication and requires replacement.
- Interference from Aftermarket Accessories (Less Common) — Improperly installed remote starters, alarms, or audio equipment interfere with the data network. These devices introduce electrical noise or draw excessive power, disrupting factory module communication.
Symptoms
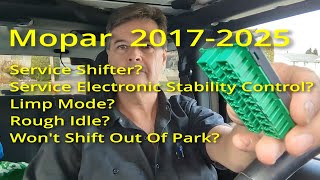
- Check Engine Light or Warning Messages — The Check Engine Light illuminates alongside specific dashboard warnings like 'Service Electronic Stability Control' or 'Service Shifter'.
- Inoperative Electronic Features — Systems controlled by the offline module stop working completely, including the infotainment screen, climate controls, or power windows.
- Intermittent System Functionality — Affected systems work sporadically; the radio cuts out, dashboard lights flicker, or power steering fails intermittently due to a loose connection.
- Drivability and Shifting Issues — Loss of communication with the electronic shifter, BCM, or ABS module prevents the vehicle from starting, locks the transmission in park, or forces 'limp mode'.
- No Scan Tool Communication (scan-tool only — no driver-felt sign) — If the gateway module to the diagnostic port goes offline, an OBD-II scanner cannot communicate with the vehicle or only sees a fraction of the modules.
Common Fixes & Costs
- Charge or Replace Vehicle Battery — Parts: $150-$350, Labor: $0-$50, ~0.5 hr book time (DIY)
- Clean and Secure a Module Ground Connection — Parts: $1-$10, Labor: $100-$250, ~1.5 hr book time (DIY)
- Replace CAN Bus Star Connector (Chrysler/Jeep) — Parts: $30-$60, Labor: $150-$300, ~2 hr book time (Intermediate)
- Repair Damaged Wiring or Connectors — Parts: $10-$50, Labor: $250-$800, ~2.5 hr book time (Intermediate)
- Reprogram/Update Module Software — Parts: $0, Labor: $150-$250, ~1.5 hr book time (Professional)
- Replace a Failed Control Module — Parts: $400-$1200, Labor: $150-$400, ~2.5 hr book time (Professional)
Used vs. New Parts: Buying Guide
When a used part is worth it: For expensive modules like a BCM or APIM on an older, high-mileage vehicle, a used part from a reputable salvage yard is cost-effective, provided it can be reprogrammed.
Donor-vehicle mileage cap: roughly under 100000 miles for the part to have meaningful remaining life.
Donor quality checklist:
- Match the part number exactly. Superseded or similar-looking parts fail to communicate.
- Ensure the seller offers a warranty (30-90 days is common).
- Verify the used module can be reprogrammed to your vehicle's VIN. Some modules are permanently 'locked' after initial programming.
Decision logic:
- If The part is a simple connector or wiring pigtail → Buy new to ensure perfect electrical connections.
- If The part is a complex electronic module and the vehicle is newer or has low mileage → Buy a new or remanufactured OEM part to ensure longevity and proper software compatibility.
- If The vehicle is older (>10 years) and the budget is the primary concern → Buy a used module, factoring in the cost and hassle of reprogramming.
Warranty tradeoff: Used parts typically have a 30-90 day warranty covering the part only. New aftermarket parts carry a 1-year to limited lifetime warranty. New OEM parts have a 1-2 year warranty, including labor if installed by a dealer.
Worst-case if a used part fails: $500-$1000 if a used module is faulty or cannot be programmed, requiring repeat labor costs and a new part.
Cost of Not Fixing It
- Immediate: Loss of non-essential features like radio, climate control, or navigation. Annoying warning lights and chimes. (Added cost: Negligible)
- Weeks to Months: Intermittent no-start or stalling conditions. Unpredictable loss of safety systems like ABS, traction control, or power steering creates a significant safety hazard. (Added cost: $200-$500 (for towing and diagnosis of new symptoms))
- Long-Term: A persistent network fault masks other serious diagnostic trouble codes. A module constantly trying to re-establish communication drains the battery, leading to premature battery failure. (Added cost: $350-$1500+ (cost of a new battery plus replacing a module damaged by voltage spikes))
Diagnosis Steps
- Check the Battery and Grounds First
Ensure the battery reads above 12.4 volts with the engine off and terminals are tight. Locate and inspect the main ground connections for the chassis and Body Control Module (BCM), sanding them to bare metal if necessary.
Tools: Digital Multimeter, Basic Hand Tools (Beginner) - Perform a Full System Scan
Use an advanced OBD-II scanner to read manufacturer-specific codes from all modules. Note exactly which modules report 'U' codes and which module is completely unresponsive to pinpoint the network break.
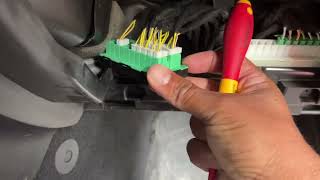
Tools: Advanced OBD-II Scanner (Beginner) - Inspect Network Junctions ('Star Connectors')
For Chrysler/Jeep/Dodge vehicles, locate the star connector behind the glove box. Perform a 'wiggle test' on the wiring harness while monitoring the scan tool to confirm intermittent faults caused by loose pins.
Tools: Trim Removal Tools, Flashlight (Intermediate) - Perform a Visual Inspection
Inspect wiring harnesses and connectors routing to the non-communicating modules. Look for chafed wires, green corrosion, or loose connections under the dashboard, in door jambs, and behind the radio.
Tools: Flashlight, Trim Removal Tools (Intermediate) - Check for Technical Service Bulletins (TSBs)
Search a TSB database for communication codes specific to your VIN. Manufacturers often release software updates to patch module glitches, requiring a dealer re-flash.
Tools: Access to TSB Database (Intermediate) - Isolate the Faulty Module
Unplug modules one by one from the network. If unplugging a specific module restores communication or correct resistance to the rest of the network, that module or its immediate wiring is the culprit.
Tools: Basic Hand Tools, Wiring Diagram (Advanced) - [PRO TIP] Test Network Resistance
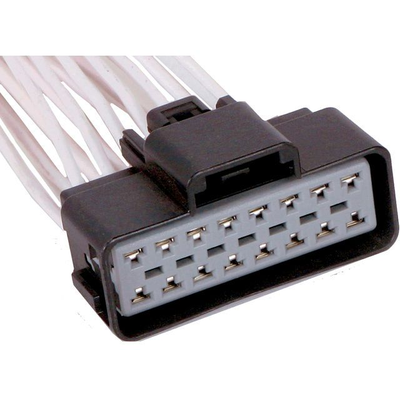
Disconnect the negative battery terminal. Measure resistance between Pin 6 (CAN High) and Pin 14 (CAN Low) at the OBD-II port. A healthy bus reads ~60 Ohms. 120 Ohms indicates an open circuit; 0 Ohms indicates a short.
Tools: Digital Multimeter, Vehicle-Specific Wiring Diagram (Advanced) - [PRO TIP] Check Network Voltages
With the ignition on (engine off), measure voltage at the OBD-II port. CAN High (Pin 6) averages 2.5-2.7V, and CAN Low (Pin 14) averages 2.3-2.5V. Voltages stuck at 0V, 5V, or 12V indicate a hard short.
Tools: Digital Multimeter, Wiring Diagram (Advanced) - [PRO TIP] Analyze Network Waveform
Connect a 2-channel oscilloscope to CAN High and CAN Low. A healthy bus shows clean, symmetrical square waves mirroring each other. Distorted waves point directly to a wiring or transceiver fault.
Tools: 2-Channel Oscilloscope, Wiring Diagram (Advanced)
When This Code Triggers (Freeze-Frame Conditions)
- Control Module Voltage: 11.5-12.4V (During key-on, engine-off initialization sequence)
- Fault Frequency Counter: 1-10 (Number of times the communication error was detected)
- Vehicle Speed: 0 mph (Fault logs at startup before the vehicle moves)
- Engine State: Off or Cranking (Communication glitches occur when modules first power up)
Related Codes
- U0073 — Stands for 'Control Module Communication Bus A Off'. This indicates the entire CAN bus is down, not just one module. Diagnosis focuses on finding a network-wide short or gateway module failure.
- U0140 — Specifically 'Lost Communication With Body Control Module (BCM)'. U2053 sets when another module misses the BCM's signal. The diagnostic focus is on the BCM's power, ground, and network lines.
- U0101 — Specifically 'Lost Communication with TCM'. This points directly to a problem with the transmission's computer, accompanied by harsh shifting or getting stuck in gear.
- U0422 — Means 'Invalid Data Received From Body Control Module'. The BCM is online but broadcasting nonsensical data, pointing to an internal fault or software issue rather than a wiring problem.
Climate & Environmental Factors
- High Humidity / Water Ingress: Moisture accelerates corrosion on connector pins, module circuit boards, and ground points, increasing resistance and causing total communication failure.
- Cold Weather: Low temperatures significantly reduce a battery's current output. A marginal battery drops below the minimum voltage required by modules during a cold start, triggering a flood of communication codes.
- Road Salt (Winter Climates): Salty slush works its way into under-vehicle connectors. Saltwater is highly conductive and corrosive, leading to short circuits and rapid degradation of wiring.
How to Clear the Code After You Fix It
- Ensure all repairs are complete and connectors are secure.
- Reconnect the negative battery terminal if it was disconnected.
- Use an OBD-II scan tool to erase all Diagnostic Trouble Codes (DTCs).
- Perform a complete drive cycle to allow all system monitors to run.
Drive cycle (~30 minutes): A generic drive cycle includes a cold start (sitting for 8+ hours), followed by a few minutes of idling, mixed city and highway driving (steady speed at ~55 mph for at least 10 minutes), and a cool-down period.
Readiness monitors affected: Comprehensive Component Monitor, Misfire Monitor
Before emissions retest: drive at least 50 miles to fully set monitors.
Watch out for:
- Clearing the code without fixing the root cause results in the code returning immediately.
- Disconnecting the battery resets all readiness monitors, requiring a full drive cycle before an emissions test.
- Monitors like EVAP have specific criteria to run (e.g., fuel level between 1/4 and 3/4 tank) and take days to set.
Will This Fail Emissions / State Inspection?
Yes — this code typically fails an OBD-II emissions inspection.
- California: An illuminated Check Engine Light results in an automatic failure. After repair, a full drive cycle must be completed. California allows the EVAP monitor to be 'not ready' on most vehicles, but all others must be complete.
- New York: An active U-code that turns on the MIL is an automatic failure. After clearing codes, most 2001 and newer vehicles pass with one monitor not ready.
- Texas: In the 17 counties requiring emissions testing, an active MIL causes the vehicle to fail. A drive cycle is needed to set the readiness monitors before a re-test.
Most Commonly Affected Vehicles
- Ford F-150 (2015-2020) — Susceptible to communication codes stemming from wiring problems in exposed harnesses or software glitches within the SYNC/APIM module.
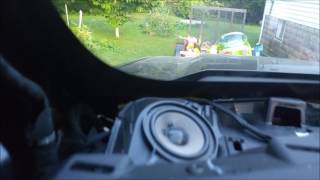
- Chevrolet Silverado (2007-2018) — Prone to setting U0140 (Lost Communication with BCM) due to a poor BCM ground connection at location G218 behind the driver's kick panel, 🎬 See how to fix the G218 ground on Chevy trucks covered in TSB PIT5405C.
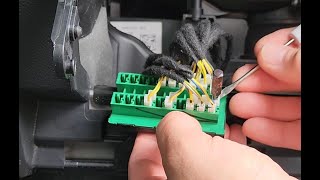
- Jeep Wrangler (JL) (2018-2024) — Experiences a flood of communication error codes traced to a poor connection or failure of the CAN bus 'star connector' (Part #68321746AA) behind the glovebox. 🎬 Watch: Troubleshooting a failed Jeep star connector
- Jeep Grand Cherokee (2014-2021) — Failures of the Uconnect infotainment system cause a loss of communication on the network, leading to various U-codes and loss of screen-controlled features.
- Chrysler Pacifica (2017-2024) — Suffers from poor pin retention in CAN bus star connectors, leading to 'Service Shifter' messages. 2022-2024 Hybrid models were recalled for a software flaw in the Power Inverter Module.
- Ram 1500 (2013-2018) — Experiences communication failures with modules like the HVAC control head. A weak battery is the primary contributing factor.
- Ford Escape (2020-2022) — Part of a field service action related to faulty fuel injectors, which triggers secondary communication codes set by the PCM.
- Jaguar/Land Rover Various Models (2010-2024) — U2053 is a defined code on these vehicles, pointing to a 'Control Module Network Signal Error' requiring a specific diagnostic path based on the workshop manual.
Manufacturer-Specific Notes
- Ford: Communication codes are frequently caused by a software glitch in the APIM (SYNC module). Ford issues Technical Service Bulletins to fix these with a software update.
- Chrysler/Jeep/Dodge/Ram: These vehicles use 'star connectors' as a central junction for network wiring. Poor pin retention in these connectors causes widespread communication failures. A firm slam of the glove box temporarily restores function, confirming a bad star connector.
- General Motors (GM): A 'Lost Communication with BCM' code is frequently caused by a poor ground connection at location G218. TSB PIT5405D details the fix: cleaning paint and insulation from the ground stud behind the driver's side kick panel.
- Jaguar/Land Rover: U2053 means 'Control Module Network Signal Error'. Diagnosis is highly dependent on the specific vehicle and requires following the manufacturer's detailed procedures, as the fault originates from numerous modules.
Frequently Asked Questions
Can a bad battery really cause code U2053?
Yes, absolutely. Electronic modules in modern cars are highly sensitive to voltage drops. A weak battery causes modules to fail initialization during startup, leading to a cascade of communication errors across the network.
Can a single bad ground wire really cause this much trouble?
Yes. A major computer like the Body Control Module (BCM) requires a solid ground to operate. If its ground connection is loose, the module cannot send stable signals, making it appear offline and causing dozens of unrelated error codes.
What are common misdiagnosis mistakes for these U-codes?
The biggest mistake is replacing a module just because a scan tool says it's offline. The actual cause is frequently a bad wire, a poor ground, or a software glitch crashing the network. Always test the network wiring, power, and grounds to the module before replacing it.
My scanner shows U2053 and a sensor code. Which do I fix first?
Always diagnose the most specific code first. If you have a code for a specific sensor and U2053, the sensor fault is the primary problem causing the module to broadcast invalid data. Fixing the faulty sensor or its wiring automatically resolves the U-code.
Will clearing the code fix the problem?
No, clearing the code only turns off the warning light temporarily; the code returns immediately upon the next key cycle if the underlying fault remains.
I can't find a definition for U2053 for my car. What should I do?
Because U2053 is a manufacturer-specific code, its exact meaning isn't published in generic code lists. Use a professional-grade scan tool to pull the manufacturer's specific description from your vehicle's computer. Searching forums for your specific make and model also provides context.
Is this an expensive repair?
It depends entirely on the root cause. If the cause is a weak battery or a dirty ground wire, the fix costs under $200. However, diagnosing a complex wiring issue or replacing a major control module costs between $500 and $1,500.
What is a 'star connector' and why does it fail?
A star connector, used frequently by Chrysler and Jeep, is a plastic block where CAN bus wires from different modules join together. They fail due to loose pin connections from vibration or moisture corrosion. This single point of failure takes down multiple vehicle systems at once.
Key Takeaways
- U2053 indicates a network communication failure, most often triggered by a voltage drop below 12.4V rather than a failed computer module.
- Always test the battery and inspect main ground connections (like GM's G218) before spending hundreds on advanced diagnostics or replacement parts.
- On Chrysler, Jeep, and Dodge vehicles, a faulty CAN bus 'star connector' behind the glovebox is the leading cause of this code and costs under $60 in parts to fix.
- Do not replace an 'offline' module without first verifying its power, ground, and network wiring using a digital multimeter and a bidirectional OBD-II scanner.
Helpful Videos
![How To Test CAN BUS With A Multimeter [CAN Bus Resistance Check] Mechanic Mindset](https://img.youtube.com/vi/JPE42HSJxAk/mqdefault.jpg)

Shop the Parts Behind U2053
Below are the parts most often responsible for code U2053, ranked by how frequently each one is the actual culprit (per the diagnosis above). Tap any to see what we have for your vehicle.


The information in this article is provided for general reference and educational purposes only. Vehicle specifications, procedures, and part compatibility can vary by production date, trim level, and region. Always consult your vehicle's factory service manual and verify part numbers before purchasing or performing repairs. Safety-critical components such as airbags, seat belts, and braking systems should be installed by a qualified professional.
- 🎬 Helpful Videos
- 🛍️ Shop This Part
- What Does U2053 Mean?
- Can I Drive With U2053?
- Common Causes
- Symptoms
- Common Fixes & Costs
- Used vs. New Parts: Buying Guide
- Cost of Not Fixing It
- Diagnosis Steps
- When This Code Triggers (Freeze-Frame Conditions)
- Related Codes
- Climate & Environmental Factors
- How to Clear the Code After You Fix It
- Will This Fail Emissions / State Inspection?
- Most Commonly Affected Vehicles
- Manufacturer-Specific Notes
- Frequently Asked Questions
- Can a bad battery really cause code U2053?
- Can a single bad ground wire really cause this much trouble?
- What are common misdiagnosis mistakes for these U-codes?
- My scanner shows U2053 and a sensor code. Which do I fix first?
- Will clearing the code fix the problem?
- I can't find a definition for U2053 for my car. What should I do?
- Is this an expensive repair?
- What is a 'star connector' and why does it fail?
- Key Takeaways
- 🎟️ Get 5% Off