
U2105 on 2007-2009 Cadillac SRX: Lost ECM Communication, X1 Connector Fault
Code U2105 on a 2007-2009 SRX almost always means there's a bad connection in the main transmission harness connector (X1). The fix, documented in GM TSB #PIC4740F, is usually inspecting and securing the connector pins, often costing $0 in parts but 1-3 hours of diagnostic and repair labor. This issue is common across platform mates like the Cadillac STS and CTS.
- U2105 is a network code, not an ECM failure. Do not replace the ECM before performing a thorough wiring inspection.
- The most likely cause is a poor connection at the large transmission harness connector (X1), as documented in a GM Technical Service Bulletin.
- Symptoms are often severe, including harsh shifting, no-start, and multiple warning lights, making the vehicle unsafe to drive.
- The fix is often low-cost in terms of parts (inspecting/securing a connector), but requires 1-3 hours of labor to access, diagnose, and repair the connection properly.
- This code will almost always appear with a group of other communication codes (U0100, U0101, P0700, etc.), which all point to the same network fault.
What's Unique About the 2007-2009 Cadillac SRX
The first-generation Cadillac SRX, along with other GM vehicles on the Sigma platform like the CTS and STS, is known for a specific electrical weak point that triggers code U2105. A widely-known General Motors Technical Service Bulletin, PIC4740F (which supersedes PIC4740E), points directly to the main transmission harness connector, a large, round, twist-lock connector known as X1, as the primary culprit. Loose, unseated, or corroded terminals in this single connector can disrupt the entire vehicle network, causing a cascade of communication codes and severe drivability issues, often fooling technicians into suspecting more expensive module failures.
Diagnostic Flowchart
Tap your situation to follow the diagnostic path that matches what you're seeing on this vehicle.
Symptoms You May Notice
- Check Engine Light (SES light) is on
- Vehicle enters 'Reduced Power' mode
- Transmission shifts harshly or gets stuck in one gear (limp mode)
- Vehicle will not crank or start
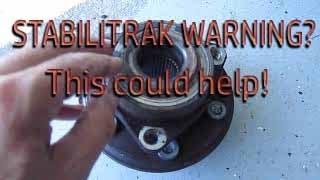
- Multiple warning lights on the instrument cluster (e.g., StabiliTrak, ABS, 'Service Stabilitrak')
- Door locks may cycle on their own while driving
- Scan tool cannot communicate with the ECM or TCM
- Key may become stuck in the ignition
- Replacing the Engine Control Module (ECM) without first inspecting the transmission X1 connector.
- Replacing the Transmission Control Module (TCM) when the fault is in the external wiring.
- Replacing the battery or alternator, assuming the electrical issues are power-supply related.
- Replacing the starter motor due to a no-crank symptom without checking for communication codes first.
Most Likely Causes
- Loose or Poorly Seated Terminals in Transmission Connector X1 🔴 High Probability → Shop Transmission Assembly This is a well-documented failure point identified by GM in Technical Service Bulletin #PIC4740F. Vibrations and environmental exposure cause pins to back out or lose contact in the large, round, twist-lock connector on the driver's side of the transmission.
How to confirm: Disconnect the large X1 connector on the driver's side of the transmission. Visually inspect for backed-out pins, green corrosion, or moisture. Gently tug on each individual wire to ensure the terminal is securely seated. The TSB warns that applying a side load to the wires may give a 'false positive lock,' so be thorough.
Typical fix: Reseat any loose terminals until they click into place. Clean the connector pins with electrical contact cleaner and apply a small amount of dielectric grease before securely reconnecting. In some cases, the terminal itself may need to be replaced if the locking tang is damaged.
Est. part cost: $0-$25 - Chafed or Damaged Wiring Harness 🟡 Medium Probability TSB #PIC4740F notes that the wiring harness can rub against a securing bracket on the passenger side of the transmission bell housing, eventually wearing through the insulation and causing a short. While the TSB specifically calls this out for the CTS and ATS, the shared architecture makes it a possibility for the SRX.
How to confirm: Visually inspect the entire length of the transmission harness, paying close attention to any points where it contacts the engine, transmission, or chassis brackets, especially near the passenger-side bell housing area.
Typical fix: Repair the damaged section of wire using solder and heat-shrink tubing.
Est. part cost: $5-$30 - Failed Control Module (ECM, TCM, or BCM) ⚪ Low Probability
How to confirm: This should only be considered after all wiring and connector issues have been ruled out. Requires advanced diagnostics to verify the module has proper power and ground but is not communicating on the CAN bus. A multimeter check between pins 6 and 14 of the OBD-II port should show approximately 60 ohms of resistance.
Typical fix: Replace the failed module and program it to the vehicle, which usually requires dealer-level tools.
Est. part cost: $300-$1000
Rare But Worth Checking
- Corroded or Failed Underhood/Rear Fuse Block:
Diagnosis Steps
- Perform a full vehicle scan to retrieve all codes from all modules. Note the presence of multiple communication (U-prefix) codes, especially U0100, U0101, and U2106.
- Locate the transmission X1 connector, which is a large, round, twist-lock connector on the driver's side of the transmission case.
- Disconnect the negative battery terminal.
- Disconnect the X1 connector. Inspect both halves for any signs of corrosion, moisture, or bent/damaged pins.
- Per TSB PIC4740F, carefully and gently tug on each individual wire leading into the back of the connector. A properly seated terminal will not move. The TSB warns that a side load on the wires can create a 'false positive lock,' so ensure you are pulling straight back.
- Inspect the transmission wiring harness for any signs of chafing, melting, or physical damage, especially where it is secured by brackets near the engine bell housing on the passenger side.
- If a loose terminal is found, use a proper terminal pick tool to release and reseat it until it clicks. If the terminal is damaged or corroded, it must be replaced.
- Apply a thin layer of dielectric grease to the connector seal to prevent future moisture intrusion.
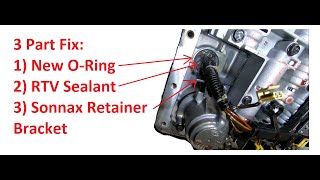
- Reconnect the connector, ensuring it clicks and the locking mechanism is fully engaged. 🎬 Watch: How to seal a leaking transmission harness connector Reconnect the battery.
- Clear all DTCs and perform a test drive to see if the codes return. If they do not, the repair is complete.
- If codes return, advanced diagnostics with a multimeter will be needed. Check for 60 Ohms of resistance between Pin 6 (CAN High) and Pin 14 (CAN Low) at the OBD-II port with the battery disconnected to verify the integrity of the main CAN bus terminating resistors.
Parts You'll Likely Need
- Dielectric Grease
(OEM #ACDelco 10-4064)— Used to protect the electrical connector from moisture and corrosion after inspection or repair.
Trusted brands: Permatex, ACDelco
OEM price range: $10-$20
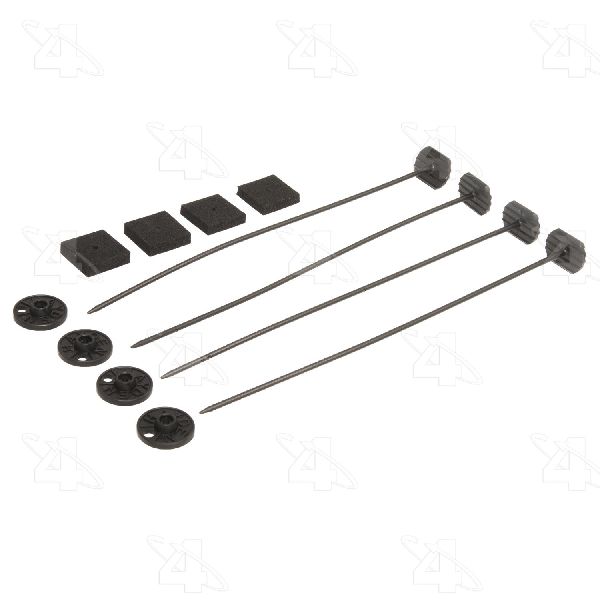
Aftermarket price range: $5-$15 - Connector Terminals / Pins — If a terminal is damaged or its locking tang is broken, it must be replaced to ensure a secure connection. These are often sourced from a dealer parts department or a wiring pigtail kit.
Trusted brands: ACDelco, Delphi
OEM price range: $5-$15 per terminal
Aftermarket price range: $2-$10 per terminal - Transmission Harness Connector Pigtail — If the connector housing itself is damaged or multiple wires are corroded, replacing the entire connector end (pigtail) is the most robust repair.
Trusted brands: ACDelco, Dorman
OEM price range: $50-$120
Aftermarket price range: $30-$80
Related Codes That Often Appear With This One
- U0100 — This is a more generic 'Lost Communication with ECM/PCM' code that is often set by multiple modules when the ECM goes offline, confirming a network-wide issue.
- U0101 — Indicates 'Lost Communication with TCM'. Since the faulty X1 connector is the main electrical interface for the transmission, communication with the TCM is almost always lost simultaneously.
- P0700 — This is a generic transmission fault code. It means the TCM has detected a serious problem (in this case, the loss of communication) and has requested the ECM to turn on the check engine light.
- C0561 — This code indicates 'System Disabled Information Stored' and is commonly associated with the StabiliTrak system. The stability system relies on data from the ECM and TCM, so when communication is lost, it disables itself and sets this code as a safety measure.
- U2100 — A general 'Controller Area Network (CAN) Bus Communication' error, indicating a network-wide problem rather than a single component failure, which is consistent with the X1 connector fault.
- U2106 — This code for 'Lost Communication With Transmission Control Module (TCM)' is frequently set alongside U2105 because the X1 connector fault affects communication to and from the TCM directly.
Technical Service Bulletins (TSBs) & Recalls
- PIC4740F: Supersedes PIC4740E. Addresses multiple communication DTCs (including U2105) and symptoms like no-crank or hard shifting. It directs technicians to inspect for loose terminals in the transmission X1 connector on SRX, STS, and CTS models, and also to check for a chafed harness on CTS and ATS models.
Platform-Specific Known Issues
- Per TSB #PIC4740F, the transmission X1 connector is a known weak point on this platform, frequently causing a loss of communication that sets code U2105 and many others.
- A real-world owner on a forum with a 2008 SRX experienced a no-start, hard shifting, and multiple communication codes. The dealer initially suspected a bad TCM. However, following the TSB, the owner inspected the X1 connector and found several unseated pins. After reseating the pins and clearing the codes, all issues were resolved permanently, avoiding a costly and unnecessary TCM replacement.
Mechanic-Grade Diagnostic Values
- CAN Bus Network Resistance — expected: Approximately 60 Ω (Ohms). Failure: A reading of 120 Ω indicates an open circuit or that one of the two terminating resistors is offline. A reading significantly less than 60 Ω indicates a short between the CAN High and CAN Low wires.
- CAN High Voltage (Key On, Engine Off) — expected: ~2.6 Volts DC. Failure: Voltage that is 0V could indicate a short to ground. Voltage significantly different from the expected value can indicate a bus problem.
- CAN Low Voltage (Key On, Engine Off) — expected: ~2.4 Volts DC. Failure: Voltage that is 0V could indicate a short to ground. Voltage significantly different from the expected value can indicate a bus problem.
Wiring & Ground Locations
- ECM (Engine Control Module) — For the 3.6L V6 engine, the ECM is mounted on the passenger side (right) valve cover. For the 4.6L V8 engine, it is on the left frame rail, below the driver's side headlight assembly.. This is the module that all other modules have lost communication with. Knowing its location is essential for checking its connectors, power, and ground connections directly.
- G107 / G108 — Both are located on the front side of the left (driver's side) cylinder head.. These are primary engine ground points. A loose or corroded connection here can interrupt power to the ECM or other critical engine components, causing communication failures.
- G200 — Located behind the left (driver's side) kick panel.. This is a major ground point for interior electronics, including the Body Control Module (BCM), which is a key player on the CAN bus network.
- CAN Bus Terminating Resistor (Secondary) — While one 120-ohm resistor is internal to the ECM, wiring diagrams indicate a second 'Data Link Resistor' is located behind the right rear quarter trim panel.. If a multimeter test at the DLC shows 120 ohms instead of 60, it means one resistor is offline. Knowing the physical location of the second resistor allows a technician to isolate which half of the CAN bus has the fault.
- Underhood Fuse Block — Located in the right front of the engine compartment, with the positive battery cable attaching directly to it.. This is the primary power distribution point for the entire vehicle. An internal failure, particularly at the main fuse connection, can cut power to the ECM and other modules, causing network-wide communication loss.
Real Owner Repair Stories
- YouTube channel 'gregsautotruck' (Cadillac SRX (year not specified, but similar platform and issue)) — Intermittent no-start, would get a 'no remote detected' message even with the remote in the car. Sometimes it would start, then stall while driving. Jiggling wires near the underhood fuse block would sometimes make it start.
❌ Tried (didn't work) Checking battery connections., Inspecting connectors to the ECM and TCM.
✅ What actually fixed it The entire underhood fuse block/positive battery terminal assembly was replaced. The internal connection for the main 250-amp fuse was failing and making intermittent contact, causing sporadic power loss to the vehicle's main systems.
"I Checked Everything" — The Actual Cause
- In cases where the primary suspect—the transmission X1 connector—and its associated wiring harness are inspected and found to be in perfect condition, but communication codes like U2105 persist, the root cause may not be a data line fault but a power supply fault. A documented case showed that an intermittent internal failure at the main 250-amp fuse connection within the underhood positive battery terminal assembly caused identical symptoms. This is often missed because a visual check of the battery terminals appears fine, and the fuse itself isn't 'blown' in the traditional sense; rather, its connection is failing, intermittently cutting power to the entire network.
When the Usual Fixes Don't Work
- While the TSB pointing to the transmission X1 connector is the most common fix, it is not the only cause. If a thorough inspection and cleaning of the X1 connector and its wiring harness does not resolve the U2105 code and associated symptoms, do not immediately condemn the ECM. There are documented cases where an intermittent failure of the main power distribution from the underhood fuse block assembly produced the exact same set of communication codes and no-start/stalling symptoms. The failure was an intermittent connection at the main 250-amp fuse, which starved modules of power, causing them to drop off the network. Before replacing expensive modules, a thorough test of the vehicle's main power and ground distribution points is critical.
Model Year Variations Within This Range
- 2007-2009: The location of the Engine Control Module (ECM) depends on the engine. On the 3.6L V6, the ECM is on the passenger side valve cover. On the 4.6L V8, it is located on the left (driver's side) frame rail, under the headlight.
Helpful Videos
We Have This Part in Stock


The information in this article is provided for general reference and educational purposes only. Vehicle specifications, procedures, and part compatibility can vary by production date, trim level, and region. Always consult your vehicle's factory service manual and verify part numbers before purchasing or performing repairs. Safety-critical components such as airbags, seat belts, and braking systems should be installed by a qualified professional.
- Cadillac SRX:
- 🧭 Diagnostic Flowchart
- 🎬 Helpful Videos
- 🛍️ Shop This Part
- What's Unique About the 2007-2009 Cadillac SRX
- Symptoms You May Notice
- Most Likely Causes
- Rare But Worth Checking
- Diagnosis Steps
- Parts You'll Likely Need
- Related Codes That Often Appear With This One
- Technical Service Bulletins (TSBs) & Recalls
- Platform-Specific Known Issues
- Mechanic-Grade Diagnostic Values
- Wiring & Ground Locations
- Real Owner Repair Stories
- "I Checked Everything" — The Actual Cause
- When the Usual Fixes Don't Work
- Model Year Variations Within This Range
- 🎟️ Get 5% Off