
OBD-II Code U3580: Comprehensive Guide to Network Communication Faults
What U3580 means, why it triggers, and how to fix it like a pro
- U3580 is a manufacturer-specific network code indicating a communication breakdown on the Controller Area Network (CAN) bus, effectively taking one or more computers offline.
- Always test the 12-volt battery first; a voltage drop below 12.2V causes modules to lose communication and triggers this code.
- Check for Technical Service Bulletins (TSBs) immediately, as 2016-2024 GM, Ford, and Subaru models have known software or water-intrusion flaws requiring specific dealer fixes.
- Never replace the module reporting the U3580 code without diagnosing the network; it is usually just the messenger reporting a fault elsewhere.
- Expect to pay $150 to $250 for a professional diagnostic scan, as pinpointing the exact short or failing module requires an oscilloscope and bi-directional scan tool.
What Does U3580 Mean?
U3580 is a manufacturer-specific network trouble code indicating one of the vehicle's computers (modules) detects a communication network problem. Your car has dozens of modules communicating over the Controller Area Network (CAN) bus. This code flags a breakdown in that conversation—a 'network down' error.
Technical definition: U3580 is a manufacturer-specific code indicating a fault on the vehicle's Controller Area Network (CAN) bus or LIN bus. A specific module or circuit fails to send or receive expected messages, or sends corrupt data.
Can I Drive With U3580?
Yes, But With Caution. You can drive the vehicle, but it is a gamble. You will experience unpredictable electrical issues, incorrect gauge readings, or sudden loss of safety features like ABS and airbags. Continued driving causes stalls in traffic or a no-start condition. Unpredictable module behavior damages other expensive electronics, adding $500-$1500 to your repair bill. Get the vehicle diagnosed immediately.
Common Causes
- Low or Unstable Battery Voltage (Very Common) — Control modules require a stable voltage (typically 12.2V-12.8V) to operate correctly. A weak, failing, or improperly coded 12-volt battery causes modules to malfunction, reset, or lose communication with each other, setting a flood of 'U' codes.
- Damaged Wiring or Corroded Connectors (Very Common) — Frayed wires, loose pins, or corrosion interrupt communication between modules. Hidden damage from previous collision repairs also causes intermittent network issues months later.
- Faulty Control Module or Gateway (Common) — Any single computer module, including the central Gateway router, can fail. It stops communicating ('goes dark') or sends bad data ('babbles'), disrupting the entire network and causing other modules to report a fault.
- Software or Calibration Anomaly (Common) — The problem is often a software bug running on a module. Manufacturers release software updates (Technical Service Bulletins or TSBs) to fix these bugs, such as the calibration issue in GM electric vehicle Battery Energy Control Modules (BECM).
- Improperly Installed Aftermarket Accessories (Common) — Aftermarket alarms, remote starters, or stereo systems improperly tapped into communication wires cause signal degradation, draw excessive power, or introduce noise, leading to network faults.
- Water Intrusion into a Module or Connector (Less Common) — Modules located in areas prone to water entry, such as Ford F-150 tail light assemblies, short-circuit when exposed to moisture, bringing down the communication lines running to them.
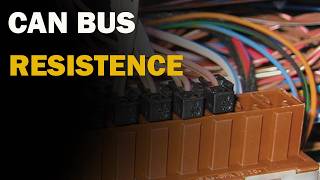
- Faulty Network Termination Resistor (Rare) — The CAN bus network has two 120-Ohm resistors at each end. If one resistor fails, it causes signal reflections and communication errors across the entire network.
Symptoms
- Engine Stalling or No-Start Condition — If communication with the main Engine Control Module (ECM) or Powertrain Control Module (PCM) is lost, the engine stalls while driving or fails to start.
- Multiple, Seemingly Unrelated Warning Lights — The check engine light illuminates alongside a cluster of lights for the ABS, airbag, traction control, and other systems.
- Erratic System Behavior — Gauges drop to zero, the infotainment system reboots, or power windows and locks work intermittently.
- Loss of Specific Features — Functions controlled by the failing module stop working. For example, a failed blind spot module disables blind spot detection.
- Specific Warning Messages on Dash — Specific messages appear on the driver information center, such as "Service High Voltage System" on GM EVs or "Check Blind Spot System" on Fords.
- Lost Communication DTCs Stored in Multiple Modules (scan-tool only — no driver-felt sign) — A full system scan reveals multiple modules logging 'U' codes pointing to a loss of communication with one specific module.
Diagnostic Flowchart
Tap your situation to follow the diagnostic path that matches what you're seeing on this code.
Common Fixes & Costs
- Replacing the 12-Volt Battery — Parts: $200-$350, Labor: $50-$100, ~0.8 hr book time (DIY)
- Repairing Damaged Wiring or Connectors — Parts: $20-$100, Labor: $250-$1000, ~3.5 hr book time (Intermediate)
- Reprogramming a Control Module — Parts: $0, Labor: $150-$450, ~1.5 hr book time (Professional)
- Replacing a Faulty Control Module or Gateway — Parts: $200-$1200, Labor: $150-$400, ~2.5 hr book time (Professional)
Used vs. New Parts: Buying Guide
When a used part is worth it: For older vehicles (>10 years) where a new module is discontinued or prohibitively expensive. A used module from a reputable dismantler with a warranty and an exact part number match is a viable option.
Donor-vehicle mileage cap: roughly under 100000 miles for the part to have meaningful remaining life.
Donor quality checklist:
- Verify the part number on the module itself, not just from a catalog.
- Ensure the donor vehicle was not scrapped due to flood, fire, or a major electrical issue.
- Obtain a short-term (30-90 day) warranty that allows time for installation and programming.
- Inspect the part for any signs of corrosion, water damage, or opened casings.
Decision logic:
- If The fix is a known software update (TSB) → Only a new module or reprogramming the existing one works. A used module has the same old software.
- If Vehicle is less than 8 years old and the part is available new → Buy new. The risk of a used part failing after the complex and costly programming process is too high.
- If The module requires VIN programming and security relearns (most BCMs, ECMs, Gateway modules) → Factor in $150-$400 for professional programming. A used part is sometimes rejected by the vehicle's security system.
Warranty tradeoff: Used parts typically offer a 30-90 day part-only warranty. New OEM parts carry a 1-2 year warranty. Aftermarket new parts vary from 1 year to a limited lifetime warranty.
Worst-case if a used part fails: $400-$800 if the used module is faulty or incompatible, requiring repeat labor for removal, installation, and programming attempts.
What Happens If You Wait — Timeline
- 0-1 month: An intermittent fault occurs. A single warning light (e.g., 'Check Blind Spot System') appears and disappears. The U3580 code is stored but does not trigger the Check Engine Light yet. (MPG impact: 0%% · Added cost: $0)
- 1-3 months: The fault becomes persistent. The Check Engine Light illuminates, and multiple system warning lights (ABS, Airbag, Traction Control) appear. A specific vehicle feature is permanently inoperative. (MPG impact: 0-2%% · Added cost: $0-$50 (cost of initial professional diagnosis))
- 3-6 months: The faulty module or wiring disrupts the entire network. Symptoms become severe and include gauges sweeping to zero, infotainment reboots, or intermittent stalling/no-start conditions. A 'babbling' module puts electrical stress on other healthy modules. (MPG impact: 2-5%% · Added cost: $500-$1500 (risk of damaging a second control module due to network instability))
- 6+ months: Cascading failure occurs. The initial problem causes permanent damage to other control modules (like the Gateway or Body Control Module). The vehicle is unreliable, fails to start, or stalls unexpectedly. A wiring short poses a fire risk. (MPG impact: 5-10%% · Added cost: $1500-$4000+ (cost to diagnose and replace multiple failed modules and repair underlying wiring issue))
Cost of Not Fixing It
- Immediate: Unpredictable behavior of safety systems like ABS, traction control, and airbags. Gauges or displays become unreliable. Vehicle stalls or fails to start. (Added cost: Negligible)
- 1-3 months: A 'babbling' module sending corrupt data puts excessive strain on other modules on the network, causing premature failure of an otherwise healthy component. (Added cost: $500-$1500)
- 3+ months: Continued electrical stress and intermittent communication leads to a cascading failure where multiple modules are damaged. A wiring short overheats and causes a fire. (Added cost: $1500-$4000+)
Diagnosis Steps
- Check and Load Test the 12V Battery
Ensure the vehicle's 12-volt battery is fully charged and healthy. Use a multimeter to check the voltage; it must be above 12.4 volts with the engine off. A reading below 12.2V requires charging. Use a dedicated battery load tester to confirm it holds a charge under load.
Tools: Multimeter, Battery Load Tester (Beginner) - Perform a Full System Scan
Use a high-quality OBD-II scanner to read manufacturer-specific codes from ALL modules (ABS, BCM, TCM, etc.). Save this full report. Look for patterns: if all other modules report 'lost communication' with one specific module, that module is your primary suspect.
Tools: Advanced OBD-II Scanner (Beginner) - Check for Technical Service Bulletins (TSBs)
Search online for TSBs related to your vehicle's make, model, year, and the U3580 code. Manufacturers issue bulletins for known software issues or common wiring problems, saving hours of diagnostic time.
Tools: Internet Access (Intermediate) - Perform a Thorough Visual Inspection
Inspect all visible wiring harnesses connected to modules reporting errors. Look for rodent chews, corrosion on connectors (especially under carpets near doors), or harnesses rubbing against sharp metal edges.
Tools: Flashlight, Inspection Mirror (Intermediate) - Test the CAN Bus Termination Resistors
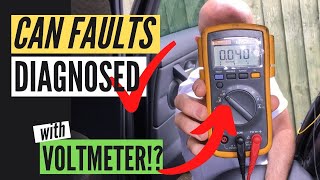
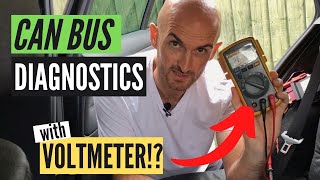
With the battery disconnected, use a multimeter to measure the resistance between Pin 6 (CAN High) and Pin 14 (CAN Low) on the OBD-II port. A healthy high-speed CAN network reads approximately 60 Ohms. A reading of 120 Ohms indicates an open circuit; near 0 Ohms indicates a short.
Tools: Multimeter (Advanced) - Check for Voltage on Communication Lines
With the key on, use a multimeter to check the voltage to ground on CAN High (Pin 6) and CAN Low (Pin 14). You should see approximately 2.5V on each line. A steady 0V, 5V, or 12V indicates a short to ground or power on that line.
Tools: Multimeter (Advanced) - Isolate the Faulty Module or Circuit
Using a vehicle-specific wiring diagram, identify all modules on the affected network. Disconnect modules one by one, re-checking the 60-Ohm resistance at the OBD-II port after each one. If resistance returns to normal, you found the source of the problem.
Tools: Multimeter, Basic Hand Tools, Vehicle-Specific Wiring Diagram (Advanced) - [ADVANCED] Monitor Module Status PIDs
Using an advanced scan tool, access the live data for the Gateway Module. Look for PIDs showing the status of other modules on the network. This provides a definitive, real-time list of which module is offline.
Tools: Advanced OBD-II Scanner with Live Data capability (Advanced) - [PRO TIP] Check CAN Bus Signal with an Oscilloscope
Connect an oscilloscope to Pins 6 and 14. A healthy CAN bus signal shows a clean, rectangular waveform. Look for noise, rounded-off corners, or incorrect voltage levels indicating wiring problems, interference, or a failing module.
Tools: Automotive Oscilloscope (Professional)
When This Code Triggers (Freeze-Frame Conditions)
- Battery Voltage: 11.5V - 12.2V (During key-on or engine cranking with a weak battery)
- Vehicle Speed: Any (Occurs at any time, including 0 mph (Key On, Engine Off))
- System State: N/A (Occurs immediately at key-on as modules perform their initial network check-in)
- Time Since Start: 0-10 seconds (Fault is detected during the initial power-up and network initialization sequence)
Related Codes
- U0100 — Generic code for 'Lost Communication With ECM/PCM.' U3580 is a manufacturer code set by a different module about a network problem, which is often the root cause of the U0100. Diagnose the U3580 first.
- U0001 — Means 'High Speed CAN Communication Bus,' indicating a general fault on the primary vehicle network. U3580 is more specific, set by a particular module that detected the fault. Fixing U3580 clears U0001.
- U0140 — Means 'Lost Communication with Body Control Module (BCM).' A failing BCM is often the root cause of a U3580 code set by other modules, as they can no longer talk to it.
- P2C8A, U3577-U357F (GM) — On affected GM electric vehicles, U3580 is found in a large group of codes pointing to a software problem in the Battery Energy Control Module (BECM) identified in TSB PIP6021B.
Climate & Environmental Factors
- High Humidity / Heavy Rain: Increases the likelihood of water intrusion into modules and connectors, especially those with compromised seals. This is a primary cause for the Ford F-150 tail light module failure.
- Cold Weather: Cold temperatures make wire insulation brittle and prone to cracking from vibration, creating shorts. It also lowers the effective power of a weak 12V battery, pushing borderline modules into a fault state.
- Road Salt (Salt Belt Regions): Road salt is highly corrosive and dramatically accelerates the decay of wiring harnesses, connector pins, and module casings on the undercarriage. This is a major factor for issues on Subaru, Hyundai, and Kia models.
How to Talk to a Mechanic About This Code
Say this: "I have a U3580 code and multiple other 'U' codes, alongside several warning lights. I need to schedule a diagnostic for a network communication issue. I already verified the 12V battery is healthy. Please check for relevant TSBs and perform a full system scan to identify the offline module."
This signals you are an informed customer. It directs the technician toward a logical diagnostic path for network faults, preventing them from wasting time on unrelated systems. Mentioning the battery and TSBs shows you did basic homework and helps avoid unnecessary diagnostic charges.
Avoid saying:
- 'My car is acting weird and has a bunch of lights on.'
- 'Just fix the check engine light.'
- 'I think it's a bad computer, can you replace it?'
Questions to ask before authorizing the repair:
- Did the full system scan show one specific module that all other modules have lost communication with?
- Have you checked the CAN bus resistance at the OBD-II port? What was the reading?
- If you are recommending a module replacement, how have you ruled out a wiring or connector problem leading to that module?
- Does the replacement module require programming, and is that included in the estimate?
- What is the warranty on both the parts and the labor for this repair?
Where to Take It: Dealer vs Independent vs Chain
- Dealer:
Often the best choice, especially for newer vehicles (less than 8 years old) or if a known TSB exists (like with many GM and Ford models). They have direct access to proprietary software and wiring diagrams essential for these repairs.
Best for: Vehicles under warranty, Known issues covered by a Technical Service Bulletin (TSB) or special coverage program, Complex software reprogramming and module replacement
Downsides: Typically higher labor rates, Defaults to module replacement instead of in-depth wiring repair (Typical cost: +40% vs. baseline) - Independent Shop:
A strong contender if you find a well-regarded independent shop specializing in electrical diagnostics. Ask if they have experience with CAN bus issues and if they own an oscilloscope and manufacturer-level scan tools.
Best for: Out-of-warranty vehicles, Diagnosing and repairing common wiring issues (chafing, corrosion), Shops that specialize in automotive electronics and diagnostics
Downsides: Lacks expensive, manufacturer-specific tools for module programming, Success is highly dependent on the technician's experience with network diagnostics (Typical cost: +0% vs. baseline) - Chain Shop:
AVOID for diagnosis and repair. A U3580 code is far beyond the scope of typical chain shop capabilities. They can replace a battery, but do not rely on them for network troubleshooting.
Best for: Battery replacement and basic code scanning
Downsides: Technicians are not equipped or trained for complex network diagnostics, High likelihood of an incorrect diagnosis, leading to unnecessary parts replacement (Typical cost: -10% vs. baseline)
When to Walk Away From the Repair
If the total estimated repair cost exceeds 50% of the car's private-party value, sell or trade it in.
- Car worth $5000, fix is $2800: Walk away. The repair cost is over 50% of the vehicle's value. You risk discovering more issues after this expensive fix.
- Car worth $15000, fix is $2200: Fix it. The repair cost is well under the 50% threshold and restores significant functionality and safety to a valuable vehicle.
- Car worth $3000, fix is $1800: Walk away. A repair costing 60% of the car's value is a poor investment, especially on an older, lower-value car that likely has other pending maintenance needs.
What Scan Tool You Need for This Code
Minimum: A scanner that reads manufacturer-specific codes from ALL vehicle modules (ABS, BCM, SRS, etc.), not just generic engine codes. Must view live data.
A basic $20 code reader only sees the engine computer and misses the U3580 code entirely, or it cannot see which other modules report communication losses. This makes proper diagnosis impossible.
Budget: BlueDriver Pro (~$120) — Performs a full system scan to read codes from all modules, giving you the crucial 'who is complaining about who' information. It also provides live data from these modules.
Mid-range: Foxwell NT510 Elite (~$180) — Offers full system diagnostics and live data, but adds crucial bi-directional controls. This allows you to command a module to perform a self-test or activate a component, confirming if a module is truly offline or just has a wiring issue.
Professional: Autel MaxiCOM MK808S (~$450) — Provides comprehensive OE-level diagnostics for all systems, advanced bi-directional control, and special service functions. Its tablet interface makes it easier to graph live data from multiple sensors on the network, spotting anomalies that indicate a wiring short or failing module.
How to Clear the Code After You Fix It
- Ensure all repairs are complete and the 12V battery is fully charged.
- Use a professional OBD-II scan tool to perform a 'Clear All DTCs' command from the Gateway or BCM.
- Turn the ignition off for 60 seconds, then start the vehicle and let it idle for 2-3 minutes.
- Perform a complete drive cycle to allow all system readiness monitors to run.
Drive cycle (~20 minutes): A universal drive cycle includes a cold start, a few minutes of idling, mixed city driving (stops and starts, varied speeds), and a period of steady-state driving at highway speeds (e.g., 55 mph for 5-10 minutes).
Readiness monitors affected: Comprehensive Component Monitor, Misfire Monitor
Before emissions retest: drive at least 50 miles to fully set monitors.
Watch out for:
- Disconnecting the battery does not reliably clear manufacturer-specific 'U' codes and resets all readiness monitors to 'Not Ready', guaranteeing an emissions test failure.
- The code returns immediately if the root physical or software fault is not corrected.
- A basic code reader cannot clear DTCs from all affected modules; a full-system scan tool is required.
Will This Fail Emissions / State Inspection?
Yes — this code typically fails an OBD-II emissions inspection.
- California: An illuminated Check Engine Light results in an automatic failure of the smog check. After repairs, a drive cycle of 50-100 miles is typically needed to set readiness monitors before a re-test is possible.
- New York: A vehicle fails the NYVIP3 OBD-II inspection if the 'Check Engine' light is on. For 2001 and newer vehicles, only one readiness monitor is allowed to be 'Not Ready' to pass.
- Texas: In counties requiring emissions testing, an illuminated 'Check Engine' light is an automatic failure. As of 2025, safety-only inspections are eliminated for non-commercial vehicles, but emissions testing remains.
Most Commonly Affected Vehicles
- Cadillac Lyriq (2023-2024) — Prone to a software issue in the Battery Energy Control Module (BECM) that sets U3580 and a cascade of other codes. The fix is a dealer-performed reprogram covered by TSB PIP6021B.
- Chevrolet Blazer EV & Equinox EV (2024-2025) — Affected by the same BECM software anomaly as the Cadillac Lyriq requiring a dealer reprogram. Some models also have a recall (N252532830) for a rear parking brake wiring harness causing network issues.
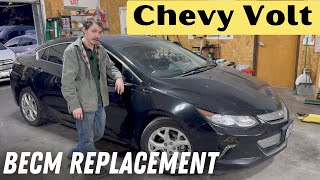
- Chevrolet Volt (2016-2019) — Known for failures of the Battery Energy Control Module (BECM) causing lost communication codes. Covered by TSB 18-NA-261 and GM Special Coverage program N232432680, extending the warranty to 15 years or 150,000 miles.
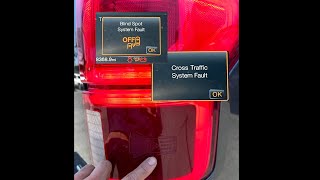
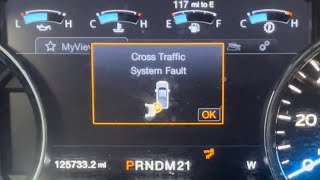
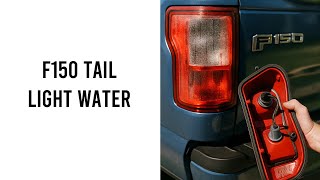
- Ford F-150 (2016-2022) — Commonly experiences water intrusion in the tail light assembly, shorting out the Side Object Detection (SOD) or Blind Spot (BLIS) module per TSB SSM 47513. Requires replacing the module and the tail light assembly.
- Hyundai Palisade (2020-2024) — Appears due to wiring harness issues. A notable issue is Hyundai Recall 235 (NHTSA 22V-633), where moisture in the accessory trailer hitch wiring harness module causes an electrical short.
- Kia Telluride (2020-2024) — Shares a platform with the Hyundai Palisade and is susceptible to similar wiring and connector-related network faults, including the trailer hitch harness recall.
- Subaru Ascent (2019-2023) — Network codes are frequently traced to a faulty or improperly installed trailer hitch wiring harness. This harness taps into the rear vehicle network and causes widespread communication failures if it shorts out.
Manufacturer-Specific Notes
- General Motors: On 2023-2024 Ultium platform EVs, this code is part of TSB PIP6021B, fixed by a dealer reprogram of the BECM. On 2016-2018 Chevy Volts, a similar BECM failure is covered by Special Coverage N232432680.
- Ford: On F-150 trucks, a cluster of 'U' codes is caused by a cracked tail light housing per TSB SSM 47513. Water shorts the blind spot (BLIS) module. The fix is replacing the module and the entire tail light assembly.
- Hyundai / Kia: On Palisades and Tellurides, network faults are traced to corrosion. A major issue is the official recall for the accessory trailer hitch wiring harness (Hyundai Recall 235), which short circuits and causes a fire risk.
- Subaru: On the Ascent, the factory or aftermarket trailer hitch wiring harness is a major suspect for U3580. The control module for the trailer lights taps directly into the rear body communication network and shorts out.
Real Owner Stories
2017 Chevy Volt at 128K miles
Car displayed 'Low Propulsion' and 'Unable to Charge' messages, then failed to start.
Outcome: Dealer diagnosed a failed Battery Energy Control Module (BECM). The part was replaced, and the car was repaired in 12 days. The total cost out-of-pocket (vehicle was out of warranty) was approximately $1,900.
Lesson: On a Gen 2 Chevy Volt, a sudden 'Low Propulsion' warning followed by a no-start condition is a classic symptom of BECM failure. Even if the car seems to recover, take it to a dealer immediately, as the failure leaves you stranded.
2019 Ford F-150
Driver noticed a rapid blinker indicator on the dash. Upon inspection, the tail light assembly was half full of water, and the bulb was broken.
Outcome: This is a well-documented issue (Ford TSB SSM 47513). Water intrusion shorts out the Blind Spot (BLIS) module located in the tail light housing, causing network codes. The correct fix is replacing the entire tail light assembly (which comes with a new seal) and the damaged module.
Lesson: On modern F-150s, do not ignore water or condensation in the tail lights. It destroys an expensive control module. Drilling a drain hole is not a fix; the assembly must be replaced to prevent recurring network faults.
2020 Subaru Ascent
Vehicle suddenly displayed a variety of warning lights and systems (like reverse camera and blind spot detection) stopped working after a trailer hitch and wiring harness were installed.
Outcome: Upon disconnecting the trailer harness module, all network communication faults cleared. The issue was traced to a faulty or improperly installed trailer wiring module disrupting the rear CAN bus network.
Lesson: If a network code like U3580 appears immediately after installing an accessory that taps into vehicle wiring (trailer hitch, stereo, alarm), that accessory is the primary suspect. Always disconnect the new component first before beginning any other diagnosis.
How to Prevent This Code From Triggering
- Maintain 12V Battery Health (Every 6 months) — Weak or unstable battery voltage is a top cause of communication module failure. Regularly clean terminals of corrosion and ensure the battery is fully charged, especially if the vehicle sits for long periods. Use a battery maintainer for stored vehicles.
- Apply Dielectric Grease to Exposed Connectors (When servicing or exposing a connector) — Dielectric grease is a non-conductive, silicone-based sealant that keeps moisture, salt, and dirt out of electrical connectors, preventing the corrosion that causes network faults. It is especially useful for connectors exposed to the elements, like trailer harnesses or underbody sensors.
- Regularly Wash Undercarriage in Salt Belt Regions (Monthly during winter) — Road salt is extremely corrosive to wiring harnesses and connectors located on the vehicle's undercarriage. Regular washing removes salt buildup and significantly slows down corrosion that leads to open circuits and network shorts.
- Inspect for and Seal Water Leaks (Annually or after noticing dampness) — Proactively check common water entry points like sunroof drains, windshield seals, and lamp housings. A small leak allows water to drip directly onto a critical control module or connector, causing a short. Sealing leaks before they cause damage prevents expensive electrical repairs.
- Ensure Professional Installation of Aftermarket Electronics (During installation) — Improper installation of stereos, alarms, or remote starters is a common cause of network faults. Installers must never tap CAN bus wires for power or signal. Ensure they use proper fuse taps and ground locations to avoid introducing noise or voltage drops onto the network.
Frequently Asked Questions
Can I fix the U3580 code myself?
Simple fixes like replacing the 12V battery or cleaning a corroded connector are DIY-friendly. However, most fixes require professional tools and expertise. Stop DIYing and take the vehicle to a specialized diagnostic shop if the battery tests fine.
Will clearing the code make it go away?
You can clear the code with a scanner, but it returns immediately if the underlying network fault is still present. Clearing codes is a diagnostic step, not a fix.
The auto parts store scanned my car for free. What now?
A free scan identifies the code but does not diagnose the root cause. Pay $150 to $250 for a professional diagnostic. This covers the technician's time to use advanced scan tools, wiring diagrams, and oscilloscopes.
My mechanic wants to replace a module for $1,200. Is that right?
Module replacement is a common fix costing $500-$900 for the part and $300-$750 for labor and programming. Always ask if they definitively ruled out wiring or software issues first. Request the results of their network resistance and voltage tests.
Why are there so many other trouble codes along with U3580?
When one module stops communicating, all modules relying on its data log a 'lost communication' fault. This creates a cascade of 'U' codes pointing back to a single root cause. Diagnosis finds that one source.
What is a gateway module and why is it important?
A gateway module is the main internet router for your car, connecting different network branches. If the gateway fails, it cuts off communication for large parts of the vehicle. This causes dozens of codes simultaneously.
I installed an aftermarket stereo and now this code appeared. Are they related?
Absolutely. Improperly tapping into a CAN bus wire for power or a speaker signal corrupts network data and triggers U3580. Professionally disconnect the aftermarket device first to see if the fault clears.
Key Takeaways
- U3580 is a manufacturer-specific network code indicating a communication breakdown on the Controller Area Network (CAN) bus, effectively taking one or more computers offline.
- Always test the 12-volt battery first; a voltage drop below 12.2V causes modules to lose communication and triggers this code.
- Check for Technical Service Bulletins (TSBs) immediately, as 2016-2024 GM, Ford, and Subaru models have known software or water-intrusion flaws requiring specific dealer fixes.
- Never replace the module reporting the U3580 code without diagnosing the network; it is usually just the messenger reporting a fault elsewhere.
- Expect to pay $150 to $250 for a professional diagnostic scan, as pinpointing the exact short or failing module requires an oscilloscope and bi-directional scan tool.
Helpful Videos
![How To Test CAN BUS With A Multimeter [CAN Bus Resistance Check] Mechanic Mindset](https://img.youtube.com/vi/JPE42HSJxAk/mqdefault.jpg)
Shop the Parts Behind U3580
Below are the parts most often responsible for code U3580, ranked by how frequently each one is the actual culprit (per the diagnosis above). Tap any to see what we have for your vehicle.


The information in this article is provided for general reference and educational purposes only. Vehicle specifications, procedures, and part compatibility can vary by production date, trim level, and region. Always consult your vehicle's factory service manual and verify part numbers before purchasing or performing repairs. Safety-critical components such as airbags, seat belts, and braking systems should be installed by a qualified professional.
- 🧭 Diagnostic Flowchart
- 🎬 Helpful Videos
- 🛍️ Shop This Part
- What Does U3580 Mean?
- Can I Drive With U3580?
- Common Causes
- Symptoms
- Common Fixes & Costs
- Used vs. New Parts: Buying Guide
- What Happens If You Wait — Timeline
- Cost of Not Fixing It
- Diagnosis Steps
- When This Code Triggers (Freeze-Frame Conditions)
- Related Codes
- Climate & Environmental Factors
- How to Talk to a Mechanic About This Code
- Where to Take It: Dealer vs Independent vs Chain
- When to Walk Away From the Repair
- What Scan Tool You Need for This Code
- How to Clear the Code After You Fix It
- Will This Fail Emissions / State Inspection?
- Most Commonly Affected Vehicles
- Manufacturer-Specific Notes
- Real Owner Stories
- 2017 Chevy Volt at 128K miles
- 2019 Ford F-150
- 2020 Subaru Ascent
- How to Prevent This Code From Triggering
- Frequently Asked Questions
- Can I fix the U3580 code myself?
- Will clearing the code make it go away?
- The auto parts store scanned my car for free. What now?
- My mechanic wants to replace a module for $1,200. Is that right?
- Why are there so many other trouble codes along with U3580?
- What is a gateway module and why is it important?
- I installed an aftermarket stereo and now this code appeared. Are they related?
- Key Takeaways
- 🎟️ Get 5% Off