
Chevrolet Impala Brake Light Switch Guide: 1958-1966
Keep your classic Impala's brake lights working correctly by understanding, diagnosing, and replacing the brake light switch.
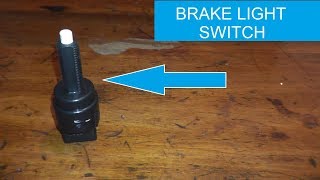
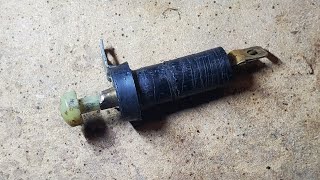
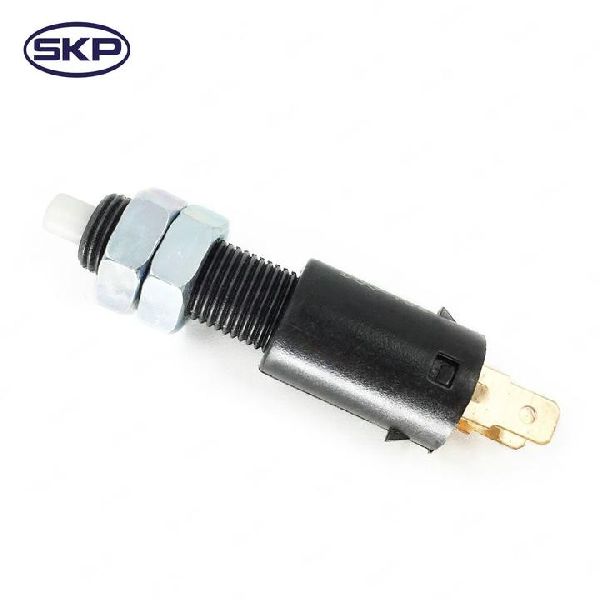
- The brake light switch is a simple, mechanical 2-terminal switch located on the brake pedal support.
- Before replacing the switch, always check the fuse, bulbs, sockets, and especially the ground connections, as these are common failure points on classic Impalas.
- Replacement is very easy for a DIYer and requires minimal tools.
- Standard Ignition (SMP) is a well-regarded aftermarket brand for this part; cheaper brands may have questionable long-term reliability.
Is Your Brake Light Switch Failing?
When your brake lights don't work, the switch is a possible suspect. However, on a classic car like the 1958-1966 Impala, it's often not the first thing to fail. Before replacing the switch, do a quick check of other, more common problem areas.
Check These First! Many brake light problems on these Impalas are caused by simple electrical issues. Check for blown fuses, burnt-out bulbs (they use a dual-filament 1157 bulb), and corroded or loose bulb sockets in the tail lights. Most importantly, check for bad grounds. 🎬 Watch: Diagnosing common tail light and brake light electrical problems. A poor ground connection at the tail light housing is a very common cause of flickering or non-working lights.
Symptoms of a Bad Brake Light Switch
- Brake Lights Do Not Turn On: This is the most common symptom. If your bulbs, fuse, and grounds are all good, the switch is the next logical part to test.
- Brake Lights Work Intermittently: The switch might make a poor connection, causing the lights to flicker or only work when the pedal is pressed hard. This can point to a worn-out switch.
- Brake Lights Stay On: While less common for this simple mechanical design, it's possible for the switch to fail in the 'on' position, which will drain your battery.
Choosing the Right Aftermarket Part
For a vehicle from this era, finding a New Old Stock (NOS) GM part is very rare and usually expensive. The standard for repair is a new aftermarket switch. Quality is important, but even the best switch won't fix bad wiring.
- Tier 1: Reputable Aftermarket (Standard Ignition): Standard Motor Products (SMP), often sold as Standard Ignition, is a well-known and trusted brand for classic car electrical components. Their switches are widely available and considered a reliable replacement for the original. They are a safe bet for quality and fit.
- Tier 2: Economy Brands (Skyward, others): Many other brands, like Skyward, offer brake light switches for your Impala. While they are more affordable, they don't have the long-term, community-verified reputation of a brand like Standard. They may work perfectly fine, but they are more of an unknown quantity. Given the low cost of even the premium brand, it's often worth spending a few extra dollars for peace of mind.
Pro Tip: The brake light power runs through the turn signal switch in the steering column. A faulty turn signal switch can sometimes cause one or both brake lights to stop working. If only one brake light is out and the bulb is good, try wiggling the turn signal lever to see if the light comes on.
Typical Costs
Replacing the brake light switch is an inexpensive repair, especially if you do it yourself.
| Item | Cost Range |
|---|---|
| New Aftermarket Switch | $5.40 - $29.97 |
| Shop Labor | $50 - $100 |
| Total Professional Repair | $55 - $130 |
Frequently Asked Questions (FAQ)
Where is the brake light switch located?
The brake light switch is located under the driver's side dashboard. Look up at the top of your brake pedal arm, where it pivots. You will see a small switch, usually with two wires coming from it, mounted on a bracket so that the pedal arm makes contact with it.
Is this a difficult part to replace myself?
No, this is one of the easiest repairs you can do. It typically requires no special tools. You just need to unplug the two wires and unthread the old switch from its mounting bracket. Thread the new one in, adjust its position so the lights turn off when the pedal is released, 🎬 Watch: How to properly adjust a classic car brake switch. and plug the wires back in. The most difficult part is usually just getting into a comfortable position under the dash.
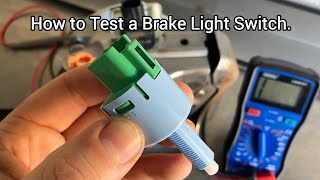
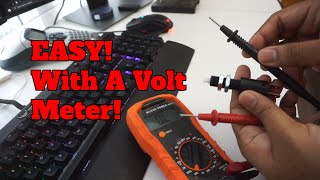
How do I test my old switch?
You can test the switch with a multimeter set to continuity. 🎬 See how to test your switch using a multimeter. Unplug the switch. Connect the multimeter leads to the two terminals on the switch. When the plunger is pressed in (brake pedal up), there should be no continuity. When the plunger is out (brake pedal pressed), the multimeter should beep or show continuity.
Are there any recalls for this part?
No. There are no active recalls or Technical Service Bulletins (TSBs) from Chevrolet or the NHTSA for the brake light switch on the 1958-1966 Impala. Recalls for vehicles this old are extremely rare and are not typically tracked in modern online databases.
Helpful Videos


Technical Specifications
OEM Part Numbers: J3194569 358560C1
Type: Mechanical Plunger Switch, Terminals: 2, Voltage: 12V
We Have This Part in Stock


The information in this article is provided for general reference and educational purposes only. Vehicle specifications, procedures, and part compatibility can vary by production date, trim level, and region. Always consult your vehicle's factory service manual and verify part numbers before purchasing or performing repairs. Safety-critical components such as airbags, seat belts, and braking systems should be installed by a qualified professional.