
Chevrolet Impala Headlight Switch Guide: 1958-1969
Everything you need to know before replacing the headlight switch on your classic Impala.
- Headlight flickering is a critical safety issue caused by the switch's internal breaker and requires immediate attention.
- Replacing the switch is a simple DIY job that most owners can do in under an hour with basic tools.
- A failing dash light dimmer is a common problem; the cause is almost always the headlight switch's internal rheostat.
- Always inspect the wiring connector for heat damage or corrosion when replacing the switch.
Is Your Impala's Headlight Switch Failing?
A faulty headlight switch in a classic car like the 1958-1969 Impala can cause confusing and dangerous problems. Over decades of use, the internal contacts corrode and the dimmer coil can break down. This can lead to flickering lights, or lights that don't turn on at all. Since the switch contains a circuit breaker, a failure can mimic a short circuit, causing the lights to turn on and off by themselves as the breaker trips and resets.
Critical Safety Warning
If your headlights are flickering or not working, it is unsafe to drive the vehicle at night or in poor visibility conditions. A complete failure can leave you in the dark unexpectedly. Address this issue immediately.
Choosing the Right Aftermarket Headlight Switch
For a vehicle of this age, New Old Stock (NOS) OEM parts are extremely rare and expensive. Aftermarket switches are the most practical and available option. Quality can vary, so it's important to choose a reputable brand.
- Premium Aftermarket (ACDelco): ACDelco is General Motors' own parts brand and is considered the top choice for replacement parts, offering as close to original quality as possible. While they may be manufactured overseas now, they are generally built to a higher standard than budget options. Expect a better feel and longer service life.
- Quality Aftermarket (Standard Ignition): Standard Motor Products (SMP) is a well-respected brand that has been around for decades. Many professional mechanics trust their electrical components. They offer a good balance of quality and price and are a solid choice for your Impala.
- Value/Economy (Replacement): These are often generic, unbranded parts. While they are the most affordable, their quality can be inconsistent. They may work fine, but some owners report issues like a stiff feel or premature failure. They can be a good option for a budget-conscious repair, but be aware of the potential for shorter lifespan.
Pro Tip: Check Your Connectors!
Before replacing the switch, inspect the plastic electrical connector that plugs into it. These old connectors can become brittle, and the terminals inside can get corroded or melt from heat over time. A bad connection can cause the same symptoms as a bad switch. 🎬 Watch this video to learn how to troubleshoot GM switch wiring. Cleaning the contacts or replacing the connector might solve your problem.
Headlight Switch Replacement Cost
The cost to replace a headlight switch on a 1958-1969 Impala is reasonable, especially if you do it yourself. The parts are affordable and the job doesn't require many specialized tools.
| Part or Service | Estimated Cost |
|---|---|
| New Aftermarket Switch | $27.74 - $89.08 |
| Shop Labor | $75 - $150 |
| Total Estimated Cost | $102.74 - $239.08 |
Frequently Asked Questions
Can I replace the headlight switch myself?
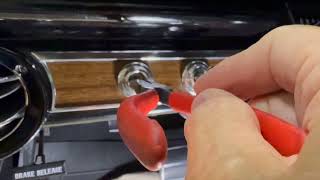
Yes, this is a very DIY-friendly job for most classic car owners. The process involves disconnecting the battery, reaching under the dash to press a release button on the switch body, 🎬 See how to easily release and remove the headlight knob. and pulling the knob and shaft out. Then you can unscrew the bezel nut, unplug the old switch, and install the new one. The most difficult part is often just the uncomfortable position of working under the dashboard.
🎬 Watch this step-by-step guide to replacing your Impala's headlight switch.Why do my dash lights flicker or not work, but my headlights are fine?
This is a classic symptom of a failing rheostat (dimmer) inside the headlight switch. The dimmer is a small wire coil that can break or get corroded spots. Sometimes, just rotating the knob back and forth rapidly can clean the contacts enough to make them work again, but replacement is the permanent fix.
My lights flash on and off while driving. Is that the switch?
It's very likely the switch. These switches have an internal circuit breaker that trips when it overheats from too much electrical current or internal corrosion. When it trips, the lights go out. After it cools for a moment, it resets, and the lights come back on. This cycling is a strong indicator that the switch needs to be replaced.
Do I need a special tool to remove the switch?
No special tools are required, but a bezel nut tool can make it easier to unscrew the retaining nut from the dash without scratching it. However, many people successfully use a pair of fine needle-nose pliers or a small flathead screwdriver to loosen the nut.
Helpful Videos

Technical Specifications
Pull-type switch with two positions for park/headlights. Integrated rotating rheostat for instrument panel dimming. Internal circuit breaker for overload protection.
We Have This Part in Stock


The information in this article is provided for general reference and educational purposes only. Vehicle specifications, procedures, and part compatibility can vary by production date, trim level, and region. Always consult your vehicle's factory service manual and verify part numbers before purchasing or performing repairs. Safety-critical components such as airbags, seat belts, and braking systems should be installed by a qualified professional.