
Ford F-350 Headlight Dimmer Switch Guide: 1960-1991
Having trouble with your headlights? Your floor-mounted dimmer switch is a likely culprit on these classic trucks.
- The headlight dimmer switch on 1960-1991 F-350s is a floor-mounted unit and a common cause of headlight problems.
- Symptoms include inability to switch beams, flickering lights, or headlights not working at all.
- Replacement is simple, affordable, and a great DIY task for most owners.
- When replacing, inspect the wiring connector for melting and consider a headlight relay kit to prevent future failures.
Is Your F-350's Headlight Dimmer Switch Failing?
On these classic Ford trucks, the headlight dimmer switch is a common failure point. Because it's a mechanical part located on the floor, it's exposed to moisture, dirt, and corrosion over the decades, which can cause it to fail. Another issue is that the original wiring routes the full electrical current for the headlights through this switch, which can cause it to wear out, overheat, or even melt the connector.
Symptoms of a Bad Dimmer Switch:
- Headlights won't switch between high and low beams: This is the most obvious sign. The switch may be physically stuck or internally broken.
- No headlights at all: If the switch fails completely, it can cut power to both high and low beams, even if the main headlight switch on the dash is working.
- Flickering headlights: As the internal contacts wear out, they can make a poor connection, causing the lights to flicker, especially when you hit a bump.
- Headlights only work on one setting: The switch might fail in a way that leaves you stuck on either low beams or high beams.
Known Issues for 1960-1991 F-350s
The original wiring design on these trucks puts a heavy electrical load on the dimmer switch and the main headlight switch. This is especially true if you've upgraded to brighter halogen bulbs. Over time, this can cause the switch and its wiring connector to overheat and melt. When replacing the switch, always inspect the wiring connector for signs of melting or corrosion. If it's damaged, it should be replaced as well.
Choosing the Right Aftermarket Dimmer Switch
For a vehicle of this age, finding a new OEM (Original Equipment Manufacturer) Ford part is nearly impossible. The good news is that the aftermarket provides reliable and affordable solutions. The design is a simple, robust, floor-mounted switch that was used across many vehicles for decades.
Brand Focus: Standard Ignition (Standard Motor Products)
Standard Ignition is a well-known and trusted aftermarket brand that has been around for over 100 years. They manufacture direct-fit replacement parts that are designed to meet or exceed original specifications. Their dimmer switches use copper alloy conductors for good electrical conductivity and are built to be durable. For a straightforward part like this, a quality aftermarket switch from a reputable brand like Standard Ignition is a perfectly reliable choice and the most practical option available.
Pro Tip: To prolong the life of your new dimmer switch and improve headlight brightness, consider installing a headlight relay harness. A relay kit takes the high-amperage load off the dimmer switch and pulls power directly from the battery. This makes your lights brighter and protects the switch from premature failure.
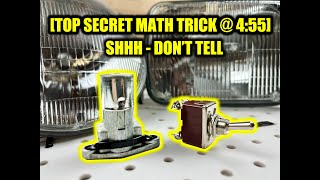
🎬 Learn how to swap your floor switch for a toggle.Headlight Dimmer Switch Replacement Cost
Replacing the dimmer switch on a 1960-1991 F-350 is very affordable. The part itself is inexpensive, and the labor is straightforward.
| Part Type | Estimated Cost |
|---|---|
| New Aftermarket (Standard Ignition) | $23.02 |
| Shop Labor | $50 - $100 |
Frequently Asked Questions
Where is the headlight dimmer switch located on my 1960-1991 F-350?
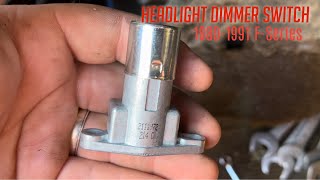
On these trucks, the dimmer switch is located on the floor, to the upper left of the clutch or brake pedal. You'll need to pull back the carpet or floor mat to see it. It is held in place by two small bolts.
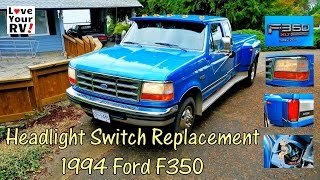
🎬 Watch this step-by-step guide to replacing your floor dimmer switch.Can I replace the dimmer switch myself?
Yes, this is a very DIY-friendly job. It typically requires only basic hand tools to unbolt the old switch, unplug the electrical connector, and install the new one. The most common issue you might face is rusty bolts.
Do I need any special tools to replace the switch?
No special tools are required. A socket set to remove the two mounting bolts is usually all that's needed. It's also a good idea to have some dielectric grease to apply to the new electrical connector to prevent future corrosion.
My new switch is installed, but the headlights still don't work. What else could be wrong?
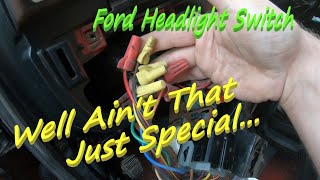
If a new dimmer switch doesn't solve the problem, check the main headlight switch on the dashboard, as it's another common failure point. 🎬 See how to replace the main dashboard headlight switch. Also, inspect the wiring and the connector plug for any signs of melting, corrosion, or damage. Finally, check your fuses and the headlight bulbs themselves.
Helpful Videos
Technical Specifications
Floor-mounted, 2-position mechanical switch with a 3-pin connector.
We Have This Part in Stock


The information in this article is provided for general reference and educational purposes only. Vehicle specifications, procedures, and part compatibility can vary by production date, trim level, and region. Always consult your vehicle's factory service manual and verify part numbers before purchasing or performing repairs. Safety-critical components such as airbags, seat belts, and braking systems should be installed by a qualified professional.