
Chevrolet Chevy II Ignition Switch Guide: 1962-1968
Everything a Chevy II owner needs to know about diagnosing and replacing a faulty ignition switch.
- Symptoms include stalling, no-start, and flickering lights.
- Replacement is a simple DIY job requiring a paperclip and basic tools.
- Choose a reputable brand like ACDelco or Standard Ignition for reliability.
- There are no recalls for this part, failure is due to age and wear.
Is Your Chevy II Ignition Switch Failing?
The ignition switch on a classic car like the 1962-1968 Chevy II is a mechanical part that sees a lot of use. Over decades, the internal electrical contacts can wear out, corrode, or break. This can lead to frustrating and sometimes dangerous problems. If you jiggle the key and the dashboard lights flicker or the engine stumbles, it's a classic sign the switch is worn out.
Key Symptoms of a Bad Ignition Switch:
- No-Start or No-Crank: You turn the key to 'Start' and get nothing—no clicking, no cranking, just silence. This can happen when the contacts inside the switch that send power to the starter are completely worn out.
- Engine Stalls While Driving: This is a serious safety issue. A worn switch can lose connection when you hit a bump, causing the engine to shut off suddenly and without warning. This also results in a loss of power steering, making the car difficult to control.
- Intermittent Electrical Problems: Your radio, heater fan, or dashboard lights may flicker or stop working randomly. This happens because the switch isn't providing consistent power to the accessory circuits.
- Car Starts, Then Immediately Dies: The engine might fire up only while the key is held in the 'Start' position but die as soon as you release it to the 'On' position. This points to a failure in the 'On' circuit of the switch.
- Key is Hard to Turn: While often related to the lock cylinder, binding or stiffness can also be a sign of a problem with the switch mechanism connected to it.
No Recalls, But A Known Issue
No official recalls or Technical Service Bulletins (TSBs) from the NHTSA exist for the ignition switch on the 1962-1968 Chevy II, which is common for vehicles of this era. However, the symptoms of failure are well-documented by owners in classic car forums.
Choosing the Right Aftermarket Ignition Switch
For a classic Chevy II, finding a "New Old Stock" (NOS) GM part is nearly impossible. Your choice is between established aftermarket brands. Quality is crucial here, as a cheap, poorly made switch can fail quickly, leaving you stranded.
| Brand Tier | Brands | Our Assessment |
|---|---|---|
| Premium Aftermarket | ACDelco, Standard Ignition (SMP) | ACDelco is the original equipment supplier for GM and is widely trusted for quality and fit, even for their classic car parts line. Standard Ignition has a long-standing reputation for producing reliable electrical components and is considered a top-tier choice by many mechanics. For a critical part like this, spending a little more for one of these brands is a smart investment. |
| Standard Aftermarket | Rostra Powertrain | Rostra is known for a variety of automotive electronics but has less of a specific track record for classic ignition components compared to ACDelco and Standard. While it may be a functional replacement, there is less community feedback available on its long-term reliability in a Chevy II. |
How to Replace the Ignition Switch (DIY)
Replacing the dash-mounted ignition switch on a '62-'68 Chevy II is a straightforward job that most owners can do at home with basic tools. The entire process usually takes less than an hour.
- Disconnect the Battery: Always disconnect the negative battery terminal first for safety.
- Release the Lock Cylinder: Insert the key and turn it to the 'Accessory' position (counter-clockwise). Find the small pinhole on the face of the lock cylinder. Insert a straightened paperclip into the hole to depress the release pin.
- Remove the Cylinder: While pushing the paperclip in, turn the key a little further counter-clockwise and wiggle the lock cylinder to pull it straight out.
- Unscrew the Bezel: With the cylinder removed, you can now unscrew the chrome bezel nut that holds the switch body to the dashboard.
- Swap the Switch: The switch will now drop down from behind the dash. Unplug the main electrical connector, plug it into your new switch, and reinstall everything in reverse order.
Frequently Asked Questions
Do I need to replace the lock cylinder and the switch together?
Not necessarily. If your key still turns smoothly but you have electrical symptoms, you likely only need the electrical switch. If your key is sticking or hard to turn, but the electronics work, you may only need the lock cylinder. However, since you have to remove the cylinder to get to the switch, many owners choose to replace both at the same time for peace of mind.
What happens if I can't turn the key to the 'Accessory' position?
If the lock cylinder is seized and you cannot turn the key, you will not be able to use the paperclip method to release it. In this situation, the lock cylinder may need to be drilled out by a locksmith or mechanic to remove it without damaging the dashboard.
Will a heavy keychain really damage my ignition switch?
Yes. While more famous on later model cars, the weight of a heavy keychain constantly pulls down on the lock cylinder and internal switch components. Over many years, this can accelerate wear and lead to premature failure. It's best to keep your car key on its own or with just a few other keys.
Is there a difference between a 1962 and a 1968 switch?
The basic dash-mounted ignition switch design was used across many GM vehicles in the 1960s. However, there can be minor differences in the electrical connectors over the years. Always verify the part is listed as a direct fit for your specific model year before purchasing.
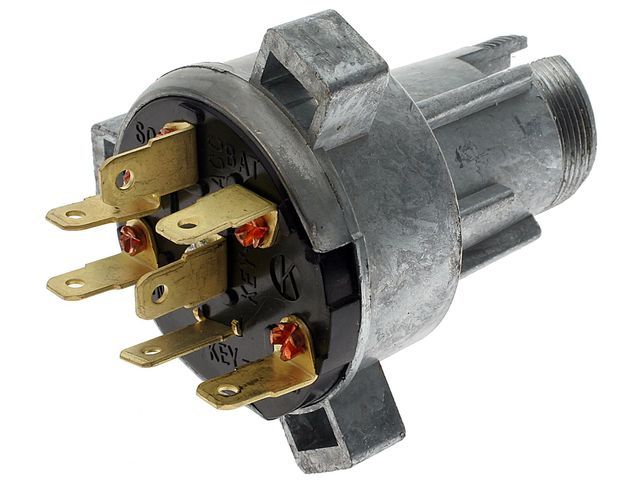
Technical Specifications
Dash-mounted electrical switch with integrated lock cylinder housing. Requires key and paperclip for tumbler removal. Features multiple positions (Off, Accessory, On, Start) to control vehicle electrical systems.
We Have This Part in Stock


The information in this article is provided for general reference and educational purposes only. Vehicle specifications, procedures, and part compatibility can vary by production date, trim level, and region. Always consult your vehicle's factory service manual and verify part numbers before purchasing or performing repairs. Safety-critical components such as airbags, seat belts, and braking systems should be installed by a qualified professional.