
Dodge Lancer & A-Body Speedometer Cable Guide: 1962-1968
If your speedometer needle is bouncing, noisy, or dead, the cable is the most likely culprit.
- Symptoms like a bouncing needle, no speed reading, or dash noises are clear indicators of a failing speedometer cable.
- Aftermarket cables are the only viable option; Lokar is a premium, cut-to-fit choice that requires careful installation.
- Before ordering, measure your old cable's length and confirm the transmission fitting size (likely 7/8") to avoid errors.
- Proper routing with gentle curves is critical for a new cable's function and longevity; sharp kinks will cause it to fail.
Is This Guide for My Car? The Lancer and Dart Connection
The Dodge Lancer was officially produced for the U.S. market in 1961 and 1962. It was built on Chrysler's A-body platform, which it shares with the Plymouth Valiant and the Dodge Dart that followed from 1963 to 1976. Because these vehicles are mechanically very similar, this guide is relevant for 1962 Lancer owners as well as owners of 1963-1968 Dodge Darts who are experiencing the same speedometer issues.
Symptoms of a Failing Speedometer Cable
A bad speedometer cable is a common problem on classic cars. Since it is a moving part, it naturally wears out over time. Watch for these clear signs.
- Wavering or Bouncing Needle: This is the most common symptom. Instead of moving smoothly, the needle jumps around erratically, even when driving at a steady speed. This is usually the first sign that the inner cable is starting to bind, fray, or is lacking lubrication.
- No Speed Reading: If the speedometer needle stays at 0 MPH, the inner cable has likely snapped completely or become disconnected.
- Squealing or Ticking Noises: A dry, unlubricated cable rubbing inside its outer housing can cause a squealing, whining, or ticking sound from behind the dashboard that changes with your speed.
Choosing the Right Aftermarket Part
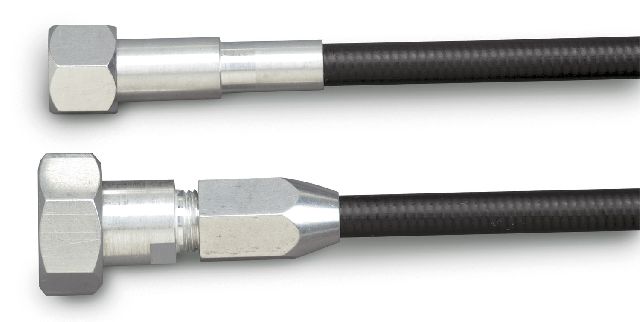
For a vehicle of this age, finding a New Old Stock (NOS) OEM speedometer cable is nearly impossible. The standard and most reliable solution is a new aftermarket cable. The Lokar brand offers a high-quality, universal "cut-to-fit" cable designed for Chrysler applications.
Aftermarket Brand Assessment: Lokar
| Quality Tier | Premium Aftermarket |
| Details | Lokar cables are known for quality construction, featuring machined aluminum fittings and a premium housing with a specially extruded liner to extend the life of the inner cable. These are "U-Cut-to-Fit" kits, meaning you trim the cable and housing to the exact length needed for your car. This provides a custom fit but requires careful installation. |
Pro Tip: Cutting Your New Cable
When cutting a universal cable to length, do not use side cutters or pliers, as this will crush the housing and cause the inner cable to fray. Forum users and mechanics strongly recommend using a Dremel tool with a cutoff wheel to make a clean, precise cut. Wrapping the cut location with masking tape can also help prevent the cable from unraveling during the cut.
Common Ordering Mistake: Check Your Length and Fittings!
Before ordering, you must verify two things on your original cable. First, measure the length of the outer housing from tip to tip. Lengths can vary significantly. Second, check the size of the threaded nut on the transmission end. Many 1960s Mopar vehicles require a 7/8" nut, but some aftermarket cables come with a 5/8" nut. Confirming these details before you buy is critical to getting the right part.
Known Issues, Recalls, or TSBs
There are no official recalls or Technical Service Bulletins (TSBs) from Dodge or the NHTSA for speedometer cable failures on the 1962-1968 Dodge Lancer or Dart. Problems with this part are due to the age and mechanical nature of the component, not a manufacturing defect.
Cost to Replace a Speedometer Cable
Replacing the speedometer cable is a budget-friendly repair, especially if you do it yourself.
| Part | Estimated Cost |
|---|---|
| New Aftermarket Cable (Lokar) | $150 - $151 |
| Shop Labor | $100 - $200 |
| Total Estimated Cost | $250 - $351 |
Frequently Asked Questions (FAQ)
Why is my new speedometer cable needle bouncing?
This is almost always caused by improper routing. The cable must be routed with large, gentle bends. Any sharp kinks or tight turns will cause the inner cable to bind and release, resulting in a bouncing needle and noise. Also, ensure the cable is not routed too close to hot exhaust components.
Can I just lubricate my old cable instead of replacing it?
You can try, but it is often a temporary fix. If the inner cable is already frayed or the outer housing is kinked or brittle, lubrication won't solve the problem. For a lasting repair, replacement is the best option. If you do lubricate a cable, use a dry graphite lubricant.
What if a new cable doesn't fix the problem?
If a new, correctly installed cable doesn't solve the issue, the problem may be the plastic drive gear inside the transmission, which can strip out. Less commonly, the speedometer gauge (the "speedo head") itself may have failed internally. You can test the gauge by connecting the cable to a drill and spinning it slowly to see if the needle moves.
Is it difficult to replace the speedometer cable myself?
No, this is a very DIY-friendly job. Access involves reaching behind the instrument cluster to release a clip and unscrewing the cable from the transmission. No special tools are required, aside from a tool to cleanly cut the new cable to length. You do not have to worry about any transmission fluid leaking when you disconnect the cable.
Technical Specifications
OEM Part Numbers: 2209229
The system is fully mechanical. Aftermarket cables are typically universal and require being cut to the correct length. Common transmission-end fitting sizes for this era are 7/8"-18 and 5/8"-18, with the 7/8" being common on many Mopar A-bodies. The speedometer head connection is typically a push-on style with a clip or a 5/8"-18 male thread.
We Have This Part in Stock

The information in this article is provided for general reference and educational purposes only. Vehicle specifications, procedures, and part compatibility can vary by production date, trim level, and region. Always consult your vehicle's factory service manual and verify part numbers before purchasing or performing repairs. Safety-critical components such as airbags, seat belts, and braking systems should be installed by a qualified professional.
- 🛍️ Shop This Part
- Is This Guide for My Car? The Lancer and Dart Connection
- Symptoms of a Failing Speedometer Cable
- Choosing the Right Aftermarket Part
- Aftermarket Brand Assessment: Lokar
- Pro Tip: Cutting Your New Cable
- Common Ordering Mistake: Check Your Length and Fittings!
- Known Issues, Recalls, or TSBs
- Cost to Replace a Speedometer Cable
- Frequently Asked Questions (FAQ)
- 🎟️ Get 5% Off