
1968-1973 Pontiac GTO Headlight Switch: An Owner's Guide
Having trouble with your GTO's headlights or dash lights? Your headlight switch might be the culprit.
- Symptoms include flickering lights, total light failure, and a non-functional dash light dimmer.
- Before replacing the switch, check the dimmer switch on the floor and headlight ground wires, as they can cause similar problems.
- Replacement is a simple DIY job that involves pressing a release button under the dash to remove the knob and shaft.
- Choosing a quality aftermarket brand like ACDelco or Standard Ignition (SMP) is recommended over budget options to ensure proper function and longevity.
Is Your GTO's Headlight Switch Failing?
The headlight switch in a classic GTO handles a lot of electrical load and can wear out over time. Symptoms often start small but can become serious safety issues. If you notice any of these signs, it might be time for a replacement.
Common Failure Symptoms:
- Flickering or Intermittent Lights: Headlights or dash lights may flicker or cut out while driving. This can be caused by worn internal contacts in the switch.
- Lights Don't Turn On: You might find that only the parking lights work, but the headlights don't, or vice-versa. In some cases, none of the lights controlled by the switch will function at all.
- Dash Lights or Dimmer Failure: The dashboard lights may not turn on, or the dimmer function stops working when you rotate the knob.
- Switch Feels Hot or You Smell Burning Plastic: A burning smell from the dash is a major red flag. It indicates the switch is overheating and could be a fire hazard due to old wiring or a failing internal circuit breaker.
Pro Tip: Check Other Components First
Before you replace the headlight switch, check for other common issues. A faulty floor-mounted dimmer switch is a frequent cause of headlight failure on these cars. Also, inspect fuses, wiring connections for corrosion, and ensure the headlight ground wires are secure 🎬 Watch this guide on how to troubleshoot GM headlight wiring., as these can mimic the symptoms of a bad switch.
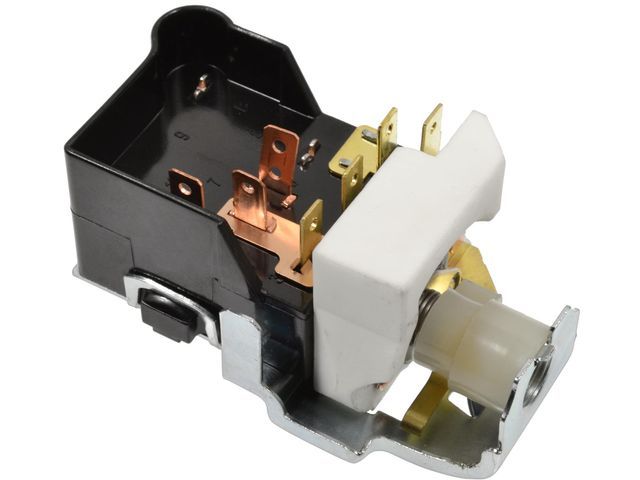
Choosing the Right Aftermarket Headlight Switch
For a 1968-1973 GTO, finding a "New Old Stock" (NOS) GM switch is very difficult and expensive. The market relies on aftermarket reproductions. Quality can vary significantly, so it's important to choose a reputable brand.
| Brand Tier | Brands | Quality & Cost Assessment |
|---|---|---|
| Premium Aftermarket | ACDelco | Often considered the closest to original equipment, ACDelco parts are known for good fit and function. They are typically the most expensive aftermarket option but offer peace of mind. The price for your GTO is approximately $48.97. |
| Quality Aftermarket | Standard Ignition (SMP) | Standard Motor Products is a well-respected brand in the classic car community. Many owners have used their electrical parts for years without issues. They offer a good balance of quality and value. Expect to pay around $23.97 - $44.68. |
| Economy / Value | Replacement | This category includes various budget-friendly brands. While they are the most affordable option at about $27.74, be cautious. Some owners report that cheaper, generic switches may not have the correct internal wiring or fail prematurely. These can be a viable option if you're on a tight budget, but inspect the part carefully. |
DIY Replacement Guide
Replacing the headlight switch on a GTO is a job most owners can do themselves in under an hour.
- Disconnect the Battery: Always disconnect the negative battery terminal before working on any electrical components.
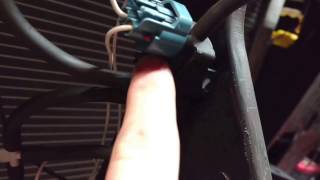
- Release the Knob & Shaft: Reach up under the dashboard behind the headlight switch. You will feel a small, spring-loaded button on the body of the switch. Push this button in and, at the same time, pull the headlight knob completely out of the dash. 🎬 See a quick demonstration of the knob and shaft removal.
- Remove the Retaining Nut: On the front of the dashboard, there is a special nut holding the switch in place. You can use a wide flat-head screwdriver or a specific tool to unscrew it.
- Swap the Switch: With the nut removed, the switch can be pulled out from behind the dash. Carefully unplug the main wiring harness connector. Plug the new switch in, and then follow the steps in reverse to install it.
Important Note for 1968-1969 Models
If your GTO has hideaway headlights, your switch will also have vacuum line connections on the back. Be sure to label these lines before removing them to ensure they are reconnected correctly on the new switch.
🎬 Watch this helpful hack for GTOs with hideaway headlights.Frequently Asked Questions
Are there any recalls for the 1968-1973 GTO headlight switch?
No, there are no open recalls or Technical Service Bulletins (TSBs) from the NHTSA for the headlight switch on the 1968-1973 Pontiac GTO. Any issues are due to the age and wear of the original components.
Do I need a special tool to replace the switch?
No special tools are required. The most difficult part is removing the retaining nut on the dash. While a special tool exists, many owners successfully use a wide, flat-blade screwdriver or a small chisel to carefully turn the nut.
My new switch looks right, but some lights still don't work. What's wrong?
First, double-check that the wiring harness is fully seated. If that's not the issue, you may have a problem elsewhere. The most common culprits are the floor-mounted dimmer switch for headlights or bad grounds. In some rare cases, a budget aftermarket switch can be faulty out of the box.
What are the OEM part numbers for this switch?
Over the years, GM used several part numbers. Common cross-referenced numbers for this switch include 1995122, 1995151, 1995173, D1559, and D1588, among others. Most aftermarket switches are designed to replace all of these variations, but always confirm the 8-prong blade terminal design matches your car's harness.
Helpful Videos


Technical Specifications
OEM Part Numbers: 1995122 1995123 1995147 1995151 1995173 1995186 D1559 D1588
8-prong male blade terminal connector. Pull knob for two-stage light activation (parking & headlights). Rotating knob for instrument panel dimming.
We Have This Part in Stock


The information in this article is provided for general reference and educational purposes only. Vehicle specifications, procedures, and part compatibility can vary by production date, trim level, and region. Always consult your vehicle's factory service manual and verify part numbers before purchasing or performing repairs. Safety-critical components such as airbags, seat belts, and braking systems should be installed by a qualified professional.