
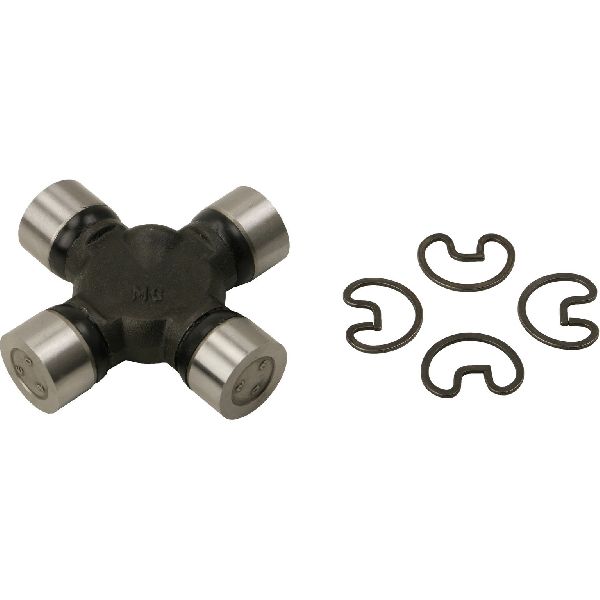
Universal Joint Replacement Guide for the 1970-1974 Chrysler Imperial
Address clunking noises and driveline vibrations by selecting the right U-joints for your classic Imperial.
- A clunk when shifting into gear or a vibration at speed are the most common signs of a failing U-joint.
- For maximum durability, choose a premium brand like Dana Spicer; they are widely considered the best available.
- Always replace U-joints in sets. If one has failed, the others have endured the same amount of wear.
- Before removing the driveshaft, mark its position relative to the transmission and differential yokes to ensure it is reinstalled in balance.
Symptoms of a Failing Universal Joint
On a heavy car like the 1970-1974 Imperial, a bad U-joint will make its presence known. The earliest signs are often noises. You might hear a squeaking or chirping sound at low speeds that comes from a dry, unlubricated joint. A more common and obvious symptom is a loud 'clunk' or 'ping' when you shift from Park into Drive or Reverse. This is the sound of excessive play in the worn-out joint. As the wear gets worse, you will likely feel a vibration throughout the car, especially at highway speeds. In some Imperials, this vibration can be severe enough to make the ashtray or other interior items rattle. If you ignore these signs, the U-joint can completely fail, causing the driveshaft to disconnect and fall, leaving you stranded and potentially causing significant damage to the underside of your car.
Choosing the Right Aftermarket U-Joint
Original Mopar U-joints for a vehicle of this era are no longer in production. The aftermarket offers a wide range of options that meet or exceed original quality. The key is to choose a brand known for durability, as the Imperial's weight and torque put significant stress on these parts. Aftermarket U-joints can be grouped into a few quality tiers.
Brand Quality Tiers
- Premium / Heavy-Duty (Best): Brands like Dana Spicer Chassis and Yukon Gear are at the top. Dana Spicer is a legendary name and was the original equipment manufacturer for many American cars; their quality is trusted by mechanics and restorers. Yukon Gear specializes in high-strength drivetrain components for racing and off-roading, making their U-joints extremely durable and likely overkill for a stock Imperial, but an excellent choice for maximum longevity.
- Standard / OEM-Quality (Good): Moog and SKF fall into this category. Both are well-respected brands. Moog has a long history of making quality suspension and driveline parts, though some users in forums note that quality can be inconsistent depending on the product line. SKF is a global leader in bearing technology, and their U-joints are a reliable choice for a daily driver or restoration.
- Economy (Acceptable): GMB is a Japanese manufacturer that offers a more budget-friendly option. While generally considered a reliable standard replacement part, they are not typically regarded as being in the same durability class as Spicer or Moog. For a car that is driven gently or infrequently, they can be a sufficient choice.
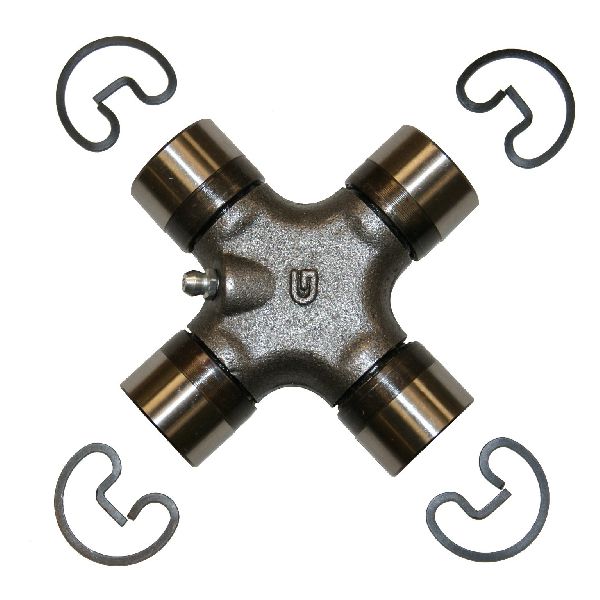
Pro Tip: Greasable vs. Non-Greasable
Many aftermarket U-joints come with a zerk fitting that allows you to grease them periodically. This can extend their life by flushing out old, contaminated grease. Non-greasable (sealed) joints are often stronger because the cross is solid instead of being drilled for grease passages. For a classic car that sees regular maintenance, greasable joints are a great option. For a lower-maintenance, fit-and-forget approach, a high-quality sealed joint from a brand like Spicer is an excellent choice.
Typical Replacement Costs
The cost to replace U-joints on your Imperial depends on the brand you choose and whether you do the work yourself. The parts themselves are affordable, but labor can add to the total cost.
| Item | Estimated Cost |
|---|---|
| Aftermarket U-Joint (Single) | $17 - $108 |
| Shop Labor | $150 - $300 |
| Total Estimated Cost | $185 - $525 (for two joints) |
Frequently Asked Questions
How many U-joints does my 1970-1974 Imperial have?
Most Imperials of this era have a one-piece driveshaft with two universal joints: one at the transmission and one at the rear differential. However, some Chrysler C-body cars, including some Imperials, were equipped with a two-piece driveshaft that includes a third U-joint and a center support bearing. It is essential to inspect your vehicle to confirm its configuration before ordering parts.
Do I need to worry about different U-joint sizes?
Yes. Chrysler used a few different U-joint sizes during this period, most commonly the "7260" and "7290" series, which have different cap diameters. Some Imperials may have also used a "1330" style joint. You must measure your existing U-joint caps or the yokes they fit into to ensure you purchase the correct replacement part.
Can I replace just one bad U-joint?
While you can replace only the failed joint, it is highly recommended to replace them all at the same time. If one U-joint has worn out from age and use, the others are likely not far behind. Replacing them all at once saves you from having to do the same job again in the near future.
Is this a difficult job to do myself?
For a mechanic with the right tools, this is a straightforward job. It requires safely raising the vehicle, unbolting the driveshaft, and using a large vise or a U-joint press tool to remove the old joints and install the new ones. The most critical step is marking the driveshaft's orientation to the yokes before removal to ensure it is reinstalled in the same position to maintain its balance.
Technical Specifications
Chrysler used several U-joint sizes. The most common are the '7260' and '7290' series, which are differentiated by their bearing cap diameter. It is critical to measure your old parts to confirm the correct size before ordering. Some models may also use a '1330' series joint.
We Have This Part in Stock


The information in this article is provided for general reference and educational purposes only. Vehicle specifications, procedures, and part compatibility can vary by production date, trim level, and region. Always consult your vehicle's factory service manual and verify part numbers before purchasing or performing repairs. Safety-critical components such as airbags, seat belts, and braking systems should be installed by a qualified professional.