
1970-1979 Buick Century Brake Light Switch: A Complete Guide
Everything a Century owner needs to know about diagnosing and replacing a faulty brake light switch.
- A faulty brake light switch is a major safety issue; replace it immediately if symptoms appear.
- Check for the 1979 model year recall (NHTSA 79V142000), as original switches were known to be faulty.
- Replacement is a simple, low-cost DIY job that takes less than 30 minutes.
- Aftermarket is the only realistic option; a reputable brand like Standard Ignition is recommended over budget options.
Is Your Brake Light Switch Failing?
A bad brake light switch can create a serious safety hazard. The symptoms are usually straightforward and easy to spot. Because this part is inexpensive and simple to replace, it's best to address these issues immediately.
Common Symptoms of Failure
- Brake Lights Don't Work: The most common and dangerous symptom is when your brake lights fail to illuminate when you press the brake pedal.
- Brake Lights Stay On: The switch can also fail in the 'on' position, causing your brake lights to remain lit even when your foot is off the pedal, which can drain your battery and confuse other drivers.
- Intermittent Brake Lights: The lights may flicker or only work some of the time, which points to a worn-out internal connection in the switch.
- Cruise Control Issues: On equipped models, a faulty switch can prevent the cruise control from engaging or cause it to disengage unexpectedly.
Known Issues: 1979 Buick Century Recall
General Motors issued a recall for some 1979 Buick Century models (NHTSA Campaign ID: 79V142000). The recall stated that an incorrect lubricant used during the switch's assembly could cause the brake lights to stop working. It could also prevent the cruise control from disengaging when the brake pedal was pressed. While this recall is decades old, it highlights a known potential failure point for the original switches on these vehicles.
Choosing the Right Aftermarket Switch
For a vehicle from the 1970s, finding a new OEM (Original Equipment Manufacturer) part from GM is highly unlikely. The aftermarket is your primary source for a new brake light switch. The good news is that this is a simple component, and reputable aftermarket brands produce reliable replacements.
- Standard Ignition (SMP): Standard Motor Products is a well-established brand known for producing quality electrical components that meet or exceed original specifications. They are generally considered a reliable choice for parts like these.
- Skyward: This brand typically offers a more budget-friendly option. While it may function correctly, long-term durability can sometimes be a concern with value-oriented brands compared to more established names.
Pro Tip: Given the very low cost of even the premium aftermarket options and the critical safety function of the part, choosing a recognized brand like Standard Ignition is a wise investment for peace of mind.
Typical Replacement Costs
Replacing the brake light switch on a 1970-1979 Century is one of the easier and more affordable repairs you can perform. The part itself is inexpensive, and labor is minimal.
| Part/Service | Estimated Cost |
|---|---|
| New Aftermarket Switch | $5.40 - $29.97 |
| Shop Labor | $45 - $90 |
| DIY Cost | $5.40 - $29.97 |
Frequently Asked Questions
Where is the brake light switch located?
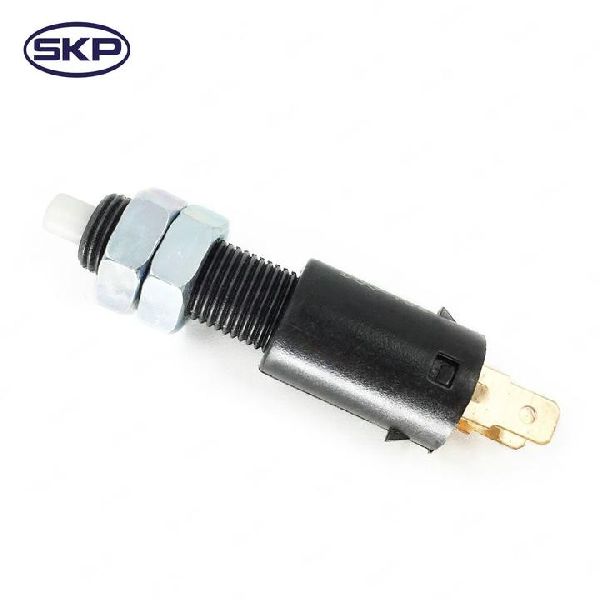
The brake light switch is mounted on a bracket directly above the brake pedal arm. You will need to look up under the dashboard from the driver's side footwell to see it. It has a wiring connector and a plunger that makes contact with the pedal arm.
Is this a difficult part to replace myself?
No, this is a very DIY-friendly job. It typically requires no special tools beyond basic hand tools to remove the retaining clip or nuts. The most difficult part is often just the uncomfortable position of working in the driver's footwell. The entire process usually takes less than 30 minutes.
Do I need to bleed my brakes after replacing the switch?
No. On the 1970-1979 Century, the brake light switch is a mechanical/electrical part and is not connected to the hydraulic brake fluid system. You will not need to bleed the brakes after replacement.
My new switch is installed, but the lights are stuck on. What's wrong?
This usually means the switch needs to be adjusted. Some switches are threaded and can be screwed in or out to set the correct distance from the pedal arm. Others are self-adjusting. Ensure the plunger is fully depressed when the brake pedal is in its resting position. If it is not, the lights will stay on.
Technical Specifications
Mechanical plunger-type switch, 2-wire connector (typical)
We Have This Part in Stock


The information in this article is provided for general reference and educational purposes only. Vehicle specifications, procedures, and part compatibility can vary by production date, trim level, and region. Always consult your vehicle's factory service manual and verify part numbers before purchasing or performing repairs. Safety-critical components such as airbags, seat belts, and braking systems should be installed by a qualified professional.