
Ford F-250 Headlight Switch: A Guide for the 1974-1981 Generation
If your headlights flicker or die unexpectedly, the switch is the likely culprit—here's what you need to know.
- Headlights flickering off and on is a direct symptom of a failing switch due to an overheating internal circuit breaker.
- Replacement is simple for a DIYer and involves pressing a release button under the dash to remove the knob.
- To prevent repeat failures, it is critical to install a headlight relay harness, which takes the high-current load off the new switch.
- Standard Ignition (SMP) is a well-regarded aftermarket brand for this part.
Is Your Headlight Switch Failing? Common Symptoms
On these classic Ford trucks, the headlight switch is a common failure point, especially after decades of use. The most frequent and dangerous symptom is headlights that flicker or shut off completely after being on for 15-20 minutes. They may come back on after a few seconds, only to repeat the cycle. This happens because the internal circuit breaker overheats and trips. This is often due to the switch's old age or an increased electrical load from accessories or even standard halogen bulbs.
Other signs of a bad headlight switch include:
- Instrument panel or dashboard lights not working.
- The dash light dimmer function (twisting the knob) no longer works.
- Tail lights, parking lights, or cab clearance lights don't turn on.
- A burning plastic smell coming from the dashboard area.
- Strange electrical behavior, like turn signal problems, that only happens when the headlights are on.
A Critical Upgrade: The Headlight Relay Harness
The original wiring design routes all headlight power directly through the dashboard switch. This high current is what causes new and old switches to overheat and fail. Experienced owners overwhelmingly recommend installing a headlight relay harness. This inexpensive kit draws power directly from the battery to the headlights, using the original switch only as a low-current trigger for the relays. This protects your new switch, prevents future failures, and often results in brighter headlights. Consider this a mandatory upgrade 🎬 Watch a heavy-duty relay harness and switch installation walkthrough. when replacing the switch.
Choosing the Right Aftermarket Headlight Switch
Finding a new OEM (Ford) switch for a truck of this age is nearly impossible. The market consists of aftermarket brands that build replacements.
- Standard Ignition (Standard Motor Products): Standard is a well-established brand in the aftermarket and is generally considered a reliable, quality choice for parts like these. They are often recommended in owner forums and their parts are designed to meet or exceed original specifications.
- Rostra Powertrain: Rostra is another manufacturer of automotive electronics, including various types of switches. While not as commonly discussed for this specific part in forums, they are a known aftermarket supplier.
Given the simplicity of the part, both brands should provide a functional replacement. However, the longevity of any new switch, regardless of brand, is greatly improved by installing a headlight relay harness.
| Part Type | Estimated Cost |
|---|---|
| New Aftermarket | $32.43 - $60.01 |
| Shop Labor | $90 - $150 |
| New OEM (NOS) | $100+ (if found) |
| Used OEM | $20 - $50 (availability and condition vary) |
Frequently Asked Questions
Why do my headlights turn off and on by themselves?
This is the classic symptom of a failing headlight switch in your F-250. The internal circuit breaker is overheating from electrical load and age, causing it to trip. After it cools for a few seconds, it resets, and the lights come back on until it overheats again. Replacing the switch and adding a relay harness is the correct fix.
Is replacing the headlight switch a difficult job?
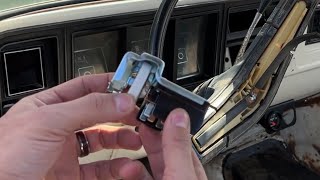
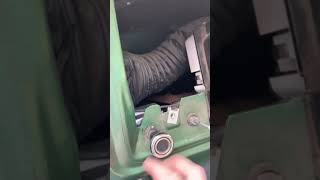
No, this is a very DIY-friendly job that typically takes less than an hour. 🎬 Watch this step-by-step guide on replacing the headlight switch. You will need to reach under the dashboard to access the back of the switch. A spring-loaded button on the switch body must be pressed to release the knob and shaft. 🎬 See how to properly remove the headlight switch knob. After that, you simply unscrew the retaining nut from the dash and unplug the wiring harness.
Do I need any special tools to replace the switch?
No special tools are required. A nut driver or screwdriver may be needed for the dash bezel screws. The retaining nut holding the switch to the dash has slots and can usually be loosened by tapping it with a flathead screwdriver. The hardest part is often reaching the release button on the switch body under the dash.
My new switch got hot and failed. Why?
You likely have a wiring short or, more commonly, you did not install a headlight relay harness. Even with a brand new switch, running the full power of the headlights through it—especially if you have upgraded halogen bulbs—will cause it to overheat and fail prematurely. The relay harness is a must-do upgrade.
Helpful Videos
Technical Specifications
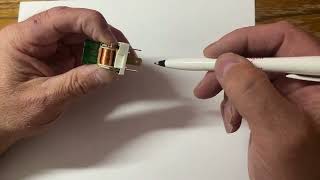
OEM Part Numbers: D3TZ-11654-A
Pull-type switch with two positions for parking lights and headlights. Features an integrated rotating rheostat for instrument panel dimming and an internal 12-amp headlight circuit breaker and 15-amp auxiliary circuit breaker.
We Have This Part in Stock


The information in this article is provided for general reference and educational purposes only. Vehicle specifications, procedures, and part compatibility can vary by production date, trim level, and region. Always consult your vehicle's factory service manual and verify part numbers before purchasing or performing repairs. Safety-critical components such as airbags, seat belts, and braking systems should be installed by a qualified professional.