
Dodge Charger Headlight Switch Guide: 1976-1988 Models
Having trouble with flickering or dead headlights on your classic Charger? Your switch is a likely culprit.
- A single aftermarket switch from a brand like Standard Ignition fits both B-body (1976-1978) and L-body (1983-1987) Chargers.
- Common failure symptoms include flickering lights, total light failure, and malfunctioning dash lights.
- Replacement is a simple DIY job that usually takes less than 30 minutes and requires no special tools.
- Driving with a faulty headlight switch is a significant safety hazard; do not drive at night if your lights are unreliable.
Is Your Dodge Charger's Headlight Switch Failing?
A bad headlight switch is a common problem on older vehicles like the 1976-1988 Dodge Charger. The original switches have handled a high electrical load for decades, which creates heat and leads to wear and tear on the internal contacts. If you're experiencing lighting issues, the switch is a primary suspect. Look for these common symptoms.
Signs of a Bad Headlight Switch:
- Flickering or Intermittent Headlights: Your headlights may flash on and off while driving. This is often the internal circuit breaker resetting due to high resistance or a short in the system.
- Lights Only Work in Certain Modes: You might lose your low beams but still have high beams, or vice-versa. This points to a failure within the switch's contacts for a specific mode.
- Total Headlight Failure: The most obvious sign is when your headlights, parking lights, or taillights won't turn on at all, even with good bulbs and fuses.
- Dashboard Lights Malfunction: Since the switch also controls instrument panel brightness, you may notice your dash lights flicker, dim, or go out completely when you turn the headlights on.
- Burning Smell or Hot Switch: A faint smell of burning plastic or a switch that is hot to the touch indicates a serious electrical issue inside the switch, which can be a fire hazard.
Safety First
Driving with malfunctioning headlights is a serious safety risk and illegal. If your headlights are unreliable, especially at night, you should not drive the vehicle until the issue is repaired. Dimmed or flickering lights can severely impair your night vision.
Choosing the Right Aftermarket Headlight Switch
For a vehicle as old as the '76-'88 Charger, finding a brand-new Original Equipment (OEM) headlight switch from Mopar is nearly impossible. The market consists almost entirely of aftermarket replacements and used parts from salvage yards.
- New Aftermarket: This is the most reliable option. Brands like Standard Ignition (a Standard Motor Products brand) are well-regarded in the classic car community for producing quality replacement parts. They often use quality materials like copper alloy conductors and test their switches to meet or exceed original specifications. This ensures a proper fit and reliable performance.
- Used OEM: A used switch from a junkyard is a possibility, but it's a gamble. You are getting a part that is just as old as the one that failed, and it may have its own set of problems or a very limited lifespan. 🎬 Learn how to refurbish vintage Mopar headlight switches
Pro Tip: While replacing the switch, inspect the wiring connector. If it looks melted, brittle, or corroded, it should be replaced as well to ensure a solid connection and prevent future failures.
Headlight Switch Replacement Cost for 1976-1988 Dodge Charger
The cost to replace the headlight switch is very reasonable, especially if you do the work yourself. The part itself is affordable, and the job is straightforward for a DIY mechanic.
| Part/Service | Estimated Cost |
|---|---|
| New Aftermarket Headlight Switch (Standard Ignition) | $42.98 |
| Used OEM Headlight Switch | $15 - $40 (Salvage Yard) |
| Shop Labor | $62 - $90 |
| Total Professional Replacement | $105 - $133 |
Frequently Asked Questions
Can I replace the headlight switch myself?
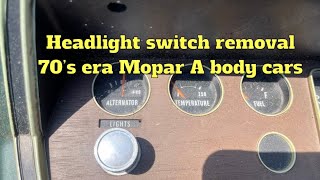
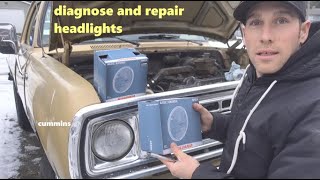
Yes, this is a very DIY-friendly job. The process typically involves disconnecting the battery, reaching under the dashboard to press a release button on the switch body, which allows the knob and shaft to be pulled out. 🎬 See how to remove a 70s Mopar headlight switch Then, you unscrew a retaining nut on the dash, unplug the old switch, and install the new one in reverse order. 🎬 Watch: Easy steps to replace your Mopar headlight switch No special tools are usually required beyond a simple screwdriver or nut driver.
Does one switch really fit all those years, from the B-body to the L-body Charger?
Yes, surprisingly. Aftermarket manufacturers like Standard Motor Products list a single part number (DS-357 or an equivalent) that covers the 1973-1978 B-body Chargers and the later 1983-1987 L-body Chargers. This indicates that despite the vast differences between the cars, the basic dash-mounted pull-style headlight switch remained consistent.
My headlights flicker but don't go out completely. Is that the switch?
Flickering is a classic symptom of a failing headlight switch in these older cars. It's often caused by the internal thermal circuit breaker cycling on and off due to corrosion or high resistance inside the switch. While other wiring issues could be the cause, the headlight switch is the most common point of failure for this specific symptom.
Are there any recalls for the headlight switch on my Charger?
Searches of the National Highway Traffic Safety Administration (NHTSA) database did not show any specific safety recalls for the headlight switch on the 1976-1988 Dodge Charger models. Failures are generally due to the age and normal wear of the component.
Helpful Videos
Technical Specifications
OEM Part Numbers: 3746862 3747821 3747862 4221224 4221225 4221226 4221257 4221398 4221400 4221403 4221405 4373134 4373506 4373751
Fits 1976-1978 and 1983-1987 Dodge Charger models. This is a dash-mounted, pull-style switch that controls headlights, parking lights, and instrument panel dimming. It includes an internal thermal circuit breaker.
We Have This Part in Stock


The information in this article is provided for general reference and educational purposes only. Vehicle specifications, procedures, and part compatibility can vary by production date, trim level, and region. Always consult your vehicle's factory service manual and verify part numbers before purchasing or performing repairs. Safety-critical components such as airbags, seat belts, and braking systems should be installed by a qualified professional.