
Guide to Replacing the 1979-1989 GMC P2500 Rear Drum Brake Hardware Kit
Keep your heavy-duty P-series van stopping safely by understanding when and why to replace your rear drum brake hardware.
- Always replace the hardware kit when changing rear brake shoes to ensure proper function.
- This job is complex due to the P2500's full-floating rear axle and is not recommended for beginners.
- Symptoms of failure include scraping noises, a loose parking brake, and a spongy pedal.
- No specific recalls or TSBs exist for this part; failures are due to age and wear.
Symptoms of Failing Drum Brake Hardware
Old, rusty, or broken hardware can cause serious braking problems. Because the GMC P2500 is a heavy-duty vehicle, you should pay close attention to any changes in brake performance. Watch out for these common signs of failure.
- Scraping or Grinding Noises: One of the most common signs is a scraping or grinding sound coming from the rear wheels when you brake. This can happen when a spring breaks and allows the metal brake shoe to rub against the drum incorrectly.
- Rattling Sounds: If you hear a rattling or clanking from the rear wheels, especially over bumps, it could be loose or broken hardware inside the drum assembly.
- Spongy or Soft Brake Pedal: If the hardware isn't allowing the self-adjusters to work correctly, the shoes may have to travel too far to contact the drum. This can result in a low or spongy-feeling brake pedal.
- Parking Brake Issues: A parking brake that feels loose, doesn't hold the vehicle securely, or goes to the floor with little resistance can be a sign of worn-out or broken hardware inside the rear drums.
Pro Tip: Always Replace Hardware with Shoes
It is highly recommended to replace the drum brake hardware kit every time you replace your brake shoes. The springs lose their tension over time due to heat and constant use. Installing new shoes with old, weak hardware can lead to noise, poor performance, and uneven wear right from the start.
Choosing the Right Aftermarket Hardware Kit
For a vehicle from this era, finding new original equipment (OEM) parts is nearly impossible. The market consists of reliable aftermarket brands that meet or exceed original specifications. Since the cost for these kits is low, it's best to choose based on quality and completeness.
Brand Quality Tiers
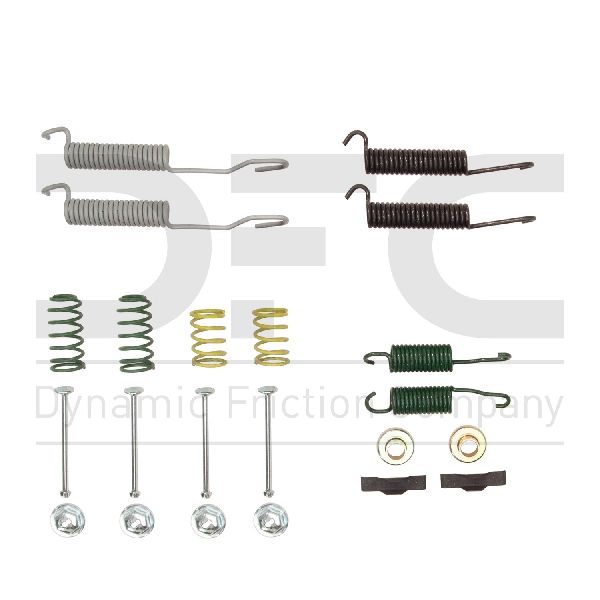
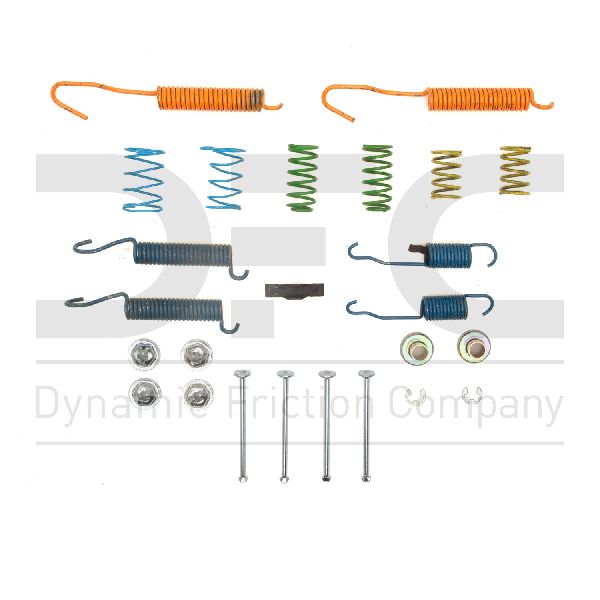
- Good (Economy): Brands like Dynamic Friction and Centric offer affordable kits that get the job done. They are considered decent quality for the price and are a popular choice for budget-conscious repairs. Dynamic Friction notes that their parts are manufactured to match OEM form and function.
- Better (Standard): A brand like Carlson often provides comprehensive kits that include all the necessary springs and clips for a full axle replacement. They state their parts meet or exceed OEM specifications, providing confidence in their fit and function.
- Best (Premium): Look for kits that specifically mention corrosion-resistant coatings or are labeled as professional-grade from established brands like AC Delco or Raybestos. For a heavy-duty work vehicle like the P2500, a premium kit ensures the longest possible service life.
A Note on P2500 Brake Service
Replacing rear drum brakes on the 1979-1989 GMC P2500 is more complex than on a typical car. These vans often have a full-floating rear axle, which requires removing the axle shaft and a special spindle nut just to get the drum off. This is a difficult job for a beginner. If you are not experienced with this type of axle, it is best to have the work done by a professional mechanic.
Cost to Replace Drum Brake Hardware
| Part/Service | Estimated Cost |
|---|---|
| Aftermarket Hardware Kit | $11 - $17 |
| Shop Labor (Hardware Only) | $200 - $350 |
| Total (Hardware Only) | $211 - $367 |
| Total with New Shoes & Drums | $450 - $700+ |
Note: Costs are estimates and will vary based on your location and the specific services performed. Labor costs are higher for this job due to the complexity of the full-floating axle design.
Frequently Asked Questions
Are there any recalls for the 1979-1989 GMC P2500 drum brakes?
No, extensive searches of the National Highway Traffic Safety Administration (NHTSA) database show no open or past recalls specifically for the drum brake hardware on the 1979-1989 GMC P2500. Any recalls found for GMC trucks are for much newer models and different brake components.
Why is this job more difficult on my P2500 van?
Your P2500 likely has a full-floating 14-bolt rear axle. To remove the brake drum, you must first unbolt and slide out the axle shaft, then use a special six-prong socket to remove a lock ring and spindle nut assembly. This is a more involved process than on standard semi-floating axles found on lighter trucks and cars.
Can I reuse my old hardware if it looks okay?
It is strongly advised not to. The springs in the kit are heat-cycled thousands of times and lose their tension. Old, weak springs can cause the new brake shoes to drag or not adjust properly, leading to poor braking and noise. Given the very low cost of a new hardware kit, it's cheap insurance for a proper brake job.
What else should I replace during a rear brake job?
When replacing the hardware and shoes, you should always inspect the wheel cylinders for any signs of brake fluid leaks. If a leak is present, the wheel cylinder must be replaced. You should also measure the inside diameter of the brake drum to ensure it is within the maximum allowable spec; if not, it must be replaced.
Technical Specifications
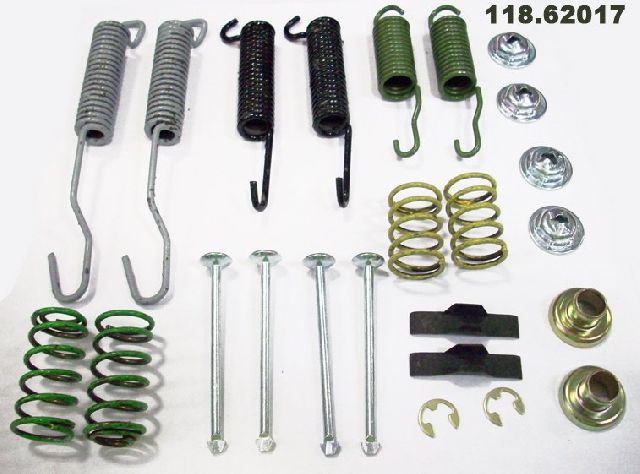
Kit typically includes return springs, hold-down springs, clips, and pins for servicing the rear drum brakes on both sides of the axle.
We Have This Part in Stock

The information in this article is provided for general reference and educational purposes only. Vehicle specifications, procedures, and part compatibility can vary by production date, trim level, and region. Always consult your vehicle's factory service manual and verify part numbers before purchasing or performing repairs. Safety-critical components such as airbags, seat belts, and braking systems should be installed by a qualified professional.