
Ford F-250 Headlight Switch Guide: 1982-1986
Everything you need to know about replacing the headlight switch in your 1982-1986 Ford F-250.
- Symptoms of failure include flickering lights, total light loss, and a non-functional dash light dimmer.
- A burning smell is a critical warning sign of a melted switch or connector, which is a fire hazard.
- Before replacing, inspect the wiring connector for melting or corrosion; it may need to be replaced too.
- To prevent repeat failures, installing a headlight relay harness is highly recommended to take the electrical load off the new switch.
Symptoms of a Failing Headlight Switch
When the headlight switch in your F-250 starts to fail, the symptoms can range from annoying to dangerous. Because all power for the lights runs directly through this switch, it is a common failure point.
- Flickering or Intermittent Lights: Your headlights, taillights, or dash lights may flicker or cut out randomly while driving. This is often caused by the internal circuit breaker overheating and resetting.
- Total Light Failure: You may experience a complete loss of headlights or all exterior lights. Sometimes they will come back on after the switch cools down, and other times they fail completely.
- Dash Lights or Dome Light Not Working: The rotating dimmer function may stop working, or the dome light may not turn on when you rotate the knob.
- Burning Smell or Melted Connector: A smell of burning plastic from the dashboard is a critical warning sign. The high electrical load can cause the switch and its plastic connector to overheat and melt. If you see this, stop driving the vehicle as it is a fire hazard.
Check the Connector First
Before ordering a new switch, unplug the old one and inspect the wiring connector. If the plastic is melted or the terminals are burnt and corroded, the connector pigtail must also be replaced. 🎬 Watch a walkthrough of the switch and connector replacement process. A new switch will fail quickly if plugged into a damaged connector.
Choosing the Right Aftermarket Part
For a truck that is four decades old, finding a new original equipment (OEM) Motorcraft switch is nearly impossible. They have been discontinued for years. Your options are typically a used OEM part from a junkyard or a new aftermarket switch.
A used switch is a gamble; it's just as old as the one that failed and may have unseen wear. A new aftermarket switch from a reputable brand like Standard Ignition (Standard Motor Products) is the most reliable and practical choice. These switches are designed to meet or exceed original specifications.
The Real Fix: Add a Headlight Relay Harness
The original wiring design is the root cause of most switch failures. All the power for the headlights runs through the dash switch, causing it to overheat. Owners and mechanics strongly recommend installing an aftermarket headlight relay harness. This simple upgrade pulls power directly from the battery to the headlights, using the headlight switch as a low-power trigger. This takes the load off your new switch, ensuring it lasts for years instead of months.
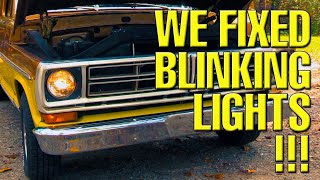
🎬 See how to fix flickering lights by installing a relay.Replacement Cost
Replacing the headlight switch is a common repair. The cost will depend on whether you do it yourself or use a repair shop.
| Part/Service | Estimated Cost |
|---|---|
| New Aftermarket Switch (e.g., Standard Ignition) | $40 - $55 |
| Shop Labor | $100 - $180 |
| Total Estimated Cost | $140 - $235 |
Frequently Asked Questions
Why do my headlights flicker on and off?
Flickering is a classic symptom of the internal circuit breaker in the headlight switch tripping due to heat and high electrical load. As it cools for a few seconds, it resets and the lights come back on, only to repeat the cycle. This indicates the switch is failing.
Why did my switch connector melt?
The connector melts because the factory wiring sends the full amperage of the headlights through the switch. Over time, this high current creates heat, which can melt the plastic connector and damage the switch terminals. This is the number one reason to install a headlight relay harness.
Is the replacement difficult to do myself?
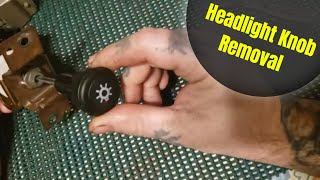
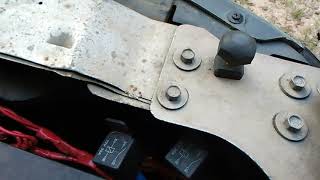
For a DIYer with basic tools, the job is manageable. The main challenge is accessing the back of the switch. You will need to remove the knob with a small pick tool 🎬 Watch this quick guide on removing the headlight knob., unscrew a retaining nut, and then reach under the dash to unplug it. On trucks with air conditioning, you may need to remove the parking brake bracket for clearance.
Do I need any special tools?
You will likely need a small hook or pick tool to release the clip on the switch knob. Basic hand tools like a socket set and screwdrivers are also required. If you need to replace a melted connector pigtail, you will also need tools for splicing wires, such as wire strippers and crimpers.
Helpful Videos

Technical Specifications
OEM Part Numbers: E3TZ-11654-A D3TZ-11654-A
Pull-knob switch with integrated instrument panel light rheostat and internal circuit breaker.
We Have This Part in Stock


The information in this article is provided for general reference and educational purposes only. Vehicle specifications, procedures, and part compatibility can vary by production date, trim level, and region. Always consult your vehicle's factory service manual and verify part numbers before purchasing or performing repairs. Safety-critical components such as airbags, seat belts, and braking systems should be installed by a qualified professional.
- Ford F-250: