
Your 2012-2017 Suzuki Swift Brake Light Switch: A Complete Replacement Guide
Understanding the common failures and choosing the right replacement brake light switch for your Swift.
- A bad brake light switch is a critical safety issue and should be fixed immediately.
- Symptoms include non-working brake lights, lights stuck on, inability to shift from Park, and ABS warnings.
- This is an easy and inexpensive DIY repair, typically taking less than an hour.
- Always check the fuse and bulbs before assuming the switch is the problem.
Is Your Suzuki Swift's Brake Light Switch Failing?
A faulty brake light switch is more than an inconvenience; it's a serious safety hazard. If the drivers behind you can't see you're braking, the risk of a rear-end collision is high. Because this switch is also tied into other systems, a failure can cause a range of confusing electronic issues in your Swift.
Common Symptoms of a Bad Switch
Pay attention to these signs. They often point to a failing brake light switch:
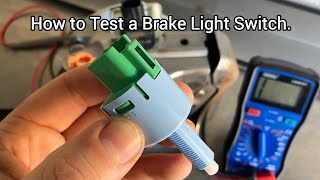
🎬 Watch: Learn more about these critical symptoms you shouldn't ignore.- No Brake Lights: The most obvious and dangerous symptom. The switch has failed and is not completing the circuit to turn the lights on.
- Brake Lights Stuck On: The switch may be stuck in the 'on' position, which can drain your battery and confuse other drivers.
- Can't Shift Out of Park: Many cars require a signal from the brake switch to allow the gear shifter to move out of Park. If this signal is missing, your shifter will be locked.
- ABS or Traction Control Warning Lights: These systems use the brake switch signal to operate correctly. A bad signal can trigger a warning light on your dashboard.
- Cruise Control Won't Work: Cruise control deactivates when you press the brake. If the switch is faulty, the cruise control system may not engage or may turn off unexpectedly.
Pro Tip: Before you replace the switch, always check the brake light fuse first. A simple blown fuse can cause similar symptoms and is a much easier fix.
Choosing the Right Aftermarket Brake Light Switch
For the 2012-2017 Suzuki Swift, you don't need to buy an expensive OEM part from a dealer. Aftermarket switches offer a reliable and cost-effective solution. The quality of aftermarket parts is generally very good for a common component like this.
Two brands you might encounter are Standard Ignition and True Tech.
- Standard Ignition: This is a well-known and respected brand in the aftermarket world. They have a long history of making quality replacement parts that fit and function like the original. Choosing a Standard part is a reliable bet for a direct, no-hassle replacement.
- True Tech: Search results for "True Tech" as a parts manufacturer are not as common as for repair shops with the same name. This may indicate it is a private-label or store brand. While likely a more budget-friendly option, it doesn't have the established public reputation of a brand like Standard Ignition.
Cost to Replace a Suzuki Swift Brake Light Switch
Replacing the brake light switch is one of the more affordable repairs you can make. The part itself is inexpensive, and labor is minimal because the job is quick.
| Part/Service | Estimated Cost |
|---|---|
| New Aftermarket Switch | $24.33 - $38.83 |
| Shop Labor | $49 - $72 |
| Total Estimated Cost (DIY) | $24.33 - $38.83 |
| Total Estimated Cost (At a Shop) | $73.33 - $110.83 |
Cost estimates are for reference only and may vary based on your location and the specific repair shop.
Known Issues and Recalls
Searches for official NHTSA recalls or Technical Service Bulletins (TSBs) for the brake light switch on the 2012-2017 Suzuki Swift did not show any results. While other Suzuki models and motorcycles have had recalls for this part, this specific vehicle generation does not appear to have a widespread, documented defect. One owner of a 2014 Swift reported an issue where the switch simply became unclipped from the pedal, which was resolved by re-securing it.
Frequently Asked Questions (FAQ)
Can I replace the brake light switch on my Swift myself?
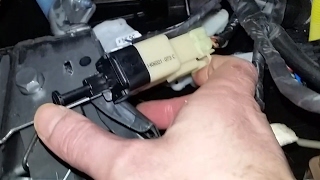
Yes, this is a great DIY task for beginners. The switch is located above the brake pedal and is usually removed by disconnecting the wire and twisting the switch out of its bracket. 🎬 See this walkthrough for testing and replacing the sensor switch. The entire job typically takes less than an hour.
Do I need to adjust the new brake light switch?
Sometimes, yes. The new switch's plunger needs to be properly positioned against the brake pedal arm. If it's not adjusted correctly, your brake lights might stay on or not come on at all. In one documented case, a Swift owner simply had to clip the switch back into place properly.
Why are my brake lights still not working after replacing the switch?
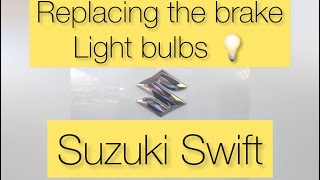
If a new switch doesn't solve the problem, check the simple things first: the fuse and the bulbs themselves. 🎬 Watch: How to replace the brake light bulbs on your Swift. After that, you could be looking at a wiring issue, which may require a professional mechanic to diagnose.
Is it safe to drive with a bad brake light switch?
No. If your brake lights are not working, it is extremely dangerous to drive. The risk of being rear-ended is very high. If your brake lights are stuck on, you should also get it fixed immediately to avoid draining your battery and confusing other drivers.
Helpful Videos

Technical Specifications
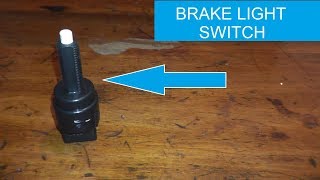
Located on the brake pedal support bracket, this is a plunger-style switch that completes an electrical circuit upon pedal depression.
We Have This Part in Stock


The information in this article is provided for general reference and educational purposes only. Vehicle specifications, procedures, and part compatibility can vary by production date, trim level, and region. Always consult your vehicle's factory service manual and verify part numbers before purchasing or performing repairs. Safety-critical components such as airbags, seat belts, and braking systems should be installed by a qualified professional.
- Suzuki Swift: