
2017-2021 Jaguar F-PACE, XE, E-PACE & I-PACE Drooping Sun Visor: The DIY Fix and Replacement Guide
A complete guide to diagnosing and fixing the common floppy sun visor issue, matching interior colors, and replacing the assembly on your Jaguar F-PACE, XE, E-PACE, or I-PACE.
- The most common failure is a 'floppy' or drooping visor, which can often be fixed at home in under 30 minutes with a single screw.
- Replacement is extremely easy, requiring only the removal of two Torx screws and one electrical plug.
- When buying a used visor, you MUST match the 3-letter 'TRIM' code from the sticker in your driver's door jamb to ensure the color is correct.
- A used OEM visor is the best value, costing around $45-$90 compared to over $210 for a new part from the dealer.
Symptoms of a Failing Sun Visor
A failing sun visor on your 2017-2020 Jaguar F-PACE, 2017-2020 Jaguar XE, 2018-2021 Jaguar E-PACE, or 2019-2020 Jaguar I-PACE will present obvious physical symptoms. The most common issues are related to the internal pivot mechanism wearing out or breaking.
- Drooping or "Floppy" Visor: The most common failure is a visor that will not stay flush against the headliner, drooping down an inch or more and obstructing your view. This is often caused by the separation of an internal plastic clamshell housing that creates tension.
- Loud "Clack" or Snapping Noise: You may hear a loud snapping or cracking sound when moving the visor up or down. This is an early sign that the internal plastic mechanism is failing.
- Vanity Mirror Light Failure: The lights around the vanity mirror may flicker or fail to turn on when the cover is opened. This can be caused by a bad connection in the wiring or a faulty switch in the mirror assembly.
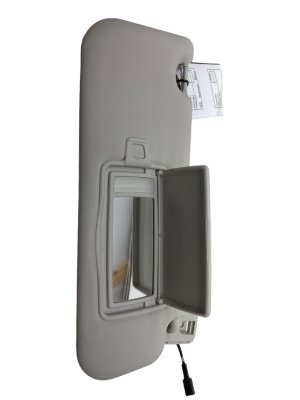
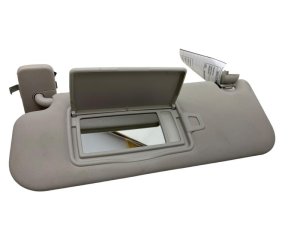
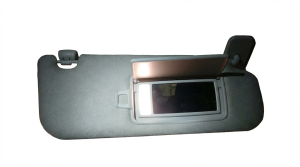
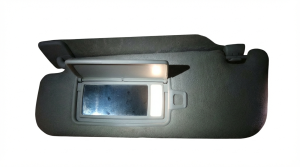
- Broken Mirror or Cover: The vanity mirror or its sliding/hinged cover can crack or break from impact or age.
- Loose Mounting: The entire visor assembly may feel loose where it attaches to the roof, indicating the mounting screws have backed out.
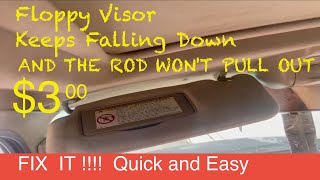
DIY Diagnosis and Repair: The Floppy Visor Fix
For the common drooping visor problem, a DIY repair is often possible and can save you hundreds of dollars. The issue typically stems from a plastic housing inside the visor that has split apart. By reinforcing this housing, you can restore the visor's tension.
🎬 Watch: This video shows how to fix a floppy visor.Pro Tip: This fix has been confirmed by numerous owners in online forums and is a permanent solution that takes less than 30 minutes.
- Remove the Visor: First, pry off the plastic trim cover at the base of the visor mount. Underneath, you will find two Torx T20 screws. Remove these screws.
- Disconnect Wiring: Carefully pull the visor mount away from the headliner and disconnect the single electrical plug for the vanity lights.
- Access the Inner Housing: Using a flat trim tool, carefully pry the vanity mirror assembly out of the visor body. It is held in by clips.
- Identify the Problem: With the mirror removed, you can often see the separated seam of the internal plastic "clamshell" housing. This separation is what causes the loss of tension.
- Secure the Housing: The most effective fix is to drill a small pilot hole and install a short (approx. 5/8" to 3/4") self-tapping screw through both halves of the plastic housing to clamp them back together permanently. Some owners have also used strong glue or a small rivet.
- Reassemble: Snap the mirror back into place, ensuring it's fully seated to restore the light connection. Reconnect the electrical plug, screw the visor mount back into the roof, and snap the trim cover back on.
Sun Visor Replacement Guide
If your visor is physically broken or the DIY fix is not possible, replacement is a very simple process that can be done with basic hand tools.
🎬 See this walkthrough for a similar Jaguar visor replacement.- Position the Visor: Unclip the visor from its outer clip and swing it towards the side window to get better access to the mounting base.
- Remove the Trim Cover: Use a small flathead screwdriver or a plastic trim tool to gently pry off the plastic cover over the mounting bracket.
- Unscrew the Mount: Remove the two Torx T20 screws that secure the visor assembly to the roof structure.
- Disconnect the Electrical Connector: As you lower the visor, you will see a small wiring harness. Press the tab on the connector and pull it apart.
- Installation: Installation is the reverse of removal. Connect the electrical plug on the new visor, position the mount, and tighten the two Torx screws. Snap the plastic trim cover back into place.
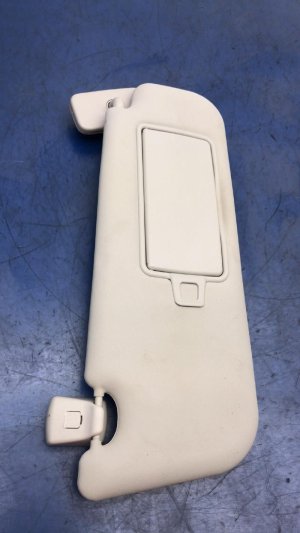
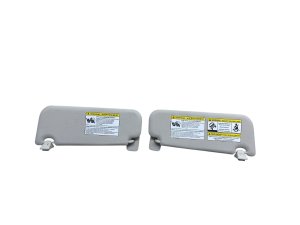
Buying a Used Sun Visor
Given the high cost of a new OEM sun visor, a used part is an excellent value. These visors are largely the same across the F-PACE, E-PACE, I-PACE, and XE models of this era, but verifying the color and material is critical.
How to Verify Compatibility
The most important step is matching your vehicle's interior color. Jaguar uses a three-letter trim code to identify the interior color scheme.
- Find Your Trim Code: Open the driver's side door and look for the vehicle identification sticker on the door jamb. In one of the corners of this sticker, you will find the word "TRIM" followed by a code (e.g., PVJ for Ebony/Black, LKP for Oyster).
- Match the Part Number: When buying a used part, provide the seller with your trim code or match the OEM part number. Common colors include Ebony (Black), and Oyster (a light beige/grey).
- Check the Material: These vehicles came with different headliner materials. The most common is a standard woven fabric called Morzine, but higher trims may have a synthetic suede called Suedecloth or Alston. Ensure the texture of the used visor matches your vehicle's headliner.
What to Inspect
- Hinge Tension: Ask the seller to confirm the visor holds its position firmly and doesn't droop.
- Physical Condition: Carefully review all photos for stains, tears, or scuffs in the fabric. Check for cracks in the plastic base or mirror cover.
- Vanity Mirror: Ensure the mirror is not cracked and the cover slides or pivots correctly.
- Why Used OEM is a Good Choice: For an interior trim part like this, a used OEM visor guarantees a perfect fit, correct electrical connection, and exact color/material match, which is often not the case with cheaper aftermarket alternatives.
Known Issues, TSBs, and Recalls
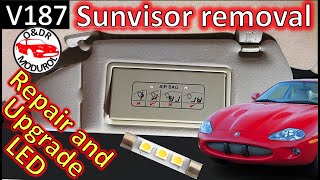
There are no active recalls for sun visors on these Jaguar models. However, a Technical Service Bulletin (JTB00327NAS) was issued for older models (2009-on XF, 2010-on XJ, 2007-on XK) for the fabric delaminating or peeling away from the vanity mirror housing. While not specific to the F-PACE, XE, E-PACE, or I-PACE, it's a condition to watch for on used parts. The fix involves applying a special double-sided tape under the fabric.
🎬 Watch: How to repair the vanity mirror flap and fabric.Cost Comparison
| Part Type | Estimated Cost | Notes |
|---|---|---|
| New OEM | $210 - $350 | Purchased from a Jaguar dealership. Guarantees correct fit and color but is very expensive. |
| New Aftermarket | Not Commonly Available | Aftermarket manufacturers rarely produce complex interior trim parts like sun visors. |
| Used OEM | $45 - $90 | The best value. Salvaged from a vehicle with the same interior. Verify color and condition before purchase. |
| Shop Labor | $50 - $100 | A professional mechanic would typically charge for 0.3 to 0.5 hours of labor for this simple replacement. |
Frequently Asked Questions
Why is my Jaguar's sun visor drooping?
The most common reason is the failure of an internal plastic tensioning mechanism. A plastic housing inside the visor separates, losing the friction needed to hold the visor up against the headliner.
Can I just tighten a screw to fix the drooping?
No, tightening the main mounting screws will not fix a drooping visor. The problem is internal to the visor body itself, not the mount. The fix requires reinforcing the internal plastic housing.
Is it difficult to replace a sun visor myself?
No, this is a very easy DIY job. It requires only a Torx screwdriver and a trim tool and can be completed in about 15 minutes. The process involves removing two screws and one electrical connector.
How do I make sure I buy the right color used sun visor?
You must find the three-letter "TRIM" code on the sticker inside your driver's door jamb. This code corresponds to your exact interior color (e.g., PVJ for Ebony, LKP for Oyster). Match this code when shopping for a used part to ensure a perfect match.
Helpful Videos
Technical Specifications
OEM Part Numbers: GX7304100CA0LKP GX7304100MAOLKP T2H60381PVJ T4A10543PVJ T4N20958LKP T4A2534PVJ
Equipped with illuminated vanity mirror. Attaches with two Torx T20 screws.
We Have This Part in Stock

The information in this article is provided for general reference and educational purposes only. Vehicle specifications, procedures, and part compatibility can vary by production date, trim level, and region. Always consult your vehicle's factory service manual and verify part numbers before purchasing or performing repairs. Safety-critical components such as airbags, seat belts, and braking systems should be installed by a qualified professional.
- Jaguar F-PACE:
- Jaguar XE:
- Jaguar E-PACE:
- Jaguar F-Pace:
- Jaguar E-Pace:
- Jaguar I-Pace: