
Grand Cherokee & Durango Sun Visor Fire Risk and Droop Fix (2011-2014)
This guide covers the common causes of sun visor failure, including drooping and the critical fire-risk recall, for the 2011-2014 Jeep Grand Cherokee and Dodge Durango.
- A critical fire hazard recall (NHTSA 14V-391 & 15V-879) affects 2011-2014 models with illuminated visors; verify recall completion before purchase or use.
- The most common failure is drooping, where the visor won't stay up, which requires full replacement.
- Compatibility depends on side (left/right), color, and feature (illuminated vs. non-illuminated). They are not interchangeable.
- Replacement is a simple DIY task for most owners, requiring only basic tools and about 20 minutes.
Symptoms of a Failing Sun Visor
A failing sun visor can present several issues, ranging from minor annoyances to significant safety hazards.
- Drooping or Not Staying Up: This is the most common failure. The internal mechanism that holds the visor in the stowed position wears out, causing the visor to droop and obstruct the driver's view.
- Vanity Light Failure: The vanity mirror light may flicker or stop working entirely. This is often caused by a break in the wiring where it flexes at the pivot point, or a short circuit.
- Burning Smell or Smoke: A strong electrical burning smell or visible smoke coming from the headliner near the visor is a critical safety issue. This indicates a short circuit in the vanity light wiring and poses a significant fire risk. Pull over and stop the vehicle immediately if this occurs.
- Rattling Noise: A loose or broken internal component can cause the visor to rattle or buzz, especially when driving over rough surfaces.
- Broken Mounting Point: The plastic base where the visor mounts to the roof can become brittle and crack, causing the entire visor to become loose or detach.
Known Issues, Recalls, and Technical Service Bulletins (TSBs)
Fire Hazard Recall: A major safety issue affects these vehicles. The wiring for the illuminated vanity mirror can be pierced by the mounting screws, creating a short circuit that can lead to a fire in the headliner. This prompted multiple recalls.
Chrysler (now FCA/Stellantis) issued several recalls to address the sun visor wiring fire risk on 2011-2014 Jeep Grand Cherokee and Dodge Durango models with illuminated vanity mirrors.
- NHTSA Recall 14V-391 (FCA P36): This initial recall was launched for approximately 651,000 vehicles built through December 11, 2013. The fix involved installing plastic guides to protect the wiring. However, this remedy proved insufficient in some cases.
- NHTSA Recall 15V-879 (FCA R71): After reports of fires in vehicles that had the first recall performed, a second, more robust recall was issued for about 388,600 vehicles built through September 1, 2012. This repair involved replacing the sun visors, modifying the sheet metal, and installing wire guides.
Before purchasing a used vehicle or a replacement visor, it is crucial to check the Vehicle Identification Number (VIN) on the NHTSA's website to see if these recalls apply and if the repair work has been completed by a dealer.
Vehicle and Part Compatibility: Getting the Right Visor
While the basic shape is the same, several variations exist. Ordering the correct visor is essential for proper fit and function.
- Vehicle Fitment: This guide and the associated recalls apply specifically to the 2011-2014 Jeep Grand Cherokee (WK2) and 2011-2014 Dodge Durango. While some part numbers may show compatibility with newer models, the primary issues and recalls are concentrated in this period.
- Left vs. Right: Visors are specific to the driver (left) and passenger (right) sides.
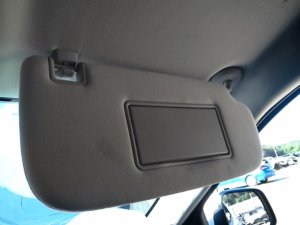
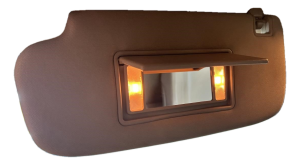
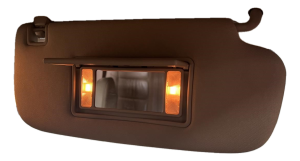
- Illuminated vs. Non-Illuminated: The most important distinction. Visors for vehicles with illuminated vanity mirrors have an electrical connector. Visors for base models without the light do not. They are not interchangeable.
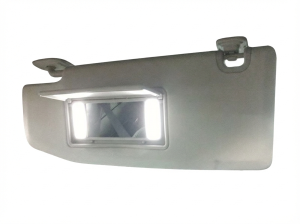
- Color Matching: The most common interior colors are black, gray, and beige/tan. The interior trim code for your vehicle is located on a sticker in the driver's side door jamb and is often labeled as "TRM". 🎬 See this video to help locate your interior trim code.
Pro Tip: The OEM part numbers provided in your vehicle's documentation or on the old part itself are the surest way to find a perfect match. Part numbers like 1WK21DX9AF and 1LS25DX9AH are common for these models.
Buying a Used Sun Visor: What to Look For
A used OEM sun visor can be a cost-effective solution, but careful inspection is key.
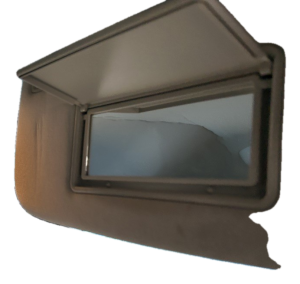
- Check the Pivot Joint: This is the most common failure point for drooping. Hold the visor base and move the visor arm. It should feel firm and hold its position without falling. Avoid any visor that feels loose or floppy.
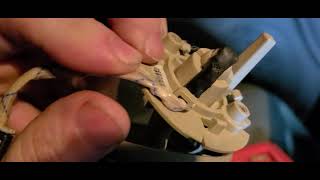
- Inspect the Wiring: For illuminated models, carefully inspect the wiring where it enters the mounting base. Look for any signs of fraying, pinching, or previous amateur repairs. Given the fire recall, this is the most critical safety check.
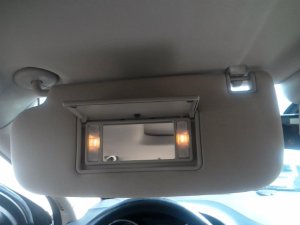
- Test the Vanity Mirror Door: Open and close the vanity mirror cover. The hinge should be intact and the door should stay closed. A broken door is a common cosmetic issue.
- Verify Features: Ensure the visor has the same features as your original—specifically the illuminated mirror and/or HomeLink buttons.
- Confirm Recall Status: If possible, ask if the visor came from a vehicle that had the final recall (R71) performed. While difficult to verify, it's worth asking. It is safer to assume a used part has not had the recall performed and to inspect the wiring carefully.
Sun Visor Replacement Guide
Replacing the sun visor is a straightforward DIY project that usually takes less than 30 minutes.
🎬 Watch a mechanic replace a Jeep Grand Cherokee sun visor.Tools Needed:
- Small flathead screwdriver or trim removal tool
- T20 or T25 Torx driver (or a 5/16" socket, depending on the screw type used)
Step-by-Step Process:
- Pry Open the Trim Cover: Use a small flathead screwdriver to gently pry open the plastic cover at the base of the sun visor where it meets the headliner.
- Remove Mounting Screws: Remove the two or three screws holding the visor to the roof structure. Support the visor as you remove the last screw.
- Disconnect Electrical Connector: If you have an illuminated visor, carefully lower it to expose the electrical wire. There will be a small plastic connector. Press the release tab and pull the two halves of the connector apart. Do not pull on the wires themselves.
- Install the New Visor: Connect the electrical plug of the new visor. Position the new visor and install the mounting screws, being careful not to overtighten them as they often thread into plastic.
- Test and Finish: Test the vanity light and the visor's movement. Snap the plastic trim cover back into place.
Cost Comparison
| Part Type | Estimated Cost |
|---|---|
| New OEM | $180 - $285 |
| New Aftermarket | $50 - $120 |
| Used OEM | $40 - $100 |
| Shop Labor | $50 - $100 |
Frequently Asked Questions (FAQ)
Why does my sun visor keep falling down?
The internal spring or clutch mechanism inside the pivot has worn out. This is a very common problem due to age and repeated use. While some attempt temporary fixes with velcro or clips, replacement is the only permanent solution.
Is it safe to use my car if the sun visor has been recalled for a fire risk?
It is strongly recommended to have the recall service performed by a dealer as soon as possible. In the meantime, avoid using the vanity light. If you smell burning plastic or see smoke, stop driving immediately. The recall repair is free of charge.
Can I install an illuminated visor in a car that didn't have one?
No, it is not a simple plug-and-play swap. The vehicle's wiring harness for a non-illuminated visor will not have the necessary power connector. You must match the new visor to your vehicle's original features.
Will a sun visor from a 2015 Grand Cherokee fit my 2012 model?
Yes, most likely. The sun visors for the 2011-2021 Grand Cherokee (WK2) and 2011-2025 Durango are physically interchangeable, provided the features (color, illumination) match. However, always prioritize matching the part number when possible.
Helpful Videos


Technical Specifications
OEM Part Numbers: 1LS25DX9AH 1LS27HDAAH 1LS27HL1AG 1WK20DX9AF 1WK21DX9AF 1WK21DX9AA 1WK21DX9AB 1WK21DX9AC 1WK21DX9AD 1WK21DX9AE 1LS25DX9AE 1LS25DX9AF 1LS25DX9AG
Available in black, gray, and beige/tan. Options include illuminated or non-illuminated vanity mirrors. Electrical connection is a single plug for illuminated models.
We Have This Part in Stock

The information in this article is provided for general reference and educational purposes only. Vehicle specifications, procedures, and part compatibility can vary by production date, trim level, and region. Always consult your vehicle's factory service manual and verify part numbers before purchasing or performing repairs. Safety-critical components such as airbags, seat belts, and braking systems should be installed by a qualified professional.
- Jeep Grand Cherokee:
- Dodge Durango:
- 🎬 Helpful Videos
- 🛍️ Shop This Part
- Symptoms of a Failing Sun Visor
- Known Issues, Recalls, and Technical Service Bulletins (TSBs)
- Vehicle and Part Compatibility: Getting the Right Visor
- Buying a Used Sun Visor: What to Look For
- Sun Visor Replacement Guide
- Cost Comparison
- Frequently Asked Questions (FAQ)
- 🎟️ Get 5% Off