
Navigator & Expedition Sun Visor Guide (2015-2022): Fixing Drooping, Electrical Faults & Fitment
Diagnose and replace a faulty sun visor in your 2015-2022 Lincoln Navigator or 2018-2021 Ford Expedition, and learn how to choose the correct used part with the right features.
- Compatibility is complex; you must match your vehicle's roof type (sunroof or not), HomeLink option, and interior color code.
- Electrical failure of the light and HomeLink is common and usually caused by a broken wire in the pivot arm.
- Replacement is very easy for DIYers, requiring only a T20 Torx driver and about 15 minutes.
- A used OEM visor offers the best value, providing a perfect match for a fraction of the new price, but inspect it for pivot stiffness and wire condition.
Symptoms of a Failing Sun Visor


A faulty sun visor can present several distinct symptoms, ranging from simple mechanical issues to electrical problems. Because the visor contains wiring for lights and other features, a failure can sometimes point to a blown fuse affecting other parts of the cabin.
1. Visor Droops or Won't Stay in Place
This is the most common mechanical failure. The internal clutch or spring mechanism that creates friction to hold the visor in position wears out over time. The visor will no longer stay flipped up against the headliner, or it may sag when moved to the side window, obstructing the driver's view.
🎬 Watch this video for tips on fixing a loose sun visor.2. Vanity Light and/or HomeLink Don't Work
If the vanity mirror light and the HomeLink garage door opener stop working, the cause is almost always an electrical issue within the visor or its connection. The wires pass through the visor's pivot arm and can break from the repeated stress of flipping the visor up and down. In some cases, the broken wire can cause a short circuit, which will blow the fuse that powers the visors and potentially other interior accessories like the glove box light. Some owners report that the electronics only work when the visor is in a specific position, like swung over to the side window, which is a clear sign of a broken internal wire.
🎬 See how to repair a Navigator HomeLink visor with wiring issues.3. Vanity Mirror Cover is Broken
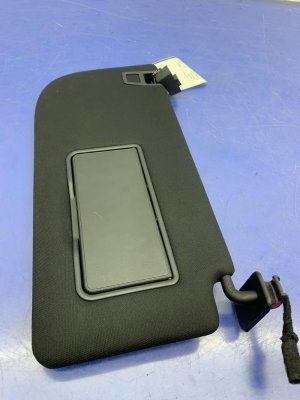
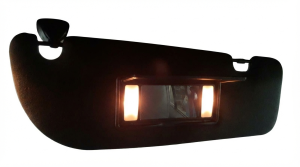
The small plastic hinges on the vanity mirror cover can become brittle and break, causing the cover to fall off or no longer stay closed. When the cover can't close, the vanity light may stay on, which can drain the battery over time or become a distraction while driving at night.
4. Rattling Noises
Loose or broken internal components, such as the mirror assembly or pieces of the failed clutch mechanism, can cause rattling or buzzing noises from within the sun visor as the vehicle moves.
Warning: If your visor's electronics are not working, check your fuse box first. A blown fuse can be a symptom of a shorted wire in the visor pivot. On many of these vehicles, the fuse for the visors (often labeled 'demand lamps' or similar) also powers other interior components.
Identifying the Correct Sun Visor for Your Vehicle


Ordering the correct sun visor is critical, as there are many variations. Using the wrong visor can result in features not working, or it may not physically fit. Before buying a replacement, you must verify four key features of your vehicle.
- Sunroof / Panoramic Roof: The headliner shape and mounting points can differ between vehicles with a standard roof and those equipped with a sunroof or a panoramic vista roof. Part descriptions often specify compatibility with or without a panoramic roof.
- HomeLink Garage Door Opener: Check your current driver's side visor for the three buttons that indicate the presence of a universal garage door opener. Not all trim levels included this feature.
- Vehicle Length (Wheelbase): Ford and Lincoln made standard-length and long-wheelbase versions of these SUVs (Expedition and Expedition MAX, Navigator and Navigator L). Part descriptions sometimes reference the wheelbase (e.g., 119" or 131.6"), so it's important to know which version you have.
- Interior Color: Visors come in several colors like Ebony (black), Medium Stone (gray), and Sandstone/Camel (tan). You must match your vehicle's interior color for a seamless repair.
Pro Tip: How to Find Your Interior Color Code
To guarantee a perfect color match, find your vehicle's interior trim code. Open the driver's door and look for the Safety Compliance Certification Label on the door jamb. On this sticker, look for the letters "INT TR". The two-character code next to it is your interior trim code. You can provide this code to a seller to confirm a color match.
Buying a Used Sun Visor: What to Inspect
A used OEM sun visor is often the best value, offering perfect fit and color match at a fraction of the price of a new one. However, you should inspect it carefully.
- Check the Pivot Stiffness: Hold the visor by its mounting base and move it up and down. It should feel firm and hold any position without drooping.
- Inspect the Wiring: Look at the wiring where it enters the pivot arm. Check for any signs of fraying, pinching, or previous repairs. This is the most common failure point.
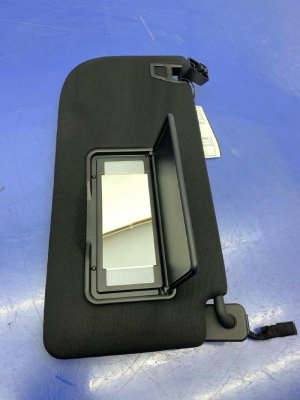
- Test the Mirror and Cover: Open and close the vanity mirror cover. Ensure its hinges are intact and that it snaps closed securely.
- Verify the Features: Double-check that the visor has the correct features for your vehicle (HomeLink buttons, correct color, and compatibility with your roof type). When buying online, purchase from a seller who lists the part number and provides clear photos.
- Confirm Compatibility: A used OEM part from a vehicle with the exact same options is the safest bet. Aftermarket visors may not match the interior fabric texture or color perfectly and may use lower-quality materials.
Sun Visor Replacement Guide
Replacing the sun visor is a simple task that most owners can do at home in under 15 minutes with basic tools.
- Difficulty: 1/5 (Beginner)
- Estimated Time: 0.25 hours
- Tools Needed: T20 Torx driver, small flathead screwdriver or plastic trim tool.
Step-by-Step Instructions:
- Expose the Mounting Screws: Use a small flathead screwdriver or a trim tool to carefully pry open the plastic cover at the base of the visor pivot. This will reveal the Torx screws underneath.
- Disconnect the Electrical Connector: Before unscrewing the visor, reach above the headliner near the mount to find the electrical plug. Press the release tab and pull the connector apart. Be gentle to avoid breaking the plastic tab.
- Unscrew the Old Visor: Use a T20 Torx driver to remove the screws holding the visor to the roof structure. There are typically three screws. Support the visor as you remove the last screw. 🎬 Watch a quick walkthrough of the visor removal process.
- Install the New Visor: Position the new visor, reconnect the electrical plug, and secure it with the Torx screws. Do not overtighten the screws.
- Test and Finish: Before snapping the plastic cover back on, test the vanity light and HomeLink buttons to ensure they have power. Once confirmed, snap the cover back into place.
Known Issues, TSBs, and Recalls
As of early 2026, there are no specific recalls or Technical Service Bulletins (TSBs) from Ford or Lincoln for sun visor failures on these models. However, forum discussions reveal a pattern of electrical failures caused by pinched or broken wires in the visor's pivot point. Additionally, TSB 21-2292 was issued for rattling or binding noises from the panoramic vista roof on some 2018-2021 Expedition and Navigator models. While not directly about the visor, any repair work on the headliner or sunroof assembly creates a risk of pinching the nearby sun visor wiring, which can lead to a short circuit.
Cost Comparison
The cost to replace a sun visor varies significantly between new OEM, used OEM, and aftermarket options.
| Part Source | Estimated Price Range |
|---|---|
| New OEM | $165 - $400+ |
| New Aftermarket | $50 - $250 |
| Used OEM | $75 - $150 |
| Shop Labor | $50 - $100 |
Frequently Asked Questions (FAQ)
Why did my visor's light and garage door opener stop working at the same time?
This happens because both features are powered by the same electrical wires that run through the visor's hinge. Over time, the repeated motion of flipping the visor up and down can cause one of these wires to break, cutting power to everything in the visor.
Can I install a visor with a HomeLink opener if my original one didn't have it?
This is likely not a simple plug-and-play swap. While the mounting may be the same, the vehicle's wiring harness may not have the necessary connections to power the HomeLink module. It would require custom wiring and is not recommended for beginners.
Is the driver's side and passenger's side sun visor the same part?
No, they are not interchangeable. They are mirror images of each other, and the driver's side is the only one that may have the HomeLink garage door opener. You must order the correct part for the specific side you are replacing.
My new visor's light doesn't work, is it defective?
First, check the fuse. A common reason for the original visor to fail is a shorted wire that blows the fuse. If you install a new visor without replacing the blown fuse, it will not work. Check your owner's manual for the fuse location, often listed under 'demand lamps' or 'interior lighting'.
Helpful Videos
Technical Specifications
OEM Part Numbers: FL1Z-7804105-AA FL1Z-7804105-AB FL7Z-7804105-AB JL7Z-7804104-EB JL7Z-7804104-FF JL7Z-7804104-HE JL7Z-7804104-JF JL7Z-7804105-BC JL7Z-7804105-BD JL7Z7804104FB JL7Z7804105HC JL7Z-7804105-GE JL7Z-7804105-GC
Requires T20 Torx bit for removal/installation.
We Have This Part in Stock

The information in this article is provided for general reference and educational purposes only. Vehicle specifications, procedures, and part compatibility can vary by production date, trim level, and region. Always consult your vehicle's factory service manual and verify part numbers before purchasing or performing repairs. Safety-critical components such as airbags, seat belts, and braking systems should be installed by a qualified professional.
- Lincoln Navigator:
- Ford Expedition:
- 🎬 Helpful Videos
- 🛍️ Shop This Part
- Symptoms of a Failing Sun Visor
- 1. Visor Droops or Won't Stay in Place
- 2. Vanity Light and/or HomeLink Don't Work
- 3. Vanity Mirror Cover is Broken
- 4. Rattling Noises
- Identifying the Correct Sun Visor for Your Vehicle
- Buying a Used Sun Visor: What to Inspect
- Sun Visor Replacement Guide
- Step-by-Step Instructions:
- Known Issues, TSBs, and Recalls
- Cost Comparison
- Frequently Asked Questions (FAQ)
- 🎟️ Get 5% Off