
2010-2013 Mazda 3 Sun Visor: Fixing Drooping, Sagging, and Light Failures
This guide covers the common failure points of the 2010-2013 Mazda 3 sun visor, how to find the correct used replacement, and how to install it yourself in minutes.
- The most common failure is a drooping or sagging visor due to a worn internal pivot; replacement is the best fix.
- Replacement is a very easy DIY job, requiring only a screwdriver and about 10-15 minutes.
- Always verify the side (left/right) and interior color (usually gray or black) before purchasing a replacement.
- If the vanity light and other interior lights fail simultaneously, check the 15A 'ROOM' fuse before replacing the visor.
Known Issues for 2010-2013 Mazda 3 Sun Visors
The most widespread problem with the sun visors in the second-generation Mazda 3 is a failure of the internal pivot mechanism. Over time, and often accelerated by heat, the internal components that create friction to hold the visor in place wear out or break. This results in a visor that droops, sags, or flops down, refusing to stay in the upright, stowed position. This can be a minor annoyance or a significant safety hazard if it obstructs the driver's vision. Another common, though less frequent, issue is the failure of the vanity mirror light, which can be caused by a burnt-out bulb, a faulty switch in the mirror cover, or a problem with the wiring leading to the visor.
Symptoms of a Failing Sun Visor
Here are the common signs that your sun visor needs attention:
- Drooping or Sagging: The visor will not stay flush against the headliner and constantly falls down.
- Lack of Tension: The visor feels loose and moves too freely with no resistance at the pivot point.
- Vanity Light Failure: The light in the mirror does not turn on when the cover is opened. This could be a bulb, a fuse, or a wiring issue within the visor itself.
- Flickering Vanity Light: The light may flicker as you move the visor, indicating a loose connection or failing wire.
- Broken Mirror or Cover: The vanity mirror itself or the sliding cover can crack or break from use or impact.
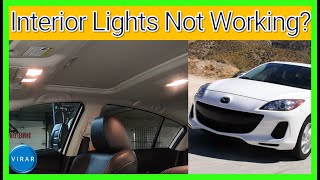
Pro Tip: If all of your interior lights (dome lights, map lights, and both vanity lights) stop working at once, check the 15-amp "ROOM" fuse in the under-hood fuse box before replacing any parts. A short in one component, like a sun visor wire, can blow this fuse and disable the entire circuit.
🎬 See how a shorted visor can blow your ROOM fuse.Is There a Recall or TSB?
As of early 2026, there are no official recalls or Technical Service Bulletins (TSBs) issued by Mazda or the National Highway Traffic Safety Administration (NHTSA) for the sun visor on the 2010-2013 Mazda 3. The drooping issue is considered a wear-and-tear item, despite being a very common complaint among owners.
Buying a Used 2010-2013 Mazda 3 Sun Visor
Purchasing a used OEM sun visor is often the most cost-effective way to get a perfect match for your interior. Aftermarket visors can have issues with color, texture, and fitment. Here’s what to look for:
- Test the Pivot: Before buying, physically test the visor's main pivot. It should feel firm and hold its position when you let go. Avoid any visor that feels loose or floppy, as it will likely fail soon.
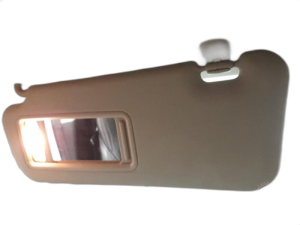
- Check the Vanity Mirror: Slide the mirror cover back and forth. It should move smoothly and you should feel a distinct click as it activates the light switch. Inspect the mirror for cracks.
- Verify the Electrical Connector: All 2010-2013 Mazda 3 visors with a light have a small electrical plug. Ensure the plug and its wires are intact with no signs of damage or corrosion.
- Confirm the Side: Sun visors are side-specific. The driver's side (Left) and passenger's side (Right) are mirror images of each other and are not interchangeable.
- Match Your Interior Color: The most common interior colors for this generation were Gray and Black/Dune. Inspect the color carefully to ensure it matches your car's headliner and trim. The interior trim code is typically found on the vehicle identification sticker in the driver's side door jamb.
- Check Part Numbers: There are several part numbers depending on the side, color, and vehicle options like a sunroof. For example, a common left-side (driver) part number is BBM2-69-320C-75, while a right-side (passenger) number is BBM3-69-270C-75. Always verify fitment with the seller.
Warning: There are different part numbers for vehicles with and without a sunroof. While the visors may look identical, there can be subtle differences in mounting or wiring. It is best to match the part to your vehicle's specific configuration.
Cost Comparison
| Part Type | Estimated Cost |
|---|---|
| New OEM | $70 - $140 |
| New Aftermarket | $35 - $70 |
| Used OEM | $30 - $75 |
| Shop Labor | $25 - $50 |
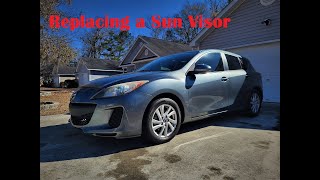
Sun Visor Replacement Guide (DIY)
Replacing the sun visor is a very simple job that most owners can do in less than 15 minutes 🎬 Watch this quick walkthrough of the sun visor replacement process. with basic tools.
- Difficulty: 1/5 (Very Easy)
- Time: 0.2 hours
- Tools Needed: Phillips screwdriver, small flathead screwdriver or trim removal tool.
Step-by-Step Instructions:
- Disconnect the Battery (Optional but Recommended): To be safe when working with electrical components, you can disconnect the negative battery terminal.
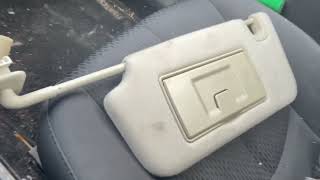
- Remove the Screw Cover: At the base of the visor pivot, there is a small plastic cover. Use a small flathead screwdriver to gently pry this cover off, exposing the mounting screw(s).
- Unscrew the Visor: Remove the Phillips head screw(s) that hold the visor's pivot mount to the roof.
- Detach the Visor: With the screw removed, pull the visor down and away from the headliner.
- Disconnect the Electrical Connector: The visor will still be attached by a short wire. Carefully depress the tab on the electrical connector and pull it apart to free the old visor.
- Installation: Installation is the reverse of removal. Plug in the new visor's electrical connector, insert the pivot mount into the headliner, secure it with the screw(s), and snap the cover back on. Test the light and the pivot tension to ensure everything works correctly.
Frequently Asked Questions (FAQ)
Why does my Mazda 3 sun visor keep falling down?
The most common reason is the failure of the internal friction mechanism inside the visor's pivot point. This part wears out over time, losing its ability to hold the visor's weight, causing it to droop or sag.
Can I just fix my drooping sun visor instead of replacing it?
While some people attempt DIY fixes using velcro, magnets, or external clips, these are temporary solutions that don't address the internal failure. Given the low cost of a used OEM or new aftermarket replacement and the ease of installation, replacement is the recommended long-term solution for restoring original function and appearance.
Is the driver's side visor the same as the passenger's side?
No, they are not interchangeable. The driver's side (LH) and passenger's side (RH) visors are mirror images of each other in both shape and mounting points.
My vanity light doesn't work. Is it the bulb or the whole visor?
It could be several things. First, check the "ROOM" fuse. If the fuse is good, the bulb may have burned out. However, the issue could also be a broken wire inside the visor's hinge or a faulty switch in the mirror cover. Often, the easiest solution is to replace the entire visor assembly 🎬 Watch this guide to fixing interior lights that won't turn on., which includes a new bulb, switch, and wiring.
Helpful Videos
Technical Specifications
OEM Part Numbers: BBM3-69-270-75 BBM3-69-270A-75 BBM3-69-270B-75 BBM3-69-270C-75 BBM2-69-320A-75 BBM2-69-320B-75 BBM2-69-320C-75 BCN6-69-320C-75
Equipped with lighted vanity mirror. Connects via a single electrical plug. Primary colors are Gray and Black/Dune.
We Have This Part in Stock


The information in this article is provided for general reference and educational purposes only. Vehicle specifications, procedures, and part compatibility can vary by production date, trim level, and region. Always consult your vehicle's factory service manual and verify part numbers before purchasing or performing repairs. Safety-critical components such as airbags, seat belts, and braking systems should be installed by a qualified professional.
- Mazda 3:
- 🎬 Helpful Videos
- 🛍️ Shop This Part
- Known Issues for 2010-2013 Mazda 3 Sun Visors
- Symptoms of a Failing Sun Visor
- Is There a Recall or TSB?
- Buying a Used 2010-2013 Mazda 3 Sun Visor
- Cost Comparison
- Sun Visor Replacement Guide (DIY)
- Step-by-Step Instructions:
- Frequently Asked Questions (FAQ)
- 🎟️ Get 5% Off